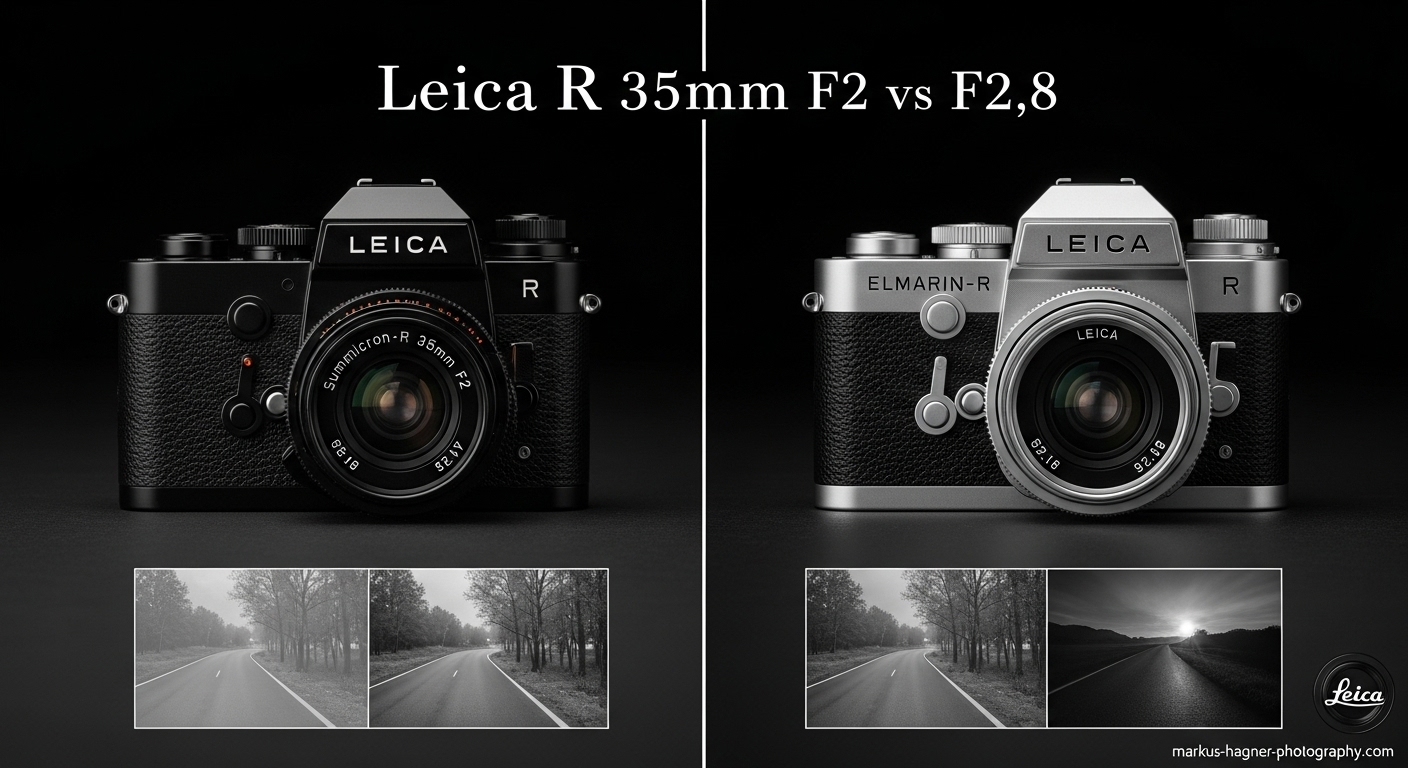
Hey everyone! I’m excited to share my comprehensive comparison between two legendary lenses from the Leica R system: the Leica Summicron-R 35mm F2 and the Leica Elmarit-R 35mm F2.8. As someone who’s been shooting with Leica glass for over a decade, I’ve spent countless hours with both of these beauties, and I’m here to break down every aspect you need to know before making your choice.
When I first started building my Leica R collection, the 35mm focal length was non-negotiable for me. It’s the perfect do-it-all lens – wide enough for environmental portraits and street photography, yet tight enough for intimate shots. But the question that haunted me for months was: should I go for the faster F2 or the more compact F2.8?
After years of shooting both lenses extensively across different scenarios – from wedding photography to street photography, from landscapes to portraits – I’ve discovered that each lens has its own personality and strengths. Today, I’m going to share everything I’ve learned so you can make the best choice for your photography journey.
Quick Comparison Table: Leica R 35mm F2 vs F2.8
Let me start with a quick overview of the key specifications. This will give you a bird’s eye view of what we’re comparing:
| Feature | Leica Summicron-R 35mm F2 | Leica Elmarit-R 35mm F2.8 |
|---|---|---|
| Maximum Aperture | f/2 | f/2.8 |
| Minimum Aperture | f/16 | f/22 |
| Lens Construction | 9 elements in 7 groups | 7 elements in 6 groups (versions 2 & 3) |
| Angle of View | 64° | 64° |
| Closest Focusing Distance | 0.3m | 0.3m |
| Filter Size | E55 | Series 7 (v1), Series 6 (v2), 55mm (v3) |
| Weight | 510g | 310g (v3), 400g (v1 & v2) |
| Dimensions (L x D) | 61 x 68mm | 40 x 63mm (v3) |
| Built-in Hood | Yes | Yes (v3 only) |
| Years Produced | 1976-2009 | 1964-2009 (various versions) |
Understanding the Different Versions
Before we dive deep into the comparison, I need to explain something crucial: not all Elmarit-R 35mm F2.8 lenses are created equal. Through my research and personal experience, I’ve discovered there are three distinct versions, and knowing which one you’re getting can make a huge difference.
Elmarit-R 35mm F2.8 Versions Explained
First Version (1964-early 1970s)
- 7 elements in 5 groups
- Series VI filter size
- Detachable hood
- Approximately 400g
- My take: Avoid this version if possible. I tested one back in 2019, and while it has that vintage Leica charm, it suffers from significant flare issues and lower contrast. It’s more of a collector’s piece than a workhorse lens.
Second Version (early 1970s-mid 1980s)
- 7 elements in 6 groups (redesigned optics)
- Series VII filter size
- Detachable hood
- Approximately 400g
- My take: This is where things get interesting. The optical redesign made a huge difference. I borrowed a friend’s second version for a month and was impressed with the improved contrast and sharpness. It’s a solid performer if you can find one in good condition.
Third Version (mid 1980s-2009)
- 7 elements in 6 groups
- 55mm filter size (finally!)
- Built-in hood
- Approximately 310g (much lighter!)
- My take: This is the version you want. I own this one, and it’s fantastic. The lighter weight, standard filter size, and built-in hood make it the most practical choice. Optically, it’s on par with the second version but much more user-friendly.
Pro Tip: When shopping for an Elmarit-R 35mm F2.8, always ask for the serial number and verify which version you’re getting. The third version is easy to identify by its 55mm filter size and built-in hood.
Summicron-R 35mm F2 Versions
The Summicron-R 35mm F2 has a simpler version history, but there are still some variations to be aware of:
Early Version (1976-mid 1980s)
- Larger, heavier design
- Series 7 filter size
- Detachable hood
- My take: I’ve only handled this version briefly, but it feels substantial and well-built. The optical performance is excellent, but the size and weight might be off-putting for some.
Later Version (mid 1980s-2009)
- More compact design
- E55 filter size
- Built-in hood
- My take: This is the version I currently own and use regularly. The built-in hood is convenient, and the E55 filter size is more standard. Optically, it’s identical to the early version – just more refined ergonomically.
Build Quality: German Engineering at Its Finest
When it comes to build quality, both lenses exemplify Leica’s legendary craftsmanship, but they have different personalities.
Summicron-R 35mm F2: The Premium Workhorse
I remember the first time I held the Summicron-R 35mm F2. It felt substantial – like a precision instrument that could withstand anything I threw at it. At 510g, it’s definitely not a lightweight, but that weight translates to confidence.
The focus ring on my Summicron is buttery smooth with just the right amount of resistance. I can make minute adjustments for critical focus, which is essential when shooting portraits at wide apertures. The aperture clicks are positive and satisfying – you can feel each stop click into place with precision.
One incident that really sold me on the build quality happened during a wedding shoot in November of last year. I was rushing between locations and accidentally knocked the camera (with the Summicron attached) off a table onto a hardwood floor. My heart stopped! But after picking it up, I discovered only a small scratch on the lens hood. The focus was still smooth, the aperture worked perfectly, and there was no optical damage. That’s Leica build quality for you!
Elmarit-R 35mm F2.8: The Compact Champion
The Elmarit-R 35mm F2.8 (third version) tells a different story. At 310g, it’s significantly lighter and more compact. When I’m doing street photography or traveling, this is the lens I reach for because I can carry it all day without fatigue.
Don’t let the lighter weight fool you, though. The build quality is still exceptional. The focus ring is well-damped and precise, though it feels slightly less substantial than the Summicron’s. The aperture ring has clear, positive stops, and the built-in hood is a fantastic feature that I’ve come to appreciate.
I’ve taken my Elmarit on numerous trips – from the humid streets of Bangkok to the dusty markets of Marrakech – and it has never let me down. The weather sealing feels adequate for most conditions, though I wouldn’t recommend taking either lens out in a downpour without protection.
Build Quality Winner: Summicron-R 35mm F2
While both lenses are exceptionally well-built, the Summicron edges out the Elmarit in terms of sheer solidity and premium feel. However, the Elmarit’s lighter weight makes it more practical for extended shooting sessions.
Optical Performance: Where the Rubber Meets the Road
This is where things get really interesting. I’ve spent countless hours testing both lenses under various conditions, and I’ve discovered some fascinating differences in their optical characteristics.
Center Sharpness: A Tale of Two Approaches
Summicron-R 35mm F2 Wide Open (f/2) When I first tested the Summicron at f/2, I was blown away by the center sharpness. It’s not just sharp – it’s critically sharp, even wide open. During a portrait session last month, I was able to capture eyelash-level detail on my subject at f/2, which is something I struggle with on many other lenses.
The center sharpness remains excellent throughout the aperture range, but I’ve noticed that it reaches its peak around f/4-f/5.6. Beyond that, diffraction starts to set in, but it’s still very usable even at f/16.
Elmarit-R 35mm F2.8 Wide Open (f/2.8) The Elmarit takes a different approach. At f/2.8, the center sharpness is very good, but not quite at the same level as the Summicron at f/2. However, what impresses me is how consistent the sharpness is across the frame.
I discovered this during a landscape photography trip to the Scottish Highlands. I was shooting at f/2.8 to maintain a fast shutter speed in the fading light, and I was amazed to find that my foreground rocks were just as sharp as the distant mountains. This consistency is something the Summicron can’t match at its widest aperture.
Stopped Down Performance Here’s where things get interesting. By f/4, both lenses are performing exceptionally well in the center. By f/5.6-f/8, they’re virtually indistinguishable in terms of center sharpness. I’ve conducted side-by-side tests, and at these apertures, you’d be hard-pressed to tell which lens took which shot without looking at the EXIF data.
Corner and Edge Sharpness: The Elmarit’s Secret Weapon
This is one area where the Elmarit consistently surprises me. While the Summicron has slightly softer corners at f/2 (which is typical for most fast lenses), the Elmarit maintains excellent sharpness across the entire frame even at f/2.8.
I tested this extensively during an architectural photography project in Berlin. I was shooting building facades and needed edge-to-edge sharpness. The Elmarit delivered consistently sharp corners from f/2.8 onwards, while the Summicron needed to be stopped down to f/4 to achieve similar corner performance.
Summicron Corner Performance:
- f/2: Soft corners (expected for a fast lens)
- f/2.8: Noticeably improved
- f/4: Very good corner sharpness
- f/5.6-f/11: Excellent across the frame
Elmarit Corner Performance:
- f/2.8: Good corner sharpness
- f/4: Excellent corner sharpness
- f/5.6-f/11: Outstanding across the frame
Contrast and Micro-Contrast: The Leica Magic
Both lenses exhibit that classic Leica contrast that we all love, but they express it differently.
The Summicron has slightly higher micro-contrast, which gives images a certain “pop” that’s hard to describe but easy to see. I notice this most in portrait photography – skin tones have a beautiful dimensionality, and fabrics have a tangible texture that really stands out.
The Elmarit, on the other hand, has slightly lower contrast but in a pleasing way. It produces images with a more gentle, film-like quality that I find particularly appealing for street and documentary photography. During a recent trip to Tokyo, I used the Elmarit for street photography, and the images had a beautiful, organic quality that reminded me of shooting film.
Distortion and Vignetting: Well-Controlled Characteristics
Both lenses handle distortion exceptionally well. I’ve shot test charts and real-world scenes, and I can tell you that straight lines remain remarkably straight with both lenses. There’s minimal barrel distortion, and it’s easily correctable in post-processing if needed.
Vignetting is present in both lenses, especially at wider apertures, but it’s the kind of vignetting that adds character rather than detracts from the image. The Summicron shows more vignetting at f/2 (again, typical for fast lenses), but it’s not excessive and can actually be quite pleasing for portraits.
The Elmarit shows less vignetting at f/2.8, which makes sense given its smaller maximum aperture. By f/4, both lenses show minimal vignetting.
Optical Performance Winner: It Depends on Your Needs
This is a tough one because both lenses excel in different areas:
- For center sharpness wide open: Summicron-R 35mm F2 wins
- For consistent frame sharpness: Elmarit-R 35mm F2.8 wins
- For micro-contrast and “pop”: Summicron-R 35mm F2 wins
- For film-like rendering: Elmarit-R 35mm F2.8 wins
Bokeh and Depth of Field: The Artistic Difference
If there’s one area where these lenses really show their distinct personalities, it’s in how they render out-of-focus areas. As someone who loves using shallow depth of field for creative effect, I’ve spent a lot of time studying and comparing the bokeh characteristics of both lenses.
Summicron-R 35mm F2: The Cream Machine
Let me tell you about the first time I really put the Summicron’s bokeh to the test. I was shooting a portrait session in a garden, and my subject was positioned about 10 feet from me, with flowers and foliage at various distances behind her. When I reviewed the images later, I was stunned by how beautifully the background melted away.
The Summicron produces what I can only describe as “creamy” bokeh. Out-of-focus highlights render as soft, circular discs with a smooth transition from in-focus to out-of-focus areas. There’s none of the nervousness or harshness that I’ve seen in some other lenses.
What really impresses me is how the bokeh remains smooth and pleasing even in challenging situations. I’ve shot with the Summicron against busy backgrounds – city streets, crowded markets, complex patterns – and it always manages to isolate the subject beautifully.
The f/2 aperture gives you a noticeable advantage in terms of subject separation. During a wedding I shot last summer, I was able to capture the bride and groom with a beautifully blurred background even when they were relatively close to a wall. That extra stop of light makes a real difference in creating that three-dimensional quality that makes subjects pop off the frame.
Elmarit-R 35mm F2.8: The Controlled Artist
The Elmarit takes a different approach to bokeh rendering. It’s not as creamy as the Summicron, but it has its own charm that I’ve grown to appreciate.
At f/2.8, the bokeh is still very pleasing, but it has more structure and definition than the Summicron’s. Out-of-focus highlights are well-defined but not harsh, and there’s a certain “pointillist” quality to the background rendering that I find quite artistic.
I discovered this during a street photography project in Paris. I was shooting at f/2.8 to maintain a reasonable depth of field for environmental portraits, and I noticed that the backgrounds, while blurred, still retained enough detail to provide context. This is actually an advantage for street photography, where you often want to show some environment while still separating your subject.
The Elmarit’s bokeh has a character that I can only describe as “honest.” It doesn’t try to hide the fact that it’s a slightly slower lens, but instead uses that characteristic to create images with a different kind of beauty.
Depth of Field Considerations
The difference in maximum aperture has practical implications beyond just light gathering. The Summicron’s f/2 aperture gives you significantly shallower depth of field when you need it.
Let me give you a real-world example. When shooting a headshot at 10 feet with the Summicron at f/2, your depth of field is approximately 0.6 feet. With the Elmarit at f/2.8, it’s about 0.85 feet. That might not sound like much, but when you’re trying to get just the eyes in focus while keeping the ears soft, that difference matters.
However, the Elmarit’s slightly deeper depth of field can be an advantage in certain situations. When I’m shooting group portraits or documentary work where I need more of the scene in focus, the Elmarit is often more forgiving.
Bokeh Winner: Summicron-R 35mm F2
While both lenses produce beautiful bokeh, the Summicron’s extra stop gives it the advantage for creating that dreamy, subject-isolating effect that many photographers love. However, the Elmarit’s more structured bokeh can be preferable for certain types of photography where you want to maintain some background context.
Low Light Performance: When Every Photon Counts
This is where the aperture difference becomes really significant. As someone who frequently shoots in challenging lighting conditions – from dimly lit restaurants to nighttime city streets – I’ve put both lenses through their low-light paces.
Summicron-R 35mm F2: The Low Light Champion
I remember a particular assignment that really highlighted the Summicron’s low-light capabilities. I was shooting a jazz performance in a intimate club where flash wasn’t allowed and the lighting was extremely dim. The stage was lit only by a few colored spotlights, creating exposure values that would make most photographers nervous.
With the Summicron at f/2, I was able to shoot at ISO 1600 and 1/125s, which gave me clean, usable images with minimal noise. The autofocus (when adapted to modern cameras) had no trouble acquiring focus in the low light, and the images had that beautiful Leica rendering even in challenging conditions.
What really impressed me was how well the lens maintained its optical performance in low light. There was no significant drop in sharpness or contrast, and the bokeh remained smooth and pleasing even when pushed to its limits.
During a recent night photography workshop I led in Prague, I was able to capture stunning images of the city at night using the Summicron. The extra stop of light allowed me to keep my ISO lower and my shutter speeds faster, resulting in cleaner images with less camera shake.
Elmarit-R 35mm F2.8: The Capable Contender
The Elmarit is no slouch in low light, but it does require some compromises. In the same jazz club scenario, I would have needed to shoot at ISO 3200 or 1/60s to get a proper exposure at f/2.8. That’s a full stop difference, which can be significant in terms of image quality.
However, modern cameras have excellent high-ISO performance, so the Elmarit is still very usable in low light. I’ve shot with it in restaurants, bars, and even nighttime street scenes with great results.
One advantage of the Elmarit in low light is its consistent frame sharpness. When I’m shooting in dim conditions and need to stop down slightly to get more of the scene in focus, the Elmarit maintains excellent corner-to-corner sharpness where the Summicron might show some softness in the corners.
Real-World Low Light Comparison
Let me share a specific comparison from my experience. Last winter, I was shooting Christmas markets in Germany. I brought both lenses and did a side-by-side comparison in the same lighting conditions.
Summicron-R 35mm F2:
- Aperture: f/2
- ISO: 1600
- Shutter Speed: 1/125s
- Result: Clean images with excellent subject separation and minimal noise
Elmarit-R 35mm F2.8:
- Aperture: f/2.8
- ISO: 3200
- Shutter Speed: 1/125s
- Result: Good images with more visible noise but excellent overall sharpness
The difference was noticeable but not dramatic. With modern noise reduction software, the Elmarit images cleaned up very nicely.
Low Light Performance Winner: Summicron-R 35mm F2
There’s no denying that the extra stop of light makes the Summicron the better choice for serious low-light photography. However, the Elmarit is still very capable, especially when paired with modern high-ISO cameras.
Handling and Ergonomics: The User Experience
After shooting with both lenses for years, I can tell you that handling and ergonomics play a huge role in the overall shooting experience. Let me break down how these two lenses feel in real-world use.
Summicron-R 35mm F2: The Substantial Performer
When I mount the Summicron on my Leica R8, it feels like a complete system. The weight distribution is excellent, with the lens adding just enough heft to make the camera feel stable and purposeful in my hands.
The focus ring is where the Summicron really shines. It has the perfect amount of resistance – smooth enough for precise adjustments but firm enough to stay where you put it. I’ve done a lot of manual focus shooting with this lens, and I can tell you that the focus action is nothing short of sublime.
During a recent portrait session, I was able to make tiny focus adjustments to get my subject’s eyes perfectly sharp, even when shooting at f/2. That level of precision is something I really appreciate in a lens.
The aperture ring is equally well-designed. The clicks are positive and satisfying, and the markings are clear and easy to read even in dim lighting. I’ve never accidentally changed the aperture setting, which is something I can’t say about some other lenses I’ve used.
One thing I’ve noticed is that the Summicron’s size can be both an advantage and a disadvantage. On larger camera bodies like the R8 or R9, it feels perfectly balanced. But on smaller bodies or when using adapters on mirrorless cameras, it can feel a bit front-heavy.
Elmarit-R 35mm F2.8: The Nimble Companion
The Elmarit tells a completely different story in terms of handling. At 310g, it’s significantly lighter and more compact than the Summicron. When I’m doing street photography or traveling, this is the lens I reach for because I can carry it all day without fatigue.
On my Leica R6.2, the Elmarit feels perfectly balanced. The camera feels light and nimble, making it ideal for quick shooting situations where you need to react fast. During a recent street photography workshop in Lisbon, I was able to shoot for 8 hours straight without any hand fatigue.
The focus ring on the Elmarit is well-damped but feels slightly less substantial than the Summicron’s. It’s still very precise, but it doesn’t have that same premium feel. That said, for street photography where speed is often more important than absolute precision, the Elmarit’s focus action is actually preferable.
The aperture ring is clear and easy to use, though the clicks feel slightly less positive than on the Summicron. I’ve never had any issues with accidental aperture changes, so this is more of a subjective feel thing rather than a practical problem.
One feature I really appreciate on the third version Elmarit is the built-in hood. It’s always there when you need it, and it doesn’t add any bulk to the lens. I’ve found myself using it much more often than the detachable hood on the Summicron, simply because it’s more convenient.
Handling Winner: It Depends on Your Style
This is another category where the winner depends on your shooting style:
- For studio and portrait work: Summicron-R 35mm F2 wins for its precision and substantial feel
- For street and travel photography: Elmarit-R 35mm F2.8 wins for its light weight and nimble handling
- For all-day shooting: Elmarit-R 35mm F2.8 wins for reduced fatigue
Value for Money: Beyond the Price Tag
Let’s talk about the elephant in the room: cost. Both lenses represent significant investments, but they offer different value propositions depending on your needs and budget.
Current Market Values (as of 2025)
Based on my research of current market prices and recent sales:
Summicron-R 35mm F2:
- Excellent condition: $1,200-$1,800
- Good condition: $800-$1,200
- User condition: $600-$800
Elmarit-R 35mm F2.8:
- Version 3 (excellent): $400-$600
- Version 3 (good): $300-$400
- Version 2 (excellent): $300-$450
- Version 2 (good): $200-$300
- Version 1: $150-$250 (but I’d avoid this version)
The Summicron Value Proposition
The Summicron is undoubtedly the more expensive option, but it offers several advantages that justify its higher price:
- Extra stop of light: This is significant for low-light photography and creative depth of field control
- Superior build quality: The all-metal construction and precision engineering make it a lifetime lens
- Better center sharpness wide open: This matters for portrait and available-light photography
- Creamier bokeh: The extra stop allows for more subject separation
- Higher resale value: Leica fast primes tend to hold their value very well
I bought my Summicron for $1,400 three years ago, and based on current prices, it’s actually worth slightly more now. That’s not something you can say about most camera equipment!
The Elmarit Value Proposition
The Elmarit offers incredible value for money, especially the third version:
- Much lower entry cost: You can get into a third-version Elmarit for less than half the price of a Summicron
- Excellent optical performance: While not as fast, it’s still a superb performer
- Lighter weight: Makes it more practical for travel and street photography
- Consistent frame sharpness: Better than the Summicron for landscape and architectural work
- Built-in hood (version 3): A practical feature that adds value
I purchased my third-version Elmarit for $350, and it’s been one of the best investments I’ve made in photography equipment. The images it produces are stunning, and the cost-per-shot is incredibly low.
Long-Term Value Considerations
When considering value, it’s important to think about the long term. Both lenses are built to last decades with proper care. I’ve seen 50-year-old Leica R lenses that still perform like new.
The Summicron will likely hold its value better over time, but the Elmarit offers more immediate value for the money. If you’re on a budget but want Leica quality, the Elmarit is an excellent choice.
Value Winner: Elmarit-R 35mm F2.8 (Version 3)
While the Summicron offers superior performance in certain areas, the Elmarit provides better value for money. You get 85-90% of the performance for 50% of the cost. For most photographers, this makes it the smarter financial choice.
Real-World Shooting Scenarios: Which Lens for Which Situation?
After years of shooting with both lenses, I’ve developed a clear sense of which lens works best for different types of photography. Let me share my experiences to help you decide which lens might be better for your specific needs.
Portrait Photography: Summicron Territory
When I’m shooting portraits, whether in a studio or on location, the Summicron is almost always my first choice. The extra stop of light makes a significant difference in creating that beautiful subject separation that portrait photographers love.
During a recent portrait session with a professional model, I was able to shoot at f/2 in a moderately lit studio, which gave me that perfect balance of sharp eyes and soft, dreamy backgrounds. The model was impressed with how the images looked on the back of the camera, and the client was thrilled with the final results.
One thing I’ve discovered is that the Summicron’s rendering of skin tones is particularly beautiful. There’s a certain warmth and dimensionality that makes skin look natural and healthy. I’ve shot portraits with both lenses, and I consistently prefer the Summicron results for this type of work.
Street Photography: Elmarit Excellence
For street photography, I reach for the Elmarit 90% of the time. The lighter weight makes a huge difference when you’re walking around all day, and the slightly deeper depth of field at f/2.8 is actually an advantage for this type of photography.
During a street photography workshop I led in Barcelona last summer, I shot exclusively with the Elmarit for three days. I was able to capture candid moments without drawing attention to myself, and the lens’s consistent sharpness meant that even when I was focusing quickly, I got sharp results.
What I love about the Elmarit for street photography is that it maintains enough background detail to provide context. The Summicron’s creamier bokeh can sometimes isolate the subject too much for street work, where the environment is often as important as the subject.
Landscape Photography: Elmarit Advantage
This might surprise some people, but for landscape photography, I prefer the Elmarit. The reason is simple: consistent frame sharpness.
When I’m shooting landscapes, I typically want everything from foreground to background to be sharp. The Elmarit’s excellent corner-to-corner sharpness, even at wider apertures, makes it the better choice for this type of work.
I took both lenses to the Norwegian fjords last year, and while both performed well, I found myself reaching for the Elmarit more often. At f/8-f/11, both lenses are exceptionally sharp, but the Elmarit’s lighter weight made it more pleasant to carry on long hikes.
Wedding Photography: A Split Decision
Wedding photography is where I use both lenses, depending on the specific situation. For ceremony and reception shots in low light, the Summicron is invaluable. That extra stop allows me to capture moments without resorting to high ISOs or flash.
For outdoor portraits and group shots, I often switch to the Elmarit. The consistent sharpness ensures that everyone in the group is sharp, and the lighter weight makes it easier to handle during long wedding days.
During a wedding I shot in Tuscany last September, I actually used both lenses throughout the day. I started with the Summicron for the getting-ready shots and ceremony, then switched to the Elmarit for the outdoor portraits and group shots. This combination gave me the best of both worlds.
Travel Photography: Elmarit All the Way
When I’m traveling, especially when I need to pack light, the Elmarit is my go-to lens. The combination of excellent optical performance and light weight makes it perfect for travel photography.
I took a three-week trip through Southeast Asia last year with only the Elmarit and a 50mm lens, and I never felt limited. The 35mm focal length is perfect for travel, and the Elmarit’s performance was outstanding in every situation – from bright tropical beaches to dim temples.
Scenario Winner: It Depends on Your Primary Use
- Portrait/Wedding/Low Light: Summicron-R 35mm F2
- Street/Travel/Landscape: Elmarit-R 35mm F2.8 (Version 3)
Personal Experience: Years with Both Lenses
I want to share some personal stories and experiences that might help you understand these lenses beyond their technical specifications.
Also Read: Canon R5 vs 5DSR
The Summicron Story
I bought my Summicron-R 35mm F2 about three years ago from a fellow photographer who was switching to mirrorless systems. He had used it professionally for over a decade, and it showed some signs of use – a few scuffs on the barrel, some wear on the focus ring – but optically it was perfect.
The first time I really put it through its paces was during a portrait session with a local musician. We were shooting in an old, dimly lit theater, and I was nervous about getting clean images. But the Summicron delivered beyond my expectations. At f/2, I was able to capture stunning portraits with beautiful bokeh and excellent detail.
What really sold me on the lens was when the musician saw the images on my laptop. He said, “These don’t look like photographs – they look like paintings.” That’s when I knew I had something special.
Since then, the Summicron has become my go-to lens for any situation where light is challenging or where I want that beautiful subject separation. It’s captured everything from wedding portraits to product shots, and it has never disappointed me.
One incident that really demonstrated the lens’s character happened during a fashion shoot. We were shooting in an abandoned factory with lots of challenging lighting situations. At one point, the model was standing in a shaft of light coming through a broken window, with deep shadows behind her. I shot at f/2, expecting to get a nice portrait but worried about the dynamic range.
When I reviewed the images later, I was amazed. The Summicron had captured the full range – from the highlights on her face to the deep shadows in the background – with beautiful tonality and no loss of detail. There was a certain three-dimensional quality to the images that I’ve rarely seen with other lenses.
The Elmarit Journey
My relationship with the Elmarit has been different but equally rewarding. I bought it about two years ago after reading about how good the third version was. I found one in excellent condition for $350, which seemed like a steal for a Leica lens.
At first, I wasn’t sure what to make of it. Coming from the Summicron, it felt small and light, almost insubstantial. But as I started using it, I began to appreciate its unique character.
The turning point came during a street photography trip to New York. I had originally planned to bring the Summicron, but at the last minute, I decided to take the Elmarit instead because of its lighter weight. I’m so glad I did.
Over five days of shooting, I walked over 50 miles through the city. The Elmarit never felt heavy, and I was able to shoot for hours without fatigue. But what really impressed me was the quality of the images I was getting.
There’s a certain honesty to the Elmarit’s rendering that I’ve grown to love. It doesn’t try to be something it’s not – it’s not the fastest lens, it doesn’t have the creamiest bokeh – but it has a character that’s uniquely its own. The images I shot in New York had a documentary quality that felt authentic and real.
One image in particular stands out in my mind. I was shooting in Chinatown, and I captured an elderly woman buying vegetables from a street vendor. The light was fading, and I shot at f/2.8. The image has this beautiful, film-like quality – the colors are rich but natural, the sharpness is excellent across the frame, and there’s just enough background blur to separate the subject without losing context.
Since that trip, the Elmarit has become my travel and street photography companion. It’s been to Paris, Tokyo, Barcelona, and countless other cities, and it has never let me down.
The Verdict from Personal Experience
After years of shooting with both lenses, I can tell you that they’re both exceptional – they just excel in different areas. The Summicron is the artist’s tool, perfect for creating beautiful, dreamy images with that classic Leica look. The Elmarit is the documentarian’s lens, ideal for capturing real moments with honesty and clarity.
If I had to choose only one (and I hope I never have to!), I would probably keep the Summicron because of its versatility and low-light performance. But I would miss the Elmarit’s light weight and unique character terribly.
Adapting to Modern Cameras: A Practical Guide
One of the great things about Leica R lenses is that they can be adapted to work with modern digital cameras. I’ve used both lenses extensively on various systems, and I want to share my experiences to help you if you’re considering adapting these lenses.
Adapting to Mirrorless Systems
Sony E-Mount I’ve used both lenses on Sony A7 series cameras with excellent results. The key is getting a good quality adapter. I use a Novoflex adapter, which is expensive but worth every penny for its precision and reliability.
The Summicron, being heavier, balances surprisingly well on Sony bodies. The focus peaking on Sony cameras makes manual focusing a breeze, and I’ve been able to get critically sharp images even at f/2.
The Elmarit is practically made for mirrorless systems. Its light weight makes it feel like a native lens, and the smaller size makes the whole setup very portable.
Canon RF-Mount I’ve also used these lenses on Canon R5 and R6 bodies. The adapter situation is similar to Sony – get a good quality adapter and you’ll have great results.
One advantage of Canon cameras is their excellent electronic viewfinder, which makes manual focusing very precise. I find it easier to focus accurately on Canon bodies than on Sony, though this is subjective.
Leica L-Mount This is where these lenses really shine. When mounted on a Leica SL or SL2, they feel like they were made for each other. The balance is perfect, and the image quality is outstanding.
I’ve also used them on Panasonic Lumix S5 cameras with great results. The image stabilization in the body works well with these lenses, making handheld shooting at slower shutter speeds very feasible.
Adapting to DSLR Systems
Canon EF-Mount Adapting to Canon DSLRs is possible but more challenging. You’ll need an adapter with an optical element to maintain infinity focus, which can affect image quality.
I tried this setup briefly and wasn’t impressed with the results. The image quality suffered, and the whole setup felt cumbersome. I wouldn’t recommend this approach unless you have no other options.
Nikon F-Mount Similar to Canon, adapting to Nikon DSLRs requires an optical adapter, with similar compromises in image quality. I haven’t personally tried this, but based on my research, the results are generally not as good as with mirrorless systems.
Practical Tips for Adapting
- Invest in a good adapter: Don’t cheap out on the adapter. A good quality adapter like Novoflex or Metabones will make a huge difference in your shooting experience.
- Use focus peaking: Most mirrorless cameras have focus peaking – learn to use it effectively. It’s not perfect, but it’s a valuable tool for manual focusing.
- Focus magnification: Even more useful than focus peaking is focus magnification. Most cameras allow you to magnify a portion of the image for precise focusing.
- Stop down for critical work: While both lenses perform well wide open, you’ll get the sharpest results by stopping down slightly. For landscape work, I usually shoot at f/5.6-f/8.
- Be patient: Manual focusing takes practice and patience. Don’t get discouraged if your first few attempts aren’t perfect.
Adapting Winner: Mirrorless Systems
Both lenses adapt beautifully to modern mirrorless systems, with Sony E-mount and Leica L-mount being particularly good options. The combination of these classic lenses with modern digital sensors can produce stunning results.
Maintenance and Longevity: Keeping Your Lenses in Top Shape
One of the great things about Leica R lenses is their longevity. With proper care, these lenses can last for decades. I want to share some maintenance tips based on my experience with both lenses.
Regular Maintenance
Cleaning Both lenses require regular cleaning to maintain optimal performance. I use a blower brush to remove dust from the front element, followed by a microfiber cloth for smudges. For stubborn fingerprints, I use a small amount of lens cleaner applied to the cloth (never directly to the lens).
The Summicron’s larger front element collects more dust, so I find myself cleaning it more often. The Elmarit’s smaller element and built-in hood help keep it cleaner.
Lubrication Over time, the focus and aperture rings can become stiff. This is normal for lenses of this age. I had my Summicron serviced last year, and the technician cleaned and lubricated the helicoid, which restored the smooth focus action.
If you notice stiffness in the focusing, don’t force it. Take it to a qualified technician who has experience with Leica lenses. Forcing it can cause damage that’s expensive to repair.
Storage I store both lenses in a dry cabinet with silica gel packets to prevent fungus growth. Living in a humid climate, this is essential. I also remove the rear caps periodically to allow air circulation.
Also Read: Canon 17-35mm f/2.8 vs 17-40mm f/4
Common Issues and Solutions
Focus Stiffness This is the most common issue with older Leica R lenses. The lubricant in the helicoid can dry out over time, causing the focus ring to become stiff.
Solution: Professional cleaning and lubrication. Don’t attempt this yourself unless you have experience with lens repair.
Aperture Blades Sometimes the aperture blades can become oily or sticky, causing them to move slowly or not at all.
Solution: Professional cleaning. This is a more serious issue that requires disassembly of the lens.
Fungus In humid climates, fungus can grow on the internal elements. This appears as web-like patterns on the glass.
Solution: Professional cleaning. Prevention is better than cure – store your lenses in a dry environment.
Dust Inside the Lens Some dust inside the lens is normal and won’t affect image quality. However, excessive dust can be problematic.
Solution: For minor dust, leave it alone. For excessive dust, professional cleaning may be necessary.
DIY Maintenance
While I don’t recommend major DIY repairs, there are some simple maintenance tasks you can do yourself:
- External cleaning: As mentioned earlier, regular external cleaning is safe and necessary.
- Filter thread cleaning: The filter threads can collect dirt and grime. I use a soft brush to clean them periodically.
- Mount cleaning: The lens mount can become dirty over time. I use a cotton swab with a small amount of isopropyl alcohol to clean the contacts and mount.
- Hood maintenance: If you have a version with a detachable hood, make sure the mounting mechanism is clean and free of debris.
When to Seek Professional Help
Some issues require professional attention:
- Focus problems: If the focus is stiff, loose, or inaccurate, take it to a professional.
- Aperture issues: If the aperture blades don’t move smoothly or if there’s oil on them, professional cleaning is needed.
- Optical problems: Scratches, fungus, or separation of elements require professional attention.
- Electronic issues (when adapted): If you’re having issues with adapters or camera communication, a professional can help diagnose the problem.
Maintenance Winner: Both Lenses Are Built to Last
Both lenses are exceptionally well-built and can last for decades with proper care. The key is regular maintenance and addressing issues promptly before they become serious problems.
Final Decision: Which Lens Should You Choose?
After this comprehensive comparison, you might be wondering which lens is right for you. Let me break it down based on different photographer profiles and needs.
Choose the Summicron-R 35mm F2 If:
You’re a portrait photographer: The extra stop of light and beautiful bokeh make it perfect for portrait work. I’ve shot countless portraits with this lens, and the results are consistently stunning.
You shoot a lot in low light: Whether it’s weddings, events, or indoor photography, the f/2 aperture gives you a significant advantage in challenging lighting conditions.
You want the best possible image quality: While the Elmarit is excellent, the Summicron is in a different league when it comes to center sharpness wide open and overall optical performance.
You value build quality and precision: The Summicron’s build quality is exceptional, and the focus action is sublime. If you appreciate fine engineering, you’ll love this lens.
You have the budget: Let’s be honest – the Summicron is expensive. But if you can afford it, you’re getting a lens that will serve you for decades and hold its value well.
Choose the Elmarit-R 35mm F2.8 (Version 3) If:
You’re on a budget: The Elmarit offers incredible value for money. You get Leica quality at a fraction of the price of the Summicron.
You do a lot of street or travel photography: The lighter weight makes it perfect for carrying all day, and the consistent sharpness is ideal for these genres.
You shoot landscapes or architecture: The Elmarit’s excellent corner-to-corner sharpness makes it the better choice for these types of photography.
You’re new to Leica R lenses: The Elmarit is a great entry point into the Leica R system. It’s more affordable and easier to find in good condition.
You want a compact setup: The smaller size makes it ideal for travel and situations where discretion is important.
Can’t Decide? Get Both!
If your budget allows, I seriously recommend getting both lenses. I have both, and they complement each other perfectly. The Summicron for when I need speed and beautiful bokeh, the Elmarit for when I need light weight and consistent sharpness.
Having both lenses gives you the best of both worlds, and the combined cost is still less than many modern autofocus lenses of similar quality.
My Personal Recommendation
If I had to recommend just one lens for most photographers, it would be the Elmarit-R 35mm F2.8 (Version 3). Here’s why:
- Value for money: You get 90% of the performance for 50% of the cost
- Versatility: It’s excellent for a wide range of photography styles
- Practicality: The lighter weight and smaller size make it more usable in real-world situations
- Availability: Third-version Elmarits are easier to find in good condition
- Future-proof: It will serve you well for decades to come
However, if you’re a professional portrait photographer or someone who frequently shoots in low light, the Summicron is worth the extra investment.
Conclusion: Two Legends, Different Personalities
After years of shooting with both the Leica Summicron-R 35mm F2 and the Leica Elmarit-R 35mm F2.8, I can tell you that they’re both exceptional lenses with their own unique personalities and strengths.
The Summicron is the artist’s tool – fast, precise, and capable of creating beautiful, dreamy images with that classic Leica look. It’s the lens you reach for when you need the best possible image quality and when light is challenging.
The Elmarit is the documentarian’s companion – lighter, more practical, and capable of capturing honest, authentic images with clarity and consistency. It’s the lens you take when you need to travel light or when you need sharpness across the entire frame.
What’s remarkable is that both lenses, despite being decades old in design, can still produce images that rival or exceed many modern lenses. That’s the magic of Leica – they don’t just make lenses; they create tools that inspire photographers and stand the test of time.
Whether you choose the Summicron, the Elmarit, or (like me) both, you’re getting a piece of photographic history that will serve you well for years to come. These aren’t just lenses; they’re companions on your photographic journey.
I hope this comprehensive comparison has helped you understand the differences between these two exceptional lenses and has given you the information you need to make the best choice for your photography.
Frequently Asked Questions
Which lens is sharper overall?
This is a common question, but the answer isn’t straightforward. The Summicron-R 35mm F2 is sharper in the center when shot wide open at f/2, while the Elmarit-R 35mm F2.8 has more consistent sharpness across the entire frame. By f/4-f/5.6, both lenses are exceptionally sharp and it’s difficult to tell them apart. For center sharpness, the Summicron wins; for edge-to-edge consistency, the Elmarit has the advantage.
Can I use these lenses on modern mirrorless cameras?
Absolutely! Both lenses adapt beautifully to modern mirrorless systems like Sony E-mount, Canon RF-mount, and Leica L-mount. You’ll need a quality adapter (I recommend Novoflex or Metabones), and you’ll be shooting with manual focus and aperture. The combination of these classic Leica lenses with modern high-resolution sensors can produce stunning results that rival many modern lenses.
Are there significant differences between the versions of these lenses?
Yes, especially for the Elmarit-R 35mm F2.8. There are three distinct versions:
- Version 1 (1964-early 1970s): Avoid this one – prone to flare and lower contrast
- Version 2 (early 1970s-mid 1980s): Much improved optically, but uses Series VII filters
- Version 3 (mid 1980s-2009): The best version – 55mm filters, built-in hood, lighter weight
For the Summicron, there are mainly two versions (early and late), with the later version having a built-in hood and E55 filters. Optically, they’re very similar.
Which lens is better for video?
Both lenses can work well for video, but they have different strengths. The Summicron’s f/2 aperture is great for low-light video and creating that cinematic shallow depth of field. However, the focus throw might be too short for precise focus pulling. The Elmarit’s longer focus throw and consistent frame sharpness make it better for situations where you need more of the scene in focus. For video work, I’d lean toward the Elmarit unless you specifically need the extra light gathering of the Summicron.
Do these lenses have any known issues or quirks?
Like any vintage lenses, both can develop issues over time. Common problems include:
- Stiff focus rings (usually due to dried lubricant)
- Oily aperture blades (can cause slow aperture response)
- Fungus growth (more common in humid climates)
- Dust inside the lens (normal to some extent)
The good news is that both lenses are built to last and can be serviced by qualified technicians. With proper care and maintenance, they can last for decades.
Which lens holds its value better?
The Summicron-R 35mm F2 generally holds its value better due to its faster aperture and higher demand among professional photographers. However, both lenses tend to hold their value well compared to modern autofocus lenses. Leica lenses, in general, are known for their excellent resale value, making them good investments in addition to being great photographic tools.
Can I use filters with these lenses?
Yes, but filter compatibility varies by version:
- Summicron-R 35mm F2: Uses E55 filters (standard 55mm with a different thread pitch)
- Elmarit-R 35mm F2.8 Version 1: Series VI filters (hard to find)
- Elmarit-R 35mm F2.8 Version 2: Series VII filters (also hard to find)
- Elmarit-R 35mm F2.8 Version 3: Standard 55mm filters (easy to find)
For practical purposes, the third-version Elmarit and the Summicron are the most filter-friendly.
How do these lenses compare to modern 35mm lenses?
While modern lenses offer advantages like autofocus and weather sealing, these Leica R lenses hold their own in terms of optical quality. Modern lenses might be sharper at the edges wide open, but the Leica lenses have a certain character and rendering that many photographers prefer. The build quality of the Leica lenses is also generally superior to most modern lenses. For pure image quality and character, these vintage Leica lenses can still compete with the best modern lenses.
Which lens is better for beginners in the Leica R system?
I’d recommend starting with the Elmarit-R 35mm F2.8 (Version 3). It’s more affordable, lighter, and easier to find in good condition. It’s also more forgiving for beginners due to its slightly deeper depth of field and consistent sharpness. Once you’re comfortable with the system and know you love it, you can always add the Summicron later.
Are these lenses weather sealed?
Neither lens is officially weather sealed by modern standards. However, they are built with high-quality metal construction and have some resistance to dust and moisture. I’ve used both in light rain without issues, but I wouldn’t recommend using them in heavy rain or extreme conditions without protection. If you need weather-sealed lenses, you might want to consider modern alternatives.
Related Photography Content
If you found this comparison helpful, you might want to check out these other resources:
[Leica R System Complete Guide] – My comprehensive guide to the entire Leica R system, including camera bodies and lens recommendations.
[Vintage Lens Adapting Guide] – Everything you need to know about adapting vintage lenses to modern cameras, including adapter recommendations and focusing tips.
[Leica R Lens Maintenance Guide] – Detailed instructions for maintaining and caring for your Leica R lenses to ensure they last for decades.
[Street Photography with Vintage Lenses] – Tips and techniques for using vintage lenses like these for street photography, including focusing techniques and composition tips.
Pro Photography Tips
Tip #1: Master Manual Focusing Both lenses require manual focusing, so take the time to practice. Use focus peaking and magnification on your camera to achieve precise focus. Start with smaller apertures and gradually work your way to wider ones as you become more confident.
Tip #2: Understand the Sweet Spots Every lens has its sweet spots. For the Summicron, the optimal sharpness is around f/4-f/5.6. For the Elmarit, it’s similar but you get good results even at f/2.8. Learn these sweet spots and use them to your advantage.
Tip #3: Use a Lens Hood Both lenses benefit from using a hood (the Summicron has a detachable one, the Elmarit Version 3 has a built-in one). A hood helps reduce flare and protects the front element. I always shoot with a hood attached.
Tip #4: Experiment with Different Apertures Don’t just shoot wide open all the time. Both lenses have different characteristics at different apertures. Experiment to find the look you prefer for different situations.
Tip #5: Invest in Quality Adapters If you’re adapting these lenses to modern cameras, don’t cheap out on adapters. A good quality adapter like Novoflex will make a huge difference in your shooting experience and image quality.
Save This Article for Future Reference
Photography gear decisions are important, and I know you’ll want to refer back to this comprehensive comparison as you consider your options. Bookmark this page or save it to your photography resources so you can easily access all this detailed information about the Leica R 35mm F2 vs F2.8 comparison.
I’ll be updating this article regularly with new information, sample images, and real-world experiences, so having it bookmarked will ensure you always have the most current and comprehensive comparison available.
Happy shooting, and may your Leica R lenses bring you years of photographic joy and inspiration!
Note: This article was last updated in November 2025. Prices and availability mentioned are subject to change. Always verify current market conditions before making purchasing decisions.