You have captured a stunning landscape with dramatic clouds and a beautifully lit foreground, but there is a problem. Your camera could not record the full dynamic range of the scene. Either the sky is blown out white, or the shadows are crushed to black. This is the classic exposure challenge that has frustrated photographers since the dawn of digital photography.
Luminosity masks offer a solution that gives you precise control over which parts of your image receive adjustments. Unlike HDR software that makes decisions for you, luminosity masks put you in complete control of the blending process. The result is natural-looking images that maintain the mood and atmosphere you witnessed in the field.
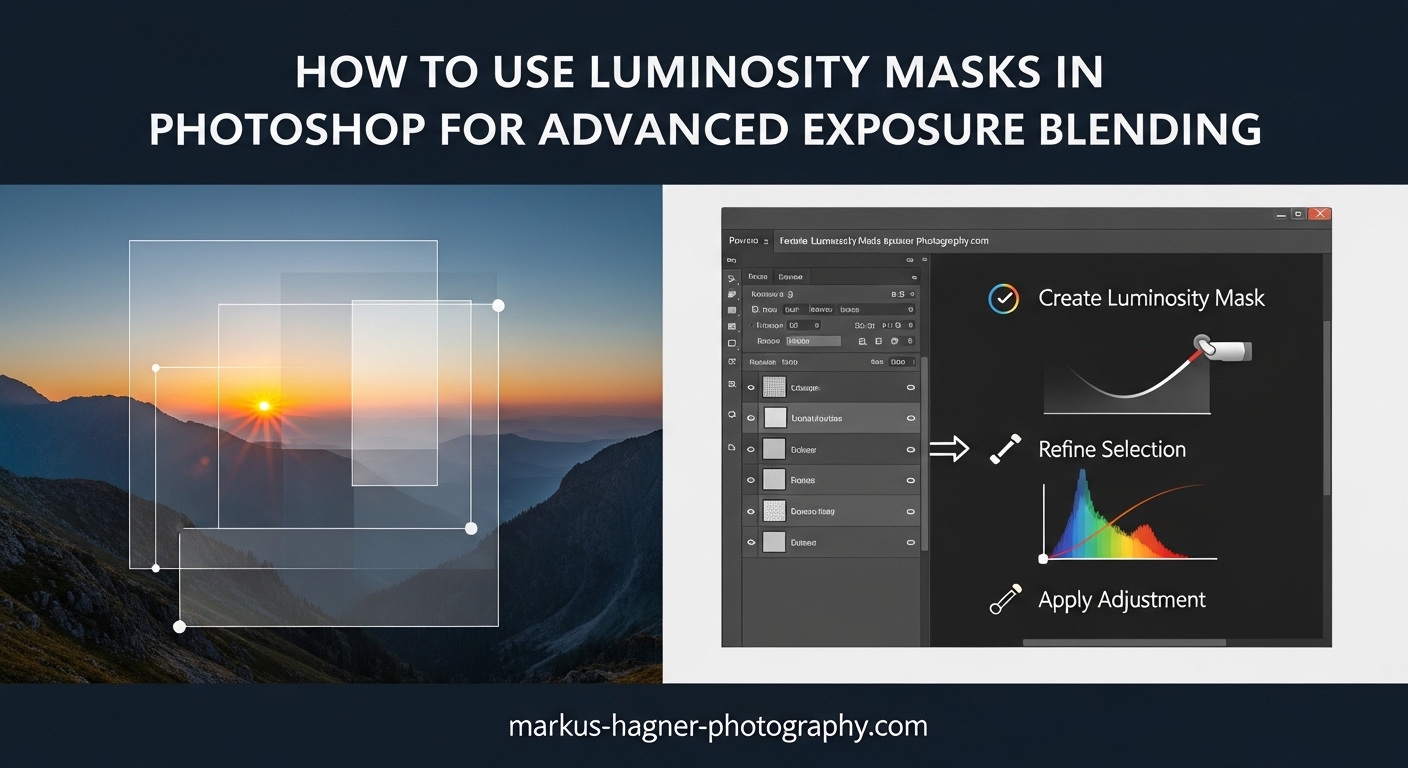
In this guide, I will walk you through everything you need to know about using luminosity masks in Photoshop for advanced exposure blending. You will learn what luminosity masks are, how to create them from scratch, and a complete workflow for blending multiple exposures seamlessly. I will also share troubleshooting tips for common issues like halos and harsh transitions.
What Are Luminosity Masks in Photoshop
Luminosity masks are selections created from the brightness values of your image itself. Think of them as custom stencils that reveal or hide adjustments based on how light or dark each pixel is. A highlights mask selects only the brightest parts of your image, a shadows mask targets the darkest areas, and midtones masks capture everything in between.
The magic of luminosity masks lies in their self-feathering nature. Unlike hard selections made with the lasso tool, luminosity masks create smooth, gradual transitions that blend adjustments naturally into your image. This is why they produce such realistic results compared to other selection methods.
Here is what makes luminosity masks different from other Photoshop selection tools. The magic wand tool selects pixels based on color similarity. The pen tool creates precise paths. But luminosity masks select based on luminance, the brightness of each pixel regardless of its color. This makes them perfect for tonal adjustments where color is not the primary concern.
The Three Main Types of Luminosity Masks
Every luminosity mask falls into one of three categories based on the tonal range it targets:
Highlights masks select the brightest portions of your image. These are ideal for recovering detail in overexposed skies, adjusting bright reflections, or controlling hot spots in your image. The brighter a pixel, the more it is selected.
Shadows masks do the opposite, targeting the darkest areas. Use these to open up underexposed foregrounds, reveal shadow detail, or reduce the intensity of dark areas without affecting midtones or highlights.
Midtones masks select the middle tonal range while excluding extreme highlights and shadows. These are excellent for adding contrast and pop to your image without affecting the brightest or darkest areas. They help you target the meat of your histogram.
Each of these basic masks can be subdivided further. A highlights mask can spawn a bright highlights mask, an even brighter highlights mask, and so on. This subdivision gives you increasingly narrow control over specific tonal ranges.
How to Create Luminosity Masks Using the Channels Method
Creating luminosity masks manually in Photoshop is straightforward once you understand the process. I recommend learning the manual method first because it builds your understanding of how these masks actually work. Later, you can speed up your workflow with actions or panels.
Prerequisites: Preparing Your Bracketed Exposures
Before creating masks, you need properly exposed source images. For exposure blending, capture bracketed shots at different exposure values. A typical three-shot bracket includes an exposure for the highlights, an exposure for the midtones, and an exposure for the shadows.
Most cameras can capture automatic exposure brackets. Set your camera to aperture priority mode and enable auto bracketing. A common bracket is -2, 0, and +2 exposure values. Keep your aperture constant to maintain consistent depth of field across all shots.
Load your bracketed exposures into Photoshop as layers in a single document. Align them if necessary using Edit > Auto-Align Layers. Convert each layer to a smart object so you can make non-destructive adjustments later. Name your layers clearly: dark exposure, normal exposure, bright exposure.
Step-by-Step: Creating Your First Highlights Mask
Let me walk you through creating a basic highlights mask using the Channels panel:
Step 1: Open the Channels panel by going to Window > Channels. You will see the RGB composite channel plus individual Red, Green, and Blue channels.
Step 2: Hold Ctrl (Command on Mac) and click on the RGB channel thumbnail. This loads the luminosity of your image as a selection. You will see marching ants appear, but do not worry if they seem to select everything. The selection is actually feathered based on brightness.
Step 3: Return to the Layers panel and click the Add Layer Mask button at the bottom. You have just created your first luminosity mask. The brightest areas of your image are revealed, while darker areas are partially hidden.
Step 4: To see your mask, Alt (Option on Mac) click on the mask thumbnail. You will see a grayscale representation where white reveals and black conceals.
Step 5: To create a narrower highlights mask, Ctrl-click on your existing mask thumbnail to load it as a selection, then create a new layer mask. Each time you do this, you create a more restrictive mask that targets only the brightest of the bright.
Creating Shadows and Midtones Masks
Creating a shadows mask follows a similar process with one key difference:
Step 1: Ctrl-click the RGB channel to load the luminosity selection.
Step 2: Invert the selection by pressing Ctrl+Shift+I (Command+Shift+I on Mac). Now the darkest areas are most selected.
Step 3: Add a layer mask. This is your basic shadows mask.
For a midtones mask, the process requires one extra step:
Step 1: Load the RGB luminosity selection.
Step 2: Add a layer mask to any layer. This is your highlights mask.
Step 3: Load the highlights mask as a selection (Ctrl-click the mask).
Step 4: Subtract this from your original selection by holding Ctrl+Alt (Command+Option) and clicking the RGB channel again.
Step 5: Create your midtones mask from this refined selection.
Keyboard Shortcuts Reference
Speed up your workflow with these essential shortcuts:
Ctrl (Cmd) + click RGB channel: Load luminosity as selection
Ctrl (Cmd) + Shift + I: Invert selection
Ctrl (Cmd) + Alt (Option) + click: Subtract from selection
Ctrl (Cmd) + Shift + Alt (Option) + click: Intersect with selection
Alt (Option) + click mask: View mask in grayscale
Ctrl (Cmd) + : Select Red channel
Ctrl (Cmd) + Shift + : Select composite RGB channel
Complete Exposure Blending Workflow
Now that you understand how to create luminosity masks, let me walk you through a complete exposure blending workflow. This is where everything comes together to create natural-looking blended images.
How to Use Luminosity Masks in Photoshop for Advanced Exposure Blending
The exposure blending workflow combines your bracketed shots into a single image with balanced tonal range. Here is my step-by-step process:
Step 1: Organize your layers. Stack your bracketed exposures with the base exposure at the bottom. I typically place the normal exposure at the bottom, the darker exposure above it, and the brighter exposure on top. This order affects how your masks work.
Step 2: Create smart objects. Right-click each layer and choose Convert to Smart Object. This preserves your original data and allows non-destructive editing. Smart objects also let you reprocess RAW files if needed.
Step 3: Generate your masks. Using the channels method described above, create your highlights, shadows, and midtones masks from the base exposure layer. These masks will control which parts of each exposure contribute to the final blend.
Step 4: Apply masks to blend layers. Apply a highlights mask to your darker exposure layer to reveal sky detail. Apply a shadows mask to your brighter exposure layer to reveal foreground shadow detail. The normal exposure in the middle fills in the midtones.
Step 5: Refine the transitions. Click on each mask and use a soft brush at low opacity to paint black or white where needed. This manual refinement ensures seamless transitions between exposures.
Step 6: Check for halos. Zoom in to high-contrast edges where sky meets trees, mountains, or buildings. If you see light or dark halos, refine those areas with your brush tool.
Step 7: Flatten or keep layered. If you are satisfied with the blend, you can flatten the image. However, I recommend keeping the layered file as a master document in case you need to make adjustments later.
Which Mask to Use for Specific Situations
Choosing the right mask depends on what you are trying to achieve:
For recovering sky detail from a dark exposure, use a highlights mask or a bright highlights mask. The more overexposed your sky in the base exposure, the more restrictive your mask should be.
For opening shadow areas with a bright exposure, use a shadows mask. If the shadows are very deep, start with a basic shadows mask. For moderately dark areas, a dark shadows mask gives more precise control.
For adding local contrast and pop, midtones masks are your best friend. Apply curves or levels adjustments through a midtones mask to increase contrast in the middle tones without affecting highlights or shadows.
Special Case: Interior Photography with Window Blowouts
Real estate and interior photographers face a unique challenge: balancing properly exposed interiors with bright windows that show outdoor views. This is one of the most common applications of luminosity masks.
The approach requires additional exposures. Capture at least one frame exposed for the interior and another exposed for the window view. In extreme contrast situations, you might need three or more exposures.
Apply a highlights mask to your window exposure to blend the outdoor view into the bright areas of your interior shot. The self-feathering nature of luminosity masks is especially valuable here because harsh transitions around window frames are immediately obvious.
Paint additional refinement around window frames where the automatic mask does not quite work. Interior edges often require more manual attention than outdoor landscape transitions.
Using the Apply Image Command for Precise Control
The Apply Image command offers another way to create and modify luminosity masks with additional control:
With a layer mask selected, go to Image > Apply Image. Choose your source image and channel (typically the RGB composite). Set the blending mode to Normal and adjust the scale and offset values to modify the mask contrast.
This technique is particularly useful for creating masks from a different layer than the one you are masking. For example, you might create a mask from a flattened composite that has better tonal distribution than any single exposure.
Advanced Luminosity Mask Techniques
Once you master the basics, several advanced techniques can take your luminosity mask workflow to the next level.
Refining Masks with Brush Tools
Luminosity masks are rarely perfect on their first application. The real power comes from refining them with brush work. Select your mask, press B for the brush tool, and paint with black to hide areas or white to reveal them.
Use a soft brush at low opacity, around 10-20 percent, for gradual adjustments. Build up your effect with multiple strokes rather than one heavy pass. This approach creates the most natural-looking results.
The beauty of refining luminosity masks is that you start with a good foundation. The mask does 80 percent of the work, and your brush work handles the remaining 20 percent where precision matters most.
Dodge and Burn with Luminosity Masks
Traditional dodging and burning can create uneven results because it affects all tones equally. Combining dodging and burning with luminosity masks gives you tonal-specific lightening and darkening.
Create a curves adjustment layer and set it to lighten your image. Apply a shadows mask to restrict the lightening to dark areas only. This mimics dodging but affects only the tones you want to brighten.
For burning, create a darkening curves layer with a highlights mask. This darkens bright areas without affecting shadows or midtones. The result is more controlled than traditional burning.
This technique is especially powerful for black and white photography where tonal control is everything. You can sculpt the light in your image with surgical precision.
Color Grading Applications
Luminosity masks are not limited to exposure blending. They are equally powerful for color grading because you can target color adjustments to specific tonal ranges.
Want to add warmth to your highlights while keeping shadows cool? Create a color balance or photo filter adjustment layer with a highlights mask. The warm tones apply only to bright areas.
For cinematic color grading, apply different color casts to shadows versus highlights. Cool shadows with warm highlights is a classic look that luminosity masks make easy to achieve.
Luminosity Masks vs HDR: A Comparison
Many photographers wonder whether to use HDR software or luminosity masks for exposure blending. Here is how they compare:
HDR software is faster and more automated. It aligns and blends exposures automatically, and many programs offer one-click presets. However, HDR can produce unnatural results with flat contrast and halos. The automatic tone mapping does not always interpret the scene as you would.
Luminosity masks require more time and skill but offer complete creative control. You decide exactly which areas blend and how. The results tend to look more photographic and less processed. Luminosity masks also work within Photoshop without additional software.
For commercial work where time matters, HDR might be the practical choice. For fine art photography or any situation where quality trumps speed, luminosity masks usually produce superior results.
Tools and Panels Comparison
Several tools and panels automate luminosity mask creation. Here is how the main options compare:
TK Actions (Tony Kuyper) is the original luminosity mask panel and remains one of the most respected options. It offers comprehensive mask generation, 16-bit support, and a logical interface. Tony Kuyper pioneered the technique, and his panel reflects deep understanding of the workflow.
Lumenzia by Greg Benz offers a modern interface with powerful features including visual mask previews, zone system integration, and the free Lumenzia LITE version for beginners. It emphasizes luminosity selections over masks, which is a useful conceptual shift.
Raya Pro integrates luminosity masks with a broader workflow including blending modes and digital blending techniques. It is popular among landscape photographers who want an all-in-one solution.
Manual creation using the channels method costs nothing and builds fundamental understanding. I recommend starting here before investing in panels. Once you understand what the panels do, you can make an informed choice about which one fits your workflow.
When NOT to Use Luminosity Masks
Luminosity masks are powerful, but they are not always the best tool. Here are situations where you might choose a different approach:
For simple global adjustments, a regular layer mask with a gradient or brush work is faster and sufficient. Luminosity masks excel at targeted adjustments but add complexity when you do not need it.
When working with images that have similar tones throughout, luminosity masks may not provide useful differentiation. A flat, low-contrast image does not have the tonal variation that makes luminosity masks effective.
For quick social media or web images where speed matters more than perfection, HDR or even the basic exposure blending in Lightroom might be more practical.
Finally, if your camera has excellent dynamic range and you captured the scene in a single exposure, you might achieve your goals with RAW processing alone. Not every image needs luminosity masks.
Troubleshooting Common Issues
Even experienced photographers encounter problems when working with luminosity masks. Here are the most common issues and how to fix them.
Fixing Halos Around High-Contrast Edges
Halos are bright or dark lines that appear where dark and light areas meet, such as along a treeline against a bright sky. They are the most common complaint about exposure blending.
The cause is usually a mask that is too sharp at transition edges. Luminosity masks naturally feather, but high-contrast boundaries can still create visible halos.
To fix halos, select your mask and apply a slight Gaussian blur. Filter > Blur > Gaussian Blur with a radius of 1-3 pixels softens the transition. Be careful not to over-blur or you lose the precision that makes luminosity masks useful.
Alternatively, paint along halo-prone edges with a soft brush at low opacity. Use black on a highlights mask or white on a shadows mask to smooth the transition manually.
Removing Unnatural Transitions
Sometimes blended images show obvious seams where one exposure ends and another begins. This usually means your mask needs refinement in that area.
The solution is patient brush work. Select the problematic mask, zoom in to the transition area, and paint with a soft brush to smooth the gradient. Work at low opacity and build up gradually.
Another approach is to create a less restrictive mask. If a bright highlights mask creates a hard edge, try a regular highlights mask instead. The broader selection creates gentler transitions.
Mask Visibility Tips
One challenge with luminosity masks is that they are hard to see while you work. Photoshop offers several ways to improve mask visibility.
Alt (Option) click a mask thumbnail to view it in grayscale. This shows exactly what your mask looks like. Press (backslash) to view the mask as a red overlay on your image, which is helpful for seeing how the mask aligns with image content.
You can also adjust the mask overlay color and opacity in the Properties panel when a mask is selected. Choose a color that contrasts with your image for better visibility.
File Size and Performance Considerations
Working with multiple smart objects and layer masks creates large files. A three-exposure blend with masks can easily exceed 500MB for a single image.
To manage file size, work with 16-bit files when you need the tonal depth but convert to 8-bit for final output if file size is a concern. Save master files with all layers intact, then create flattened versions for delivery.
If Photoshop runs slowly, consider merging some layers once you are satisfied with their adjustments. You can also reduce the number of history states in Preferences to free up memory.
Common Beginner Mistakes
Several mistakes trip up photographers new to luminosity masks:
Using too many masks at once creates a confusing workflow. Start with one or two masks and add more only when needed.
Forgetting to invert selections when creating shadows masks leads to masks that do the opposite of what you intend.
Not checking the actual blend while working. It is easy to focus on the mask and forget to view the image result. Toggle your layers on and off frequently to check your progress.
Over-blending is another common issue. Sometimes one or two well-placed adjustments are all you need. More masks do not always mean better results.
Frequently Asked Questions
What does luminosity blend mode do in Photoshop?
The luminosity blend mode preserves the color values of the underlying layer while using the luminosity (brightness) values of the blended layer. This is useful for adjusting contrast and detail without affecting color saturation. When combined with luminosity masks, you can target these brightness adjustments to specific tonal ranges in your image.
What is luminosity masking in Photoshop?
Luminosity masking is a technique that creates selections based on the brightness values in your image. Unlike color-based selections, luminosity masks target pixels according to how light or dark they are. This allows you to make adjustments to highlights, midtones, or shadows independently, with natural feathered transitions that blend seamlessly into your image.
How to seamlessly blend two photos in Photoshop?
To seamlessly blend two photos, place them as layers in a single document with the base image on the bottom. Create a luminosity mask from the base image by Ctrl-clicking the RGB channel in the Channels panel. Apply this mask to your top layer to create a brightness-based blend. Refine the mask with a soft brush at low opacity, focusing on transition areas. For exposure blending, use a highlights mask to blend darker exposures and a shadows mask for brighter exposures.
How to gradually blend images with a layer mask?
Create a layer mask on your top layer and apply a black-to-white gradient across the transition area. White reveals the top layer while black conceals it, creating a gradual blend. For more natural results, use a luminosity mask instead of a gradient. Apply the luminosity mask, then use a soft brush at 10-20 percent opacity to paint additional refinement along the transition zone until the blend looks seamless.
Conclusion
Luminosity masks give you the precision control that HDR software cannot match. By creating selections based on brightness values, you can blend exposures, adjust tones, and enhance your images with natural-looking results that respect the original mood of the scene.
The technique does have a learning curve. Do not be discouraged if your first attempts do not look perfect. Like any skill, luminosity masking improves with practice. Start with simple two-exposure blends and work up to more complex situations as your confidence grows.
Remember that luminosity masks are a means to an end, not the goal itself. The best blended images are those where viewers cannot tell any blending occurred. Use these techniques to serve your creative vision, and your photographs will speak for themselves.