In today’s competitive real estate market, aerial photography has become a game-changer for property listings. According to the National Association of Realtors, properties with drone photography sell 68% faster than those without aerial images. When I started incorporating drone exterior shots into my photography business three years ago, I saw client engagement increase by over 40%.
This comprehensive guide will teach you everything you need to know about using a drone for real estate exterior photography. You will learn the legal requirements, essential equipment, pre-flight planning, shot techniques, camera settings, and post-processing workflows that professional aerial photographers use to create stunning property images.
Whether you are a real estate agent wanting to capture your own listings or a photographer expanding into aerial work, mastering drone exterior photography opens up new revenue opportunities. The demand for quality aerial real estate images continues to grow as buyers increasingly start their property search online, making visual impact more important than ever in 2026.
Legal Requirements and Part 107 Certification
Before flying a drone for any commercial purpose, including real estate photography, you must obtain FAA Part 107 certification. This certification demonstrates that you understand airspace regulations, weather patterns, emergency procedures, and safe drone operation. The certification process involves passing a 60-question knowledge test at an FAA-approved testing center.
I completed my Part 107 certification in about two weeks of study, using free FAA resources and online practice tests. The test covers topics including airspace classification, weather effects on drone flight, radio communication procedures, and emergency protocols. Once you pass, your certification remains valid for two years before requiring recurrent training.
FAA Regulations for Commercial Drone Operations
Commercial drone pilots must follow specific operational rules under Part 107. Your drone must weigh less than 55 pounds, stay below 400 feet in altitude, and remain within visual line of sight at all times. You cannot fly over people not involved in the operation, and flights are restricted to daylight hours unless you obtain a waiver for civil twilight operations.
One often overlooked requirement involves registering your drone with the FAA before any commercial flight. Registration costs $5 and is valid for three years. You must display your registration number on the drone itself. Flying without registration can result in civil penalties up to $27,500, so this small investment protects your business significantly.
Airspace Restrictions and the B4UFLY App
Understanding airspace classifications prevents dangerous situations and legal violations. Class B airspace surrounds major airports, while Class C covers medium-sized airports with radar approach control. Class D airspace encompasses smaller airports with control towers. Real estate properties near these areas may require airspace authorization before you can legally fly.
The FAA’s free B4UFLY app shows airspace restrictions for any location in the United States. Before every real estate drone shoot, I check the app to verify airspace status, temporary flight restrictions, and any required authorizations. Some properties fall within controlled airspace that requires LAANC (Low Altitude Authorization and Notification Capability) approval, which you can obtain through apps like AirMap or Aloft.
Insurance and Liability Protection
While not legally required, drone liability insurance protects your business from potential accidents and property damage. Most real estate agents and brokerages require proof of insurance before hiring drone photographers. Annual policies typically cost $500 to $1,500 depending on coverage limits, and they provide peace of mind that protects both you and your clients.
I recommend obtaining at least $1 million in liability coverage for real estate drone work. This amount covers most accident scenarios including property damage and bodily injury. Some insurance providers offer per-flight coverage if you only fly occasionally, while annual policies make more sense for frequent commercial operations.
Essential Equipment for Exterior Drone Photography
Choosing the right drone for real estate exterior photography balances image quality, flight time, portability, and budget. The most popular drones for this work feature 4K video capability, at least 12-megapixel still photos, three-axis gimbal stabilization, and obstacle avoidance sensors. DJI currently dominates the market with several models suited for real estate work.
For beginners entering real estate drone photography, the DJI Mini 4 Pro offers excellent value in a sub-250g package that does not require registration. Its 48MP camera captures detailed still images, while the 4K video quality meets MLS requirements. The obstacle avoidance system helps prevent accidents during property flyovers.
Key Features to Prioritize for Real Estate Work
When evaluating drones for exterior property photography, focus on camera specifications first. Look for at least 12 megapixels for still photos, 4K video resolution, and RAW photo capability. RAW format preserves significantly more image data than JPEG, giving you flexibility during post-processing to recover highlights and adjust exposure.
Flight time directly impacts your productivity on location. Drones with 30 minutes or more of flight time allow you to capture multiple shot angles without landing to swap batteries. I carry at least three fully charged batteries for every real estate shoot, which provides 90+ minutes of total flight time sufficient for even large properties.
ND Filters for Aerial Photography
Neutral density filters function like sunglasses for your drone camera, reducing light entering the lens without affecting color. These filters prove essential for maintaining proper shutter speed in bright outdoor conditions. For real estate exterior shots, you want a shutter speed roughly double your frame rate for smooth video, which becomes difficult in bright sunlight without ND filters.
A set of ND8, ND16, ND32, and ND64 filters covers most lighting conditions you will encounter. I use ND16 most frequently for real estate work during midday sun, while ND32 handles extremely bright conditions. PolarPro and DJI both make quality filter sets specifically designed for popular drone models.
Spare Batteries and Storage Cards
Nothing ends a real estate drone shoot faster than depleted batteries or full storage cards. I recommend carrying at least three batteries for any property shoot, plus a portable charging bank if you need to recharge on location. Storage cards should offer fast write speeds for 4K video and enough capacity for 64GB or more per battery.
Using separate cards for each battery prevents catastrophic data loss if one card fails. Label your batteries and cards to track usage and know when replacements are needed. Batteries typically last 200 to 300 charge cycles before significant capacity reduction, so monitor their performance over time.
Pre-Flight Planning and Safety Checklist
Successful real estate drone photography starts with thorough pre-flight planning. I always arrive at a property 30 minutes before my scheduled shoot time to assess conditions, identify obstacles, and plan my flight paths. This preparation prevents wasted flights and ensures I capture every shot the client needs.
Property Assessment Before Flying
Walk the property perimeter to identify potential hazards including power lines, trees, antennas, and nearby structures. Note the positions of any obstacles that could interfere with your planned flight paths. Properties in dense neighborhoods require more careful planning than those with open surroundings.
Check for any temporary hazards like construction equipment, parked vehicles, or people in the area. Communicate with the property owner or real estate agent about your planned flight areas and ask them to keep people and pets inside during the shoot. This communication prevents safety issues and liability concerns.
Weather and Lighting Evaluation
Wind speed directly impacts flight stability and image quality. Most consumer drones handle winds up to 15-20 mph, but strong gusts can make smooth footage nearly impossible. I check wind conditions using apps like UAV Forecast, which provides detailed aviation weather data including wind speed at different altitudes.
Lighting conditions significantly affect your exterior shots. The golden hour, occurring during the first hour after sunrise and the last hour before sunset, provides warm, directional light that enhances architectural features. Overcast days offer soft, even lighting that works well for exterior details without harsh shadows.
Complete Pre-Flight Safety Checklist
Before every flight, run through this safety checklist:
1. Verify Part 107 certification is current and drone registration is valid
2. Check B4UFLY app for airspace restrictions and authorizations
3. Inspect drone for physical damage, loose propellers, and battery condition
4. Confirm GPS signal strength shows at least 8 satellites
5. Calibrate compass if prompted or if location changed significantly
6. Set return-to-home altitude above tallest obstacle on property
7. Verify camera settings match planned shot types
8. Brief any observers on safety zones and communication signals
9. Check battery levels on drone and controller (minimum 50% each)
10. Clear takeoff and landing area of debris and obstacles
Flight Path Planning Strategy
Plan your shot sequence before takeoff to maximize battery efficiency. Start with the highest priority shots in case weather or equipment issues force an early landing. I typically begin with establishing shots from higher altitudes, then work progressively closer to the property for detail shots.
Visualize each shot including the drone position, camera angle, and movement pattern. This mental preparation helps you execute smooth, professional footage without wasting time hovering and repositioning. Write down your shot list and check off each one as you complete it.
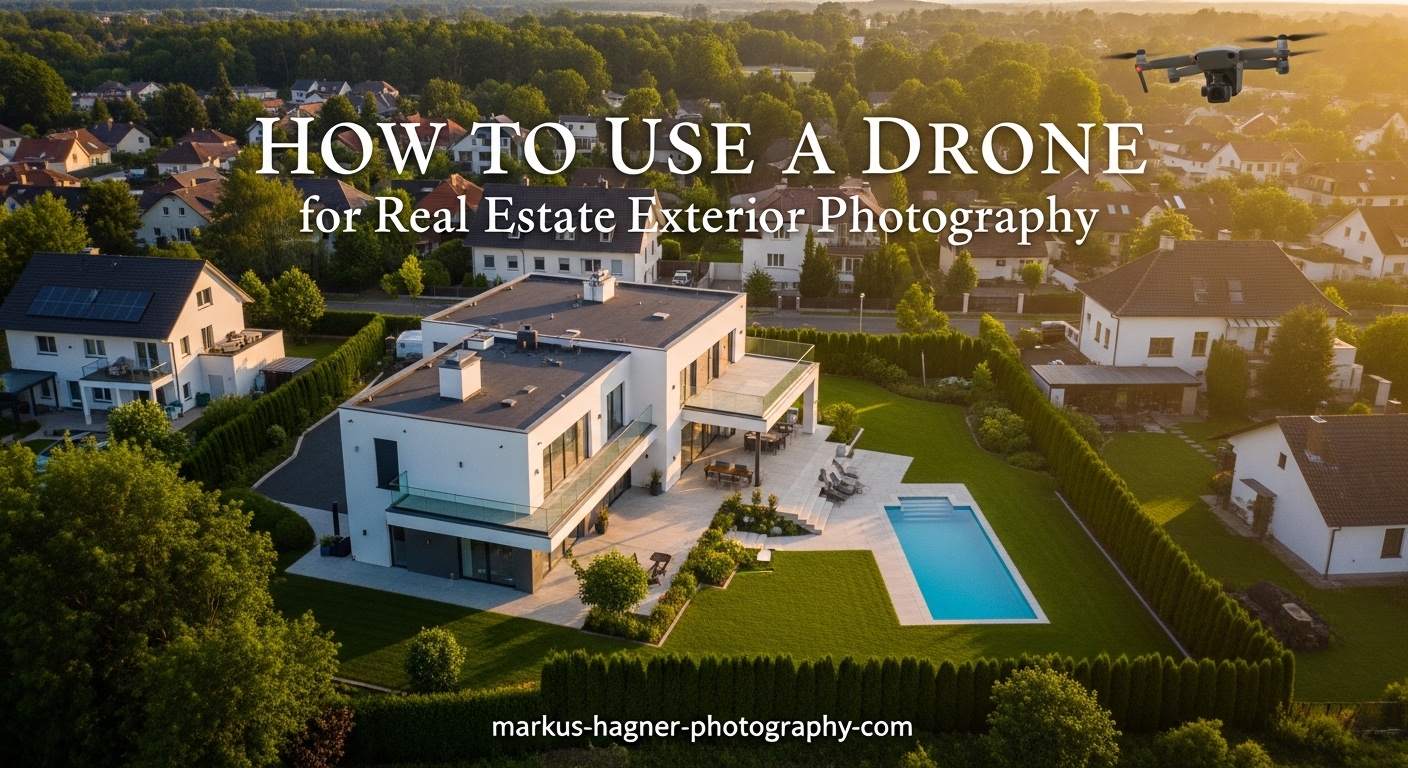
How to Capture Essential Exterior Drone Shots
The core of real estate drone photography involves capturing a consistent set of exterior shots that showcase the property effectively. These shots provide potential buyers with a complete understanding of the property layout, surrounding neighborhood, and exterior features that ground-level photography cannot convey.
The Establishing Shot
The establishing shot provides an overview of the entire property and its context within the surrounding area. Fly to an altitude of 100-200 feet and position the drone to show the property in relation to the street, neighboring homes, and nearby amenities. This shot helps buyers understand the property setting and neighborhood character.
For video establishing shots, start high and slowly descend while moving toward the property. Keep movements slow and steady, using the gimbal to maintain a level horizon. A 15-20 second establishing clip provides editors with enough footage for transitions in property marketing videos.
The Orbit Shot
Orbit shots circle the property at a constant radius, revealing all exterior angles in smooth motion. Position the drone 50-100 feet from the property at an altitude of 30-60 feet. Use the drone’s Point of Interest or Orbit mode to automatically circle while keeping the camera centered on the building.
For manual orbit shots, fly laterally while simultaneously rotating the drone to keep the property centered in frame. This technique requires practice but gives you more control over speed and framing. Complete at least one full orbit to capture all property angles.
Top-Down (Nadir) Shot
The top-down or nadir shot looks directly down on the property from above, showing lot layout, landscaping, and outdoor living spaces. Fly directly over the property center at 100-150 feet altitude with the camera pointing straight down. This perspective reveals property boundaries, pool areas, and yard dimensions that buyers cannot see from street level.
For video, capture a slow ascent while keeping the camera pointed down, revealing progressively more of the surrounding neighborhood. This rising nadir shot creates dramatic reveal footage that works well as an opening or closing sequence in property videos.
Front Elevation and Approach Shot
Front elevation shots showcase curb appeal and the home’s primary facade. Position the drone 30-50 feet in front of the property at roof height, then capture both still images and slow video approaches. The approach shot simulates arriving at the property, creating an emotional connection for potential buyers.
Fly the approach shot slowly toward the front door, then pause briefly before either continuing past or reversing away. Keep movements smooth and deliberate. Fast or jerky motion looks unprofessional and can cause motion sickness in viewers.
Backyard and Amenity Shots
Exterior features like pools, patios, outdoor kitchens, and landscaping deserve dedicated attention. Position the drone to showcase these amenities from their most flattering angles. For pools, a slightly elevated angle captures the water color and surrounding deck in one frame.
Outdoor living spaces photograph best from 15-30 feet altitude, low enough to show detail but high enough to capture the full area. Include shots of any views from the backyard, as these represent significant selling points for many properties.
Neighborhood Context Shots
Buyers want to understand not just the property but its location within the community. Capture shots showing nearby parks, schools, shopping areas, or other amenities within view of the property. These context shots help buyers visualize daily life in the neighborhood.
Fly to an altitude of 150-300 feet for neighborhood overview shots. This height reveals street patterns, nearby amenities, and the overall character of the surrounding area. Be mindful not to capture identifying details of neighboring properties that could raise privacy concerns.
Optimal Camera Settings for Exterior Shots
Proper camera settings make the difference between amateur and professional drone photography. Understanding how ISO, shutter speed, aperture, and white balance interact allows you to capture images that require minimal post-processing and meet the quality standards expected by real estate professionals.
Why RAW Format Matters
Always shoot real estate drone photos in RAW format rather than JPEG. RAW files contain significantly more image data, preserving details in highlights and shadows that would be lost in compressed JPEG files. This extra data proves invaluable when editing exterior shots with bright skies and shadowed architectural details.
RAW files require post-processing, but the flexibility they provide justifies the extra effort. You can recover blown highlights, adjust white balance after capture, and push exposure without introducing artifacts. Most professional real estate photographers shoot exclusively in RAW for this reason.
ISO, Aperture, and Shutter Speed Settings
For still photography, keep ISO as low as possible, ideally ISO 100 or 200, to minimize noise in your images. Most drone cameras have fixed apertures, so you control exposure primarily through shutter speed and ISO. In bright daylight, fast shutter speeds of 1/1000 or higher produce sharp, well-exposed images.
For video, follow the 180-degree shutter rule: set your shutter speed to roughly double your frame rate. At 30fps, use 1/60 second shutter speed. This creates natural motion blur that appears cinematic rather than choppy. ND filters become essential for maintaining these slower shutter speeds in bright conditions.
ND Filter Selection Guide
Choosing the right ND filter depends on lighting conditions and your desired shutter speed. Use this guide for video shooting at 1/60 second:
Bright direct sunlight: ND32 or ND64
Partly cloudy bright conditions: ND16 or ND32
Overcast or golden hour: ND8 or ND16
Early morning or late evening: No filter or ND4
For still photography, ND filters matter less since you can use faster shutter speeds. However, if you want motion blur in clouds or water features, ND filters allow slower shutter speeds even in daylight.
White Balance and Exposure
Setting white balance correctly saves significant editing time. For exterior real estate shots, use daylight white balance (5500-5600K) for sunny conditions, or cloudy white balance (6000-6500K) for overcast days. Shooting in RAW lets you adjust white balance later, but starting with the correct setting streamlines your workflow.
Use exposure bracketing for challenging lighting situations where the sky is much brighter than shaded areas of the property. Most drones can capture 3-5 exposure brackets automatically, which you can blend in post-processing to create balanced images with detail in both highlights and shadows.
Advanced Techniques and Troubleshooting
Even experienced drone photographers encounter challenges during real estate exterior shoots. Understanding how to handle difficult conditions and common problems ensures you deliver quality results regardless of circumstances.
Handling Wind and Weather Challenges
Wind presents the most common challenge for real estate drone photography. When winds exceed 15 mph, consider rescheduling your shoot if possible. If you must fly in windy conditions, use your drone’s Sport mode for faster response and stronger motor output. Fly lower where wind effects are less severe, and avoid flying directly downwind of obstacles that create turbulence.
I learned to work with the breeze rather than fighting it. Position yourself upwind of the property so the wind naturally pushes the drone toward your subject. This technique reduces battery drain from constant corrections and produces smoother footage.
Dealing with Property Obstacles
Trees, power lines, and nearby structures create navigation challenges around many properties. Always identify these obstacles during your pre-flight walk-around and plan flight paths that maintain safe clearance. Use your drone’s obstacle avoidance sensors, but never rely on them exclusively, as they can miss thin branches or wires.
For tight spaces between trees and buildings, fly slowly and be prepared to take manual control if the drone’s automated systems struggle. Consider capturing some shots from slightly farther away and using digital zoom rather than risking close proximity to obstacles.
Common Mistakes to Avoid
New drone photographers often fly too fast, creating footage that appears rushed and unprofessional. Slow, deliberate movements always look better than fast, aggressive flight patterns. Think of drone movements as camera movements, not aircraft maneuvers. Every motion should serve the composition.
Another frequent mistake involves insufficient battery monitoring. Always land with at least 20% battery remaining to ensure safe return. Pushing batteries to their limits risks emergency landings on property you cannot access or, worse, losing the drone entirely.
Golden Hour Optimization
The golden hour provides the most flattering natural light for exterior real estate photography. Schedule shoots to coincide with this window whenever possible. The warm, directional light enhances architectural textures and creates appealing shadows that add depth to your images.
Plan your shot sequence carefully during golden hour since you have limited time. Start with the most important shots while light conditions are optimal. For east-facing properties, morning golden hour works best. West-facing homes photograph better during evening golden hour.
Post-Processing Your Exterior Drone Photos
Post-processing transforms good drone photos into exceptional marketing materials. A consistent editing workflow ensures all your images maintain professional quality and match the expectations of real estate clients who need polished, print-ready images for their listings.
Editing Workflow Overview
My standard workflow begins with importing RAW files into Adobe Lightroom Classic. I apply a base preset developed specifically for real estate drone photos, then adjust exposure, highlights, shadows, and white balance for each image individually. The goal is natural-looking results that accurately represent the property without obvious manipulation.
For images with challenging dynamic range, I blend exposure brackets using Lightroom’s HDR merge or specialized software like Photomatix. This technique preserves sky detail while lifting shadow areas, creating balanced images impossible to capture in a single exposure.
Key Adjustments for Real Estate Drone Photos
Start with exposure correction, ensuring the property itself is properly exposed even if the sky appears slightly bright. Recover highlight detail in clouds using the highlight slider. Lift shadows in architectural details without creating an unnatural HDR appearance.
Adjust white balance to neutralize any color casts. Drone cameras sometimes produce slightly cool images, so warming the temperature slightly often improves results. Increase vibrance modestly to enhance colors without oversaturating the image.
Export Settings for MLS and Web
MLS systems typically accept images up to certain dimensions, often around 4000 pixels on the long edge. Export JPEG files at 80% quality for optimal file size and image quality balance. Include metadata for copyright protection but remove GPS coordinates for privacy reasons.
For social media and web use, create smaller versions at 1920 pixels on the long edge. These load faster and display well on mobile devices where most property searches now occur. Always keep your edited RAW files as masters for future needs.
Frequently Asked Questions
How to take real estate photos with a drone?
To take real estate photos with a drone, start by obtaining Part 107 certification and checking airspace restrictions. Plan your shots before flying, including establishing shots from 100-200 feet, orbit shots around the property, top-down views, and front elevation shots. Use a camera with at least 12 megapixels, shoot in RAW format, keep ISO low (100-200), and maintain slow, smooth movements. Fly during golden hour for best lighting, and always follow safety protocols including pre-flight checklists and obstacle awareness.
How much do realtors pay for drone photography?
Realtors typically pay between $100 and $500 for drone photography services, with the average ranging from $150 to $300 for a standard residential property. Factors affecting price include property size, number of shots required, video vs still photography, turnaround time, and local market conditions. Full packages combining drone photos, video, and ground-level photography often command $300 to $800 or more for luxury properties.
Do I need a drone license for real estate photography?
Yes, you need a Part 107 Remote Pilot Certificate from the FAA to legally fly a drone for real estate photography in the United States. This applies to any commercial drone use, including when real estate agents fly their own drones for listings. The certification requires passing a 60-question knowledge test at an FAA-approved testing center. Flying commercially without certification can result in civil penalties up to $27,500.
What is the best time of day for drone real estate photography?
The golden hour, occurring during the first hour after sunrise and the last hour before sunset, provides the best lighting for drone real estate photography. This warm, directional light enhances architectural features and creates appealing depth. Overcast days also work well by providing soft, even lighting without harsh shadows. Avoid midday sun when possible, as it creates unflattering shadows and blown-out highlights.
How long does a drone real estate shoot take?
A typical drone real estate photography shoot takes 30 to 60 minutes on location, depending on property size and complexity. This includes 15-30 minutes for pre-flight planning and safety checks, followed by 15-30 minutes of actual flight time capturing various shot angles. Large properties or those requiring video may take longer. Always budget extra time for unexpected conditions or reshoots.
Conclusion
Mastering how to use a drone for real estate exterior photography opens significant opportunities in the growing aerial imaging market. By following the legal requirements, investing in quality equipment, planning your flights carefully, and executing professional shot techniques, you can deliver images that help properties sell faster and command higher prices.
Start by obtaining your Part 107 certification if you have not already. Practice the essential shot types at properties you can access easily, focusing on smooth movements and proper camera settings. Build a portfolio showing consistent quality across different property types and lighting conditions. With dedication to the techniques covered in this guide, you will develop the skills needed to succeed in real estate drone photography.