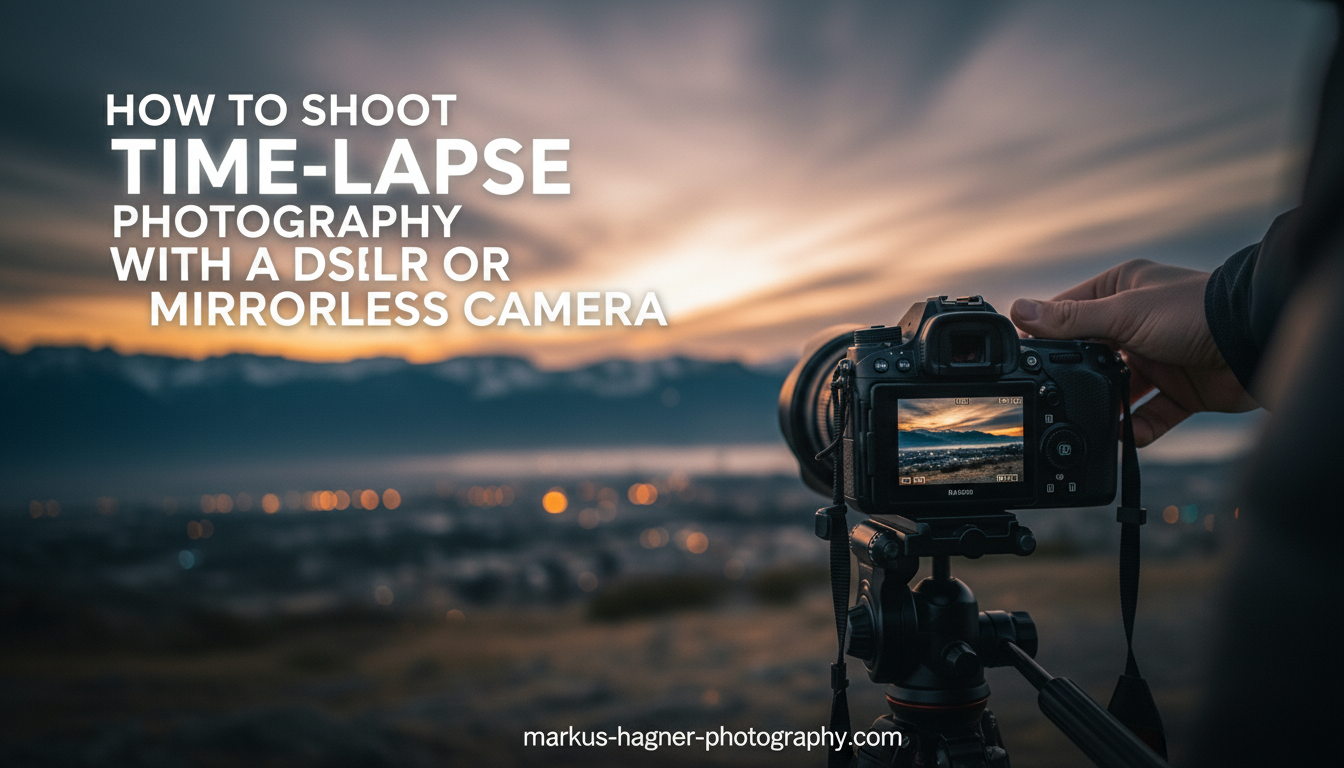
Time-lapse photography has fascinated me since I first captured a sunset compressing 45 minutes into a 15-second clip. That moment changed how I viewed photography entirely. Watching clouds race across the sky and shadows crawl across the landscape revealed details invisible to the naked eye. If you have ever wanted to capture the passage of time in a single video, this guide will show you exactly how to shoot time-lapse photography with a DSLR or mirrorless camera.
Learning how to shoot time-lapse photography opens up creative possibilities that standard still photography simply cannot match. You can document construction projects, capture star trails, show city traffic flowing like rivers of light, or compress an entire day into minutes. The technique requires patience and planning, but the results are incredibly rewarding.
In this comprehensive guide, I will walk you through everything you need to know about time-lapse photography. We will cover essential equipment, camera settings, interval calculations, common mistakes to avoid, and advanced techniques for more challenging shots. Whether you are shooting with a Canon DSLR or a Sony mirrorless camera, the principles remain the same.
What Is Time-Lapse Photography?
Time-lapse photography is a technique where you capture a series of photos at set intervals over an extended period, then play them back as video at a much faster rate. The result compresses time, making slow processes appear to move quickly. A sunset that takes 30 minutes in real life might play back in just 10 seconds of video.
The magic happens through frame rate manipulation. When you shoot one photo every 5 seconds but play them back at 30 frames per second (fps), each second of video represents 150 seconds of real time. This 50x speed increase creates that distinctive accelerated motion effect.
Standard video captures 24 to 60 frames per second continuously. Time-lapse differs by capturing frames much more slowly, with gaps between each shot. These gaps are what create the time compression effect. The longer the interval between shots, the faster the final video appears to move.
Photographers use time-lapse for capturing weather changes, celestial movements, urban activity, construction progress, plant growth, and countless other subjects. Any process that unfolds too slowly to appreciate in real time becomes compelling when compressed into a time-lapse sequence.
Essential Equipment for Time-Lapse Photography
Getting started with time-lapse photography does not require expensive gear, but having the right equipment makes a significant difference in your results. Here is what you need to know about each component.
Camera: DSLR or Mirrorless
Almost any interchangeable lens camera works for time-lapse photography. Both DSLR and mirrorless cameras excel at this technique, though each has advantages. Mirrorless cameras have become increasingly popular for time-lapse work because they lack a mechanical mirror that can cause subtle vibrations during each shot. This mirror slap can introduce micro-blur in DSLR shots, though using mirror lock-up mode minimizes this issue.
Full-frame cameras offer better low-light performance, which matters for night sky and astro time-lapse photography. Crop sensor cameras like APS-C bodies work perfectly fine for most situations and often cost significantly less. What matters most is having manual control over exposure settings and the ability to shoot in RAW format.
Modern cameras often include built-in interval shooting functions. Check your camera manual for features called “Interval Timer,” “Time-lapse Movie Mode,” or similar names. These built-in features have improved dramatically in recent years and work well for many situations.
Tripod: Your Most Critical Investment
A sturdy tripod is non-negotiable for time-lapse photography. Any camera movement between shots ruins the smooth flow of your final video. I learned this lesson the hard way when a cheap tripod shifted slightly during a 2-hour shoot, creating a jarring jump in my footage.
Look for a tripod that can support at least twice your camera and lens weight. Carbon fiber tripods offer excellent stability while remaining lightweight for hiking to locations. Avoid budget tripods with plastic components, as they flex and shift over time.
Consider the shooting environment when choosing your tripod. For coastal locations or windy conditions, a heavier tripod or one with a hook for adding weight provides extra stability. Some photographers hang their camera bag from the tripod center column for added security.
Intervalometer: Controlling Your Shots
An intervalometer is a device that triggers your camera to take photos at set intervals automatically. While many cameras include built-in interval functions, external intervalometers offer several advantages including more precise control, easier programming, and the ability to shoot bulb exposures longer than 30 seconds.
External intervalometers come in two main types. Wired models connect directly to your camera via a cable and offer reliable operation at affordable prices. Wireless intervalometers allow remote operation and some include features like smartphone app control. For most photographers, a simple wired intervalometer provides everything needed.
When shopping for an intervalometer, verify compatibility with your specific camera model. Different brands use different connectors, and even within brands, connector types can vary between camera lines.
ND Filters: Controlling Light for Motion Blur
Neutral density (ND) filters reduce the amount of light entering your lens without affecting color. For time-lapse photography, ND filters serve a crucial purpose: they allow you to use slower shutter speeds even in bright conditions, creating natural motion blur in moving elements like water, clouds, or traffic.
Without an ND filter, shooting at f/16 and ISO 100 in bright daylight might force you to use a shutter speed of 1/125 second or faster. This freezes motion, making clouds appear as a series of static images rather than flowing smoothly. Adding a 6-stop or 10-stop ND filter lets you use shutter speeds of 1/2 second or longer, creating that smooth, cinematic motion blur.
Square filter systems offer the most versatility, allowing you to stack multiple filters and use graduated ND filters that darken just the sky. Variable ND filters provide adjustable density in a single filter, though some models can cause uneven exposure at extreme settings.
Memory Cards: Speed and Capacity Matter
Time-lapse photography generates large numbers of files quickly. A 3-hour shoot capturing one frame every 5 seconds produces over 2,000 images. Shooting in RAW format compounds storage needs significantly.
Card speed matters more than many photographers realize. Fast cards clear the camera buffer quickly, preventing missed shots during rapid sequences. For most time-lapse work, cards with UHS-I U3 or UHS-II ratings provide sufficient speed. Slower cards can cause the camera to pause while writing, creating gaps in your sequence.
Capacity planning requires some math. If your RAW files average 30MB each and you plan to shoot 2,000 frames, you need at least 60GB of storage. I recommend carrying multiple cards rather than one massive card, as this provides redundancy if a card fails.
Battery Power for Long Shoots
Long time-lapse sequences can deplete batteries faster than expected. A 4-hour night sky shoot with long exposures will drain most camera batteries completely. Planning for power needs prevents disappointing mid-shoot failures.
Battery grips that hold two batteries effectively double your shooting time. Some cameras support USB power delivery, allowing you to connect external power banks for extended operation. For really long shoots, consider a dummy battery that connects to an AC adapter or large external battery.
Temperature affects battery performance significantly. Cold weather can reduce battery capacity by 50% or more. If shooting in winter conditions, keep spare batteries warm in an inside pocket and swap them frequently.
Best Camera Settings for Time-Lapse Photography
Consistent exposure across all frames is the key to professional-looking time-lapse videos. This means shooting in manual mode and locking in your settings before starting the sequence.
Manual Mode: Essential for Consistency
Shooting in manual mode gives you complete control over aperture, shutter speed, and ISO. Automatic modes can cause exposure variations between frames, creating distracting flicker in your final video. When the camera decides exposure for each shot independently, small changes in scene brightness trigger exposure adjustments that become visible as brightness fluctuations.
Set your aperture first based on depth of field needs. For landscapes, f/8 to f/11 typically provides sharp focus throughout the scene while avoiding diffraction. For subjects where you want background blur, wider apertures work fine.
Choose your ISO based on lighting conditions. Keep ISO as low as possible to minimize noise, typically ISO 100 or 200 for daylight shooting. Night time-lapse may require higher ISO settings, but test your specific camera to find the highest ISO that produces acceptable noise levels.
Set shutter speed based on the motion blur effect you want. The 180-degree shutter rule suggests using a shutter speed twice your frame interval. For a 2-second interval, this means a 1-second shutter speed. This creates natural-looking motion blur that mimics how our eyes perceive motion.
Manual Focus: Lock It Down
Auto focus has no place in time-lapse photography. Even small focus hunting between shots creates noticeable jitter in your final video. Switch your lens to manual focus mode and focus carefully before starting your sequence.
For landscape time-lapse, focus about one-third into the scene and use a small aperture for maximum depth of field. Many photographers use hyper focal distance focusing to ensure sharpness throughout the frame. Live view magnification helps achieve precise focus.
Once focused, consider taping the focus ring in place with a small piece of gaffer tape. This prevents accidental focus changes from bumping the lens or temperature shifts affecting focus position.
White Balance: Consistency Is Key
Like exposure, white balance should remain constant throughout your sequence. Auto white balance adjusts based on scene content, which can shift colors as clouds move or lights turn on. Set a custom white balance or choose an appropriate preset like Daylight or Cloudy.
Shooting in RAW format gives you flexibility to adjust white balance in post-processing without quality loss. However, setting white balance correctly in-camera provides a consistent starting point for editing and helps you evaluate exposure more accurately while shooting.
RAW vs JPEG: Quality vs Convenience
RAW files contain significantly more data than JPEGs, providing greater flexibility for exposure adjustments, white balance changes, and shadow/highlight recovery in post-processing. For time-lapse photography, this extra data proves invaluable when dealing with challenging lighting conditions.
The downside of RAW is file size and processing time. A 2,000-frame time-lapse in RAW format requires substantial storage and computing power to process. Some photographers shoot JPEG for simple projects to streamline workflow, accepting the reduced editing flexibility.
For important projects or challenging lighting situations, RAW remains the professional choice. The ability to recover blown highlights or lift shadows often saves shots that would otherwise be unusable.
Brand-Specific Settings
Different camera brands organize time-lapse features differently in their menus. Here are quick guides for the major brands.
Canon cameras typically place time-lapse settings in the red shooting menu under “Interval Timer” or “Time-lapse Movie Mode.” Some Canon DSLRs require accessing mirror lock-up through the custom functions menu to minimize vibration.
Nikon cameras often include interval shooting under the “Interval Timer Shooting” option in the shooting menu. The Z-series mirrorless cameras offer excellent built-in time-lapse features with exposure smoothing options.
Sony cameras generally feature time-lapse settings in the main camera menu under “Interval Shoot. Func.” Many Sony cameras allow saving settings to custom memory slots for quick recall. Sony mirrorless cameras also benefit from their electronic shutter option, eliminating all mechanical vibration.
How to Shoot Time-Lapse Photography: Step-by-Step Guide
Now that you understand the equipment and settings, let me walk you through the complete process of capturing a time-lapse sequence from start to finish.
Step 1: Scout Your Location
Successful time-lapse photography begins before you even set up your camera. Scout potential locations ahead of time, ideally visiting at the same time of day you plan to shoot. Look for interesting compositions that include movement, whether clouds, traffic, people, or water.
Consider the direction of light and how shadows will move during your shoot. A scene that looks stunning at golden hour might become harsh and unflattering an hour later. Apps like PhotoPills help plan sun position and golden hour timing for any location.
Check weather forecasts before heading out. Partly cloudy days often produce the most dramatic time-lapse footage, with clouds creating moving patterns of light and shadow. Completely clear skies can result in static, boring footage.
Step 2: Set Up Your Tripod and Camera
Position your tripod on solid, stable ground. Avoid setting up on surfaces that might shift or vibrate, like wooden boardwalks or loose gravel. Extend the tripod legs fully before adjusting the center column, as raising the center column reduces stability.
Mount your camera securely and frame your composition. Leave some extra space around the edges if possible, as this gives you flexibility to crop and stabilize in post-processing. Check that your horizon is level using the camera’s electronic level or a hot-shoe bubble level.
Attach your intervalometer and any filters you plan to use. Make sure all cables are secured so they will not flap in the wind or get snagged during the shoot.
Step 3: Configure Your Camera Settings
Switch your camera to manual mode and set your aperture, shutter speed, and ISO. Take several test shots to verify your exposure is correct, checking the histogram to ensure you are not clipping highlights or shadows.
Set your lens to manual focus and focus carefully. Use live view magnification to check critical focus on your main subject. Once focused, tape the focus ring to prevent accidental movement.
Choose your white balance preset or set a custom white balance. Verify you are shooting in RAW format for maximum editing flexibility.
For DSLR users, enable mirror lock-up to minimize vibration from the mirror mechanism. Mirrorless users should enable electronic shutter or electronic front curtain shutter for the same reason.
Turn off image stabilization when your camera is mounted on a tripod. Stabilization systems can actually introduce blur when the camera is already stable, as they attempt to correct for motion that does not exist.
Step 4: Program Your Intervalometer
Enter your desired interval between shots. This depends on your subject and the speed of motion you want to capture. Fast-moving subjects like traffic need shorter intervals (1-3 seconds), while slow-moving clouds work well with longer intervals (5-10 seconds).
Set the number of shots or total duration. Calculate how many frames you need based on your desired video length. At 30 fps, a 10-second video requires 300 frames. Always shoot more frames than you think you need.
Set any delay before shooting starts if you want time to walk away from the camera or if you are waiting for a specific moment to begin.
Step 5: Take Test Shots
Before committing to a long sequence, fire off a few test shots using your intervalometer. Check these images carefully for focus, exposure, and composition. Look for any unwanted movement or vibration.
Review your test shots at 100% magnification to verify sharp focus. Check the histogram to confirm proper exposure. Make any necessary adjustments before starting your full sequence.
Step 6: Start Your Sequence
Once everything is set up and tested, start your intervalometer and step away from the camera. Avoid touching or bumping the tripod during shooting. If you need to stay nearby, sit or stand in a position where you will not accidentally contact the setup.
Monitor your camera occasionally to ensure it continues shooting properly. Watch for error messages, battery warnings, or memory card capacity issues. Some intervalometers display a count of shots taken, allowing you to verify progress.
Be patient. Time-lapse photography requires waiting. A 3-hour sequence means 3 hours of waiting. Use this time to scout other locations, take still photos with a second camera, or simply enjoy the scene.
Step 7: Monitor and Adjust
For shoots spanning significant time periods, lighting conditions may change dramatically. A sunset time-lapse transitions from bright daylight to near darkness, requiring exposure adjustments.
For basic time-lapse work, accept that you may need to crop or adjust portions of your sequence in post-processing. More advanced techniques like holy grail shooting involve carefully ramping exposure throughout the sequence, which I cover in the advanced techniques section.
Step 8: End Your Sequence and Backup
When your intervalometer completes its programmed sequence or you decide to end the shoot, verify the camera has finished writing all images to the card before powering off. Turning off the camera mid-write can corrupt files or the entire card.
Immediately back up your images to a laptop or portable hard drive. Memory card failures happen, and losing hours of shooting to a corrupted card is heartbreaking. I carry a portable SSD and card reader for field backups.
Interval Calculation: How to Choose the Right Interval
Choosing the right interval between shots is crucial for achieving the motion speed you want in your final video. Too short an interval creates footage that barely moves. Too long an interval produces jumpy, stuttering motion.
The Basic Formula
The relationship between shooting interval, playback speed, and time compression follows a simple formula. Divide your playback frame rate (typically 30 fps) by your shooting interval to find your time compression factor.
For example, shooting at 2-second intervals and playing back at 30 fps gives you a compression factor of 60. Every second of video represents 60 seconds of real time. A 10-minute real-time event becomes a 10-second video.
Conversely, to determine how many frames you need, multiply your desired video length by your frame rate. A 15-second video at 30 fps requires 450 frames.
Quick Reference: Intervals by Subject Type
Different subjects require different intervals based on how quickly they move. Here is a practical guide based on my experience and community recommendations.
Traffic and fast-moving vehicles: 1-2 seconds. Cars and trucks move quickly enough that longer intervals create jumpy footage.
People walking, busy street scenes: 2-3 seconds. Human movement is slower than vehicles but still needs relatively tight intervals.
Clouds moving quickly in wind: 3-5 seconds. Fast-moving cumulus clouds on windy days work well at these intervals.
Clouds moving slowly, gentle sky changes: 5-10 seconds. Stratiform clouds and subtle sky transitions need longer intervals.
Sunrise or sunset (full sequence): 5-10 seconds. The light changes gradually, so these intervals capture smooth transitions.
Construction projects, slow processes: 30 seconds to 5 minutes. Very slow processes can use much longer intervals.
Stars and night sky: 20-30 seconds. This allows for longer exposures to capture faint stars while maintaining smooth star movement.
Northern lights: 5-15 seconds. Aurora moves relatively quickly and requires shorter intervals to capture its dance.
Practical Calculation Example
Let me walk through a real example. You want to capture a 2-hour sunset time-lapse and create a 15-second video at 30 fps.
First, calculate total frames needed: 15 seconds x 30 fps = 450 frames.
Next, calculate the interval: 2 hours = 7,200 seconds. Divide 7,200 by 450 frames = 16 seconds per frame.
At a 16-second interval, you will capture 450 frames over 2 hours, producing exactly 15 seconds of video.
Always round your interval down rather than up. It is easier to speed up footage slightly in editing than to deal with a video that is too short.
Buffer and Write Time Considerations
Your interval must be longer than your shutter speed plus the time needed to write each file to your memory card. If your shutter speed is 1 second and your camera takes 0.5 seconds to write each file, your minimum interval is 1.5 seconds.
For most daylight shooting with fast shutter speeds, this is not a concern. For long-exposure night photography, this becomes critical. Always test your setup to ensure your interval allows sufficient time for each shot to complete.
Common Time-Lapse Mistakes and How to Avoid Them
After shooting time-lapses for years, I have made nearly every mistake possible. Here are the most common issues and how to prevent them.
Flicker: The Most Frustrating Problem
Flicker appears as rapid brightness fluctuations in your final video. It typically stems from inconsistent exposure between frames. Even tiny exposure variations of 1/3 stop become glaringly obvious when frames play at 30 fps.
The primary cause is shooting in automatic modes. Aperture priority mode sounds appealing for changing light conditions, but mechanical aperture blades do not open to exactly the same position every time. These microscopic variations create flicker.
Shoot in manual mode with all settings locked down. For situations with changing light, use manual mode and plan to adjust exposure carefully during the shoot, or use specialized deflickering software like LRTimelapse in post-processing.
Exposure Shifts During Long Shoots
Sunsets and sunrises present a unique challenge: light levels change dramatically over the course of your sequence. If you lock exposure for the start, your images will be severely underexposed by the end.
The holy grail technique addresses this by gradually adjusting exposure throughout the sequence. This requires careful planning and execution, often using bulb ramping features on advanced intervalometers or specialized camera settings.
For simpler solutions, accept that portions of your sequence may need exposure adjustment in post-processing. Shooting in RAW gives you the latitude to recover shadows and tame highlights significantly.
Battery and Memory Card Failures
Nothing hurts more than watching your battery die or memory card fill up 80% through a 4-hour shoot. These failures are entirely preventable with proper planning.
Always start with a fully charged battery and carry spares. Calculate your expected power consumption based on shot count and exposure time. For critical shoots, use a battery grip with two batteries or an external power solution.
Format your memory cards before each shoot rather than just deleting old files. Formatting provides a clean file system and reduces the chance of corruption. Carry more storage capacity than your calculations suggest you need.
Focus Drift
Even with manual focus engaged, focus can shift over long shoots. Temperature changes cause lens elements to expand or contract slightly. Some lenses suffer from focus creep, where gravity gradually pulls the focus ring.
Taping the focus ring prevents accidental bumps and reduces focus creep. For critical shoots, check focus periodically by magnifying live view without touching the camera.
Camera Shake and Vibration
Any movement during the sequence ruins the smooth flow of your time-lapse. DSLR mirror slap creates subtle but visible vibration. Wind can shake lightweight tripods. Even walking nearby can transfer vibrations through the ground.
Use mirror lock-up on DSLRs or electronic shutter on mirrorless cameras. Position tripods on solid surfaces away from foot traffic. Add weight to the tripod for stability in windy conditions. Avoid extending the center column, which acts as a lever and amplifies vibration.
Wrong Interval Choice
Choosing an interval that is too long creates choppy, stuttering footage. Choosing an interval that is too short fills memory cards unnecessarily and creates footage that moves too slowly.
Research your subject before shooting. Watch example time-lapses to see what intervals others use. When in doubt, shoot at a slightly shorter interval than you think you need. You can always speed up footage in editing, but you cannot add frames that were never captured.
Advanced Time-Lapse Techniques
Once you master basic time-lapse photography, several advanced techniques can take your work to the next level.
Holy Grail: Day-to-Night Transitions
The holy grail time-lapse captures the transition from day to night or night to day, smoothly adjusting exposure as light levels change by 15 or more stops. This technique is considered one of the most challenging in time-lapse photography.
Success requires carefully ramping your exposure settings throughout the sequence. Start with your daylight settings and gradually increase exposure time, open aperture, or raise ISO as light fades. The key is making changes smoothly and consistently.
Specialized software like LRTimelapse helps automate this process by analyzing your sequence and generating smooth exposure transitions. The software works with Lightroom to apply graduated adjustments across your images before assembling them into video.
Motion Control: Adding Camera Movement
Static time-lapses are beautiful, but adding controlled camera movement creates even more dynamic results. Motorized sliders move the camera horizontally during the sequence, while motorized pan/tilt heads add rotation.
Motion control requires specialized equipment that moves the camera precisely between shots. The movement must be tiny enough that each frame remains smooth but consistent enough that the cumulative motion creates a controlled pan or dolly effect.
Entry-level motorized sliders cost several hundred dollars, while professional motion control systems run into the thousands. Many photographers start with simple 2-axis pan/tilt heads before investing in full slider systems.
Astrophotography Time-Lapse
Capturing the night sky in motion creates stunning footage of stars wheeling across the horizon or the Milky Way rising. These sequences require careful planning and execution.
Location matters enormously for astro time-lapse. You need dark skies far from city light pollution. Apps and websites show light pollution maps to help find suitable locations.
Camera settings for astro time-lapse differ from daytime work. You need wide apertures (f/2.8 or faster), high ISO (1600-6400 depending on your camera), and long exposures (15-25 seconds). Longer exposures than 25 seconds start showing star trailing rather than sharp points.
The interval between astro shots must account for your long exposure time plus buffer clearing. With a 20-second exposure and 5-second write time, your minimum interval is 25 seconds.
Post-Processing Workflow Overview
Creating your final time-lapse video requires processing hundreds or thousands of images and assembling them into video. The basic workflow involves several steps.
First, import your images into Lightroom or similar RAW processing software. Apply basic adjustments to one image, then synchronize these settings across all images in the sequence. Keep adjustments consistent to avoid introducing flicker.
Export your processed images as JPEG or TIFF files. Import these into video editing software like Adobe Premiere Pro, After Effects, or free alternatives like DaVinci Resolve. The software interprets the image sequence as video at your chosen frame rate.
Apply any additional color grading, stabilization, or speed adjustments. Export your final video in an appropriate codec and resolution for your intended use.
Frequently Asked Questions
How to do time-lapse photography with a DSLR?
To shoot time-lapse with a DSLR, mount your camera on a sturdy tripod, switch to manual mode, set your aperture, shutter speed, and ISO, then focus manually. Connect an intervalometer or use your camera’s built-in interval timer function. Program your interval based on your subject (typically 2-10 seconds), set the number of shots needed, and start the sequence. Use mirror lock-up to minimize vibration, and always shoot in RAW format for editing flexibility.
How to take timelapses on mirrorless cameras?
Shooting time-lapse on mirrorless cameras follows the same process as DSLRs but with some advantages. Use manual mode and manual focus, set your exposure settings, and program your interval using the built-in interval timer or external intervalometer. Mirrorless cameras benefit from electronic shutter options that eliminate all mechanical vibration. Many modern mirrorless cameras include advanced time-lapse features with exposure smoothing for changing light conditions.
What is the best interval for time-lapse photography?
The best interval depends on your subject speed. Fast-moving traffic needs 1-2 second intervals. Clouds typically work well at 3-10 seconds depending on wind speed. Sunrise and sunset sequences use 5-10 second intervals. Night sky photography requires 20-30 second intervals to allow for longer exposures. As a general rule, faster-moving subjects need shorter intervals, while slow processes can use longer intervals.
How many photos do I need for a time-lapse?
For a standard 30 fps video, you need 30 photos for each second of final footage. A 10-second time-lapse requires approximately 300 photos. A 30-second time-lapse needs about 900 photos. Always shoot more frames than you think you need, as you can trim footage in editing but cannot add frames that were never captured.
Do I need an intervalometer for time-lapse?
While many modern cameras include built-in interval shooting functions, an external intervalometer offers several advantages including more precise control, easier programming, reliability, and the ability to shoot exposures longer than 30 seconds. For beginners, your camera’s built-in function may suffice, but serious time-lapse work benefits from a dedicated intervalometer. They are relatively inexpensive and provide greater flexibility.
What ND filter should I use for time-lapse?
A 6-stop (ND 1.8) or 10-stop (ND 3.0) neutral density filter works well for most daytime time-lapse situations. These filters allow you to use slower shutter speeds for natural motion blur even in bright conditions. For very bright midday shooting, a 10-stop filter gives you the most flexibility. Variable ND filters offer adjustable density but can cause uneven exposure at extreme settings.
Why is my time-lapse flickering?
Flicker is caused by inconsistent exposure between frames. The most common cause is shooting in automatic modes where the camera makes small exposure adjustments for each shot. Always shoot in manual mode with locked settings. Other causes include mechanical aperture inconsistency, auto white balance adjustments, and light source flicker. Deflickering software like LRTimelapse can fix many flicker issues in post-processing.
Conclusion
Learning how to shoot time-lapse photography with a DSLR or mirrorless camera opens up an entirely new dimension of creative expression. The technique requires patience, planning, and attention to detail, but the results make every minute worthwhile. Watching hours of real time compressed into seconds of captivating video never gets old.
Remember the fundamentals: use a sturdy tripod, shoot in manual mode with locked settings, focus manually, and choose your interval based on subject speed. Start with simple subjects like clouds or sunsets before tackling advanced techniques like holy grail day-to-night transitions.
Every time-lapse you shoot teaches you something new. You will learn how different intervals affect motion, how light changes throughout the day, and how to anticipate the perfect moment to start shooting. These skills develop through practice, so get out there and start shooting.
The equipment does not need to be expensive to get started. A basic DSLR or mirrorless camera, a decent tripod, and an affordable intervalometer provide everything needed for your first time-lapses. As your skills grow, you can invest in ND filters, motion control systems, and specialized software.
Time-lapse photography transforms the ordinary into the extraordinary. A simple sunset becomes a symphony of moving light and color. Traffic flow becomes abstract art. Stars trace ancient paths across the sky. Master this technique, and you will see the world in an entirely new way.