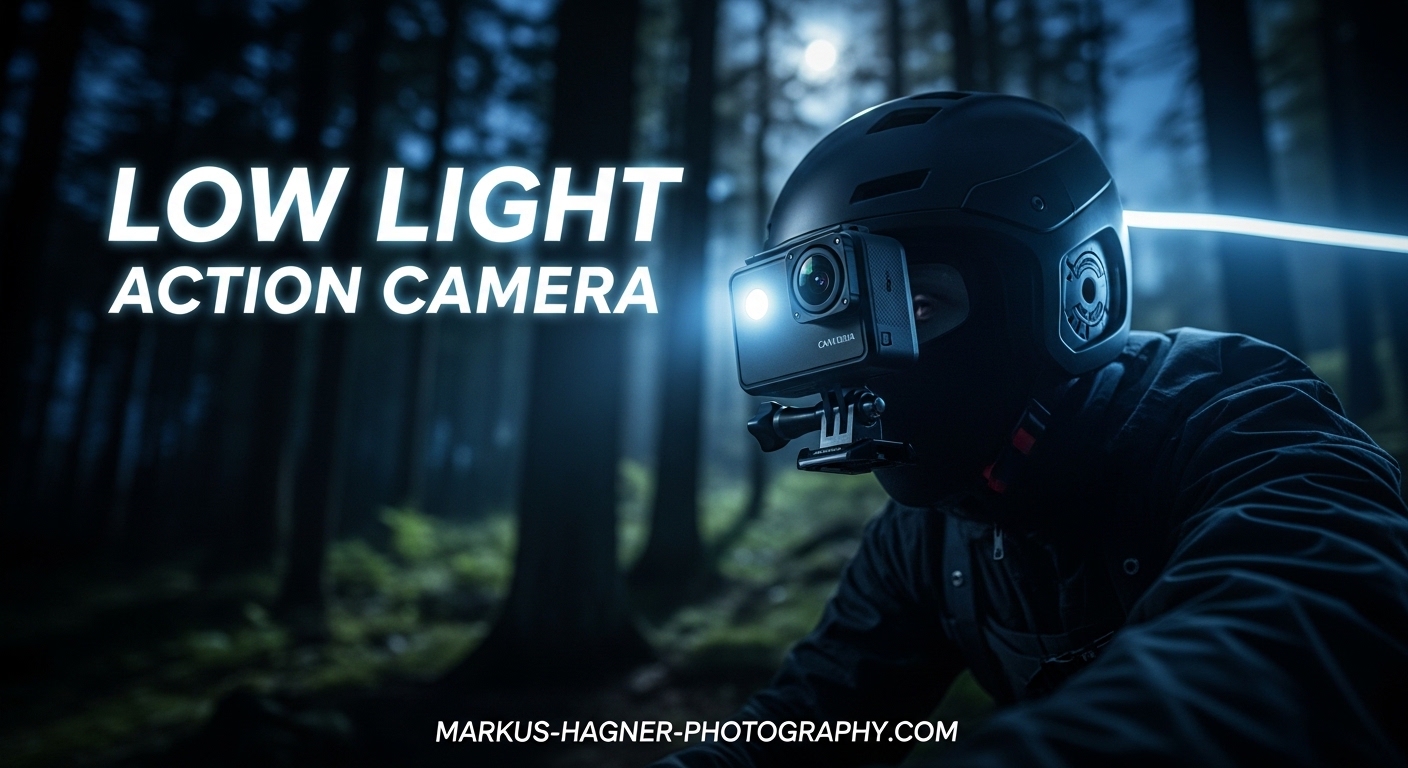
You’ve just captured an epic night ride or an indoor sports moment with your action camera, but when you review the footage, it looks like you filmed through a bowl of jelly. That wobbly, distorted effect ruins what could have been great content. This is the infamous jello effect, and it’s one of the most frustrating problems action camera users face in low light conditions.
The jello effect, technically known as rolling shutter distortion, happens because action cameras read their sensors line by line rather than capturing the entire frame at once. In bright conditions, this isn’t noticeable. But when light gets scarce and shutter speeds drop, any camera movement during that split-second readout creates wavy, skewed footage that looks amateurish at best.
In this guide, I’ll show you exactly how to shoot in low light with an action camera without the jello effect. We’ll cover the technical settings that matter, practical shooting techniques, and post-processing tricks that can salvage footage when prevention isn’t possible. After testing these methods across GoPro, DJI, and Insta360 cameras, I’ve found reliable approaches that work in real-world conditions.
Understanding the Jello Effect and Rolling Shutter
The jello effect occurs because action cameras use electronic shutters that scan the sensor sequentially from top to bottom. Unlike a global shutter that captures the entire frame simultaneously, a rolling shutter captures different parts of the frame at slightly different moments in time. When you or your subject moves during this scan, horizontal lines become slanted and straight edges appear wavy.
Action cameras are particularly vulnerable to this issue for several reasons. Their small sensors require longer exposure times in dim conditions. Their wide-angle lenses exaggerate perspective distortion. And their electronic image stabilization (EIS) systems, while helpful in bright light, can actually amplify jello artifacts when shutter speeds drop below certain thresholds.
Low light makes the jello effect worse because your camera must use slower shutter speeds to gather enough light. A slower shutter means each frame is exposed over a longer period, giving more time for movement to occur during the sensor readout. The result? More pronounced wobble and distortion in your footage.
The key insight from my testing is that jello effect and motion blur exist on opposite ends of a spectrum. Fast shutter speeds reduce blur but require stabilization that may introduce jello. Slow shutter speeds reduce jello but introduce blur. Finding the right balance is what separates usable low light footage from unusable mess.
Essential Action Camera Settings for Low Light
Your camera settings make the biggest difference in preventing jello effect while maintaining acceptable low light quality. Here are the specific adjustments that work across most action cameras.
Shutter Speed: The Critical Setting
Shutter speed is the most important setting for controlling jello effect. For action cameras with electronic stabilization, you need a minimum shutter speed of around 1/200 second for EIS to work properly without introducing artifacts. This gives the stabilization algorithm enough sharp frames to work with.
In low light, maintaining 1/200 or faster is challenging. If you must go slower, turn off electronic stabilization entirely and rely on physical mounting or a gimbal instead. Many FPV pilots and experienced videographers recommend this approach: let your physical setup handle stability, then stabilize further in post if needed.
The traditional 180-degree shutter rule suggests using a shutter speed twice your frame rate (1/60 at 30fps, 1/120 at 60fps). In low light, this often produces motion blur that’s acceptable for cinematic footage but won’t work well with EIS. You’ll need to decide between cinematic motion blur with stabilization in post, or sharper footage that may require more light.
Frame Rate Selection
Lower frame rates give your camera more time to capture light per frame, which helps in low light. Shooting at 24fps or 30fps instead of 60fps means each frame gets roughly twice the light gathering time. However, lower frame rates also mean any jello effect will be more visible and harder to fix.
For the best balance, I recommend 30fps for most low light action camera work. This provides reasonable light sensitivity while keeping jello manageable. If you’re shooting static scenes with minimal movement, 24fps works well. For faster action where you might slow footage down, 60fps is worth considering if you have enough light.
Keep in mind that some advanced features like 3D noise reduction only work at specific frame rates. GoPro’s 3DNR, for example, functions at 4K 24/25/30fps but not at higher frame rates. Check your camera’s specifications to understand what low light features are available at each frame rate.
ISO and Noise Management
ISO determines how sensitive your sensor is to light. Higher ISO values let you shoot in darker conditions but introduce noise and grain. Most action cameras have limited ISO ranges compared to larger cameras, typically maxing out between ISO 1600 and 6400.
The challenge is that cameras often boost ISO automatically before lowering shutter speed, which creates grainy footage even when you’d prefer motion blur over noise. In Protune or manual mode, you can control this behavior by setting ISO limits that force the camera to use slower shutter speeds instead.
For GoPro cameras, I recommend setting ISO maximum to 1600 for acceptable noise levels. For DJI Action cameras, ISO 3200 is often usable thanks to their larger sensors. Insta360 cameras handle high ISO reasonably well, but results vary significantly between models. Always test your specific camera’s noise performance before important shoots.
Stabilization Settings: The EIS Trade-off
Electronic image stabilization (HyperSmooth on GoPro, RockSteady on DJI, FlowState on Insta360) works by cropping and warping frames to smooth out motion. This process requires sharp, high-shutter-speed footage to work effectively. When shutter speeds drop, EIS can actually make jello effect worse.
In low light conditions, you have three options for stabilization. First, keep EIS on but maintain a minimum 1/200 shutter speed, accepting that you’ll need more light or higher ISO. Second, turn off EIS and use a gimbal or very stable mounting. Third, turn off EIS and stabilize in post-production software, which often handles low light footage better than in-camera processing.
Many experienced users on forums report better results by turning off in-camera stabilization for low light work. The reasoning is that post-production stabilization tools like the one in DaVinci Resolve or Final Cut Pro have more processing power and can analyze footage more intelligently than real-time camera processing.
Sharpness and Other Picture Settings
High in-camera sharpness settings can exaggerate noise and jello artifacts. For low light shooting, reduce sharpness to low or medium. This creates softer footage that actually looks cleaner and is easier to stabilize in post.
If your camera offers flat or log color profiles, use them. These profiles retain more dynamic range and respond better to post-processing noise reduction. The slightly washed-out look straight from camera is normal and will be corrected during color grading.
EV compensation can help in some situations. Setting EV to -1.0 or -1.5 slightly underexposes the image, which reduces the camera’s tendency to boost ISO. This works particularly well for mountain biking and other outdoor action sports where you can recover shadows in post but can’t fix blown-out highlights or excessive noise.
Physical Shooting Techniques to Minimize Jello
Camera settings alone won’t eliminate jello effect. Your physical approach to shooting matters just as much, especially when you can’t control the lighting conditions.
Mount Stability Matters More Than You Think
The type of mount you use significantly impacts jello effect. Rigid mounts transfer less vibration to the camera than flexible ones. If you’re using 3D-printed TPU mounts on drones or vehicles, consider switching to rigid plastic or carbon fiber mounts for low light shoots.
FPV pilots have discovered that flexible TPU mounts can introduce jello even with perfect camera settings. The mount itself vibrates at frequencies that the rolling shutter captures as wobble. For critical low light footage, use the most rigid mounting solution available.
For helmet mounts and chest rigs, tighten all straps and consider adding padding to absorb high-frequency vibrations. The goal is to isolate the camera from as much movement as possible before the footage is captured.
Movement Techniques
How you move while shooting dramatically affects jello appearance. Smooth, deliberate movements produce less jello than jerky, rapid motions. When panning, move slowly and consistently rather than making sudden direction changes.
If you’re recording from a moving vehicle or bike, suspension and tire pressure affect vibration transmission. Softer suspension settings and proper tire inflation reduce the high-frequency vibrations that cause jello. This is why the same camera settings might produce different results on different vehicles.
For handheld shooting, brace your arms against your body and move from your core rather than your wrists. This technique, borrowed from professional videography, creates more stable footage even without stabilization assistance.
Add Light When Possible
The most effective solution for low light jello is simply adding more light. Even a small LED panel or headlamp can provide enough illumination to maintain faster shutter speeds. This isn’t always practical, but when available, it’s the most reliable fix.
Consider the direction of added light as well. Side lighting creates shadows that add depth and make noise less noticeable. Front-facing flat lighting can actually make grain more visible by eliminating shadows that would otherwise hide texture.
Equipment Solutions for Low Light Jello Prevention
Beyond basic settings and technique, certain equipment choices can significantly improve your low light action camera results.
ND Filters in Low Light
ND filters might seem counterintuitive for low light since they reduce light entering the lens. However, they serve a specific purpose: allowing you to use optimal shutter speeds in conditions where light varies rapidly.
Some users report that ND filters actually reduce rolling shutter jello in certain conditions. The theory is that the filter reduces the total light, forcing longer exposures that smooth out the line-by-line readout artifacts. This approach works best in borderline lighting conditions where you’re close to having enough light.
If you use ND filters, start with the lightest option (ND8 or ND16) and test results. Heavy ND filters in genuinely low light will force impractically slow shutter speeds that introduce more problems than they solve.
Gimbal vs Electronic Stabilization
A physical gimbal provides mechanical stabilization without relying on high shutter speeds or in-camera processing. For low light work, a gimbal lets you use slower shutter speeds while maintaining smooth footage. The trade-off is added weight, bulk, and cost.
Modern action camera gimbals are more compact than ever, and some fold small enough to carry in a jacket pocket. If you frequently shoot in low light conditions, a gimbal investment often pays off in usable footage that would otherwise be ruined by jello or blur.
The best approach combines both: use a gimbal for physical stability while keeping EIS on a low setting for additional smoothing. This layered approach handles different types of movement effectively.
Camera Model Considerations
Different action cameras handle low light differently. Larger sensors gather more light, reducing the need for extreme ISO settings. The DJI Action series, with its 1/1.3-inch sensor, generally outperforms the GoPro Hero series in low light, though GoPro has improved significantly in recent generations.
GoPro’s newer models include advanced processing that reduces jello effect through software. The HyperSmooth High Boost setting can help in some low light situations, though results vary. DJI’s RockSteady and HorizonBalancing features similarly adapt to lighting conditions.
Insta360 cameras offer unique advantages because their 360-degree capture allows stabilization in post with more source material to work with. This can produce cleaner low light results than traditional action cameras in some scenarios.
Post-Processing Solutions for Jello and Noise
When prevention fails, post-processing can salvage footage. Modern software offers powerful tools for both stabilization and noise reduction.
Software Stabilization
Post-production stabilization often outperforms in-camera EIS for low light footage. Software like DaVinci Resolve, Final Cut Pro, and Adobe Premiere Pro have stabilization algorithms that analyze footage over time rather than processing in real-time.
DaVinci Resolve Studio includes a rolling shutter correction feature specifically designed to fix jello effect. This tool identifies and corrects the horizontal skew that characterizes rolling shutter artifacts. The free version of Resolve lacks this specific feature, but other stabilization tools still help.
When stabilizing in post, apply noise reduction first, then stabilization. Stabilizing noisy footage can create weird artifacts as the algorithm tries to track grain patterns as if they were actual image features.
Noise Reduction Techniques
Video noise reduction has improved dramatically in recent years. Both temporal noise reduction (analyzing multiple frames) and spatial noise reduction (analyzing within a single frame) have their places.
Temporal noise reduction works best on static or slowly moving scenes. It compares multiple frames to identify and remove random noise patterns. For fast action, temporal reduction can create ghosting artifacts, so use it sparingly or stick to spatial reduction.
Third-party plugins like Neat Video and DeNoise provide more sophisticated noise reduction than built-in tools. These plugins analyze your specific footage and create custom noise profiles for optimal results. For critical projects, they’re worth the investment.
Workflow Recommendations
For best results with challenging low light footage, follow this workflow: apply noise reduction first, then rolling shutter correction if available, then stabilization, and finally color grading. This order ensures each tool works with the cleanest possible input.
Export at a slightly higher bit rate than your source footage to avoid introducing compression artifacts that might be mistaken for noise or jello. When the final output will be heavily compressed (like YouTube), clean footage going in produces better results after compression.
Frequently Asked Questions
How to shoot action shots in low light?
Use manual mode with a minimum shutter speed of 1/200 for stabilization, set ISO between 800-1600 to balance noise and exposure, shoot at 30fps for the best light-to-motion balance, and consider using a gimbal instead of electronic stabilization. Add light when possible, and stabilize in post-production if needed.
How to avoid grain in low light video?
Keep ISO as low as possible while maintaining exposure, use a flat color profile to retain detail, reduce in-camera sharpness, and apply temporal noise reduction in post-production. Shooting at lower frame rates (24-30fps) gives each frame more light, reducing the need for high ISO.
Do GoPros work well in low light?
GoPros can capture usable footage in low light but have limitations compared to larger sensor cameras. Recent models (Hero 11-13) perform significantly better with improved noise reduction and low light modes. For best results, use Protune with manual ISO limits, shoot at 30fps or lower, and stabilize in post rather than relying on HyperSmooth at slow shutter speeds.
How to get sharper images in low light?
Maintain a shutter speed of at least 1/200 when using electronic stabilization, use a rigid mount to minimize vibrations, keep your ISO under 1600 to avoid softening from noise, reduce in-camera sharpening for cleaner results, and apply selective sharpening in post-production only to your final output.
Conclusion
Shooting in low light with an action camera without jello effect requires understanding the fundamental trade-off between shutter speed, stabilization, and noise. There’s no magic setting that solves everything, but by applying the techniques in this guide, you can capture usable footage in conditions that would otherwise produce wobbly, unusable results.
The key principles to remember: maintain at least 1/200 shutter speed when using electronic stabilization, use rigid mounts to minimize vibrations, control ISO manually to prevent automatic noise, and consider stabilizing in post rather than in-camera for challenging footage. When possible, add light rather than fighting against darkness.
Every shooting situation is different, so test these settings with your specific camera before important shoots. The combinations of shutter speed, ISO, and stabilization that work for a night mountain bike ride might differ from what works for indoor sports or nighttime vlogging. With practice, you’ll develop an intuition for what works in each scenario and be able to capture clean footage regardless of lighting conditions.