Shooting at night used to frustrate me endlessly. I remember my first attempt at capturing city streets after dark with my early mirrorless camera. The footage came out grainy, shaky, and nothing like the moody scenes I envisioned. After years of experimenting and countless night shoots, I’ve learned exactly what makes night footage look cinematic rather than amateur.
This guide covers everything you need to know about shooting cinematic video at night with a mirrorless camera. You’ll discover the exact camera settings that work, how to find and use available light, and the equipment that makes the biggest difference. Whether you’re filming travel vlogs, music videos, or documentary footage, these techniques will transform your night videography.
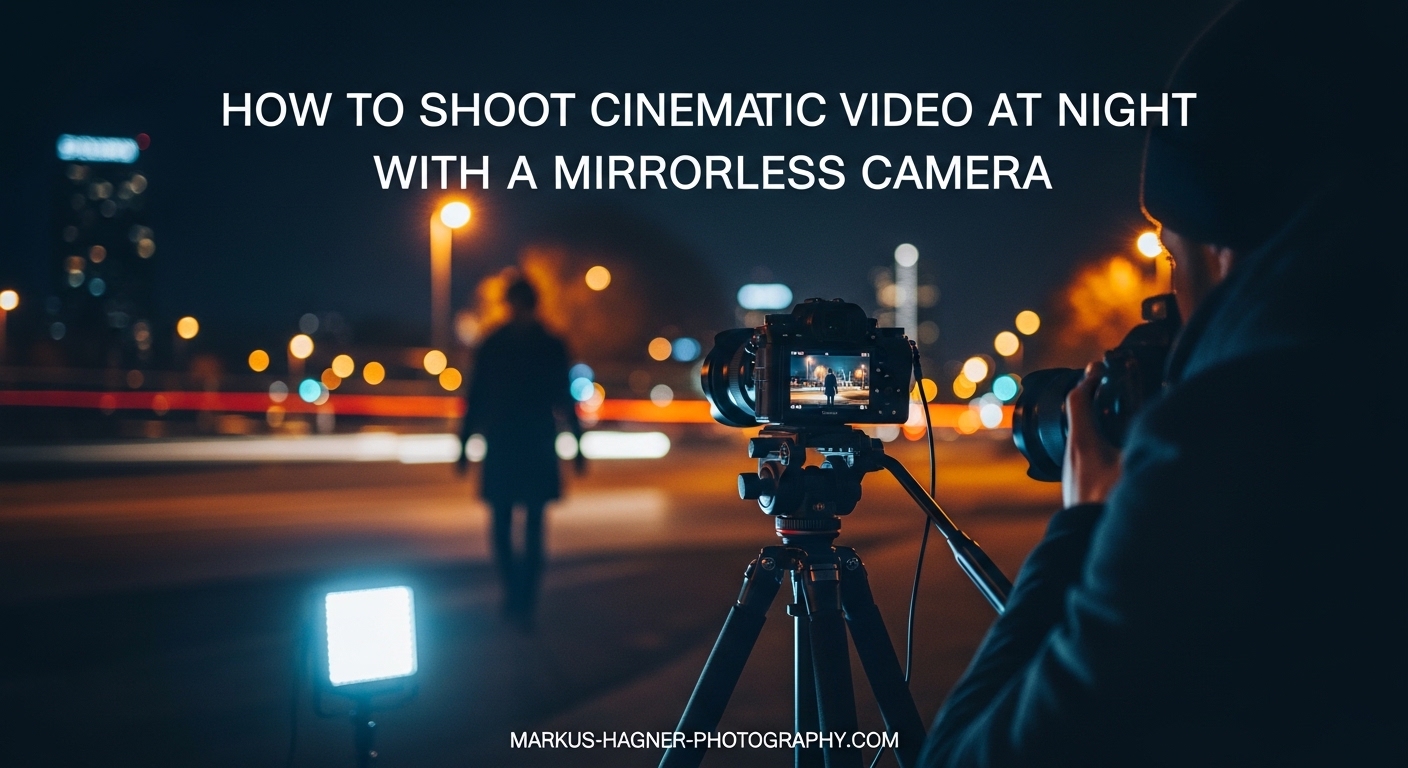
Mirrorless cameras have revolutionized low-light video work. Their electronic viewfinders show you exactly how your exposure looks before you press record. Their sensors handle high ISO settings with minimal noise. And features like focus peaking help you nail focus even in near-darkness. Let me show you how to leverage these advantages for stunning night footage.
Why Mirrorless Cameras Excel for Night Video
Mirrorless cameras offer several advantages that make them ideal for shooting cinematic video at night. Understanding these benefits helps you work smarter, not harder, when light is scarce.
The electronic viewfinder (EVF) is perhaps the biggest game-changer. Unlike optical viewfinders on DSLRs, an EVF shows you exactly what your sensor sees. You can see your exposure in real-time, adjusting settings while watching the image get brighter or darker. This immediate feedback eliminates the guesswork that plagued night videography in the past.
Modern mirrorless cameras also feature advanced autofocus systems that work surprisingly well in low light. Sony’s Real-time Tracking, Canon’s Dual Pixel CMOS AF II, and similar systems from Nikon and Panasonic can lock onto subjects even when you can barely see them yourself. This wasn’t possible just a few years ago.
Key Mirrorless Advantages for Low Light
Beyond the EVF and autofocus, mirrorless cameras typically offer better high ISO performance than their DSLR counterparts. The short flange distance (the space between the lens mount and sensor) allows for lens designs that transmit more light to the sensor. Many recent models also include in-body image stabilization (IBIS), which helps you capture steady handheld footage at slower shutter speeds.
Focus peaking is another invaluable feature. It highlights in-focus areas with colored outlines, typically red or yellow. When shooting in darkness, this visual confirmation helps you verify sharpness even when the viewfinder image looks dim. Zebra patterns work similarly, showing overexposed areas so you don’t blow out highlights from street lights or neon signs.
The histogram display available on most mirrorless cameras gives you objective exposure data. Your eyes adjust to darkness and can fool you into thinking footage is properly exposed when it’s actually underexposed. The histogram tells the truth, helping you capture maximum shadow detail without clipping highlights.
Understanding the Exposure Triangle for Night Video
Before diving into specific settings, you need to understand how ISO, aperture, and shutter speed work together. This relationship, called the exposure triangle, becomes even more critical when shooting cinematic video at night.
Each setting affects both exposure and image quality. Raising ISO brightens your image but adds noise. Opening your aperture lets in more light but reduces depth of field. Slowing shutter speed increases exposure but introduces motion blur. The key is finding the right balance for your creative vision.
ISO: Balancing Brightness and Noise
ISO controls your camera’s sensitivity to light. Lower ISO values (100-800) produce cleaner images but require more light. Higher values (1600-12800+) let you shoot in darker conditions but introduce digital noise.
For night video, start with your camera’s native ISO, usually around 800 for most mirrorless models. This is where the sensor performs best. From there, increase ISO only as much as needed. Many cameras have a “second native ISO” around 3200 or 6400 that actually performs cleaner than intermediate values.
I typically try to stay below ISO 6400 on full-frame cameras and ISO 3200 on APS-C sensors. Beyond these values, noise becomes noticeable even after post-processing. If you need more light, consider opening your aperture wider or finding additional light sources before pushing ISO further.
Aperture: Gathering Every Available Photon
Aperture refers to the opening in your lens, measured in f-stops. Lower f-stop numbers mean wider openings that let in more light. For night videography, fast lenses with maximum apertures of f/1.4, f/1.8, or f/2.0 make a tremendous difference.
An f/1.4 lens lets in four times more light than an f/2.8 lens. That’s the equivalent of two full stops of ISO. If you’re shooting at ISO 6400 with an f/2.8 lens, switching to an f/1.4 lens would let you drop to ISO 1600 with the same exposure. The noise reduction is dramatic.
The trade-off is depth of field. Wide apertures create shallow focus, which can be beautiful for isolating subjects but challenging for establishing shots. Focus becomes more critical when depth of field is razor-thin, especially in low light where autofocus may struggle.
Shutter Speed: The 180-Degree Rule
Shutter speed determines how long your sensor captures light for each frame. For cinematic video at night, follow the 180-degree shutter rule: set your shutter speed to approximately twice your frame rate.
Shooting at 24fps? Use 1/48 second (or 1/50 on most cameras). At 30fps, use 1/60 second. This creates natural motion blur that our eyes expect from cinema. Faster shutter speeds produce stuttery, video-like motion. Slower speeds blur movement too much.
The 180-degree rule can be challenging at night because it limits how slow your shutter can go. You can’t simply slow to 1/15 second for more light without sacrificing motion quality. This is why aperture and ISO become so important for night shooting.
Some videographers break this rule intentionally for night work, using slower shutter speeds like 1/30 at 24fps. This doubles the light gathering but creates more motion blur. It works for static scenes but not for fast action. Consider it another creative tool rather than a violation.
Essential Camera Settings for Cinematic Night Video
Now let’s get specific. Here are the exact settings I use when shooting cinematic video at night with a mirrorless camera.
Step-by-Step Camera Setup
First, switch your camera to full manual mode (M). Auto settings fail in challenging night lighting because cameras meter for middle gray. Your night scenes should actually be dark, and auto exposure will brighten them unnaturally.
Set your frame rate next. For cinematic footage, choose 24fps (23.98fps on most cameras). This matches the frame rate of feature films and creates the smooth, cinematic motion viewers expect. If you need slow motion, 60fps or 120fps works, but the base aesthetic will feel more like video.
Configure your shutter speed according to the 180-degree rule. At 24fps, set 1/48 or 1/50 second. At 30fps, use 1/60 second. Lock this setting rather than leaving it in auto.
Open your aperture as wide as it goes, or to the widest setting that gives you adequate depth of field. If your lens opens to f/1.8, start there. You can stop down slightly if depth of field becomes too shallow.
Begin with ISO at your camera’s native setting, typically 800. Take a test shot and evaluate the exposure using your histogram. Increase ISO gradually until you achieve proper exposure, staying below your camera’s noise threshold.
Frame Rate Selection Guide
Your frame rate significantly affects the look of your footage. Here’s how to choose the right one for night shooting.
24fps creates the most cinematic feel and is the standard for narrative filmmaking. The motion blur at this frame rate matches what our eyes perceive as natural. It’s also the most light-efficient since each frame gets more exposure time than higher frame rates.
30fps works well for web content, vlogs, and documentary work. It feels slightly more “live” than 24fps but still maintains a professional appearance. Some creators prefer it because it handles camera movement slightly better.
60fps and higher are useful for slow-motion effects. But remember, shooting at 60fps with the 180-degree rule means using 1/120 second shutter speed. That’s fast, and it lets in half as much light as 24fps at 1/48 second. Reserve high frame rates for situations where you have adequate light or intentionally want a staccato, energetic look.
White Balance for Night Scenes
White balance becomes tricky at night because you’re dealing with mixed light sources. Street lights might be sodium vapor (very orange), LED signs could be any color temperature, and moonlight is surprisingly blue. Auto white balance often fails, creating inconsistent colors as you pan through different light sources.
For urban night scenes, I typically set white balance between 3200K and 4500K. This keeps artificial lights looking warm but not overly orange. It also renders skin tones reasonably well under street lighting.
Consider setting custom white balance using a gray card in your main light source. This gives you a consistent starting point. You can always adjust in post-production, but getting close in-camera saves time and maintains color fidelity.
Some videographers intentionally embrace the color casts of night lighting. Sodium vapor street lights create an orange, almost monochromatic look that can be moody and cinematic. LED signs add splashes of color. Don’t automatically neutralize everything.
Picture Profiles and Log Footage
Many mirrorless cameras offer log picture profiles (S-Log, C-Log, N-Log, V-Log, etc.). These capture maximum dynamic range by recording a flat, low-contrast image that you color grade later.
Log profiles can help with night video because they preserve shadow detail and prevent highlight clipping. Street lights and neon signs can easily overexpose, and log gives you more headroom to recover those highlights in post.
The downside is that log footage requires color grading. You can’t use it straight from camera. If you’re new to color grading, start with a standard picture profile and graduate to log as your skills develop.
Some cameras also offer HLG (Hybrid Log-Gamma), which provides extended dynamic range without requiring as much grading as log. It’s a good middle ground for night video work.
Recommended ISO Settings by Lighting Condition
Different night scenarios require different ISO approaches. Here’s a practical guide based on common shooting situations.
For well-lit city centers with bright street lights and storefronts, ISO 800-1600 usually suffices with a fast lens. The ambient light is substantial enough that you won’t need extreme ISO values.
In residential neighborhoods with dimmer street lighting, plan on ISO 1600-3200. This assumes you’re using an f/1.8 or faster lens. Slower lenses may require ISO 3200-6400.
For rural locations with only moonlight, you’ll need ISO 3200-12800 depending on the moon phase and whether there’s snow or light-colored surfaces to reflect light. A full moon provides surprisingly workable light for video.
Indoor night scenes with practical lights (lamps, candles, fairy lights) vary widely. Start at ISO 800 and increase as needed. The key is positioning your subject close enough to light sources for proper exposure.
Finding and Using Available Light
When shooting cinematic video at night, available light becomes your primary tool. Learning to find, evaluate, and use existing light sources separates amateur footage from professional results.
Urban Light Sources
City environments offer abundant light sources once you start looking for them. Street lights provide the most obvious illumination, but their quality varies dramatically. Older sodium vapor lamps cast a warm, almost monochromatic glow. Newer LED street lights tend toward cooler, bluer tones with higher color accuracy.
Storefront windows and illuminated signs create localized pools of light perfect for subjects. Position people near these sources for dramatic, directional lighting. The contrast between the bright sign and dark surroundings creates natural vignetting.
Car headlights work beautifully for moving light effects. A passing car can illuminate your subject momentarily, creating dynamic footage. For controlled shots, have a friend slowly drive past while you record. The sweeping light adds production value instantly.
Natural Night Light
Don’t overlook moonlight. A full moon on a clear night provides enough illumination for video work at high ISO settings. The light quality is similar to sunlight but much dimmer, creating soft shadows and gentle modeling.
Moonlit landscapes have a distinctive blue cast that many filmmakers embrace rather than correct. This cool tone contrasts beautifully with warm artificial lights, creating visual interest in mixed-lighting scenes.
Starlight alone is too dim for video work, but it can contribute to overall exposure on clear nights away from city light pollution. Combine it with a small practical light on your subject for star-filled backgrounds.
Creating Your Own Practical Lights
Sometimes the available light isn’t quite right, and you need to add your own. Portable LED panels have become incredibly compact and affordable. A small panel at 1% brightness can provide just enough fill light to lift shadows without looking artificial.
Fairy lights (string lights) create beautiful bokeh backgrounds and can illuminate faces when positioned close enough. They’re inexpensive, battery-powered, and create instant production value. Carry a few strings in your camera bag.
Candles and lanterns provide warm, flickering light that looks incredibly cinematic on camera. The challenge is exposure, as the flicker creates inconsistent brightness. Use them as accent lights rather than key lights.
Phone screens and tablets work in a pinch as soft light sources. The screen can illuminate a face in close-up shots when no other light is available. It’s not ideal, but it’s saved many shots for me.
Essential Equipment for Night Videography
While technique matters most, the right equipment makes night shooting significantly easier. Here’s what I consider essential for cinematic video at night.
Fast Prime Lenses
If you only invest in one piece of gear for night video, make it a fast prime lens. A 50mm f/1.4 or f/1.8 lens gathers two to four times more light than typical zoom lenses. That’s the difference between ISO 6400 and ISO 1600, which dramatically impacts image quality.
The 35mm focal length works beautifully for environmental portraits and street scenes. It’s wide enough to show context while tight enough to isolate subjects. A 35mm f/1.4 or f/1.8 should be in every night videographer’s bag.
For tighter shots, 50mm and 85mm primes create beautiful compression and bokeh. At f/1.8, an 85mm lens turns background lights into creamy circles of color that scream “cinematic.”
Zoom lenses have improved dramatically, but most still max out at f/2.8. For night work, that’s two stops slower than an f/1.4 prime. Some manufacturers now offer f/2 zooms, which help, but primes remain superior for low light.
Tripod and Stabilization
A sturdy tripod is non-negotiable for many night video scenarios. When shutter speeds drop and you want static shots, nothing else provides stable footage. Look for a tripod with a fluid head for smooth pans and tilts.
For handheld work, in-body image stabilization (IBIS) helps tremendously. Many modern mirrorless cameras offer 5-axis stabilization that compensates for camera shake at surprisingly slow shutter speeds. Combine IBIS with a lens that has optical stabilization for even better results.
Gimbals work for night video but have limitations. The motors can introduce jitter at very slow walking speeds, and balancing becomes more critical with heavier lenses. They excel for tracking shots but can’t replace a tripod for locked-off compositions.
Audio Equipment
Night shooting often means quiet environments where camera noise becomes obvious. Your camera’s built-in microphone picks up lens motor sounds, image stabilization clicks, and handling noise. An external microphone dramatically improves audio quality.
Shotgun microphones mount on your camera’s hot shoe and capture directional audio while rejecting camera noise. They’re the most versatile option for run-and-gun night shooting.
Lavalier microphones work well for interview-style footage where you can mic your subject. They’re immune to camera noise and provide consistent audio regardless of camera position.
Remember that night environments have distinct soundscapes. City sounds, distant traffic, and ambient noise all contribute to the atmosphere. Don’t automatically filter these out in post-production.
ND Filters for Night Video
This might seem counterintuitive, but ND filters help even at night. When shooting near bright light sources, you may need to reduce exposure without changing ISO, aperture, or shutter speed. A variable ND filter gives you this control.
The 180-degree shutter rule limits how fast your shutter can be. If you’re at 24fps with 1/50 second shutter, wide aperture, and base ISO, bright neon signs or car headlights can still overexpose. An ND filter lets you darken the image while maintaining your cinematic motion blur.
Keep ND filters thin to avoid vignetting with wide lenses. High-quality filters maintain sharpness and don’t introduce color casts that complicate night white balance.
Creative Techniques for Cinematic Night Footage
Technical settings provide the foundation, but creative techniques make your cinematic video at night truly memorable. Here are approaches that elevate night footage above the ordinary.
Silhouette and Backlighting
Position subjects in front of bright light sources to create dramatic silhouettes. A person walking past a street light or illuminated sign becomes a graphic shape against the brightness. This technique works especially well when there’s atmospheric haze or fog to catch the backlight.
Silhouettes emphasize form and movement over detail. They’re inherently mysterious and cinematic. Use them for establishing shots, transitions, or moments when you want to suggest rather than show.
Bokeh and Out-of-Focus Lights
City lights at night transform into beautiful bokeh when shot out of focus. Use this intentionally by positioning your subject in front of distant lights, then shooting with your aperture wide open. The background becomes a canvas of colored circles.
You can also create custom bokeh shapes by cutting patterns in black paper and placing them over your lens. Heart shapes, stars, or custom designs add a unique touch to night footage.
Focus pulls between foreground subjects and background bokeh create cinematic transitions. Rack focus from a face to distant street lights, then back. This simple technique adds professional polish.
Light Painting in Video
Light painting typically refers to still photography, but you can adapt the concept for video. Have someone move a light source through the frame while you record. Car taillights, flashlights, and sparklers all create dynamic light trails.
For controlled light painting, use a tablet or phone displaying colorful abstract patterns. Move it through the frame at various distances and speeds. The results are unpredictable but often stunning.
Color Grading Night Footage
Post-production color grading dramatically affects the mood of night footage. Teal and orange is a popular cinematic look that works well for night scenes. Cool shadows in teal tones contrast with warm skin tones and practical lights.
Embrace the color casts of artificial lighting rather than always correcting them. Sodium vapor lights create an orange, almost film-noir atmosphere. Blue LED lighting suggests technology and modernity. Use these colors to support your story.
Be careful with noise reduction during color grading. Heavy noise reduction smears detail and makes footage look processed. It’s better to accept some grain than to destroy fine detail with aggressive noise reduction.
Common Mistakes to Avoid
After years of night shooting, I’ve made every mistake possible. Here are the most common errors and how to avoid them when shooting cinematic video at night.
Pushing ISO Too High
The temptation to crank ISO for brighter footage is strong, but the results disappoint. Video noise at extreme ISO settings looks digital and amateurish. It’s better to underexpose slightly and lift shadows in post than to overexpose with high ISO and deal with noise.
Learn your camera’s limits through testing. Shoot the same scene at various ISO settings and examine the footage at 100% magnification. Find the threshold where noise becomes unacceptable, then stay one or two stops below it in real shooting.
Ignoring White Balance
Auto white balance creates inconsistent colors as you pan through different light sources. A single shot might shift from orange to blue to green as different lights enter the frame. This screams amateur video.
Lock your white balance manually. Choose a setting that works for your primary light source and commit to it. You can adjust individual shots in post-production, but consistent in-camera white balance makes editing much easier.
Relying on Autofocus in Darkness
Even the best autofocus systems struggle in near-darkness. They hunt, pulse, and often miss. For critical shots, switch to manual focus and use focus peaking or magnification to confirm sharpness.
If you must use autofocus, look for high-contrast edges for the system to grab. A bright light behind your subject provides contrast. Face detection works reasonably well when there’s enough light on the face for the camera to recognize.
Forgetting About Audio
Night environments have distinct audio characteristics. Quiet moments reveal camera noise that would be masked by daytime ambient sound. Wind noise becomes more obvious. Distant sounds carry further in the quiet.
Monitor your audio with headphones during night shoots. What sounds quiet in the field might be dominated by camera noise on playback. Use external microphones positioned away from the camera body.
Underexposing Footage
Fear of noise leads many videographers to underexpose, planning to lift shadows in post. This approach often backfires because lifting underexposed footage introduces more noise than properly exposing at a higher ISO.
Aim for proper exposure in-camera. Use your histogram to verify you’re capturing midtones without clipping highlights. Properly exposed footage at ISO 3200 usually looks better than underexposed footage at ISO 800 lifted two stops in post.
FAQ: Shooting Cinematic Video at Night
Are mirrorless cameras better for night shooting?
Yes, mirrorless cameras offer significant advantages for night shooting. Their electronic viewfinders show real-time exposure, so you can see exactly how dark your image will be before recording. They typically have better high ISO performance than DSLRs, and features like focus peaking help you confirm sharpness in low light. Many also include in-body image stabilization for steadier handheld footage at slow shutter speeds.
How to shoot a dark cinematic video?
To shoot dark cinematic video, use 24fps with a 1/48 second shutter speed for natural motion blur. Open your aperture wide (f/1.8 or faster) and keep ISO as low as possible while maintaining exposure. Embrace shadows rather than trying to eliminate them. Use practical lights like street lamps and signs as your primary illumination. Color grade with a film look, often using teal and orange tones. Most importantly, underexpose intentionally rather than lifting everything to middle gray.
What is the 180 rule in videography?
The 180-degree rule states that your shutter speed should be approximately twice your frame rate for natural-looking motion blur. Shooting at 24fps means using 1/48 second (or 1/50 on most cameras). At 30fps, use 1/60 second. This creates the motion blur our eyes expect from cinema. Breaking this rule with faster shutter speeds creates stuttery, video-like motion, while slower speeds produce excessive blur.
What is the best ISO for night videography?
The best ISO for night videography depends on your camera, but generally stay between 800-3200 on full-frame cameras and 800-1600 on APS-C sensors. Start at your camera’s native ISO (usually 800) and increase only as needed. Many cameras have a second native ISO around 3200 or 6400 that performs cleaner than intermediate values. Always test your specific camera to find its noise threshold.
Putting It All Together
Shooting cinematic video at night with a mirrorless camera combines technical knowledge with creative vision. Master the exposure triangle, understand your camera’s limits, and learn to see available light as your primary tool.
Start with the fundamentals: 24fps, 1/48 second shutter, wide aperture, and the lowest ISO that gives proper exposure. Use your EVF and histogram to evaluate exposure objectively. Set white balance manually to avoid inconsistent colors.
Invest in a fast prime lens before anything else. The difference between f/1.8 and f/2.8 is dramatic in low light. A 35mm or 50mm prime opens creative possibilities that simply aren’t available with slower zoom lenses.
Practice finding and using available light. Street lights, storefronts, car headlights, and practical lights all become your tools. Position subjects thoughtfully within these light sources. Embrace shadows rather than trying to illuminate everything.
Finally, remember that night footage should look dark. Don’t brighten everything to daytime levels. The mood, mystery, and atmosphere of night are what make this footage special. Trust your vision and let the shadows work for you.
With these techniques and consistent practice, you’ll capture night footage that rivals professionally shot cinema. The tools are accessible, and mirrorless cameras have made what was once technically challenging entirely achievable. Now get out there and start shooting.