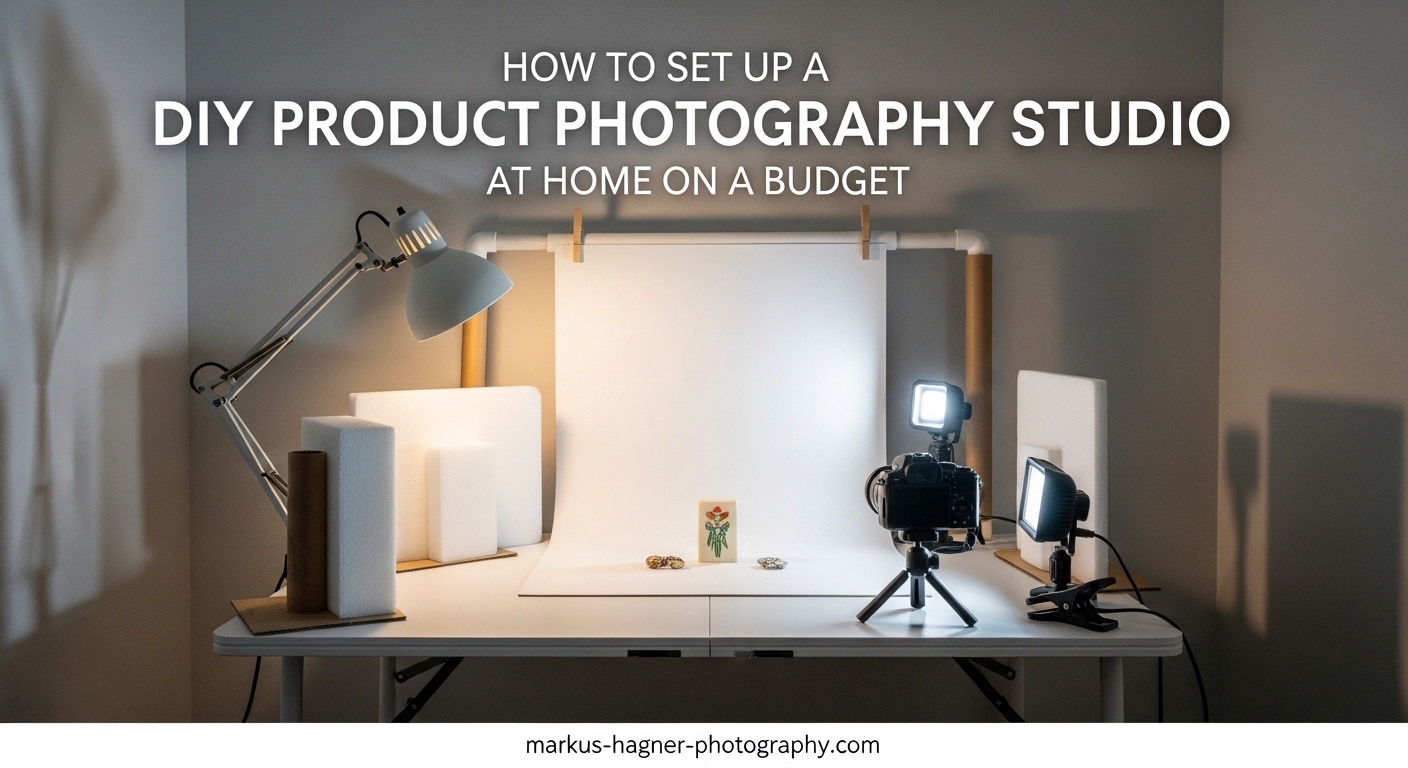
Creating professional product photos at home does not require expensive equipment or a dedicated studio space. I have helped dozens of small business owners build functional product photography setups in apartments, spare bedrooms, and even closet corners. The truth is, you can capture magazine-quality product images with under $200 in equipment if you know what to buy and how to use it.
This guide will walk you through everything you need to know about setting up a DIY product photography studio at home on a budget. Whether you sell on Etsy, Amazon, or your own website, the techniques here will help you create images that convert browsers into buyers. I will cover space assessment, equipment selection, lighting setup, backdrop options, and step-by-step instructions that anyone can follow.
Professional product photographers charge anywhere from $25 to $100 per image. When you are selling dozens or hundreds of products, those costs add up quickly. Building your own home studio pays for itself after just a few product shoots. Plus, you get complete control over your schedule and can reshoot whenever you update products or change your branding.
Assessing Your Available Space
The first step in building your home product photography studio is evaluating what space you have available. You do not need a massive room or a separate building. I have seen excellent studios set up in spaces as small as 60 square feet. What matters more than size is how you use the space.
Look for an area with these characteristics: access to natural light (a window), enough room for a table and tripod, and electrical outlets for lighting equipment. A corner of a bedroom, a section of your living room, or even a converted closet can work perfectly. The key is choosing a space you can dedicate to photography without having to set up and tear down constantly.
If you live in a studio apartment or have limited space, consider a portable setup. Many photographers use a folding table that doubles as a workspace when not shooting. Backdrop stands can be disassembled and stored in a closet. Light stands collapse to under three feet. This approach works well for anyone who cannot dedicate permanent space to photography.
Natural Light Considerations
Window light is the most budget-friendly lighting source available. A large window facing north or south provides consistent, soft light throughout the day. East-facing windows give warmer morning light, while west-facing windows provide afternoon warmth. Avoid direct sunlight hitting your products directly, as this creates harsh shadows and blown-out highlights.
If your only window gets direct sun, hang a white sheet or purchase a diffusion panel to soften the light. This simple step costs under $20 and dramatically improves your results. I recommend testing your window light at different times of day to see when you get the most consistent results.
For those without good window access, artificial lighting becomes essential. The good news is that affordable LED panels have improved dramatically in recent years. You can now get daylight-balanced continuous lights for under $50 each that produce professional results.
Space Requirements by Product Size
The size of products you photograph determines your minimum space needs. Small items like jewelry, cosmetics, and electronics work well in spaces as small as 4 feet by 4 feet. Medium products like shoes, handbags, and small appliances need at least 6 feet by 6 feet. Large products like furniture or exercise equipment require 10 feet by 10 feet or more.
Account for working room around your shooting area. You need space to move around the product, adjust lighting, and access your camera. A cramped space makes every shot take longer and limits your creative angles. When in doubt, choose a slightly larger space than you think you need.
Ceiling height matters for taller products and overhead lighting setups. Standard 8-foot ceilings work for most product photography. If you plan to use boom arms or hang lights from above, measure to ensure you have adequate clearance. Basements with exposed rafters often work well for ceiling-mounted equipment.
Essential Equipment List for Your Product Photography Studio
Building a home product photography studio requires specific equipment, but you do not need to buy everything at once. I recommend starting with the essentials and upgrading as your needs grow. Here is what you need to get started, organized by priority.
Camera Options
Smartphone (Budget Option): Modern smartphones capture excellent product photos. The iPhone 13 or newer and recent Android flagships have cameras that rival entry-level DSLRs. For under $1000 (which you may already own), you get a capable camera, editing apps, and instant upload capability. This is how I recommend most beginners start.
Entry-Level DSLR or Mirrorless (Mid-Range Option): Cameras like the Canon EOS Rebel series or Sony Alpha a6000 series offer more control and better image quality than smartphones. Budget $400-700 for a body and kit lens. The larger sensor and interchangeable lenses make a noticeable difference for larger prints and difficult lighting situations.
Professional Camera (Premium Option): Full-frame cameras like the Sony A7 series or Canon R series provide the best image quality and low-light performance. Budget $1500-3000 for body and lens. These make sense if you photograph products professionally or need maximum detail for large prints.
Tripod Requirements
A sturdy tripod is non-negotiable for product photography. Hand-holding your camera introduces blur and makes consistent framing impossible. Budget tripods under $30 often wobble and break quickly. I recommend spending $50-100 on a decent aluminum or carbon fiber tripod from brands like Manfrotto, Vanguard, or Neewer.
Look for a tripod that extends to at least your eye level, has a ball head for easy positioning, and includes a quick-release plate. The weight capacity should exceed your camera weight by at least 50%. A tripod that barely holds your camera will shake during shooting.
For product photography, you do not need expensive features like carbon fiber construction or advanced video heads. A basic tripod with solid construction works perfectly. Consider buying used tripods from camera stores or online marketplaces to save money.
Backdrop and Background Systems
Seamless Paper Rolls (Best for E-Commerce): Paper rolls in white, gray, or black create professional sweep backgrounds that never wrinkle. A 53-inch wide roll costs $25-40 and lasts through hundreds of shoots. Paper tears easily, so you cut off the used portion and roll out fresh paper for each session. Savage and Manfrotto make reliable seamless paper.
Vinyl Backdrops (Durable Option): Vinyl backdrops wipe clean and last indefinitely. They work well for products that might stain or damage paper. A 5×7 foot vinyl backdrop costs $30-60. The downside is they show wrinkles if not stored properly and reflect more light than paper.
Foam Board and Poster Board (Budget Option): White foam board from craft stores costs $5-10 and creates clean backgrounds for small products. Position two boards at a 90-degree angle to create a seamless corner. This works perfectly for jewelry, cosmetics, and small electronics.
Reflectors and Bounce Boards
Reflectors bounce light back into shadow areas, reducing contrast and revealing detail. You do not need expensive photography reflectors. White foam board from craft stores works identically and costs a fraction of the price. I keep several 20×30 inch foam boards in my studio at all times.
If you prefer purpose-built equipment, 5-in-1 reflectors include white, silver, gold, and black surfaces plus a diffusion panel. These cost $15-30 and fold down to a compact 12-inch circle. The silver side adds brightness, while the gold side warms the light for lifestyle product shots.
Position your reflector opposite your main light source, just outside the frame. Move it closer or farther to control the fill intensity. A simple reflector often eliminates the need for a second light.
Light Stands and Mounting
Light stands hold your lights at precise heights and angles. Basic aluminum stands cost $15-30 each and extend to 6-7 feet. Look for stands with wide bases for stability, especially if you use softboxes or umbrellas that catch air like sails.
For small product setups, tabletop light stands work well and take less space. These 12-24 inch stands cost $10-20 each and position lights close to your product. I use tabletop stands for jewelry and small product photography.
Clamps and grip equipment help position reflectors, backdrops, and small lights. A handful of spring clamps from a hardware store costs under $10 and solves countless positioning problems. Super clamps with studs cost more but hold heavier equipment securely.
Budget Comparison by Investment Level
Here is what you can expect to spend at different budget levels:
Under $100 (Starter Kit): Foam board backdrops ($15), white poster board ($5), DIY reflectors from foam board ($10), clamp lights with daylight bulbs ($20), basic tripod ($30). This setup produces solid results for small products using natural or clamp light.
Under $200 (Improved Starter): Everything above plus a 5-in-1 reflector ($20), two LED panel lights ($60), and light stands ($30). This budget allows consistent artificial lighting that works any time of day.
Under $500 (Serious Setup): Seamless paper backdrop and stand ($80), two softbox lighting kits ($150), quality tripod ($80), reflector ($25), tethering cable ($15), memory cards ($25). This setup approaches professional quality and handles most product types.
Under $1000 (Professional Home Studio): Entry-level DSLR or mirrorless camera ($500), multiple backdrop colors ($120), strobe or continuous lighting kit ($250), boom arm ($50), premium tripod ($150), accessories ($50). This investment level matches what many professional studios use.
Lighting Setup Guide for Product Photography
Lighting makes or breaks product photography. You can have the best camera and backdrop, but poor lighting produces amateur results. Understanding how to control and shape light separates snapshot photographers from professionals. Let me break down your options.
Natural Light vs Artificial Light
Natural Light: Window light costs nothing and produces beautiful, soft results. It works best for products with texture, handmade items, and lifestyle-style product photos. The downside is inconsistency. Clouds, time of day, and seasons all affect the quality and color of natural light.
I recommend natural light for beginners and anyone on a tight budget. Master window light before investing in artificial equipment. You will learn more about lighting by observing how window light changes throughout the day than by reading any tutorial.
Artificial Light: Continuous LED lights or flash/strobe lighting provide consistent, controllable illumination. You can shoot at midnight or noon and get identical results. Artificial light also enables faster shooting since you never wait for the right natural light conditions.
The trade-off is cost and learning curve. Good artificial lighting requires understanding light placement, modifier selection, and exposure settings. But once mastered, artificial light gives you complete creative control over every aspect of your images.
Continuous Lighting Options
Continuous lights stay on while you compose and shoot. You see exactly what the final image looks like before pressing the shutter. This makes continuous lighting easier for beginners to learn. LED panels have become the dominant continuous light option for product photography.
Look for LED panels with high CRI (Color Rendering Index) ratings above 90. CRI measures how accurately a light renders colors. Cheap LEDs with low CRI produce color casts that are difficult to correct in editing. Panels from Neewer, Godox, and GVM offer good CRI ratings at affordable prices.
Panel size affects light quality. Larger panels produce softer shadows. A 12×12 inch panel creates soft light for small products, while a 2×2 foot panel works better for medium items. For the softest possible light, use a large panel close to your product.
Flash and Strobe Lighting
Flash and strobe lights fire brief, powerful bursts of light. They produce more light than continuous LEDs, allowing smaller apertures for greater depth of field. Flash also freezes any camera or subject movement, ensuring sharp images.
Speedlights (hotshoe flashes) offer an affordable entry point. A single speedlight, light stand, and umbrella cost under $150. The flash mounts on the stand and fires into the umbrella, creating soft, diffused light. Many photographers start here before upgrading to studio strobes.
Studio strobes provide more power and faster recycling between shots. Monolight strobes with built-in modeling lights let you preview the light before shooting. Budget $200-400 per strobe for entry-level options from Godox or Flashpoint. Professional strobes from Profoto or Broncolor cost significantly more.
Light Modifiers: Softboxes and Umbrellas
Bare bulbs and direct LED panels create harsh shadows. Modifiers soften and shape the light. The two most common modifiers for product photography are softboxes and umbrellas.
Softboxes: These enclosed boxes diffuse light through a front panel, creating soft, directional illumination. Softboxes offer more control than umbrellas because the light only exits through the front. Sizes range from small 12-inch boxes to large 60-inch rectangles. For most product photography, a 24-36 inch softbox works well.
Umbrellas: Shoot-through umbrellas position between the light and product, diffusing the light as it passes through. Reflective umbrellas bounce light back toward the product. Umbrellas cost less than softboxes ($15-40 vs $40-100) but provide less control. Spill light can contaminate your background.
For product photography, I prefer softboxes because they contain the light better and create more professional results. Umbrellas work fine for beginners or when shooting lifestyle images where some light spill does not matter.
Two-Light and Three-Light Setups
Single Light Setup: One light positioned at 45 degrees to the product creates dramatic shadows on one side. Use a reflector opposite the light to fill shadows. This simple setup produces professional results for most products.
Two-Light Setup: Position a main light at 45 degrees and a fill light on the opposite side at lower power. The main light creates shape and dimension, while the fill light softens shadows without eliminating them entirely. This classic setup works for 90% of product photography.
Three-Light Setup: Add a background light or accent light to the two-light setup. The background light illuminates your backdrop separately from the product, allowing pure white backgrounds. An accent light (also called a kicker or hair light) adds highlights to the product edges, separating it from the background.
For white-background e-commerce photos, you need either a three-light setup or a separate background light. The product and background require different exposure levels. Lighting them independently gives you complete control.
Troubleshooting Common Lighting Problems
Harsh Shadows: Move your light source farther from the product or use a larger modifier. Alternatively, add a fill light or reflector to open up shadow areas.
Hot Spots and Glare: Angle your light differently or move it farther away. Use a polarizer filter on your lens to reduce reflections on shiny surfaces. Diffusion panels between the light and product also help.
Inconsistent Color: Use lights with matching color temperatures. Mixed lighting (daylight LEDs plus tungsten bulbs) creates color casts. Set your camera white balance manually or use a gray card for accurate color.
Dark Backgrounds: Add a separate light for your background. Position it behind the product, aimed at the backdrop. Increase power until the background appears pure white in your images.
Background and Backdrop Options
Your background choice affects the entire mood of your product photos. E-commerce platforms typically require pure white backgrounds, while lifestyle and social media images benefit from textured or colored backdrops. Understanding your options helps you make informed decisions.
Seamless Paper Backdrops
Seamless paper remains the professional standard for product photography. The paper creates a smooth, curved transition from horizontal surface to vertical background called a sweep. This eliminates the visible corner where two surfaces meet.
Paper comes in widths from 26 inches to 140 inches. For most home studios, 53-inch or 107-inch widths work best. The 53-inch size handles products up to about 18 inches wide, while 107-inch paper accommodates larger items and group shots.
White is the most versatile color, required for most e-commerce platforms. Gray provides a neutral background for products that blend into white. Black creates dramatic, high-contrast images. Consider buying two or three colors to handle different product types.
Store paper rolls vertically to prevent warping. When the paper gets dirty or torn, cut off the damaged section and roll out fresh paper. A single roll lasts through dozens of shoots.
Vinyl and Fabric Backdrops
Vinyl backdrops offer durability that paper cannot match. They wipe clean with a damp cloth, making them ideal for products that might spill or stain. Food photographers often prefer vinyl for this reason. Vinyl also photographs as pure white more easily than paper.
The downside of vinyl is weight and storage. Rolled vinyl takes more space than paper and shows creases if folded. Budget $30-80 for a quality vinyl backdrop in 5×7 foot size.
Fabric backdrops include muslin, canvas, and synthetic materials. These work well for lifestyle images and textured backgrounds. Wrinkled fabric creates interesting texture, while stretched fabric provides smooth surfaces. Fabric backdrops typically cost $20-60 and require ironing or steaming before use.
DIY Backdrop Solutions
You do not need to purchase professional backdrops to get started. Several household items create effective backgrounds for product photography:
Foam Board: White foam board from craft stores costs $5-10 per sheet. Position two boards at right angles to create a seamless corner. This works perfectly for small products under 12 inches.
Poster Board: Similar to foam board but thinner and more flexible. Poster board costs $1-3 per sheet and works for products under 8 inches. The thin material curves smoothly for sweep backgrounds.
Contact Paper: Adhesive contact paper in white or gray adheres to any flat surface. Cover a piece of plywood or foam board to create an inexpensive backdrop. Contact paper costs $5-15 per roll.
Bristol Board: Heavyweight paper in various colors. Bristol board creates smooth backgrounds for small products. The paper resists curling better than standard poster board.
Backdrop Stand Systems
Professional backdrop stands hold paper, vinyl, or fabric securely. A basic stand includes two upright supports and a crossbar. Stands adjust from 5 to 10 feet wide and 4 to 9 feet tall. Budget $40-100 for a quality stand system.
For paper rolls, add a background paper holder that slides through the roll core. This allows easy rolling and unrolling. Some stands include built-in holders, while others require separate purchase.
DIY backdrop stands work well for permanent installations. Mount brackets to walls and hang a dowel or PVC pipe between them. This approach costs under $20 and handles lightweight backdrops. For paper rolls, you need sturdier support to handle the weight.
How to Set Up a DIY Product Photography Studio at Home: Step-by-Step Instructions
Now that you understand the equipment and options, here is a complete step-by-step guide to setting up your home product photography studio. Follow these instructions in order for the best results.
Step 1: Choose and Prepare Your Space
Select a location with adequate space, access to natural light or electrical outlets, and minimal foot traffic. Clear the area of clutter and distractions. Clean floors and surfaces to prevent dust from appearing in your photos.
Measure your available space and note the locations of windows, outlets, and any obstacles. Sketch a rough floor plan showing where you will place your table, lights, and camera. This planning prevents problems later.
Consider the time of day when you will shoot most often. If you rely on natural light, choose a space with good window exposure during your typical shooting hours. For artificial light, ensure adequate electrical capacity for your equipment.
Step 2: Set Up Your Backdrop System
Assemble your backdrop stand according to the manufacturer instructions. Position it against a wall with enough clearance to work around the sides. For seamless paper, slide the crossbar through the roll core and secure it to the stands.
Roll out enough paper to create a sweep from the floor to the top of the backdrop stand. The curve should be gradual, not sharp. Tape the paper to the floor to prevent it from rolling back up. For vinyl or fabric, attach it to the crossbar and let it hang to the floor.
Position your shooting table or platform in front of the backdrop. A folding table, piece of plywood on sawhorses, or dedicated shooting table all work. The table should sit several inches from the backdrop to allow light to reach the background.
Step 3: Position Your Lighting Equipment
Start with your main (key) light. Position it at 45 degrees to your product, slightly above eye level. This angle creates dimensional shadows that reveal the product’s form. The light should illuminate the front and side of your product.
Add your fill light or reflector opposite the main light. A fill light should be set to about half the power of your main light. A reflector should be positioned close enough to bounce light into shadows without appearing in frame.
If using a background light, position it behind the product, aimed at the backdrop. Adjust power until the background appears white but not blown out. Check your camera’s histogram to ensure the background values fall between 240-255.
Step 4: Configure Your Camera and Tripod
Set up your tripod at the distance required to frame your product with some margin around the edges. Attach your camera and compose a test shot. The camera should be level with or slightly above your product for most items.
Set your camera to manual mode. Start with these baseline settings: ISO 100-200 (lowest native ISO), aperture f/8-f/11 (for maximum sharpness and depth of field), and shutter speed adjusted for proper exposure. Use manual white balance set to match your light sources.
If shooting with a smartphone, use the native camera app or a manual control app like Lightroom Mobile. Lock focus and exposure by tapping and holding on your product. Avoid digital zoom, which degrades image quality.
Step 5: Test and Adjust Settings
Take a test shot and review it carefully on your camera’s LCD or computer monitor. Check for exposure, focus, white balance, and composition. Look for harsh shadows, hot spots, or color casts that need correction.
Adjust your lighting position and power based on the test shot. Move lights closer for softer shadows or farther for harder shadows. Increase or decrease power to correct exposure. Add or move reflectors to fill shadows.
Repeat this process until you achieve consistent, professional results. Once your setup is dialed in, document your settings and light positions for future sessions. This saves time when you return to photograph similar products.
Step 6: Fine-Tune Lighting Angles
The final step is refining your lighting for the specific product you are photographing. Different products require different approaches. Textured products benefit from side lighting that reveals surface detail. Shiny products need larger, softer light sources to minimize reflections.
Move your main light higher or lower to change shadow length. Position it more to the side for increased texture, or more frontally for even illumination. Watch how the light interacts with your product and adjust accordingly.
For reflective products, use a large softbox or scrim positioned close to the product. The larger the light source relative to the subject, the softer the reflections. Black cards positioned just outside the frame add definition to reflective edges.
DIY Light Box Construction
A light box (also called a light tent) creates a fully diffused lighting environment perfect for small, reflective products. Building your own costs under $20 and takes about 30 minutes.
Materials Needed: Large cardboard box (18-24 inches), white fabric or tissue paper, white poster board or foam board, scissors or box cutter, tape, and two clip lights or LED panels.
Construction Steps:
Cut large windows in three sides of the box, leaving the bottom and one side intact. Cut the windows about 2 inches from the edges to maintain structural integrity. Leave the front open for your camera to shoot through.
Cover the three windows with white fabric or tissue paper. This material diffuses the light entering the box. Tape the fabric securely, pulling it taut to avoid wrinkles that might show in photos.
Line the inside of the box with white poster board or foam board. Create a curved sweep from the bottom to the back of the box. White surfaces reflect light inside the box, creating even illumination from all angles.
Position your light sources outside the box, aimed at the fabric-covered windows. The fabric diffuses the light, creating soft, shadowless illumination inside. Place your product on the sweep and shoot through the open front.
Basic Shooting Techniques and Camera Settings
Professional product photography requires understanding fundamental camera settings. These settings control exposure, depth of field, and color accuracy. Master these basics to consistently produce sharp, well-exposed images.
Essential Camera Settings
ISO: Set your ISO to the lowest native value, usually 100 or 200. Low ISO produces the cleanest images with minimal noise. Only increase ISO if you cannot achieve proper exposure with your available light.
Aperture: For product photography, use apertures between f/8 and f/16. These mid-range apertures provide good depth of field while maintaining lens sharpness. Most lenses are sharpest around f/8-f/11. Avoid f/22 and smaller apertures, which introduce diffraction that softens images.
Shutter Speed: With your camera on a tripod, shutter speed becomes less critical. Use whatever speed produces correct exposure at your chosen ISO and aperture. Speeds from 1/60 to several seconds work fine with a stable tripod and static subjects.
Focus: Use manual focus or single-point autofocus. Manual focus ensures precise control over the focal point. If using autofocus, select the center focus point and recompose if necessary. Focus on the most important feature of your product.
White Balance for Color Accuracy
Accurate color reproduction is critical for e-commerce product photography. Customers expect the product they receive to match the photos they viewed. Incorrect white balance creates color casts that misrepresent your products.
Set custom white balance using a gray card or white balance target. Photograph the gray card under your shooting lights, then use this image to set custom white balance in your camera. This ensures accurate color regardless of your light source.
If shooting RAW format (recommended), you can adjust white balance in post-processing. However, setting correct white balance in-camera saves editing time and ensures your LCD preview shows accurate colors.
Composition and Product Positioning
Product photography composition differs from other genres. The goal is clear, accurate product representation rather than artistic interpretation. Follow these composition principles for effective product images.
Center your product in the frame with even space on all sides. For e-commerce platforms, leave extra room at the top and bottom to accommodate cropping. The product should fill 60-70% of the frame for main product shots.
Shoot from multiple angles to show all product features. Standard angles include front, back, both sides, top, and three-quarter views. Capture detail shots of important features, textures, and any included accessories.
Keep the camera level with or slightly above your product for most shots. Shooting up at products distorts proportions. Use a slight downward angle for products meant to be viewed from above, such as food or flat-lay items.
Shooting for E-Commerce Platforms
Different platforms have different requirements. Amazon requires pure white backgrounds (RGB 255, 255, 255) for main product images. Etsy allows lifestyle images but requires at least one photo showing the product clearly. Check your platform’s guidelines before shooting.
For white background images, ensure your background exposure reads 250-255 on your histogram. Any value below 250 will appear slightly gray. Overexpose the background slightly to ensure pure white, but avoid blowing out the product itself.
Shoot in the largest resolution your camera offers. Higher resolution provides more flexibility for cropping and resizing. Most platforms accept images up to 10MB or larger. Check specific requirements for each platform you use.
Handling Reflective Products
Reflective products like jewelry, electronics, and glassware present unique challenges. These items mirror their surroundings, including your camera, lights, and backdrop. Managing reflections requires specific techniques.
Use a large light source positioned close to the product. The larger the light source relative to the product, the softer and more controlled the reflections appear. A 3-foot softbox positioned 2 feet from a small product creates a large, soft reflection.
Black cards placed just outside the frame add definition to chrome and metal surfaces. These dark reflections separate the product from the background and reveal its form. Position them carefully to add definition without creating unwanted shadows.
For extremely reflective products like chrome or mirrored items, consider using a light tent or building a white enclosure around the product. This eliminates all reflections except the white environment, creating clean product images.
Product-Specific Photography Tips
Jewelry: Use macro lenses or extension tubes for close-up detail shots. Position lights to create sparkle in gemstones without creating hot spots on metal. Black velvet backgrounds prevent reflections and emphasize sparkle.
Food: Style food carefully and shoot quickly before items wilt or melt. Use slightly warmer light to make food appear appetizing. Props like utensils and ingredients add context and visual interest.
Electronics: Turn on screens to show devices in use. Use polarizer filters to reduce screen glare. Capture both static product shots and lifestyle images showing the product in context.
Clothing: Steam or iron garments before shooting. Use mannequins, flat-lay, or model photography depending on your brand aesthetic. Capture detail shots of fabric texture, tags, and construction.
Budget-Saving Tips and DIY Alternatives
You do not need to spend thousands to create professional product photos. Many successful e-commerce businesses started with minimal equipment and upgraded over time. Here are my best tips for maximizing your budget.
Start Minimal and Upgrade Gradually
Resist the urge to buy everything at once. Start with the absolute minimum equipment and add pieces as your needs grow. This approach prevents wasting money on gear you never use.
Many photographers recommend starting with just a smartphone, window light, foam board reflectors, and a DIY backdrop. This setup costs under $50 and produces surprisingly professional results. Once you master this basic setup, you will know exactly what equipment to add next.
Upgrade based on specific limitations, not general recommendations. If your images lack sharpness, invest in a better tripod. If shadows are too harsh, add a softbox or larger light source. Each upgrade should solve a specific problem you have identified.
Household Items as Equipment Substitutes
Many everyday items work as photography equipment. Before buying professional gear, check what you already own:
Reflectors: White poster board, foam board, white sheets, aluminum foil (for silver reflection), or even a white wall can bounce light into shadows.
Diffusers: White shower curtains, thin white fabric, or parchment paper diffuse harsh light. Clamp these materials between your light source and product.
Backdrops: Wrapping paper, contact paper, tile samples, wood boards, and fabric remnants all create interesting backgrounds for lifestyle product shots.
Props: Books, plants, ceramics, and other household items add context to lifestyle images. Thrift stores offer inexpensive prop options.
Buying Used Equipment
Photography equipment depreciates quickly, making used gear an excellent value. Camera bodies lose value as new models release, while lenses and lights hold value better. Consider these sources for used equipment:
MPB and KEH specialize in used camera equipment with warranties. Local camera stores often have used sections. Online marketplaces like Facebook Marketplace and OfferUp sometimes offer great deals, but inspect items carefully before purchasing.
Lights and stands work perfectly fine used. These items have no moving parts that wear out. Look for cosmetic damage that does not affect function. A scratched light stand works as well as a new one at a fraction of the cost.
Smartphone Photography as a Starting Point
Modern smartphones capture excellent product photos when used correctly. The iPhone 13 Pro and later models include macro capabilities and excellent low-light performance. Recent Samsung and Google Pixels offer similar capabilities.
For best smartphone results, use a tripod with a phone mount, shoot in good light, and avoid digital zoom. Enable grid lines for straight horizons. Use portrait mode selectively, as the artificial background blur often looks unnatural for products.
Several apps improve smartphone camera control. Lightroom Mobile, Halide, and Camera+ 2 offer manual exposure, focus peaking, and RAW capture. These apps transform your smartphone into a more capable camera.
Common Mistakes to Avoid
Learning from others’ mistakes saves time and frustration. Here are the most common errors new product photographers make:
Skipping the Tripod: Hand-holding produces inconsistent results and blurry images. Always use a tripod for product photography.
Ignoring White Balance: Incorrect white balance creates color casts that misrepresent your products. Set custom white balance or shoot RAW for correction later.
Over-Lighting: More lights do not mean better photos. Start with one light and add more only when necessary. Simple setups often produce the best results.
Inconsistent Setup: Changing your setup between products creates inconsistent images across your catalog. Once you dial in a setup, document it and maintain consistency.
Neglecting Post-Processing: Even professional photos benefit from editing. Basic adjustments to exposure, contrast, and color take images from good to great.
Frequently Asked Questions
How to set up a photo studio at home cheap?
Set up a cheap home photo studio by starting with natural window light, white foam board reflectors ($10), a DIY backdrop from poster board ($5), and a basic tripod ($30). Use your smartphone camera to start. This under $50 setup produces professional results for small products. Add inexpensive LED panel lights ($30-50 each) only when you need consistent artificial lighting.
What equipment do I need for product photography?
Essential product photography equipment includes a camera (smartphone, DSLR, or mirrorless), sturdy tripod, backdrop system (seamless paper or DIY alternative), lighting (natural window light or artificial lights), reflectors or bounce boards, and basic props. Start with these basics before adding softboxes, multiple lights, or specialized equipment.
Can I use my smartphone for product photography?
Yes, modern smartphones capture excellent product photos suitable for e-commerce and social media. The iPhone 13 or newer and recent Android flagships offer cameras that rival entry-level DSLRs. Use a tripod with phone mount, shoot in good light, and consider apps like Lightroom Mobile for manual control. Smartphone photography is the most budget-friendly way to start.
What is the best lighting for product photography?
The best lighting depends on your products and budget. Natural window light is free and produces beautiful results. For artificial lighting, continuous LED panels with high CRI ratings (above 90) offer the best value for beginners. Softboxes create softer shadows than umbrellas. A two-light setup with 45-degree key light and fill light or reflector works for most products.
How do I get a pure white background for product photos?
Achieve pure white backgrounds by lighting your backdrop separately from your product. Use a background light aimed at white seamless paper or vinyl. Expose the background to RGB values of 250-255 (check your histogram). Overexpose the background slightly without blowing out the product. For e-commerce platforms like Amazon, pure white backgrounds (255, 255, 255) are required for main images.
Conclusion
Setting up a DIY product photography studio at home on a budget is entirely achievable with the right knowledge and minimal investment. Start by assessing your available space, then build your equipment collection gradually based on actual needs rather than perceived requirements. Natural light and basic equipment produce professional results when you understand lighting principles.
The most important step is simply getting started. You do not need expensive equipment to create images that sell products. A smartphone, window light, and foam board reflector can capture photos that rival professional studios. As your business grows and your needs become clearer, upgrade strategically to address specific limitations.
Remember that consistency matters more than perfection. Establish a setup that works for your products, document your settings and positions, and maintain that consistency across your entire catalog. Professional-looking product images build customer trust and increase sales, regardless of your equipment budget.
Take action today. Set up your basic studio, photograph your first product, and learn from the results. Every successful product photographer started exactly where you are now. Your home studio awaits.