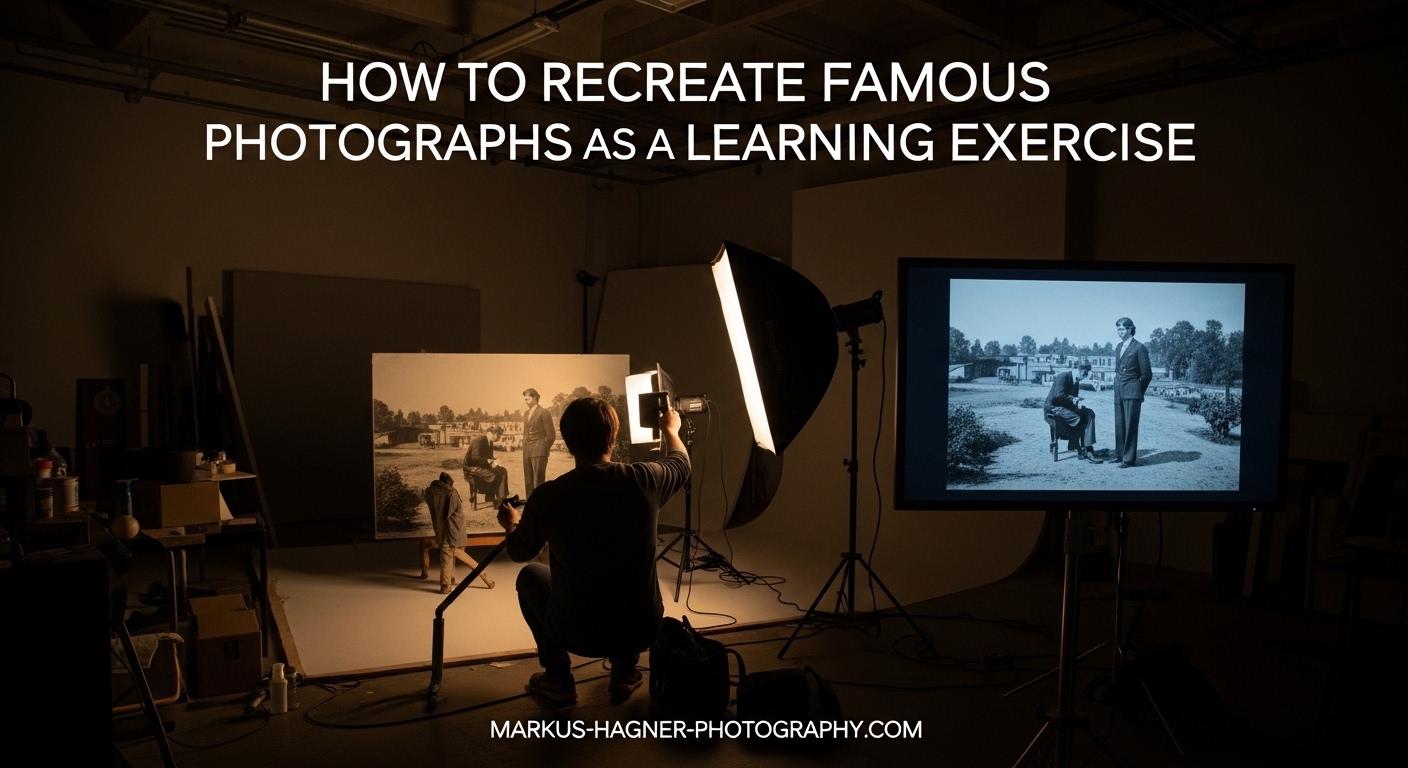
When I first started learning photography, I spent months shooting randomly and hoping something would turn out well. Then a mentor suggested I recreate famous photographs as a learning exercise. Skeptical at first, I tried it anyway. After recreating just three master photographs over a single month, I learned more about lighting, composition, and post-processing than I had in my previous six months of shooting.
This practice, often called a master study or copycat project, is how artists have learned for centuries. Painters copy the old masters. Musicians learn covers before writing original songs. Photographers can apply the same principle. When you recreate famous photographs, you are forced to understand every decision the original photographer made, from where they placed their lights to why they chose a specific camera angle.
In this guide, I will walk you through exactly how to recreate famous photographs as a learning exercise. You will learn why this method works so well, how to analyze reference photos systematically, and how to work around common limitations like not having professional lighting equipment or access to models.
Why Master Studies Work for Photography Learning
The concept of learning by copying masters is not new. Art students have been sketching classical sculptures and paintings for hundreds of years. Music students learn by playing songs written by others. This approach works because it bypasses the overwhelming blank slate problem.
When you create a photograph from scratch, you make dozens of decisions: where to place your subject, what angle to shoot from, how to light the scene, which camera settings to use, and how to edit the final image. Without experience, these decisions feel arbitrary. You might choose a certain aperture because it sounds good, not because you understand its effect on the final image.
Recreating famous photographs changes this dynamic completely. Instead of guessing, you are reverse engineering. You look at a finished image and work backward to figure out how it was created. This process forces you to understand the relationship between technical choices and visual results.
I have found that even failed recreations teach valuable lessons. When my first attempt at matching a particular lighting setup looked nothing like the original, I had to figure out why. Was my light too close? Too soft? Coming from the wrong angle? Each failure taught me something specific about how light behaves.
The master study approach also builds confidence. When you successfully recreate a photograph that once seemed impossibly complex, you realize that professional work is not magic. It is the result of learnable skills and deliberate choices. This realization transforms how you approach your own original work.
How to Recreate Famous Photographs: A Step-by-Step Guide
Follow this systematic process to get the most from your photo recreation exercises. Each step builds on the previous one, so do not skip ahead even if you feel eager to start shooting.
Step 1: Choose Your Reference Photograph
The photograph you choose to recreate matters more than you might expect. Select something that challenges you but remains achievable with your current resources. A complex studio portrait with multiple lights might teach you about lighting ratios, but if you only have window light available, the exercise becomes frustrating rather than educational.
Consider these factors when selecting your reference: Do you have access to similar subjects or environments? Is the lighting something you can approximate with available equipment? Does the photograph align with skills you want to develop?
For your first few recreations, I recommend choosing photographs with single, identifiable light sources. Portraits lit by window light, simple product shots, or landscapes with clear compositional structure work well. Save multi-light studio setups and heavily staged conceptual work for when you have more experience.
Step 2: Analyze the Lighting Setup
Lighting is usually the most important element to understand when you recreate famous photographs. Start by identifying the main light source. Where is it coming from? Look at the shadows on your subject’s face or the objects in the scene. Shadows point away from the light, so they reveal direction immediately.
Next, assess the quality of the light. Hard light creates sharp, defined shadows with clear edges. Soft light produces gradual transitions between highlights and shadows. Hard light typically comes from small, distant sources like direct sun or bare flash. Soft light comes from large sources relative to the subject, like overcast sky, large windows, or softboxes.
Look for multiple light sources. Many professional photographs use two, three, or more lights. You might see a main light illuminating the subject, a fill light reducing shadow density, a rim light separating the subject from the background, and sometimes a background light. Each light serves a specific purpose.
Pay attention to the lighting ratio, which is the brightness difference between highlights and shadows. High contrast images have large ratios, while evenly lit images have small ratios. Understanding this helps you position lights or reflectors to achieve similar effects.
Step 3: Break Down the Composition
Composition analysis involves understanding where elements are placed within the frame and why. Start by identifying the main subject and its position. Many photographs place subjects according to the rule of thirds, with key elements at intersection points roughly one-third into the frame from each edge.
Look for leading lines that guide your eye through the image. These could be actual lines like roads or fences, or implied lines created by the direction of a subject’s gaze or body positioning. Leading lines often direct attention toward the main subject.
Consider the camera angle and perspective. Was the photograph taken from eye level, above, or below the subject? How does this angle affect how the subject appears? Low angles can make subjects appear powerful or imposing, while high angles can make them seem smaller or more vulnerable.
Examine the depth of field. Is everything sharp from foreground to background, or is there visible background blur? Shallow depth of field usually indicates a wide aperture and creates subject isolation. Deep depth of field suggests a narrow aperture and keeps more of the scene in focus.
Note the focal length effect. Wide angles exaggerate perspective and can distort features close to the lens. Telephoto lengths compress perspective and isolate subjects from backgrounds. The visual characteristics of different focal lengths are noticeable even if you cannot determine the exact millimeter.
Step 4: Plan Your Setup and Equipment
With your analysis complete, plan how to achieve similar results with available equipment. You probably will not match everything exactly, and that is fine. The goal is learning principles, not perfect replication.
If the reference uses studio lighting and you only have natural light, find a window that approximates the direction and quality of the original light source. A large window with indirect sunlight behaves similarly to a large softbox. Sheer curtains can act as diffusion.
For fill light, use reflectors. White foam board, silver car sunshades, or even white walls can bounce light into shadows. Position your reflector on the opposite side from your main light to reduce shadow density.
Gather or create props and backgrounds that approximate the original. You might not have the exact same furniture or objects, but you can often find substitutes that serve similar visual functions. The shape, color, and texture of objects matter more than their identity.
If the original photograph features a person and you lack a model, consider the self-portrait method. Set up your camera on a tripod, use a remote trigger or timer, and pose yourself. This approach teaches you about both the technical and subject-direction aspects of photography.
Step 5: Capture the Shot
With your setup prepared, start capturing. Use manual mode so you have full control over exposure settings. Your earlier analysis should guide your aperture choice for depth of field. Shutter speed should be fast enough to avoid camera shake unless you are using a tripod.
Take test shots and compare them to your reference image. Look at your phone or a printed copy of the original while you shoot. This constant comparison helps you identify what needs adjustment.
Expect to make many small adjustments. Move your light source slightly closer or further. Adjust your reflector position. Change your camera angle by a few degrees. These incremental changes add up to significant differences in the final image.
Do not rush. Many photographers allocate 2 to 4 hours for a recreation exercise. The learning happens during the process of troubleshooting and refining, not in the final capture.
Step 6: Match the Post-Processing
Post-processing is often where photographs get their final distinctive look. Analyze the color palette of your reference. Is it warm or cool? Are colors saturated or muted? Does it have a color cast that gives it a particular mood?
For black and white photographs, examine the tonal range. Are the blacks crushed and contrasty, or is there detail preserved throughout? How bright are the highlights? Black and white conversion is not simply removing color; different conversion methods emphasize different tones.
Look for evidence of dodging and burning, which are local brightening and darkening adjustments. These techniques guide the viewer’s eye and create dimension. Many famous photographs have been carefully dodged and burned in specific areas.
Apply similar adjustments to your recreation. Use Lightroom, Photoshop, or your preferred editing software. Match the overall contrast, color treatment, and any distinctive processing characteristics you identified.
Analyzing Your Reference Photo: What to Look For
Systematic analysis separates productive recreation exercises from frustrating guessing games. Use this checklist when examining any photograph you plan to recreate.
For lighting analysis: identify the main light direction by studying shadows, determine light quality by examining shadow edge transitions, look for additional light sources by checking for illumination that cannot be explained by the main light alone, and note the overall contrast level between highlights and shadows.
For composition analysis: identify the main subject and its position within the frame, look for leading lines or visual paths that guide the eye, examine the camera height and angle relative to the subject, check for framing elements that surround or partially obscure the subject, and assess the use of negative space.
For technical analysis: estimate depth of field by checking what is sharp versus blurred, consider focal length characteristics like perspective compression or distortion, look for motion blur that might indicate slower shutter speeds, and check for grain or noise that might indicate higher ISO or film stock.
For post-processing clues: identify the overall color temperature and any color casts, assess saturation and vibrance levels, note contrast characteristics including black and white points, look for vignetting or edge darkening, and check for any obvious retouching or compositing.
Common Challenges and How to Overcome Them?
Every photographer faces obstacles when trying to recreate famous photographs. Here are solutions to the most common challenges.
Gear limitations: You probably do not have the same equipment as the photographer who created your reference image. This is normal and actually beneficial. Working with limitations forces creative problem-solving. A $200 softbox and a $2,000 softbox both produce soft light. The expensive version offers more control and consistency, but the fundamental quality of light is similar. Focus on understanding principles rather than matching equipment exactly.
No access to models: Self-portraits work surprisingly well for recreation exercises. Set up your camera, frame the shot, and position yourself where the subject should be. Use a remote trigger or self-timer. This approach teaches you about posing and expression from both sides of the camera.
Location constraints: If you cannot access a similar location to your reference photograph, create a convincing substitute. Backgrounds can often be approximated with fabric, paper, or careful positioning. The key elements are usually the lighting and subject treatment, not the specific location.
Time management: Some photographers use the 80/20 rule for recreation exercises. Spend 20% of your time on analysis and 80% on execution, or limit the entire exercise to a set time like 3 hours. Perfectionism can turn a learning exercise into an endless frustration. Accept that your recreation will not be perfect and focus on what you learn from the process.
Frustration with results: Your first recreations will probably disappoint you. This is expected. The value is in the attempt and the analysis of why your result differs from the reference. Each failed recreation teaches you something specific about technique that you can apply to future work.
Copyright and Ethical Considerations
Recreating photographs for learning purposes is generally acceptable, but you should understand the boundaries. This section addresses common questions about the ethics and legality of photo recreation exercises.
Educational use is the key principle. When you recreate a photograph to learn technique, you are engaged in education, not competition with the original photographer. This falls within generally accepted fair use principles in most jurisdictions.
However, you must be transparent about what you are doing. Never claim a recreation as your own original work. If you share your recreation publicly, clearly state that it is a study or exercise based on another photographer’s work. Credit the original photographer by name.
Do not use recreations commercially without permission. Selling prints, using recreations in advertising, or entering them in competitions as original work crosses ethical and potentially legal lines. Keep recreations in the educational realm where they belong.
Some photographers worry that copying will prevent them from developing an original style. The opposite is usually true. By understanding how great photographs are made, you gain a vocabulary of techniques you can combine and adapt in your own unique way. Copying is a phase, not a permanent practice.
Taking It Further: From Copying to Original Style
The goal of recreation exercises is not to become good at copying. It is to internalize techniques that inform your original work. Here is how to progress from recreation to creation.
After completing several recreations, you will notice patterns in what appeals to you. Maybe you gravitate toward dramatic lighting with strong shadows. Perhaps you prefer soft, diffused light with gentle transitions. These preferences form the foundation of your personal style.
Start applying learned techniques to original subjects. Use the lighting setups you have practiced, but photograph different people or objects. Apply the composition principles you have internalized to scenes you discover in daily life.
Document your learning journey. Keep notes on each recreation exercise, including what you learned and what challenges you faced. Reviewing these notes reveals your progress and highlights areas that still need work.
Curate a collection of photographs you want to study. Having a ready list of reference images prevents decision paralysis when you are ready for your next exercise. Include variety in your list: different lighting styles, subject types, and processing approaches.
Eventually, you will find yourself creating original work that incorporates techniques from multiple photographers you have studied, combined in ways that are uniquely yours. This synthesis is where true artistic development happens.
Frequently Asked Questions
What is a master study in photography?
A master study in photography is the practice of recreating a photograph by an accomplished photographer to understand their technical and creative decisions. You analyze lighting, composition, camera settings, and post-processing, then attempt to replicate the image. This hands-on approach teaches you the ‘why’ behind great photographs, not just the ‘how’.
Is it legal to recreate famous photographs?
Recreating photographs for personal learning and educational purposes is generally acceptable under fair use principles. However, you should never claim the recreation as original work, use it commercially without permission, or present it as your own art. Always credit the original photographer and be transparent that your work is a study or exercise.
How long should a photo recreation exercise take?
Many photographers recommend the 80/20 approach: spend 20% of your time analyzing and 80% shooting, or limit yourself to a set time like 2-4 hours to avoid perfectionism. The goal is learning, not creating an exact replica. Even a quick recreation that doesn’t match perfectly teaches valuable lessons about lighting, composition, and technique.
What if I don’t have the same equipment as the original photographer?
Working with different equipment is part of the learning process. Focus on understanding the principles behind the original shot rather than matching it exactly. A softbox can be approximated with a white sheet and window light. A telephoto lens effect can be mimicked by shooting from distance and cropping. These constraints force creative problem-solving.
What are good famous photographs to start recreating?
Start with photographs that match your current skill level and available resources. Simple portraits with natural window light, basic still life compositions, or straightforward landscape framing work well for beginners. Avoid complex multi-light setups or heavily staged conceptual work until you have more experience. The goal is learning, not frustration.
Conclusion
Recreating famous photographs as a learning exercise has transformed how I approach photography. What once felt like guesswork now feels like a series of deliberate, understandable choices. The techniques I learned from master studies appear in my original work constantly, often without conscious thought.
If you have never tried this exercise, start today. Pick a simple photograph, spend time analyzing it, and attempt a recreation with whatever equipment you have available. The lessons you learn will stay with you throughout your photography journey. Remember that even failed attempts teach valuable lessons, and every photographer who came before you learned by studying those who came before them.