Whether you are capturing exhibits behind museum display cases, documenting marine life at aquariums, or creating artistic street photography through shop windows, learning how to photograph through glass opens up creative possibilities that many photographers overlook.
Shooting through transparent surfaces presents unique challenges that can frustrate even experienced photographers. Unwanted reflections, glare, and focus issues plague these shots consistently.
I have spent years refining techniques for photographing through glass and other surfaces. In this guide, I will share practical methods that work whether you are shooting with professional equipment or just your smartphone.
How to Photograph Through Glass: Understanding the Challenges
Glass photography presents three main problems that every photographer encounters. Understanding these challenges is the first step toward solving them effectively.
Reflections are the most obvious issue. Glass surfaces reflect light from your surroundings, including you and your camera. These reflections obscure your subject and create distracting elements in your image.
Autofocus systems struggle with glass. The camera cannot decide whether to focus on the glass surface itself or the subject behind it. This results in missed focus and soft images.
Distortion occurs when shooting through glass at an angle. Curved surfaces, like aquarium tanks, bend light in unpredictable ways. This warps your subject and reduces image quality.
Each of these challenges has a solution. The right combination of equipment, positioning, and technique will let you capture clean shots through any transparent surface.
How to Photograph Through Glass Without Reflections In 2026?
Eliminating reflections is the most critical skill when you photograph through glass. These techniques work in most situations and range from free positioning tricks to affordable equipment solutions.
Position Your Lens Against the Glass
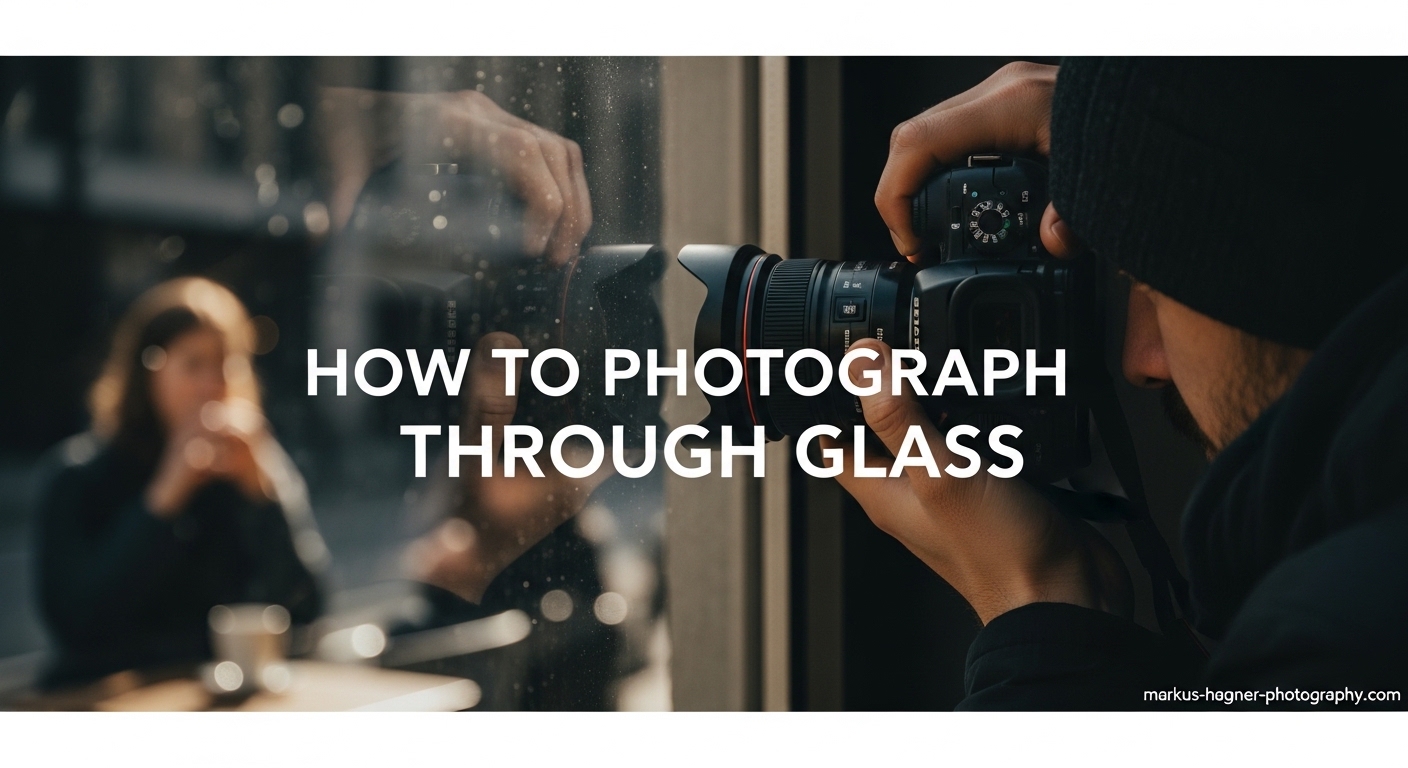
The simplest method requires no extra equipment. Press your lens directly against the glass surface. This eliminates reflections entirely by removing the air gap between lens and glass.
I use this technique constantly at museums and aquariums. It works remarkably well but requires care. Move gently to avoid scratching either surface.
For expensive lenses, invest in a rubber lens hood. These flexible hoods protect your equipment while creating a seal against the glass. They cost under twenty dollars and solve multiple problems simultaneously.
Use a Circular Polarizing Filter
A circular polarizing filter reduces reflections significantly. Rotate the filter while watching your viewfinder. You will see reflections fade as you find the optimal angle.
Polarizers work best when the light source is at a ninety-degree angle to your lens. They are less effective when shooting directly toward or away from light sources.
These filters also increase color saturation and contrast. The effect is particularly noticeable when shooting through windows on sunny days.
Keep in mind that polarizers reduce light entering your camera. You may need to increase ISO or use slower shutter speeds in dim conditions.
Adjust Your Shooting Angle
Sometimes moving a few inches makes the difference between a ruined shot and a perfect image. Walk around your subject to find angles where reflections disappear.
Shooting slightly downward or upward often eliminates problematic reflections. This technique works especially well for display cases and street photography through windows.
Frame shots so that dark areas appear behind the camera position. Reflections of dark surfaces are less noticeable than bright ones.
Create a Light Block with Black Material
Professional photographers often use black fabric or foam core boards to block light from hitting the glass. This creates a controlled environment where only your subject is visible.
You can drape black clothing over yourself and your camera. This simple trick reduces your own reflection dramatically. Dark clothing helps even without additional materials.
For critical shots, create a tent around your lens using black fabric. This blocks light from all directions and guarantees reflection-free images.
Essential Equipment for Shooting Through Glass
While positioning techniques work with any camera, certain accessories make glass photography consistently easier. Building a kit for these situations does not require a large investment.
Rubber Lens Hood or Collar
This is the most valuable accessory for glass photography. Rubber hoods seal against glass surfaces, eliminating reflections completely. They also protect your lens from scratches.
Look for hoods that match your lens diameter. Universal options with adjustable openings work with multiple lenses. Expect to pay between fifteen and forty dollars depending on quality.
Circular Polarizing Filter
A quality polarizer belongs in every photographer’s bag. For glass photography, it is indispensable. Buy one that matches your largest lens and use step-down rings for smaller lenses.
Cheap polarizers can introduce color casts. Invest in reputable brands to maintain image quality. Good polarizers last for years and improve many types of photography beyond just shooting through glass.
Lens Skirt
Designed specifically for aquarium and museum photography, lens skirts are flexible rubber cups that block stray light. They are particularly useful when you cannot press directly against glass due to security barriers.
Professional photographers swear by these for tricky situations. They are more expensive than basic rubber hoods but offer superior light control in challenging environments.
Black Foam Core Boards
Inexpensive and lightweight, foam core boards reflect no light. Use them to block light sources from the sides of your lens. This technique is essential for product photography and controlled setups.
Boards from office supply stores work perfectly. Cut them to size for portability. I carry two pieces taped together for easy storage in my camera bag.
Microfiber Cleaning Cloth
Dirty glass creates focus problems and visible artifacts. A quality microfiber cloth removes smudges and fingerprints from both sides of the glass surface.
Always clean the glass before shooting. This simple step improves image quality dramatically. I keep several clothes in my bag and use them constantly while traveling.
Creative Glass Photography Techniques
Once you master eliminating reflections, you can explore creative possibilities that make glass a compositional element rather than an obstacle.
Embrace Intentional Reflections
Sometimes reflections add depth and interest to an image. Street photographers often use window reflections to create layered compositions that tell multiple stories at once.
Look for situations where the reflection complements your subject. A portrait reflected in a shop window, for example, reveals both subject and photographer perspective.
Prism Photography and Light Refraction
Prisms split white light into rainbow colors. Placing a prism in front of your lens creates dramatic effects that transform ordinary scenes into abstract art.
Glass objects like wine glasses, bottles, and even smartphone screens can create similar refraction effects. Experiment with different glass types to discover unique visual signatures.
DIY Glass Modifications
Photographers have modified glass surfaces for creative effects for decades. Dry erase markers can draw patterns directly on glass. Colored gels taped to windows change the color palette of your image.
Even Vaseline applied to a clear filter creates soft-focus effects reminiscent of early photography. These DIY techniques produce results impossible to replicate in post-processing.
Picture Frame Glass Technique
Remove glass from an old picture frame and use it as a creative filter. Hold it at various distances from your lens to create different effects. The glass can be colored, scratched, or treated for unique results.
This technique works particularly well for portrait and artistic photography. The separation between glass and lens allows for controlled soft focus and light manipulation.
Photographing Through Different Surface Types
Each transparent surface presents unique challenges. Understanding these differences helps you adapt your approach for any situation.
Museum Display Cases
Museum photography combines multiple challenges: security barriers, low light, and reflective glass. Approach display cases at an angle initially to assess reflection issues.
Use a rubber lens hood pressed gently against the glass when allowed. When barriers prevent contact, use a lens skirt and maximize distance from the glass to reduce your reflection.
Museum lighting often includes spotlights that create harsh reflections. Move to find angles where these lights are not reflected in the glass. Sometimes crouching low or shooting from above solves the problem.
Aquarium Tanks
Aquarium photography presents curved glass challenges. The curve introduces distortion that increases toward the edges of your frame. Position yourself perpendicular to the glass surface whenever possible.
Higher ISO values are often necessary due to dim aquarium lighting. Use the widest aperture your lens allows to gather more light. Manual focus is usually required since autofocus systems struggle with the multiple glass layers.
Time your shots between school movements in the tank. Wait for clear sight lines and avoid shooting when visitors create ripples or waves near your viewing area.
Windows and Street Photography
Street photography through windows offers endless creative possibilities. Shop windows at night reflect street scenes while showing interior displays simultaneously.
Weather dramatically affects window photography. Rain creates texture and refraction. Condensation adds mood and abstraction. Each weather condition offers different creative opportunities.
Clean windows produce the clearest images. Dirty windows can add character. Decide which effect serves your vision and choose locations accordingly.
Water and Aquatic Environments
Shooting through water follows similar principles to glass photography. The surface acts as a curved, moving lens that distorts and refracts light.
Underwater housings allow photographing through water directly. For surface shots, position yourself as perpendicular to the water surface as possible to minimize distortion.
Polarizing filters cut through surface glare when photographing subjects in shallow water. This reveals details that would otherwise be hidden by reflections.
Plastic and Acrylic Barriers
Many venues use plastic instead of glass. These surfaces scratch more easily and introduce color casts. Acrylic is particularly prone to greenish tints.
Adjust white balance to compensate for color shifts. RAW format gives you flexibility to correct these issues in post-processing without degrading image quality.
Plastic surfaces are softer than glass. Extra care is needed when pressing lens hoods against them to avoid damage.
Mesh and Grid Surfaces
Some barriers use mesh or wire grids. These create moire patterns that can ruin images. The solution is to increase distance from the mesh and use wider apertures to render the grid out of focus.
Changing focal length sometimes eliminates moire patterns. Zoom in or out slightly to see if the pattern disappears from your viewfinder.
Common Problems and Practical Solutions
Even experienced photographers encounter issues when shooting through glass. These solutions address the most frequent problems reported by the photography community.
Autofocus Hunting on Glass
Your camera’s autofocus system often cannot distinguish between the glass surface and your subject. The result is continuous focus hunting or focus on the wrong plane.
The solution is simple: switch to manual focus. Most cameras allow you to autofocus initially and then lock focus manually. Use focus peaking if your camera offers this feature to confirm sharpness.
Color Casts from Tinted Glass
Many windows and display cases use tinted glass that shifts colors in your images. Green and magenta casts are most common.
Shoot in RAW format to preserve color information. Adjust white balance in post-processing using the eyedropper tool on neutral areas. Custom white balance presets can also help if you shoot consistently similar scenes.
Scratches and Smudges Visible
Dirty glass creates visible artifacts that distract from your subject. Scratches catch light and appear as bright lines in your images.
Clean both sides of the glass before shooting whenever possible. A microfiber cloth removes most smudges. For scratches, use wider apertures to render them out of focus. Repositioning to avoid backlit scratches also helps.
Low Light Situations
Museums, aquariums, and indoor spaces often have dim lighting. Shooting through glass compounds this problem by reducing available light further.
Increase ISO cautiously to avoid excessive noise. Use lenses with wide maximum apertures. A tripod enables longer shutter speeds when static subjects allow. Modern cameras perform remarkably well at high ISO values.
Restrictions on Equipment
Many venues restrict tripods, large bags, and professional-looking equipment. Plan for these limitations by using compact gear and handholding techniques.
Stabilize your camera against your body or available surfaces. Use camera straps as tension braces. Higher shutter speeds reduce motion blur when handholding.
Smartphone Glass Photography Tips
Mobile photographers face the same challenges but with fewer equipment options. These techniques help you capture excellent images through glass using only your smartphone.
Press your phone directly against the glass surface. The proximity eliminates reflections effectively. A simple rubber case provides protection for your device.
Lock focus and exposure before shooting. Tap and hold on your subject to activate focus lock. This prevents the phone from refocusing on the glass surface.
Use the telephoto lens if available. The longer zoom lens reduces the angle of view and minimizes edge distortions when shooting through curved surfaces.
Smartphone editing apps can correct color casts and adjust perspective after capture. Take multiple shots from slightly different positions to maximize options.
Frequently Asked Questions
How to take a picture through glass without reflection?
Press your lens directly against the glass surface to eliminate reflections. If you cannot touch the glass, use a circular polarizing filter and adjust your shooting angle until reflections disappear. Black clothing and blocking light sources from behind your camera also help significantly.
What is the 20-60-20 rule in photography?
The 20-60-20 rule suggests positioning yourself 20% from the edge of a glass surface rather than shooting straight on. This angle reduces reflections significantly while minimizing distortion. It is particularly useful for display cases and windows where direct perpendicular shooting creates the most problematic reflections.
What is a photograph on glass called?
Photography on glass is called ambrotype or collodion positive in historical contexts. Modern glass photography includes techniques like shooting through windows, aquarium photography, and creative refraction images using prisms or glass objects as filters.
Do polarizing filters work for shooting through glass?
Yes, circular polarizing filters reduce reflections significantly when photographing through glass. Rotate the filter while watching your viewfinder to find the optimal angle. Polarizers work best when the light source is at a 90-degree angle to your lens and are less effective shooting directly toward or away from light.
How do you focus when shooting through glass?
Switch to manual focus when your camera struggles with glass surfaces. Most cameras autofocus incorrectly on the glass itself rather than your subject. Focus peaking mode helps confirm sharpness. You can also autofocus initially and then lock focus manually to prevent the camera from hunting.
Conclusion
Learning how to photograph through glass and other surfaces opens countless creative opportunities. The techniques I have shared work whether you are shooting museum exhibits, aquarium displays, or street photography through shop windows.
Start with the basics: press your lens against the glass, use a polarizing filter, and adjust your angle to eliminate reflections. As you gain confidence, explore creative techniques that use glass as an artistic element rather than an obstacle.
Equipment like rubber lens hoods and polarizing filters makes the job easier, but positioning and technique matter more than gear. Practice these methods with whatever camera you have available.
Every transparent surface presents a unique challenge. Each situation teaches something new about light, reflection, and composition. The more you photograph through glass, the more intuitive these techniques become.