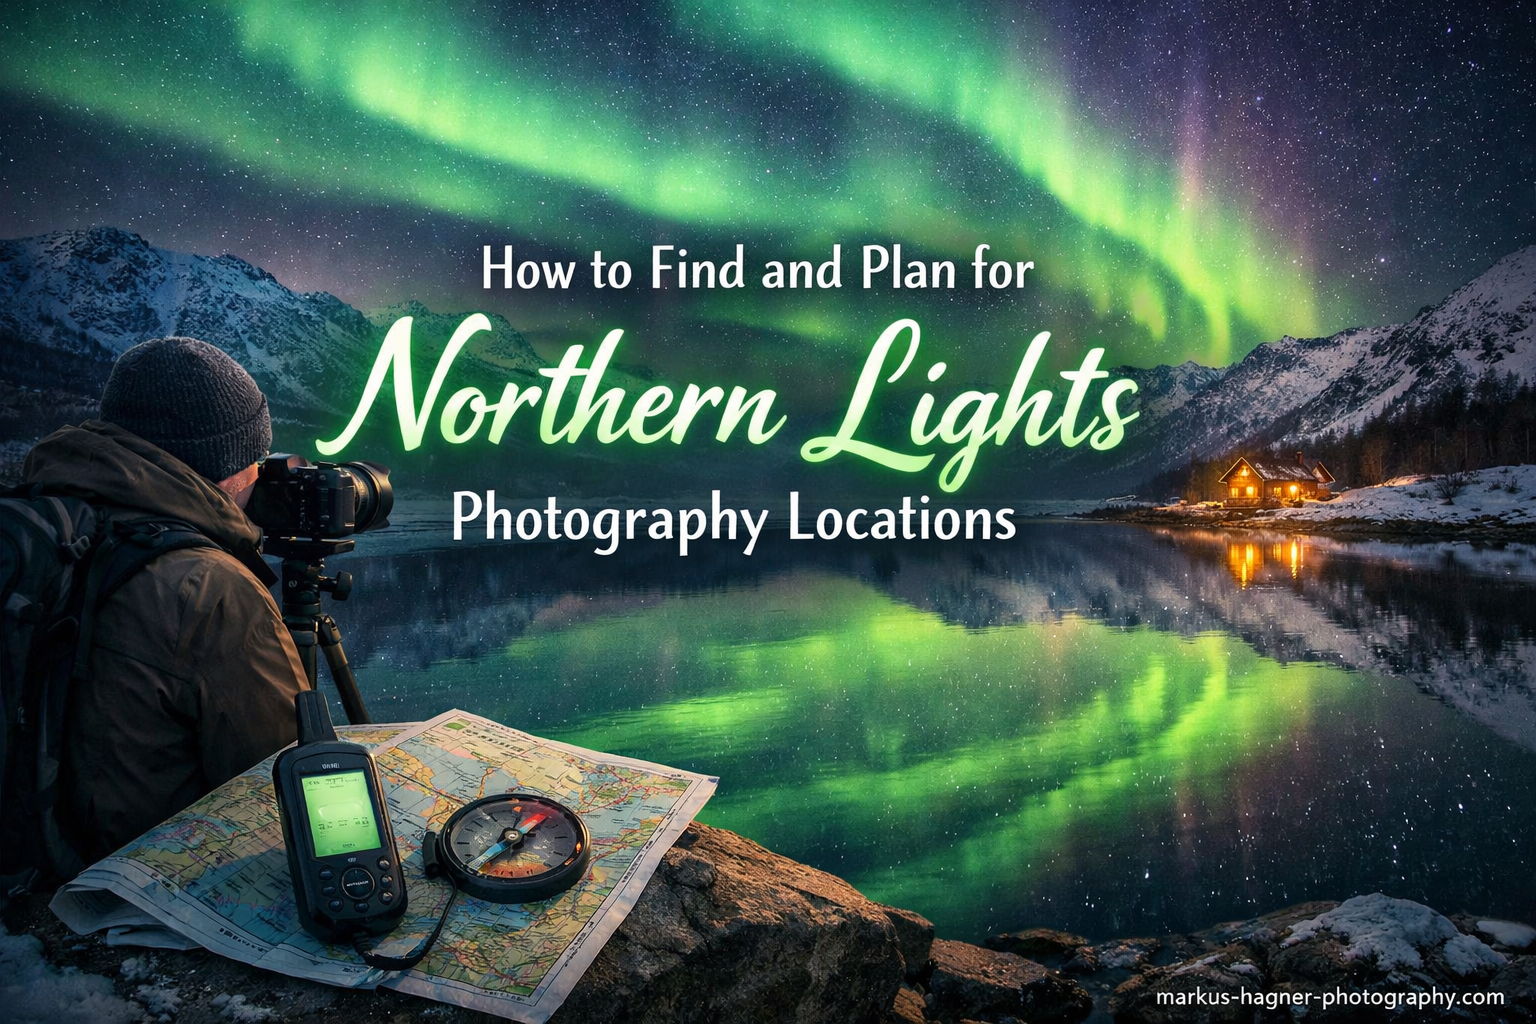
Standing beneath a dancing curtain of green and purple light is one of the most profound experiences a photographer can have. I have spent years chasing the aurora borealis across frozen landscapes, and I can tell you that the difference between a successful trip and a disappointing one comes down to planning. Learning how to find and plan for northern lights photography locations transformed my approach from hoping for luck to creating my own opportunities.
In this guide, I will share everything I have learned about researching aurora hotspots, reading forecasts like a meteorologist, and positioning yourself in the right place at the right time. Whether you are planning your first aurora adventure or looking to improve your success rate, this comprehensive framework will help you capture the northern lights reliably.
Understanding Aurora Basics
Before you can effectively plan aurora photography trips, you need to understand what creates these celestial light shows and what factors determine their visibility. This knowledge forms the foundation for every location and timing decision you will make.
What Causes the Northern Lights?
The aurora borealis occurs when charged particles from the sun collide with gases in Earth’s upper atmosphere. Solar wind carries these particles toward Earth, where our planet’s magnetic field funnels them toward the polar regions. When these particles strike oxygen and nitrogen molecules, they excite the atoms, which then release energy as visible light.
Different gases produce different colors. Oxygen at higher altitudes (around 150-300 miles up) creates red auroras, while oxygen at lower altitudes (about 60 miles) produces the characteristic green glow most photographers chase. Nitrogen adds blue and purple hues to the display, creating the complex color palettes that make each aurora unique.
The KP Index Explained
The KP index is the single most important number for aurora hunters. This scale ranges from 0 to 9 and measures geomagnetic activity on a global scale. A KP of 0 means minimal activity, while a KP of 9 indicates an extreme geomagnetic storm visible far from the poles.
For most northern lights photography locations within the auroral oval, you only need a KP of 2 or 3 to see strong displays. However, if you are trying to photograph aurora from lower latitudes like the northern United States, you will need KP levels of 5 or higher. I always check the 3-day KP forecast before any aurora hunting trip.
The Auroral Oval and Why It Matters
Imagine a ring of aurora activity circling the magnetic north pole. This ring, called the auroral oval, is where northern lights occur most frequently and intensely. The oval shifts and changes size based on solar activity, expanding during geomagnetic storms and contracting during quiet periods.
Your goal as an aurora photographer is to position yourself under or near this oval. Locations like Fairbanks (Alaska), Tromso (Norway), and Yellowknife (Canada) sit directly under the auroral oval, making them reliable choices regardless of KP levels. This is why these destinations consistently deliver better results than places at the edge of aurora visibility.
Solar Cycle and Aurora Activity
Solar activity follows an approximately 11-year cycle, with periods of high activity (solar maximum) and low activity (solar minimum). We are currently approaching a solar maximum, which means more frequent and intense aurora displays through 2026 and beyond.
During solar maximum, you can expect more coronal mass ejections (CMEs) and solar flares, both of which supercharge aurora activity. This makes 2026 an excellent time to plan your northern lights photography trip. However, even during solar minimum, locations under the auroral oval still see regular displays.
How to Find Northern Lights Photography Locations In 2026?
Finding the right shooting spot involves more than just picking a destination. You need to research specific viewpoints that offer clear northern horizons, minimal light pollution, and interesting foreground elements for your compositions.
Using Light Pollution Maps
Light pollution is your enemy when photographing the northern lights. Even small towns can wash out the subtle colors and structure of aurora displays. I use light pollution maps like Dark Site Finder and Light Pollution Map to identify truly dark areas near my destination.
Look for locations classified as Bortle 1-3 (dark gray or black on most maps). These areas have minimal artificial light and will show the aurora in its full glory. Remember that the aurora itself can be bright enough to illuminate your foreground, so you do not need light pollution for landscape detail.
Researching Photo Forums and Communities
Some of my best location discoveries came from photography forums like Fred Miranda, photography subreddits, and 500px location searches. Photographers love sharing their favorite spots, and you can often find GPS coordinates, best viewing angles, and seasonal tips that guidebooks never mention.
Search for your destination plus “aurora photography” or “northern lights” on these platforms. Pay attention to images that show unique foregrounds like mountains, lakes, or distinctive trees. These compositional elements transform a simple aurora snapshot into a compelling photograph.
Scouting Locations on Google Earth
Once you have identified potential areas, use Google Earth to virtually scout your locations before you travel. Look for open areas with clear sightlines to the north, interesting terrain features, and road access. The 3D view helps you understand how the landscape will frame your compositions.
I always check the terrain profile to ensure no hills or mountains will block my northern view. Flat areas near water often work well because frozen lakes provide clean, reflective foregrounds and unobstructed horizons. Near Fairbanks, places like Creamer’s Field and Chena Lakes Recreation Area fit this description perfectly.
Checking Accessibility and Safety
A location is only good if you can safely reach it in winter conditions. Many aurora hotspots require driving on icy roads in complete darkness. Research road conditions, winter closures, and whether you need a 4WD vehicle with winter tires.
Also consider how far you will need to walk from your vehicle. Standing still in subzero temperatures for hours is exhausting, and long hikes back to your car after midnight in deep snow can be dangerous. I prefer locations within a short walk of parking areas, especially when I am traveling alone.
Aurora Forecasting and Monitoring
Even the perfect location will not produce aurora photos if the conditions are not right. Mastering aurora forecasting separates casual tourists from serious aurora photographers who consistently capture stunning images.
NOAA Space Weather Prediction Center
The National Oceanic and Atmospheric Administration (NOAA) provides the most reliable aurora forecasts available. Their Space Weather Prediction Center website offers 3-day forecasts showing predicted KP levels, auroral oval positions, and probability of visible aurora at different latitudes.
I check the NOAA 30-minute aurora forecast when I am actively shooting. This short-term prediction uses real-time satellite data to show where aurora is occurring right now. If you see activity building, you have time to reposition to a better shooting location.
University of Alaska Fairbanks Aurora Forecast
The Geophysical Institute at the University of Alaska Fairbanks produces detailed aurora forecasts specifically optimized for Alaska and high-latitude locations. Their website shows expected aurora activity in three-hour blocks and provides a simple 0-10 activity scale that is easy to interpret.
What I love about this resource is the detailed nightly forecast that accounts for local weather and daylight conditions. They also send email alerts when activity spikes, which has saved many of my aurora sessions.
Best Aurora Forecast Apps
When you are in the field, mobile apps provide convenient access to forecasts and alerts. My top recommendations include Aurora Watch (free alerts when activity rises), My Aurora Forecast (comprehensive data with push notifications), and Aurora Reach (community reports with live sighting maps).
These apps pull data from multiple sources including NOAA, so you get consolidated information in one place. Enable push notifications so you never miss a sudden geomagnetic storm. I have had nights where I was ready to sleep when my phone alerted me to a KP 7 event that produced the best aurora I have ever photographed.
How to Read an Aurora Forecast?
Understanding aurora forecasts requires looking at multiple factors together. Start with the KP index for overall activity level. Then check the auroral oval forecast to see where the active zone will be positioned. Finally, examine the Bz component of the interplanetary magnetic field (IMF).
When Bz is negative (southward), aurora activity intensifies because solar particles can more easily connect with Earth’s magnetic field. A positive Bz often means weak or no aurora even when KP is moderate. I have learned to wait for negative Bz periods before heading out.
Top Northern Lights Photography Locations
Not all aurora destinations are created equal. Some locations offer more reliable weather, better accessibility, or more photogenic landscapes. Here is my breakdown of the best regions for northern lights photography based on years of experience and community feedback.
Alaska (Fairbanks Region)
Fairbanks sits directly under the auroral oval, making it one of the most reliable northern lights photography locations in the world. The region sees aurora on roughly 240 nights per year, and the continental climate means more clear nights than coastal locations. I have had 70%+ success rates on multi-night trips here.
Popular spots include Cleary Summit (30 minutes from downtown), Chena Hot Springs Road (multiple pullouts), and Murphy Dome (requires 4WD in winter). The University of Alaska Museum of the North offers a great indoor backup if weather fails. Fairbanks also has affordable accommodations compared to many aurora destinations.
Iceland
Iceland offers dramatic volcanic landscapes that create unforgettable aurora compositions. The black sand beaches at Reynisfjara, the ice lagoon at Jokulsarlon, and the mountain Kirkjufell provide iconic foregrounds. The ring road makes most locations accessible by rental car.
However, Iceland’s coastal weather is notoriously unpredictable. Cloud cover can persist for days, even when aurora activity is high. I recommend planning at least 7-10 nights to ensure clear weather. The wind can also be brutal, so bring sturdy tripods and weigh them down.
Northern Scandinavia
Norway, Sweden, and Finland all offer excellent aurora opportunities. Abisko in northern Sweden is famous for its “blue hole,” a local microclimate that often stays clear when surrounding areas are cloudy. This phenomenon makes Abisko one of the most reliable aurora photography locations in Europe.
Tromso in Norway provides easy access to fjords and mountains, plus urban amenities and a lively food scene. Finnish Lapland offers remote wilderness and unique accommodations like glass igloos. All three countries have excellent infrastructure and tour options for those uncomfortable with winter driving.
Canada (Yukon and Northwest Territories)
Yellowknife in the Northwest Territories sits directly under the auroral oval and boasts some of the highest aurora frequency rates in North America. The Great Slave Lake provides frozen foreground options, and the city has developed excellent aurora tourism infrastructure.
The Yukon offers more remote, wilderness-focused experiences. Whitehorse serves as a base for trips to more isolated locations. Both territories have cold, clear winters perfect for aurora photography, though temperatures regularly drop below -30 degrees Celsius, requiring serious cold weather gear.
Location Comparison Overview
Choosing between destinations depends on your priorities. Alaska offers reliability and value, Iceland provides dramatic landscapes but weather challenges, Scandinavia combines culture with aurora, and Canada delivers remote wilderness experiences. Consider your budget, tolerance for cold, and whether you want tour support or independent exploration.
Step-by-Step Planning Framework
Now that you understand aurora science, location research, and forecasting, let me walk you through my complete planning process. This framework has helped me achieve consistent results across multiple destinations.
Phase 1: Destination Research (2-3 Months Before)
Start by selecting your destination based on your travel dates, budget, and photography goals. Research the best months for your chosen location, accounting for both aurora season and typical weather patterns. Book accommodations early for popular destinations like Iceland and Tromso, especially during peak season (September through March).
Join Facebook groups and online communities for your destination. Locals often share real-time conditions, road closures, and hidden gems that never appear in guidebooks. I have discovered my favorite shooting spots through these community connections.
Phase 2: Weather and Aurora Monitoring (1-2 Weeks Before)
Begin checking long-range weather forecasts and aurora predictions. While forecasts beyond 3 days are unreliable, they can help you identify potentially active periods. Download your aurora apps and configure notification settings. Make sure you understand how to read all the data these apps provide.
Create a list of backup shooting locations in different directions from your base. If weather blocks one area, you may be able to drive to clearer skies. Having multiple options prevents wasting nights waiting for clouds to clear.
Phase 3: Daily Planning (During Your Trip)
Each afternoon, check the weather forecast for the coming night. Cross-reference with aurora predictions to identify promising time windows. Scout your chosen location during daylight hours if possible, noting compositions and potential hazards.
Charge all batteries, format memory cards, and test your equipment before dark. Cold temperatures drain batteries quickly, so keep spares in an inside pocket close to your body. Arrive at your shooting location at least 30 minutes before astronomical twilight ends to set up in remaining light.
Phase 4: Backup Planning
Despite perfect preparation, some trips will not produce aurora. Weather happens. Solar activity can be unpredictable. Plan non-aurora activities for your destination so disappointment does not ruin your entire trip. Iceland has waterfalls and hot springs, Alaska has dog sledding and hot springs, and Scandinavia offers culture and cuisine.
I also recommend building flexibility into your itinerary. If your first three nights are cloudy, having a fourth and fifth night dramatically improves your odds. This is why I never plan aurora trips shorter than five nights.
Photography Equipment Essentials
While detailed equipment recommendations deserve their own guide, here are the basics you need for successful aurora photography. Getting these fundamentals right prevents frustration in the field.
Camera and Lens Requirements
You need a camera with manual controls and good high-ISO performance. Full-frame cameras generally handle noise better at high ISOs, but modern crop-sensor bodies work well too. Your lens should be wide-angle (14-24mm on full frame, or 10-18mm on crop) with a fast aperture of f/2.8 or wider.
Is f/2.8 fast enough for northern lights? Yes, absolutely. Most of my aurora images are shot at f/2.8 to f/4. Faster lenses like f/1.4 or f/1.8 allow shorter exposures or lower ISOs, but f/2.8 gets the job done. The key is having a quality lens that stays sharp wide open.
Stability and Accessories
A sturdy tripod is non-negotiable for aurora photography. You will be shooting exposures of 5-25 seconds, and any camera movement will blur your stars and aurora. Carbon fiber tripods handle cold better than aluminum (which conducts heat away from your hands).
A remote shutter release or intervalometer prevents camera shake when triggering exposures. Headlamps with red modes preserve your night vision while setting up. Hand warmers taped to your lens barrel prevent frost from forming during long shooting sessions.
Recommended Settings
Start with these baseline settings and adjust based on conditions: ISO 1600-3200, aperture wide open (lowest f-number), shutter speed 15-20 seconds. If the aurora is moving rapidly, shorten your shutter to 5-10 seconds to capture its structure. If activity is weak, extend to 25-30 seconds.
Focus manually on a bright star or distant light at infinity. Autofocus will hunt and fail in darkness. Once focused, tape your focus ring or switch to manual focus mode to prevent accidental changes.
Frequently Asked Questions
Where should I photograph the northern lights?
The best northern lights photography locations include Fairbanks (Alaska), Iceland, Tromso and Abisko (Scandinavia), and Yellowknife (Canada). Choose locations under the auroral oval for highest reliability, with minimal light pollution and clear northern horizons. Alaska offers reliability and value, Iceland provides dramatic landscapes, Scandinavia combines culture with aurora, and Canada delivers wilderness experiences.
How do I predict where the northern lights will appear?
Use NOAA Space Weather Prediction Center forecasts for 3-day KP predictions and auroral oval positions. Check the University of Alaska Fairbanks aurora forecast for detailed activity levels. Aurora forecast apps like My Aurora Forecast provide mobile access with push notifications. Monitor the Bz component of the IMF – negative values indicate stronger aurora potential.
What are the best settings for northern lights photography?
Start with ISO 1600-3200, aperture at your widest setting (f/2.8 or lower), and shutter speed of 15-20 seconds. For fast-moving aurora, reduce shutter to 5-10 seconds. For weak displays, extend to 25-30 seconds. Focus manually on a distant star or light at infinity. Always use a sturdy tripod and remote shutter release.
Is F2.8 fast enough for aurora photography?
Yes, f/2.8 is sufficient for most aurora photography. This aperture allows proper exposure at reasonable ISO settings when aurora is active. Faster lenses (f/1.4 to f/1.8) offer advantages for dim displays or shorter exposures, but f/2.8 captures excellent images. The key is using a quality lens that remains sharp at its widest aperture.
Is Alaska or Iceland better for northern lights photography?
Alaska (especially Fairbanks) offers higher reliability due to its position under the auroral oval and continental climate with more clear nights. Iceland provides more dramatic foreground compositions with volcanic landscapes but suffers from unpredictable coastal weather. Choose Alaska for consistent aurora sightings, Iceland for unique landscape combinations. Plan longer stays in Iceland (7-10 nights) versus Alaska (4-5 nights) to account for weather differences.
When is the best time of year for northern lights photography?
Aurora season runs from late August through early April in most locations. September through March offers the best balance of darkness and manageable temperatures. Avoid full moon periods for maximum aurora visibility. The current solar cycle peak (2026–2026) provides enhanced aurora activity, making this an excellent time to plan your trip.
How to Find and Plan for Northern Lights Photography Locations: Final Thoughts
Successfully photographing the northern lights requires understanding aurora science, researching locations thoroughly, mastering forecasting tools, and planning meticulously. The photographers who consistently capture stunning aurora images are not luckier than everyone else. They simply prepare better.
Remember that even perfect planning cannot guarantee aurora sightings. Weather and solar activity have their own schedules. What proper planning does is maximize your odds and ensure you are ready when conditions align. I have stood under brilliant green curtains on nights when forecasts predicted nothing, and I have shivered through cloudless nights with no aurora despite promising predictions.
The key is building redundancy into your plans. Choose locations with high success rates, allow multiple nights, have backup shooting spots ready, and prepare alternative activities. With this approach, your northern lights photography adventure will be rewarding regardless of what the aurora decides to do.
Start planning your 2026 aurora adventure today. The solar maximum is approaching, and the next few years offer the best northern lights opportunities in over a decade. Use this guide to find your perfect location, and I hope to see your stunning aurora images soon.