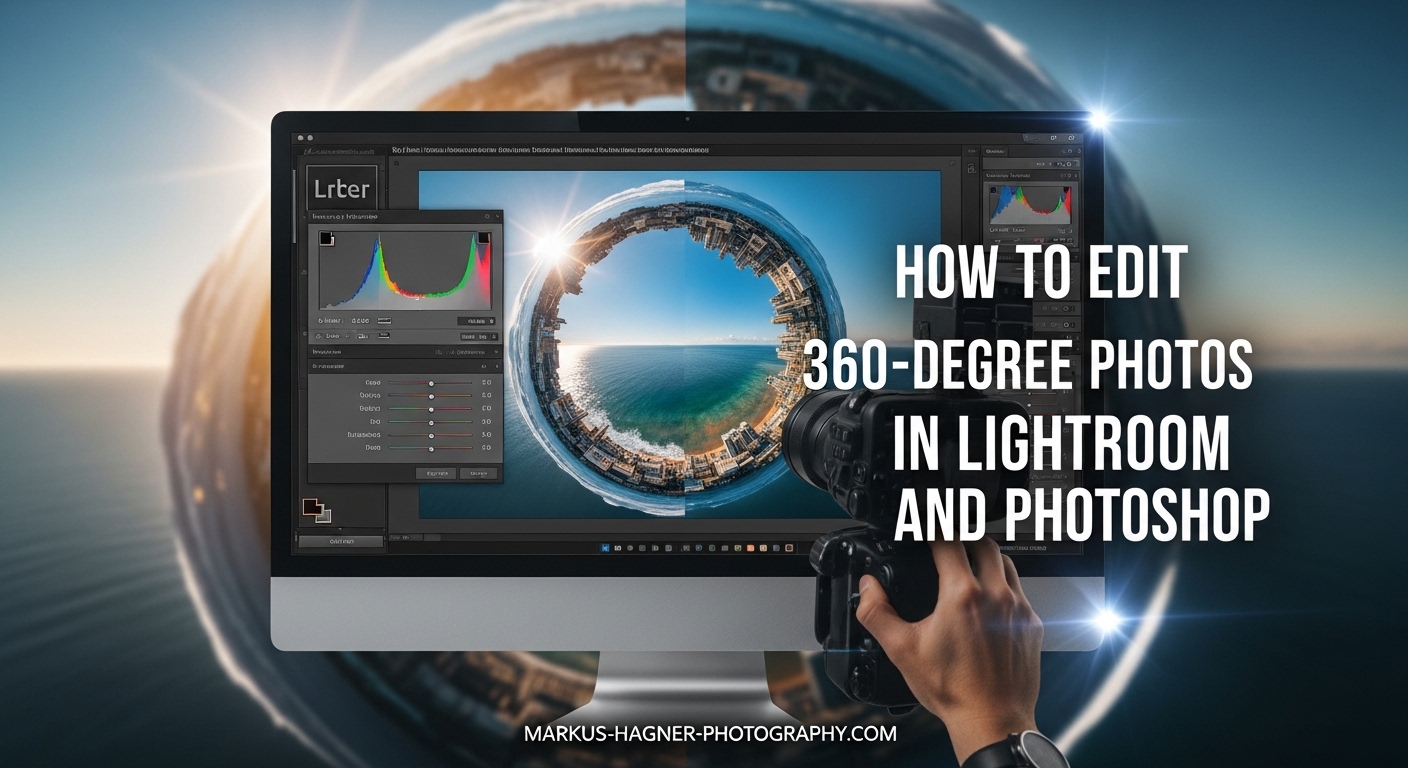
Editing 360-degree photos used to confuse me when I first started shooting with an Insta360 camera. I would make adjustments in Lightroom, export the image, and suddenly my VR-ready photo was just a flat, distorted mess. Sound familiar? You are not alone. In this guide, I will walk you through exactly how to edit 360-degree photos in Lightroom and Photoshop while preserving that critical 360 metadata.
Whether you are creating virtual tours for real estate, product 360 spins, or immersive travel photography, getting the editing workflow right makes all the difference. I have tested these techniques across thousands of 360 images from various cameras including Insta360, Ricoh Theta, and DSLR panoramas. By the end of this article, you will have a complete workflow for editing 360 photos without losing the spherical projection that makes them work on VR platforms and social media.
What Are 360-Degree Photos?
Before diving into editing, let me explain what makes 360 photos unique. A 360-degree photo captures a complete spherical view of a scene, from the sky above (zenith) to the ground below (nadir). When you view it on a platform like Facebook or a VR headset, you can look in any direction by dragging or turning your head.
The technical format is called an equirectangular projection. Think of it like peeling an orange and flattening the skin into a rectangle. Your 360 photo looks like a distorted, super-wide panorama with a 2:1 aspect ratio. The top and bottom edges contain the most distortion because they represent the poles of the sphere. This format is what allows platforms to wrap the flat image back into an interactive sphere.
Most 360 cameras save photos as JPEG files with special metadata (XMP GPano data) that tells viewing software how to interpret the image. Some cameras like the Ricoh Theta can shoot in RAW/DNG format, giving you more editing flexibility. DSLR panoramas require manual stitching using software like Photoshop Photomerge or PTGui.
Can You Edit 360 Photos in Lightroom?
Yes, Lightroom can edit 360 photos, but with important limitations. Lightroom treats your 360 image as a flat equirectangular file. You will not see a spherical preview or have 360-specific tools. However, Lightroom works perfectly for global adjustments like exposure, white balance, contrast, and color grading.
The key is understanding what you can and cannot do. Basic tonal adjustments work great. Crop or transform tools will break the spherical projection. And most importantly, your export settings determine whether the 360 metadata survives the editing process.
How to Edit 360 Photos in Lightroom In 2026?
Here is my step-by-step workflow for editing 360-degree photos in Lightroom Classic. This process works for images from any 360 camera or stitched panoramas.
Step 1: Import Your 360 Photo
Import your 360 photo into Lightroom just like any other image. Connect your camera or memory card, or use File > Import Photos and Video. Lightroom will display the equirectangular projection, which looks like an extremely wide panorama with curved distortion at the top and bottom.
If you are working with RAW files from a Ricoh Theta or similar camera, Lightroom applies its default camera profile. This is fine for editing, but some photographers prefer to stitch RAW files first using the manufacturer software before importing to Lightroom.
Step 2: Make Basic Panel Adjustments
Start in the Basic panel with global exposure and tone adjustments. 360 photos often need exposure tweaks because the camera captures such a wide field of view. Here is my typical approach:
Exposure: Adjust the overall brightness. I usually start between -0.3 and +0.3 depending on the scene.
Contrast: Add contrast carefully. Too much can make the distortion at the poles more noticeable.
Highlights: Pull down blown-out highlights, especially in skies. The -50 to -80 range often works well for outdoor 360 shots.
Shadows: Lift shadow detail without going too far. Over-lifting shadows can introduce noise, which becomes very visible in the compressed areas of an equirectangular image.
Whites and Blacks: Set your white and black points to add punch. Hold Alt (Option on Mac) while sliding to see clipping warnings.
Step 3: Correct Colors and White Balance
360 cameras sometimes struggle with white balance because they capture lighting from every direction simultaneously. Use the White Balance selector (eyedropper) to click on a neutral gray area if available. If not, manually adjust Temperature and Tint until the colors look natural.
For vibrance and saturation, go easy. I typically add +10 to +20 Vibrance and leave Saturation at 0 or slightly negative. Remember that oversaturated colors look artificial when viewed in VR.
The HSL panel gives you targeted control over specific colors. I often desaturate cyans and blues slightly to prevent skies from looking unnatural.
Step 4: Apply Lens Corrections
Lightroom may automatically apply lens corrections if it recognizes your 360 camera profile. Check the Lens Corrections panel. For most 360 photos, I leave Enable Profile Corrections unchecked because the camera already corrects lens distortion during stitching.
However, if you notice chromatic aberration (color fringing), enable Remove Chromatic Aberration. This helps clean up color artifacts without affecting the 360 projection.
Step 5: Export with Metadata Preserved
This is the most critical step. Your 360 photo contains special metadata (XMP GPano tags) that tells platforms how to display it as an interactive sphere. Lose this data, and your photo becomes a flat, distorted panorama.
Go to File > Export and use these settings:
File Format: JPEG (most compatible with 360 platforms)
Quality: 85-100 (I use 90 for a good balance of quality and file size)
Color Space: sRGB (required for web and social media)
Image Sizing: Leave unchecked or set a long edge of 6000-8000 pixels
Metadata: Include All Metadata (critical for preserving 360 data)
Click Export and verify the result by opening the file in a 360 viewer or uploading to Facebook. It should display as an interactive spherical image, not a flat panorama.
Batch Editing 360 Photos with Presets
If you shoot multiple 360 photos in the same location, create a preset to apply consistent edits. After editing one photo, click the plus icon in the Presets panel and check the boxes for Basic, Tone Curve, HSL, and other adjustments you want to save.
Apply the preset to all similar photos, then sync settings across selected images using the Sync button in Develop mode. This saves tremendous time for real estate photographers shooting entire properties.
Can You Edit 360 Photos in Photoshop?
Yes, Photoshop offers more flexibility than Lightroom for 360 editing. While Lightroom handles global adjustments well, Photoshop excels at localized edits, content removal, and batch processing with Actions.
Photoshop does not have a native 360 viewing mode in the standard version, but you can make powerful edits to the equirectangular image. The key advantage is Content-Aware technology for removing tripods, fixing stitch lines, and cleaning up problem areas.
How to Edit 360 Photos in Photoshop
Here is my complete Photoshop workflow for 360-degree photos, including advanced techniques like tripod removal.
Step 1: Open Your Equirectangular Image
Open your 360 photo in Photoshop via File > Open. You can also send images directly from Lightroom by right-clicking and choosing Edit In > Edit in Adobe Photoshop. This keeps your file in the Lightroom catalog after saving.
The image opens as a flat equirectangular projection. Do not be alarmed by the distortion at the top and bottom. This is normal and necessary for the 360 format.
Step 2: Basic Color and Exposure Adjustments
Use adjustment layers for non-destructive editing. I typically start with:
Levels or Curves: Set black and white points, adjust midtones
Color Balance or Selective Color: Fine-tune specific color ranges
Hue/Saturation: Adjust overall or targeted color saturation
Work on a new layer for each adjustment. This lets you revisit and tweak settings later without affecting your original image.
Step 3: Remove Unwanted Objects with Content-Aware Fill
One of the biggest advantages of Photoshop is Content-Aware Fill. Use it to remove unwanted elements from your 360 photo.
Select the object using the Lasso or Marquee tool. Go to Edit > Content-Aware Fill. Photoshop analyzes surrounding pixels and generates a fill that blends naturally. Preview the result and adjust sampling area if needed.
For 360 photos, pay attention to the edges of your selection. Content-Aware Fill works best with soft edges that blend into surrounding areas.
Step 4: Remove the Tripod from the Nadir
The nadir (bottom center of a 360 photo) usually shows your tripod or camera mount. Removing it is a common challenge for 360 photographers. Here is my technique:
Navigate to the bottom center of your equirectangular image. The tripod appears as a distorted shape in this area. Create a new layer and select the tripod area with the Lasso tool, adding a 5-10 pixel feather to the selection.
Go to Edit > Content-Aware Fill. Photoshop samples the surrounding floor or ground texture. Adjust the sampling area to exclude any parts of the tripod itself. Click OK to apply.
For stubborn cases, use the Clone Stamp tool on a new layer. Sample clean areas of the floor and paint over the tripod remnants. Use a soft brush and low opacity (30-50%) for natural blending.
Step 5: Fix Visible Stitch Lines
Stitch lines appear where multiple images were combined during panorama creation. They show up as visible seams or color mismatches. To fix them:
Zoom in to 100% and scan your image for problem areas. Stitch lines are most visible in areas with repeating patterns or high contrast edges.
Use the Spot Healing Brush or Clone Stamp to blend stitch lines. Work on a separate layer and use a soft brush slightly larger than the stitch line. Sample from both sides of the seam to create a smooth transition.
For color mismatches, add a Hue/Saturation or Color Balance adjustment layer with a layer mask. Paint on the mask to apply the adjustment only to the problem area.
Step 6: Use Photoshop Actions for Batch Processing
If you need to edit many 360 photos with the same adjustments, record an Action. Go to Window > Actions and click the Create New Action icon. Name your action and click Record.
Perform your typical editing steps: color correction, exposure adjustment, sharpening. When finished, click the Stop button in the Actions panel.
To apply your action to multiple images, use File > Automate > Batch. Select your action, choose a source folder of 360 images, and set a destination folder. Photoshop processes all images automatically.
Step 7: Save and Export
Save your edited 360 photo using File > Save As or File > Export > Export As. For JPEG export:
Format: JPEG
Quality: 85-100
Color Profile: Convert to sRGB
Metadata: Include All (critical for 360 data)
Always verify your exported file in a 360 viewer before publishing. Check that the spherical projection works correctly and that no unwanted artifacts appeared during editing.
How to Preserve 360 Metadata When Editing
The single biggest problem I see photographers face is losing 360 metadata after editing. Without this data, platforms treat your image as a regular flat photo instead of an interactive 360 sphere.
Why Metadata Matters
360 photos contain special XMP metadata tags (GPano tags) that describe the image properties: projection type, field of view, and other parameters. Facebook, Google, VR platforms, and 360 viewers all rely on this data to display your image correctly.
When metadata is lost, your 360 photo becomes a weird, distorted panorama that nobody can interact with. It is frustrating after spending time on careful edits.
Lightroom Metadata Preservation
In Lightroom, always check Include All Metadata in the Export dialog. This preserves the original EXIF and XMP data, including 360-specific tags.
If you edit in Photoshop from Lightroom (Edit In > Edit in Adobe Photoshop), the roundtrip workflow usually preserves metadata. However, always verify the final export.
Photoshop Metadata Preservation
When saving from Photoshop, use File > Save As and check the metadata options in the save dialog. For JPEG, ensure Include XMP and Include EXIF are selected.
Be cautious with File > Export > Save for Web (Legacy). This option strips metadata by default and is not suitable for 360 photos.
Recovering Lost Metadata
If you accidentally lose metadata, you can re-inject it using tools like ExifTool or online metadata editors. You will need to manually add the GPano tags:
GPano:ProjectionType=equirectangular
GPano:UsePanoramaViewer=True
GPano:CroppedAreaImageWidthPixels=[your image width]
GPano:CroppedAreaImageHeightPixels=[your image height]
GPano:FullPanoWidthPixels=[your image width]
GPano:FullPanoHeightPixels=[your image height]
This is tedious, so always preserve metadata during your initial workflow.
Common 360 Photo Editing Problems and Solutions
After editing hundreds of 360 photos, I have encountered every problem imaginable. Here are the most common issues and how to fix them.
Problem: My 360 Photo Looks Flat After Editing
If your exported photo displays as a flat, distorted image instead of an interactive sphere, you lost the 360 metadata. Check your export settings and ensure Include All Metadata is selected. Re-export if necessary, or use ExifTool to re-inject the GPano tags.
Problem: Stitch Lines Are Visible in My Panorama
Visible seams between stitched images usually indicate parallax errors during shooting or imperfect alignment. In Photoshop, use the Clone Stamp or Healing Brush to blend the seams. For severe cases, re-stitch the panorama using Photomerge with the Spherical layout option.
Problem: The Tripod Shows in the Nadir
Use Content-Aware Fill in Photoshop to remove the tripod from the bottom center of your image. Select the tripod area with a feathered selection and let Photoshop sample surrounding pixels. For complex floors with patterns, use the Clone Stamp for more control.
Problem: Colors Look Different After Export
This usually indicates a color space mismatch. Ensure you export in sRGB for web and social media. If editing in ProPhoto RGB or Adobe RGB, convert to sRGB during export to prevent color shifts.
Problem: Batch Editing Takes Too Long
Create a Lightroom preset or Photoshop Action for your standard 360 edits. Apply the preset or action to multiple images at once. For real estate photographers, this reduces editing time from hours to minutes.
Frequently Asked Questions
Can Lightroom edit 360 photos?
Can I edit 360 photos in Photoshop?
How do I edit a 360 degree photo?
How do I preserve 360 metadata when exporting from Lightroom?
How do I remove the tripod from a 360 photo?
Conclusion
Learning to edit 360-degree photos in Lightroom and Photoshop opens up creative possibilities for virtual tours, real estate photography, and immersive storytelling. The key takeaways from this guide are straightforward: treat your 360 photo as an equirectangular image, make global adjustments carefully, and always preserve metadata during export.
Lightroom excels at quick color and exposure corrections with batch processing through presets. Photoshop provides powerful tools for removing tripods, fixing stitch lines, and automating repetitive tasks with Actions. Together, they form a complete toolkit for professional 360 photo editing.
Remember to verify your exports in a 360 viewer before publishing. A quick check prevents the frustration of uploading a flat, broken image to your virtual tour or social media. With practice, editing 360-degree photos becomes second nature, and your results will look polished and professional.
Now grab your 360 camera, shoot some test images, and practice these workflows. The more you edit, the more intuitive the process becomes. Happy shooting.