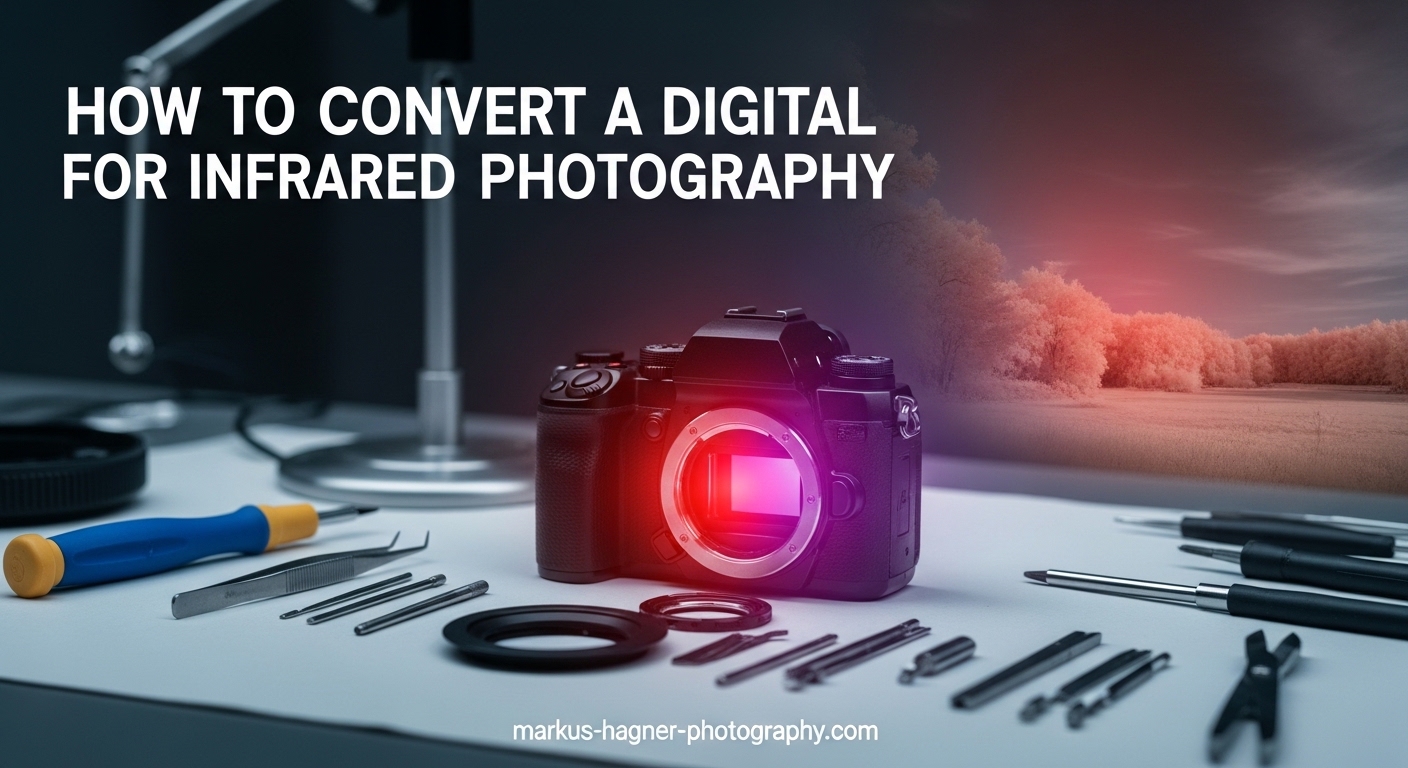
Converting a digital camera for infrared photography opens up an entirely new world of creative possibilities. In 2026, more photographers than ever are exploring this fascinating technique that transforms ordinary scenes into ethereal, dreamlike images. This guide will walk you through everything you need to know about infrared camera conversion, from understanding the science behind it to choosing the right filter and finding a professional service.
I spent three months researching infrared photography before taking the plunge with my first converted camera. The results completely changed how I see the world through my lens. White foliage against dark skies, glowing skin tones, and otherworldly landscapes become possible once you remove the invisible barrier blocking infrared light from your sensor.
Whether you are a beginner curious about this technique or an experienced photographer ready to dedicate a camera body to infrared work, this guide covers all the essential information you need to make informed decisions.
Understanding Infrared Photography
Infrared photography captures light wavelengths beyond what human eyes can see. The visible light spectrum ranges from approximately 380nm to 700nm. Infrared light begins at around 700nm and extends into the near-infrared region up to about 1200nm. Digital camera sensors can actually detect these infrared wavelengths quite well, but manufacturers intentionally block them.
Your camera contains something called a hot mirror or IR-blocking filter. This special piece of glass sits directly in front of the sensor. Its job is to reflect infrared light away while allowing visible light to pass through. Without this filter, your photos would look strange because the sensor would capture both visible and infrared light simultaneously.
When you convert a digital camera for infrared photography, you remove this hot mirror filter. Technicians replace it with a filter that blocks visible light while allowing infrared wavelengths to pass through. This modification lets your camera see the world in infrared, producing those distinctive images where green foliage appears white or glowing, and blue skies turn dark.
Infrared Filter Options and Wavelengths
Choosing the right infrared filter is one of the most important decisions you will make. Different wavelengths produce dramatically different results. Understanding these options helps you select the perfect filter for your creative vision.
590nm Filter: The False Color Specialist
The 590nm filter sits at the edge of the visible red spectrum. It allows some visible red light to pass through along with infrared wavelengths. This combination creates the famous false color infrared effect. Yellow trees against blue-purple skies produce striking, surreal images that look almost psychedelic.
Photographers who enjoy extensive post-processing often prefer 590nm. The captured images contain color information you can manipulate through channel swapping. Swapping the red and blue channels creates the classic gold sky and blue foliage look popular in many infrared photographs.
665nm Filter: The Versatile Compromise
The 665nm filter offers a middle ground between pure infrared and the visible spectrum. It still produces some false color effects, but they are subtler than 590nm. You get pinkish-white foliage and slightly lighter skies.
This wavelength works well for photographers who want flexibility. You can process images for false color effects or convert them to black and white. The 665nm filter captures enough infrared light for dramatic monochrome images while preserving some color information for creative editing.
720nm Filter: Classic Black and White Infrared
The 720nm filter represents the classic choice for infrared photography. It blocks virtually all visible light, allowing only pure infrared wavelengths to reach the sensor. This produces the timeless white foliage and dark sky look that defined infrared photography for decades.
Images from a 720nm converted camera work beautifully in black and white. The strong contrast between glowing vegetation and dark skies creates dramatic landscape photographs. Portrait photographers also favor this wavelength for its flattering skin tones and the way it smooths skin texture.
830nm Filter: Deep Infrared Photography
The 830nm filter produces the most dramatic infrared effects. It captures only deep infrared wavelengths, resulting in extremely high contrast images. Foliage appears brilliantly white while skies turn nearly black.
This wavelength requires longer exposure times than the others. Your converted camera will need higher ISO settings or slower shutter speeds to capture enough light. The results are worth it for photographers seeking maximum drama in their infrared work.
Full Spectrum Conversion: Maximum Flexibility
Full spectrum conversion removes the hot mirror without installing a replacement filter. This modification allows your camera to capture everything from ultraviolet through visible light to infrared wavelengths. You gain maximum flexibility but lose the convenience of a dedicated infrared camera.
With full spectrum conversion, you must use external filters on your lens to control which wavelengths reach the sensor. A UV/IR cut filter blocks ultraviolet and infrared, letting you shoot normal visible light photos. Adding an infrared pass filter restricts the camera to IR wavelengths. This versatility appeals to photographers who want one camera body to handle multiple specialized applications.
How to Convert a Digital Camera for Infrared Photography
Converting a digital camera for infrared photography involves precise technical work on sensitive electronic components. The process requires specialized tools, a clean environment, and extensive knowledge of camera construction. Understanding what happens during conversion helps you appreciate why professionals strongly recommend against attempting this yourself.
The Conversion Process Explained
Step 1: Complete disassembly of the camera body. Technicians must remove the back panel, LCD screen, circuit boards, and eventually access the sensor assembly. Each screw and ribbon cable requires careful tracking to ensure proper reassembly.
Step 2: Removal of the sensor stack. The sensor sits within a complex assembly that includes the hot mirror filter, low-pass filter, and protective glass. This entire unit must come out without damaging delicate ribbon cables or scratching the sensor surface.
Step 3: Hot mirror removal. The IR-blocking filter attaches to the sensor stack with special adhesive. Removing it requires careful heating and precise mechanical work. Any damage to the underlying low-pass filter ruins the sensor assembly.
Step 4: Filter installation. The new infrared pass filter gets installed in place of the hot mirror. This requires perfect alignment and dust-free handling. Even tiny particles between the filter and sensor cause noticeable spots in every image.
Step 5: Reassembly and calibration. After reinstalling the sensor, technicians must recalibrate autofocus systems. Infrared light focuses at a different point than visible light, so the camera needs adjustment to focus correctly.
Why DIY Conversion Is Dangerous
Several serious risks make DIY infrared camera conversion extremely dangerous. Camera flash units contain high-voltage capacitors that can deliver lethal electrical shocks even when batteries are removed. These capacitors hold charge for weeks after the last use.
Sensors and their filters are incredibly fragile. A single scratch means replacing the entire sensor assembly, which often costs more than the camera itself. Static electricity can destroy sensitive electronic components instantly.
The calibration process requires specialized equipment most photographers do not own. Without proper focus adjustment, your converted camera will never achieve sharp images. Professional services include this calibration as part of their standard workflow.
Forum discussions from photographers who attempted DIY conversions reveal a common story. Most started with confidence based on online tutorials but ended with destroyed cameras. The money saved by avoiding professional services disappears quickly when you need to buy replacement equipment.
Professional Conversion Services
Professional conversion services handle the technical complexity for you. These specialized companies convert thousands of cameras annually and have developed precise workflows that ensure consistent, high-quality results.
What to Look For in a Conversion Service
Experience matters significantly in infrared conversion. Look for companies with years of operation and thousands of successful conversions. Check customer reviews specifically mentioning the camera model you plan to convert.
Warranty coverage protects your investment. Reputable services offer warranties ranging from six months to lifetime coverage on their workmanship. This guarantee demonstrates confidence in their conversion quality.
Turnaround time varies between services. Most complete conversions within two to four weeks after receiving your camera. Some offer rush service for an additional fee if you need your camera back sooner.
Cost Considerations
Professional infrared camera conversion typically costs between $250 and $450 depending on your camera model and the filter you choose. Full spectrum conversions usually fall at the lower end since they do not require installing a replacement filter. Specific wavelength conversions cost more due to the precision glass filter installation.
Mirrorless cameras generally cost less to convert than DSLRs because their simpler construction requires less disassembly time. Older camera models sometimes cost more if replacement parts are scarce or if the service has limited experience with that specific model.
Shipping costs add to the total expense. You will need insured shipping both ways, which typically adds $50 to $100 to the overall cost. Factor this into your budget when planning your conversion.
Best Cameras for Infrared Conversion
Not all cameras work equally well for infrared conversion. Some models produce better results due to their sensor design, while others have known issues that make them poor candidates. Choosing the right camera maximizes your investment and ensures satisfying results.
Beginner-Friendly Options
Older mirrorless cameras make excellent choices for first-time infrared conversions. The Sony NEX series, Olympus OM-D E-M10 models, and Panasonic Lumix G series offer compact bodies with excellent sensors at affordable used prices. These cameras typically sell for $200 to $400 used, making the total conversion investment reasonable.
Entry-level DSLRs like the Canon Rebel series or Nikon D3000 series also convert well. These cameras are widely supported by conversion services and have extensive online resources for infrared photography techniques.
Mirrorless Advantages
Mirrorless cameras offer several advantages for infrared photography. Their electronic viewfinders show you the infrared image in real-time before you shoot. This live preview makes composition much easier than using an optical viewfinder with an external filter.
The simpler construction of mirrorless cameras generally means faster, less expensive conversions. Fewer mechanical parts reduce the risk of something going wrong during the process. The lighter weight also makes these cameras easier to carry during long infrared shooting sessions.
What to Avoid
Some camera models have known issues with infrared conversion. Cameras with sensor-shift image stabilization can develop calibration problems after conversion. While professional services can usually handle these, the added complexity increases risk.
Very new camera models sometimes lack conversion support initially. Services need time to develop procedures for new camera designs. Check with your chosen conversion service about support for specific models before purchasing a camera for conversion.
Cameras with fixed lenses generally cannot be converted because the filter sits behind the lens assembly. Most point-and-shoot cameras fall into this category. Stick to interchangeable lens cameras for conversion projects.
Shooting Techniques and Tips
Infrared photography requires some adjustments to your normal shooting workflow. Understanding these differences helps you capture stunning images from your first converted camera outing.
White Balance Settings
Your camera’s automatic white balance will not work correctly after infrared conversion. You need to set a custom white balance for every shooting session. Most photographers use green grass or foliage as their white balance target.
Setting custom white balance is essential because infrared light behaves differently than visible light. Without proper white balance, your images will have strong color casts that are difficult to correct in post-processing. Take the time to set this correctly before shooting.
Exposure Considerations
Infrared light meters differently than visible light. Your camera’s light meter may not provide accurate readings, especially in mixed lighting conditions. Many infrared photographers shoot in manual mode with exposure bracketing to ensure they capture usable images.
Higher wavelength filters like 830nm require more exposure compensation. You might need to increase ISO or use slower shutter speeds to capture enough light. A sturdy tripod becomes essential when shooting with deep infrared filters in anything but bright sunlight.
Focus Adjustments
Infrared light focuses at a different point than visible light. Professional conversion services calibrate your camera’s autofocus to account for this shift. However, you may still need to fine-tune focus for critical shots.
Live view focusing works reliably with converted cameras because the sensor sees exactly what it will capture. Use live view and magnify the preview for precise manual focus when shooting landscapes or other static subjects.
Lens Hot Spot Issues
Some lenses produce bright spots in the center of infrared images. This hot spot effect varies by lens design and aperture setting. Certain lenses are notorious for hot spots while others work beautifully for infrared photography.
Research lens compatibility before investing in glass for your converted camera. Online forums and conversion service websites often maintain lists of lenses that perform well for infrared work. Shooting at wider apertures sometimes reduces hot spot severity.
Post-Processing Workflow
Post-processing plays a crucial role in infrared photography. Raw files from converted cameras contain unique color information that you can manipulate for dramatic effects. Developing an efficient workflow helps you process images consistently.
Channel Swapping for False Color
Channel swapping swaps the red and blue color channels in your image. This simple adjustment transforms the typical pinkish-white foliage and blue sky into the classic golden sky and blue-white trees. Most photo editing software can perform this operation.
The Channel Mixer in Photoshop or similar tools in other editors gives you precise control over the color transformation. Experiment with different mixing ratios to find the look that matches your creative vision. Save your favorite settings as presets for consistent results.
Black and White Conversion
Converting infrared images to black and white creates dramatic results. The extreme tonal separation between foliage and sky produces images with impact. Use the channel mixer or black and white adjustment layers to control which color information translates to specific gray tones.
Infrared black and white images often benefit from increased contrast. The glowing foliage against dark skies creates natural contrast that you can enhance further in post-processing. Be careful not to clip highlights or shadows completely.
Software Recommendations
Adobe Photoshop and Lightroom handle infrared files well with their standard editing tools. Capture One also supports infrared workflows with excellent color editing capabilities. Some photographers use specialized plugins designed specifically for infrared photography.
Free alternatives like GIMP and RawTherapee can process infrared images effectively. These programs offer channel swapping and color adjustment tools comparable to commercial software. The specific software matters less than understanding how to manipulate the unique color information in infrared files.
Frequently Asked Questions
How to make a digital camera infrared?
You convert a digital camera to infrared by removing the internal IR-blocking filter (hot mirror) and replacing it with an IR-pass filter. This process requires professional service due to the technical complexity and safety risks involved. Technicians disassemble the camera, remove the sensor, replace the filter, and recalibrate the autofocus system.
Can you take infrared photos with a digital camera?
Standard digital cameras can capture some infrared light using external filters like the Hoya R72, but exposure times become extremely long and composition is difficult. Converting a camera by removing the internal IR-blocking filter allows normal exposure times and live view composition.
Can we convert a normal camera to a thermal camera?
No, infrared photography conversion is different from thermal imaging. Infrared camera conversion captures near-infrared light (700-1200nm), which is reflected light. Thermal cameras detect far-infrared radiation (heat) at much longer wavelengths (8000-15000nm) and require completely different sensor technology.
Why convert camera to infrared?
Converting a camera to infrared eliminates the need for long exposures with external filters, enables live view composition, allows handheld shooting, and produces unique creative effects impossible with standard photography. It opens up new artistic possibilities with glowing foliage, dark skies, and ethereal skin tones.
How much does infrared camera conversion cost?
Professional infrared camera conversion typically costs between $250 and $450 depending on your camera model and filter choice. Full spectrum conversions usually cost less than specific wavelength conversions. Additional costs include insured shipping both ways, typically adding $50 to $100 to the total.
Can I still use my camera for normal photography after conversion?
No, once converted for a specific infrared wavelength, the camera cannot capture normal color photos. The internal filter blocks visible light. Full spectrum conversions allow normal photography by adding a UV/IR cut filter to the lens, but require filter changes for different types of shooting.
Conclusion
Learning how to convert a digital camera for infrared photography opens up incredible creative opportunities. The process involves removing your camera’s internal IR-blocking filter and replacing it with glass that passes infrared wavelengths. While DIY tutorials exist online, the technical complexity and serious safety risks make professional conversion the only sensible choice for most photographers.
Choose your filter wavelength based on the look you want to achieve. The 590nm filter produces stunning false color images, while 720nm delivers classic black and white infrared. Full spectrum conversion offers maximum flexibility if you do not mind using external filters. Consider starting with an affordable used mirrorless camera for your first conversion project.
Once you have your converted camera, take time to learn the unique shooting techniques infrared photography requires. Set custom white balance, bracket your exposures, and research which lenses perform best. The otherworldly images you will create make the learning curve worthwhile. Infrared photography has transformed how I see the world, and it can do the same for you.