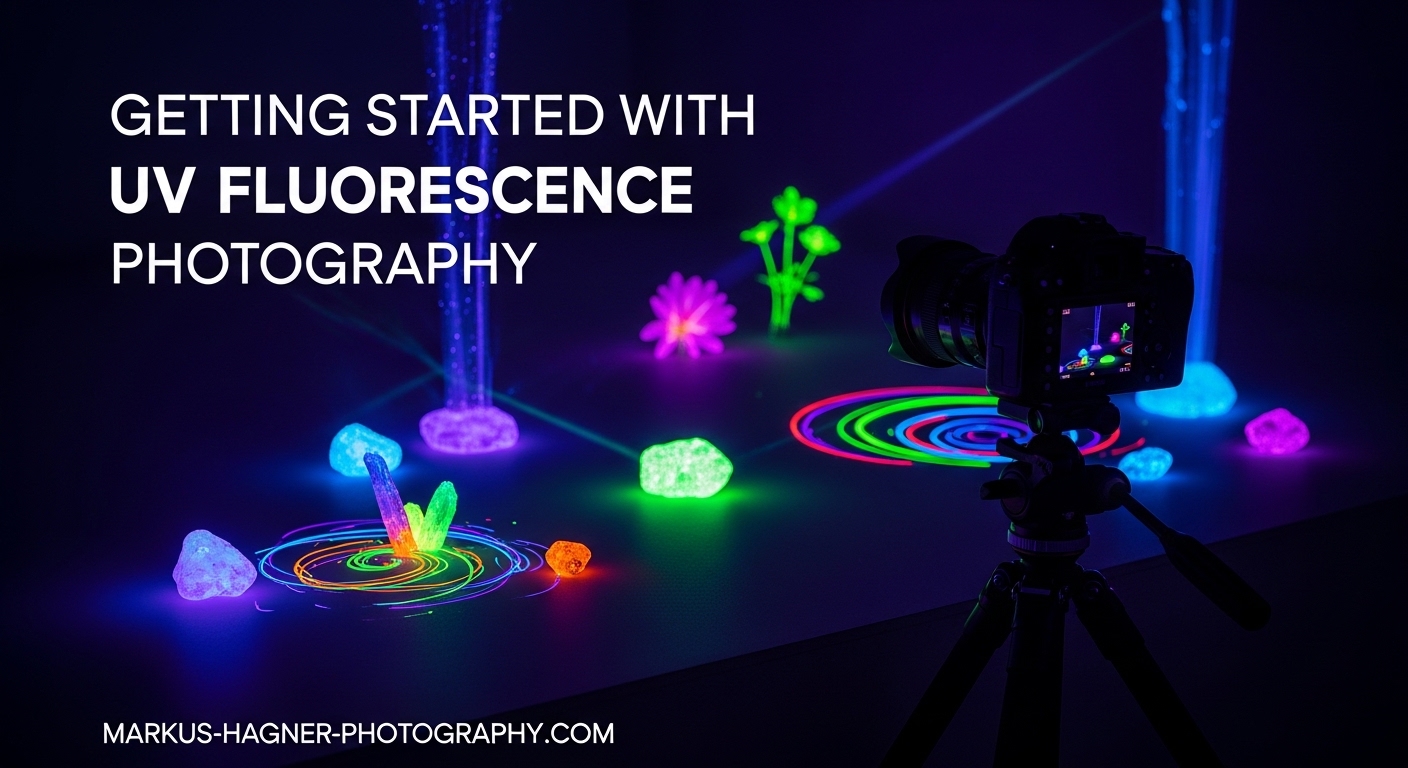
UV fluorescence photography reveals a hidden world of glowing colors that exist all around us but remain invisible to the naked eye. This specialized technique captures the visible light that certain objects emit when illuminated with ultraviolet light, transforming ordinary flowers, minerals, and everyday items into spectacular displays of neon blues, electric greens, and vibrant reds. Whether you are a macro photography enthusiast looking to expand your creative horizons or a curious beginner wanting to explore ultraviolet-induced visible fluorescence (UVIVF), this guide will walk you through everything you need to get started with UV fluorescence photography.
Our team has spent countless nights experimenting with different UV light sources, camera settings, and subjects to develop a practical workflow that produces consistent results. We will cover the essential equipment, critical safety precautions, proper camera setup, and the techniques that will help you capture stunning fluorescent images on your very first attempt.
What is UV Fluorescence Photography?
UV fluorescence photography captures the visible light emitted by certain materials when they absorb ultraviolet energy and re-emit it at longer wavelengths. Unlike standard photography that records reflected light, this technique records the glow produced when UV photons excite molecules in fluorescent subjects. The result is an image showing colors and patterns that simply do not exist under normal lighting conditions.
It is important to distinguish UV fluorescence from UV reflective photography. UV reflective photography captures ultraviolet light that bounces off subjects using specialized equipment and camera modifications. UV fluorescence photography, on the other hand, captures the visible glow that subjects produce when excited by UV light. Your standard camera sensor can record this visible fluorescence without any modifications, making it far more accessible to beginners.
The phenomenon of fluorescence occurs naturally in many flowers, which use UV patterns to guide pollinators. Minerals like fluorite, calcite, and willemite also exhibit dramatic fluorescence under UV light. Even common household items like tonic water (thanks to quinine), laundry detergent, and certain plastics can produce surprising fluorescent effects.
Equipment Needed for UV Fluorescence Photography
Getting started with UV fluorescence photography requires specific equipment, but you do not need to invest in expensive specialized cameras. Your existing DSLR or mirrorless camera will work perfectly. The key investment is a proper UV light source and some essential accessories.
UV Light Source: 365nm vs 395nm
The most critical piece of equipment is your UV light source, and here is where wavelength matters significantly. UV lights typically come in two common wavelengths: 365nm and 395nm. The difference between these options dramatically affects your results.
365nm UV lights produce purer ultraviolet output with minimal visible light contamination. This wavelength excites fluorescent subjects more effectively and produces cleaner, more vibrant fluorescence. You will see stronger colors and better contrast in your images. The downside is that quality 365nm torches cost more, typically ranging from $35 to $100.
395nm UV lights are cheaper and widely available, but they emit more visible purple light along with the UV. This visible light contamination can wash out fluorescence and create a purple cast in your images. While you can still capture fluorescence with 395nm lights, the results will not be as dramatic or clean.
For beginners serious about UV fluorescence photography, we strongly recommend investing in a 365nm UV torch. The Convoy S2+ with UV emitter offers excellent value at around $25 to $35 and produces reliable results. Brands like Alonefire and Darkbeam also offer quality options at various price points.
Camera and Lens Requirements
Any modern DSLR or mirrorless camera will work for UV fluorescence photography. You do not need modified sensors or special UV lenses. Since fluorescence is visible light, your camera’s standard sensor captures it without issues.
A macro lens significantly enhances your results because many fluorescent subjects are small flowers, insects, or mineral specimens. Macro lenses allow you to fill the frame with your subject and capture fine details in the fluorescent patterns. If you do not own a macro lens, extension tubes on a standard lens provide a budget-friendly alternative.
Essential Accessories
A sturdy tripod is absolutely essential for UV fluorescence photography. Because fluorescence is relatively weak, you will be working with long exposures ranging from several seconds to 30 seconds or more. Any camera movement during these exposures will blur your images.
A remote shutter release or cable release prevents camera shake when triggering the shutter. If you do not have one, your camera’s self-timer works as an alternative. Set it to a 2 or 10 second delay to allow any vibrations to settle before the exposure begins.
UV protection glasses are not optional. We will cover safety in detail shortly, but add these to your equipment list now. Look for glasses rated to block UV-A, UV-B, and UV-C radiation.
Safety Considerations for UV Photography
Before we discuss camera settings and techniques, we need to address safety. Ultraviolet light can cause serious eye damage and skin injury with prolonged exposure. Taking proper precautions protects your health and allows you to enjoy this fascinating photography genre for years to come.
Eye Protection
Never look directly at your UV light source, even briefly. The concentrated UV output can cause photokeratitis, essentially a sunburn on your cornea. Symptoms include pain, redness, and temporary vision loss. Repeated exposure increases your risk of cataracts and other eye conditions.
Always wear UV-rated safety glasses when setting up and adjusting your UV lights. Polycarbonate safety glasses with 99.9 percent UV protection are affordable and effective. Put them on before turning on your UV light and keep them on until you turn the light off.
Skin Protection
Prolonged UV exposure can burn your skin just like sunlight. When shooting for extended periods, wear long sleeves and gloves to protect exposed skin. This is especially important when holding subjects close to your UV light source during composition.
Keep your UV torch pointed away from your body and face at all times. When not actively lighting your subject, turn the light off or point it at a non-reflective surface.
Safe Handling Practices
Never aim UV lights at other people or pets. The concentrated beam can cause eye damage even at a distance. Store your UV equipment in a safe place away from children who might accidentally turn on the lights and look directly at them.
Some photographers report that UV light can cure certain finishes and varnishes. Be cautious when photographing instruments, artwork, or finished wood items for extended periods, as the UV exposure might affect these surfaces.
Getting Started with UV Fluorescence Photography: Setup Guide
Now that you understand the equipment and safety requirements, let us walk through the complete setup process for your first UV fluorescence photography session.
Step 1: Find a Dark Location
Complete darkness is essential for UV fluorescence photography. Any ambient light will compete with the weak fluorescence and reduce contrast in your images. An interior room with blackout curtains works well. A garage or basement with no windows is even better.
If you must shoot outdoors, plan your session for a moonless night far from city lights. However, indoor shoots give you far more control over your environment and are much easier for beginners.
Step 2: Set Up Your Tripod and Camera
Position your tripod so your camera faces your shooting surface at a comfortable working height. A table or bench at waist height works well for most subjects. Ensure your tripod is stable and will not shift during long exposures.
Mount your camera and compose your shot roughly. You will refine the composition after setting up your light source. If you are using a macro lens, set it to the magnification you want before continuing.
Step 3: Prepare Your Background
A black or very dark background makes fluorescence pop dramatically. Black velvet or black felt works excellently because these materials absorb nearly all light and do not fluoresce under UV. You can also use black poster board or even a black t-shirt in a pinch.
Some fabrics and papers fluoresce under UV light, which can create unwanted color casts. Test your background material before your shoot by hitting it with your UV torch in a dark room.
Step 4: Position Your UV Light Source
Place your UV torch so it illuminates your subject evenly from the side or slightly above. Avoid pointing the light directly at your camera lens, as this can cause flare and reduce contrast. A 45-degree angle to your subject typically works well.
You can handhold your UV light during the exposure to paint light across your subject, or use a small stand or clamp to hold it in position. Painting with light gives you more control over the lighting direction and allows you to build up exposure over multiple passes.
Step 5: Prepare Your Subject
Test your subject under UV light before setting up your shot. Not all flowers, minerals, or objects fluoresce strongly. Fresh flowers typically show better fluorescence than dried specimens. White and pale-colored flowers often produce the most dramatic results.
Position your subject against your dark background and check the fluorescence with your UV torch. Look for interesting patterns and colors before committing to your composition.
Camera Settings and Techniques
With your setup complete, it is time to configure your camera for UV fluorescence photography. These settings will help you capture the weak fluorescent glow with proper exposure and sharp focus.
Shoot in Manual Mode
Manual mode gives you complete control over aperture, shutter speed, and ISO. Your camera’s meter will not accurately read UV fluorescence, so automatic modes will produce unreliable results. Switch to manual mode and use your histogram to evaluate exposure.
Aperture Settings
Choose an aperture that provides adequate depth of field for your subject. For macro work, start around f/11 to f/16. Smaller apertures (higher f-numbers) increase depth of field but require longer exposures. If your subject is relatively flat, f/8 may provide sufficient depth of field while allowing shorter exposure times.
Avoid apertures smaller than f/22, as diffraction will soften your images. Find the balance between depth of field and image sharpness that works for your specific subject.
Shutter Speed and Long Exposure
UV fluorescence is weak compared to normal lighting, so expect long exposure times. Start with 10 to 15 seconds and check your results. Some subjects may require 30 seconds or longer to capture sufficient fluorescence.
Use your camera’s histogram to evaluate exposure. You want data across the tonal range without clipping the highlights. Fluorescent subjects can have very bright spots that blow out easily, so watch for overexposure.
ISO Settings
Keep your ISO as low as possible to minimize noise. ISO 200 to 400 is a good starting point for most cameras. Higher ISO values let you use shorter exposures but introduce noise that becomes very visible in dark backgrounds.
Modern cameras handle higher ISOs better than older models, so experiment with your specific gear to find the noise threshold you find acceptable.
White Balance
Set your white balance to daylight (around 5500K) or shoot in RAW and adjust white balance in post-processing. RAW format is essential because it gives you maximum flexibility to adjust white balance and exposure after the fact.
Fluorescence colors often look best with cooler white balance settings, but this is a creative choice. Experiment to find the look you prefer.
Focusing in the Dark
Focusing presents a unique challenge because your viewfinder is nearly dark. Turn on your UV light and illuminate your subject while focusing. Use your camera’s live view with focus peaking if available. Manual focus typically works better than autofocus in these conditions.
Take a test shot at a wider aperture to check focus, then stop down to your working aperture for the final exposure. Some photographers use a flashlight briefly to focus, then turn off all lights except the UV source for the actual exposure.
Finding Fluorescent Subjects
Half the fun of UV fluorescence photography is discovering what glows. Many common subjects produce surprising results under UV light.
Flowers are the most accessible subjects for beginners. Sunflowers, daisies, dandelions, and many white flowers show dramatic fluorescence. The patterns often differ significantly from what you see in visible light, revealing UV nectar guides that attract pollinators.
Minerals and rocks can produce spectacular fluorescence. Calcite, fluorite, willemite, and scheelite are known for strong fluorescence. Rock and mineral shops often sell fluorescent specimens, or you can search for rocks in your area and test them with your UV light.
Insects and plants sometimes fluoresce unexpectedly. Scorpions are famous for glowing blue-green under UV light. Lichens, certain fungi, and some leaves also show fluorescence.
Household items offer creative possibilities. Tonic water glows bright blue thanks to quinine. Laundry detergents, certain plastics, and some papers contain optical brighteners that fluoresce strongly. These everyday subjects are perfect for practice sessions.
Troubleshooting Common Issues
When starting out, you may encounter several common problems. If you see no fluorescence in your images, your UV light may emit too much visible light. Try a purer 365nm source or add a UV-pass filter to block visible light contamination.
Overexposure occurs when bright fluorescent spots blow out. Reduce your exposure time or move your UV light farther from the subject. For motion blur, ensure your tripod is stable and use a remote shutter release. Focus issues typically resolve with careful manual focusing using live view.
Frequently Asked Questions About UV Fluorescence Photography
Which UV light is better, 365nm or 395nm?
365nm UV lights produce better fluorescence photography results. This wavelength generates purer UV output with minimal visible light contamination, resulting in cleaner images with more vibrant colors. 395nm lights are cheaper but emit visible purple light that washes out fluorescence and adds unwanted color casts to your photos.
Can I use my phone as a UV camera?
Standard smartphone cameras cannot capture true UV photography because the built-in UV filters block ultraviolet light. However, phones work fine for UV fluorescence photography because the fluorescence is visible light. You can photograph fluorescent subjects with your phone, though you will need a UV light source and long exposure apps for best results.
What is the best UV nm for fluorescence photography?
365nm is the best UV wavelength for fluorescence photography. This wavelength falls in the UV-A spectrum and effectively excites most fluorescent materials while producing minimal visible light contamination. Shorter wavelengths like 254nm (UV-C) produce stronger fluorescence but require special equipment and pose greater safety risks.
Is a diamond fake if it glows under UV light?
No, fluorescence under UV light does not indicate a fake diamond. Approximately 25 to 35 percent of natural diamonds exhibit some degree of fluorescence when exposed to UV light, typically glowing blue. Fluorescence is a natural characteristic and does not affect a diamond’s authenticity. Some people actually prefer fluorescent diamonds for their unique appearance.
Conclusion
UV fluorescence photography opens up an invisible world of color that most people never experience. With a quality 365nm UV light source, basic camera equipment, and proper safety precautions, you can capture stunning images of glowing flowers, minerals, and everyday objects. The technique requires patience and experimentation, but the results are worth the effort.
Start with simple subjects like white flowers or tonic water to practice your technique. Master the camera settings and develop your workflow before tackling more challenging subjects. As you gain experience, you will discover fluorescent subjects everywhere and develop your own creative approach to this fascinating photography genre.
Remember that safety always comes first. Protect your eyes with UV-rated glasses and limit your exposure to ultraviolet light. With proper precautions and consistent practice, UV fluorescence photography will become a rewarding addition to your photographic repertoire.