I remember the first time I truly understood the power of shadows in photography. It was a crisp autumn morning, and I was shooting in an abandoned warehouse when I noticed how the morning light was casting these incredible geometric patterns through the broken windows. In that moment, I realized I’d been ignoring one of photography’s most powerful tools. Shadows aren’t just the absence of light—they’re storytellers, mood-setters, and artistic elements that can transform ordinary scenes into extraordinary works of art.
After years of experimenting with shadow photography techniques, I’ve discovered that mastering shadows is like learning a new language. It opens up endless creative possibilities and allows you to see the world through an entirely different lens. In this comprehensive guide, I’ll share everything I’ve learned about creative shadow photography, from the technical fundamentals to advanced artistic techniques that will help you develop your unique vision.
Understanding Shadows in Photography
Shadows are more than just dark areas in your photographs—they’re the yin to light’s yang, creating the contrast and depth that make images pop. I’ve learned that understanding shadows starts with grasping their fundamental nature: shadows occur when an object blocks light from reaching a surface. The quality, direction, and intensity of these shadows depend entirely on your light source and how you position your subjects.
The Science Behind Shadows
When I first started exploring shadow photography, I was fascinated by how shadows behave differently based on light quality. Hard shadows, created by small, direct light sources like the midday sun or a bare flash, have sharp, well-defined edges. These shadows are perfect for creating dramatic, high-contrast images that emphasize texture and form.
Soft shadows, on the other hand, are produced by larger, diffused light sources like an overcast sky or a softbox. These shadows have gradual transitions and are ideal for more subtle, moody images. I discovered that understanding this distinction is crucial for controlling the mood of your photographs.
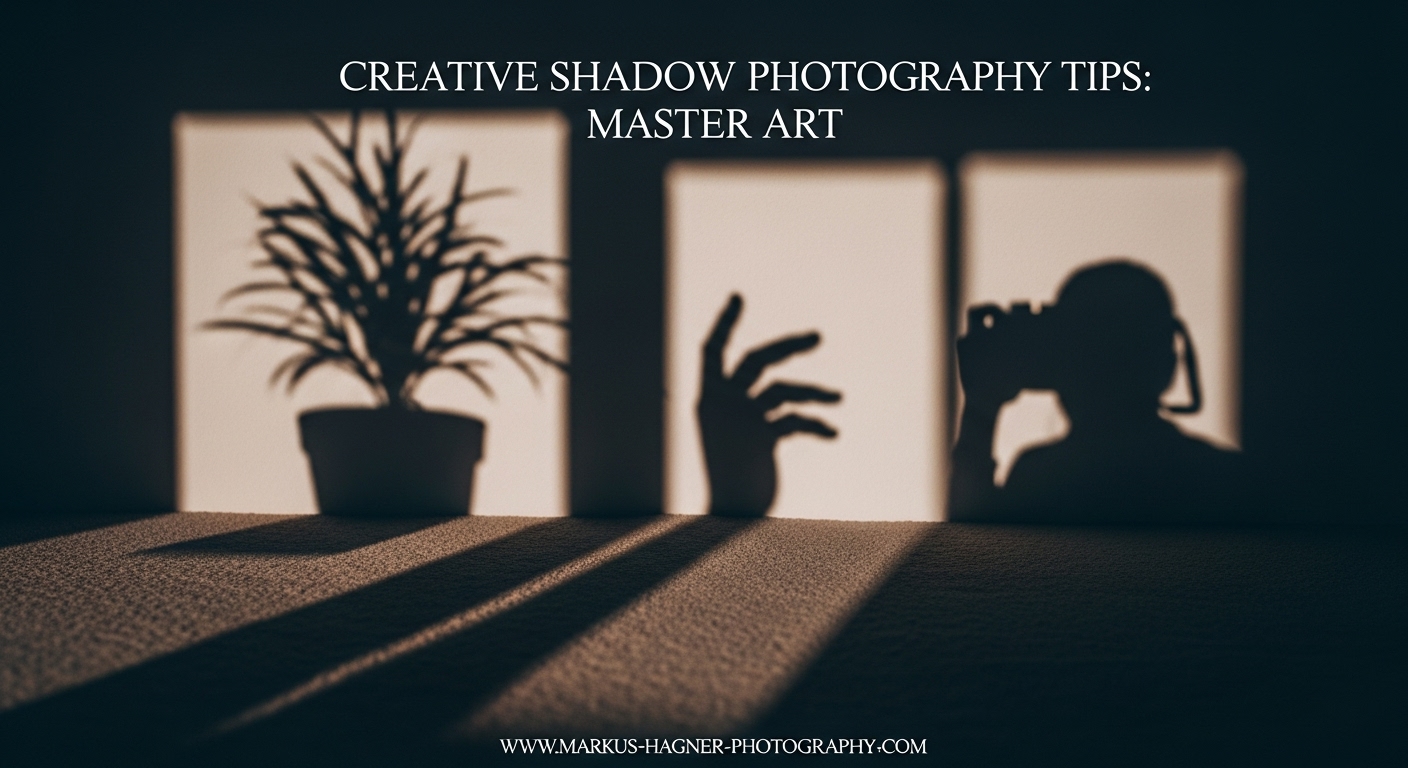
Why Shadows Matter in Your Images
I can’t tell you how many times I’ve seen potentially great photos fall flat because the photographer didn’t consider the shadows. Shadows add depth to your images, creating a three-dimensional feel in a two-dimensional medium. They guide the viewer’s eye, create balance, and establish mood. In my experience, images without shadows often look flat and lifeless, while those with intentional shadow play feel dynamic and engaging.
One of my favorite discoveries was how shadows can simplify complex scenes. By using shadows to hide distracting elements, you can create cleaner, more powerful compositions. I once shot a cluttered urban scene at golden hour, and the long shadows transformed the chaos into a beautiful abstract pattern that became one of my best-selling prints.
Essential Gear for Shadow Photography
You don’t need a fortune in equipment to create stunning shadow photography, but having the right tools can definitely expand your creative possibilities. I’ve built my shadow photography kit over years of experimentation, and I’ll share what’s actually worth investing in.
Camera Bodies That Excel in Shadow Work
I’ve shot shadow photography with everything from smartphone cameras to professional DSLRs, and I’ve learned that almost any modern camera can capture great shadows if you know how to use it. However, some features make the process easier:
Full-frame cameras generally perform better in high-contrast situations because of their superior dynamic range. I use a Sony A7III for most of my shadow work, and I love how it handles the deep blacks and bright highlights that are common in shadow photography.
Mirrorless cameras are fantastic for shadow photography because their electronic viewfinders show you exactly how your exposure will look, including the shadows. This real-time feedback is invaluable when you’re trying to fine-tune your shadow effects.
DSLRs still have their place, especially if you’re working with studio lights. I keep a Canon 5D Mark IV in my kit for studio sessions because it handles artificial light beautifully and gives me that classic DSLR feel.
Lenses That Bring Shadows to Life
The lens you choose can dramatically affect how shadows appear in your images. Through years of trial and error, I’ve found that certain lenses work better for shadow photography than others:
Prime lenses are my go-to for shadow work. A 50mm f/1.8 is perfect for capturing sharp shadows with beautiful bokeh. I discovered that prime lenses force you to move around and compose more thoughtfully, which often leads to more interesting shadow interactions.
Wide-angle lenses (24-35mm) are excellent for environmental shadow photography where you want to show the relationship between your subject and its shadow. I love using my 24mm for architectural shadow work, as it can capture those long, dramatic shadows that buildings cast at golden hour.
Macro lenses open up a whole new world of shadow photography. I’ve spent countless hours with my 100mm macro lens exploring the intricate shadows created by small objects like leaves, flowers, and household items. The level of detail you can capture is mind-blowing.
Lighting Equipment for Shadow Control
While natural light is wonderful, having control over your light sources gives you unlimited creative possibilities. Here’s what I keep in my lighting kit:
Speedlights and flashes are essential for creating dramatic shadows. I use Godox TT600 speedlights because they’re affordable, reliable, and compatible with various triggers. The key is to use them without modifiers when you want hard shadows, or with softboxes when you need softer shadows.
Continuous lights are perfect for seeing exactly how your shadows will fall before you take the shot. I have a set of LED panels that I use for product photography and portraits. They’re especially great for beginners because you can see the shadow effects in real-time.
Light modifiers give you precise control over shadow quality. My kit includes softboxes, umbrellas, grids, and snoots. I discovered that grids are fantastic for creating focused, dramatic shadows, while softboxes are perfect for the gentle, flattering shadows needed in portrait work.
Reflectors are unsung heroes in shadow photography. I use a 5-in-1 reflector to bounce light into shadow areas, creating more balanced images. The silver side gives me a strong, cool fill light, while the gold side adds warmth to the shadows.
Mastering Light Sources
Understanding and controlling your light sources is perhaps the most crucial aspect of shadow photography. I’ve spent years studying how different types of light create different shadow effects, and I’m excited to share these insights with you.
Natural Light Techniques
Natural light is my favorite starting point for shadow photography because it’s free, abundant, and constantly changing. Here’s how I make the most of it:
Golden hour (the first hour after sunrise and the last hour before sunset) is magical for shadow photography. The low angle of the sun creates long, dramatic shadows that add depth and interest to your images. I’ve captured some of my best shadow work during these times, especially in urban environments where buildings cast fascinating geometric patterns.
Midday sun is often avoided by photographers, but I’ve learned to embrace it for shadow photography. The harsh, direct light creates sharp, defined shadows that are perfect for high-contrast black and white images. I discovered that positioning subjects to create interesting shadow shapes can turn the challenging midday light into a creative asset.
Overcast days might seem like poor conditions for shadow photography, but I’ve found they’re perfect for creating soft, subtle shadows. The diffused light creates gentle transitions that work beautifully for portraits and moody landscapes. I once shot an entire series of forest scenes on an overcast day, and the soft shadows created an ethereal, dreamlike quality.
Window light is one of the most versatile natural light sources for shadow photography. I’ve turned my home into a shadow photography studio using nothing but windows and simple objects. Placing subjects near windows creates beautiful directional shadows, and you can control the quality by adjusting curtains or using different times of day.
Artificial Light Methods
Artificial light gives you complete control over your shadows, which is why it’s essential for studio work and creative projects. Here’s how I use artificial light to create stunning shadow effects:
Single light setups are where I recommend starting if you’re new to artificial shadow photography. Using one light source creates clean, predictable shadows that are easier to control. I’ve created entire portfolios using just a single speedlight positioned at different angles to my subjects.
Multiple light setups open up endless creative possibilities. I often use a key light to create my main shadows and a fill light to control their intensity. The key is to experiment with different ratios between your lights—sometimes I’ll use a 3:1 ratio for dramatic shadows, other times I’ll go for 1:1 for softer effects.
Colored gels have revolutionized my shadow photography. By placing colored gels over my lights, I can create shadows with color tints that add mood and interest to my images. I discovered that blue gels create cool, mysterious shadows, while orange gels add warmth and drama.
Household lighting shouldn’t be overlooked. I’ve created some of my most creative shadow images using nothing but desk lamps, flashlights, and even smartphone lights. The key is to experiment with different bulbs and positions—LED lights create different shadows than incandescent bulbs, and moving the light source closer or farther dramatically changes shadow quality.
Composition Techniques
Composition is where the art of shadow photography truly comes alive. I’ve spent countless hours studying how shadows interact with other elements in the frame, and I’ve developed several techniques that consistently produce compelling images.
Using Shadows as Leading Lines
One of my favorite discoveries was using shadows as leading lines to guide the viewer’s eye through the image. Shadows naturally create lines that can direct attention to your main subject or create a sense of movement. I often look for long shadows cast by buildings, trees, or people and use them to create dynamic compositions.
In urban environments, I’ve found that late afternoon shadows from buildings create perfect leading lines that draw the eye down streets or toward architectural details. I once shot a series where I positioned myself so that my own shadow led to interesting subjects, creating a self-referential composition that viewers found intriguing.
Creating Balance with Shadows
Shadows are powerful tools for creating visual balance in your compositions. I’ve learned that shadows can act as counterweights to bright areas, preventing your images from feeling lopsided. When I’m composing a shot, I often ask myself: “Where do I need shadow to balance this light?”
In portrait photography, I use shadows to balance facial features. A classic technique is to ensure that one side of the face has more shadow than the other, creating a natural sense of depth and dimension. I discovered that this technique is especially effective in black and white portraiture, where the tonal balance becomes even more critical.
Framing Subjects with Shadows
Using shadows to frame your subjects is a technique I’ve found incredibly effective for creating focus and interest. Shadows can create natural frames that highlight your main subject and add depth to the composition. I often look for situations where architectural elements or natural objects cast shadow frames around my subjects.
One of my most successful images was created when I noticed that a window grille was casting a perfect shadow frame around a model’s face. By positioning her just right, I created an image where the shadow frame added mystery and drew attention directly to her eyes. This technique works equally well with landscapes, architecture, and still life photography.
Negative Space and Shadows
I’ve learned to embrace negative space in my shadow photography, using shadows to create breathing room and emphasize simplicity. Large areas of shadow can create powerful minimalist compositions that focus attention on small, well-lit details. I often shoot high-key images where most of the frame is in shadow, with just a small area illuminated to create impact.
In my urban photography, I’ve found that large shadow areas can simplify busy scenes, turning chaos into order. I once shot a crowded city street at midday and used the deep shadows between buildings to create a minimalist composition that highlighted just a few well-placed elements.
Advanced Shadow Photography Methods
Once you’ve mastered the basics, you can explore more advanced techniques that will truly set your shadow photography apart. These are the methods I’ve developed over years of experimentation that consistently produce unique and compelling images.
Silhouette Photography
Silhouettes are a powerful form of shadow photography where your subject becomes a dark shape against a brighter background. I’ve found that silhouette photography works best when you have a strong, recognizable shape and a clean, bright background.
The key to great silhouettes is exposing for the background, not the subject. I set my camera to spot metering and meter off the bright area behind my subject. This ensures that my subject becomes a pure black shape while the background maintains detail and color.
I’ve created some of my most memorable silhouette images during sunrise and sunset, when the sky provides a colorful backdrop. People, trees, buildings, and even everyday objects can make stunning silhouettes when positioned correctly against the light.
Shadow Patterns and Textures
Creating patterns with shadows is one of my favorite creative techniques. I’ve discovered that almost any object with a repetitive structure can create fascinating shadow patterns. Lace, fences, grids, and even kitchen utensils can cast beautiful shadow patterns that add visual interest to your images.
For texture work, I love using side lighting to create shadows that emphasize surface textures. The raking light creates tiny shadows that reveal every detail of textured surfaces like brick walls, tree bark, or fabric. I’ve spent entire afternoons just exploring how different surfaces react to side lighting, and the results are often surprising and beautiful.
Multiple Shadow Techniques
Creating multiple shadows is an advanced technique that can produce surreal and artistic images. I’ve experimented with using multiple light sources to create several shadows of the same subject, each with different qualities and colors.
One of my favorite setups involves using two colored lights at different angles to create overlapping colored shadows. The interplay between the different shadow colors can create incredibly complex and visually striking images. I discovered that this technique works especially well for abstract and conceptual photography.
Shadow Portraiture
Shadow portraiture is where I’ve had some of my most creative breakthroughs. Using shadows to sculpt and define facial features can create incredibly powerful and emotive portraits. I’ve developed several techniques specifically for shadow portraiture:
Rembrandt lighting creates a triangle of light on the cheek opposite the main light source. This classic portrait lighting technique uses shadows to create depth and dimension in the face. I’ve found that it works beautifully for both men and women, adding a sense of drama and sophistication.
Butterfly lighting creates a shadow under the nose that resembles a butterfly. This technique is perfect for beauty and fashion photography, as it creates flattering shadows that emphasize cheekbones and jawlines.
Split lighting divides the face into equal parts of light and shadow. This dramatic technique is perfect for creating moody, intense portraits that convey strong emotions. I’ve used it extensively for character studies and artistic portraits.
Post-Processing Secrets
Post-processing is where good shadow photography becomes great. I’ve spent years developing editing techniques that enhance shadows while maintaining the natural feel of the image. Here are my go-to methods for taking your shadow photography to the next level.
Exposure and Contrast Adjustments
The foundation of shadow post-processing is getting your exposure and contrast right. I’ve learned that the key is to maintain detail in both the highlights and the shadows while preserving the mood of the image.
In Lightroom, I start by adjusting the overall exposure to get the brightness right, then I fine-tune with the highlights and shadows sliders. I typically pull back the highlights slightly to recover detail and lift the shadows just enough to see texture without losing the dramatic effect.
Contrast is crucial for shadow photography. I’ve found that increasing contrast can make shadows more dramatic, but it’s important not to overdo it. I often use the tone curve for more precise control, creating a gentle S-curve that adds punch to the image without looking unnatural.
Black and White Conversion
Many of my best shadow photographs end up in black and white. Removing color allows viewers to focus on the interplay between light and shadow, creating more powerful and timeless images.
When converting to black and white, I don’t just desaturate the image. I use the black and white mix panel in Lightroom to control how different colors convert to gray tones. This allows me to create separation between elements that might have similar brightness but different colors.
I’ve discovered that adding a slight vignette can enhance shadow photography by drawing attention to the center of the image and creating a more immersive viewing experience. The key is to keep it subtle—just enough to guide the eye without being obvious.
Dodge and Burn Techniques
Dodge and burn are traditional darkroom techniques that I’ve adapted for digital shadow photography. Dodging lightens specific areas, while burning darkens them. These techniques allow me to fine-tune the shadows and highlights in my images with surgical precision.
I use adjustment layers with layer masks in Photoshop for non-destructive dodging and burning. This allows me to paint light or dark exactly where I want it, with complete control over the intensity. I’ve found that this technique is especially useful for portrait shadow work, where I can sculpt the shadows on a face to enhance features and create mood.
Color Grading for Mood
Even when I’m working primarily with shadows, color plays a crucial role in setting the mood of the image. I’ve developed several color grading techniques specifically for shadow photography:
Split toning allows me to add different colors to the highlights and shadows. I often add cool tones to shadows and warm tones to highlights to create visual interest and depth. This technique can transform a simple shadow image into something much more evocative.
Color grading with lookup tables (LUTs) has become one of my favorite methods for adding consistent mood to shadow photography. I’ve created custom LUTs that enhance the shadow qualities while maintaining a cohesive look across a series of images.
Creative Project Ideas
Sometimes the hardest part of shadow photography is knowing what to shoot. I’ve developed several project ideas that will keep you inspired and help you build a impressive shadow photography portfolio.
30-Day Shadow Challenge
I created this challenge for myself when I was feeling stuck in a creative rut, and it transformed my approach to shadow photography. The idea is simple: shoot and post one shadow photograph every day for 30 days, each with a different theme or technique.
Here are some daily themes I’ve used:
- Day 1: Self-shadow portrait
- Day 2: Architectural shadows
- Day 3: Nature shadow patterns
- Day 4: Shadow still life
- Day 5: Motion blur with shadows
- Day 6: Shadow leading lines
- Day 7: Minimalist shadow composition
This challenge forced me to see shadows everywhere and experiment with techniques I might not have tried otherwise. By the end of the 30 days, I had a completely new portfolio and a much deeper understanding of shadow photography.
Shadow Portrait Series
Portraits are where I’ve had some of my most creative breakthroughs with shadow photography. I’ve created several portrait series focusing specifically on shadow techniques:
Character studies using dramatic shadow lighting to reveal personality and emotion. I’ve photographed everyone from artists to business owners, using shadows to highlight their unique features and tell their stories.
Family shadow portraits that capture the relationships between family members through their interactions with light and shadow. I’ve created images where parents and children cast shadows that interact in meaningful ways, creating visual metaphors for their relationships.
Cultural shadow portraits explore how different cultures interact with light and shadow. I’ve photographed people from various backgrounds, using shadow techniques that reflect their cultural heritage and personal stories.
Urban Shadow Exploration
Cities are playgrounds for shadow photographers, and I’ve spent countless hours exploring urban environments for shadow opportunities. Here are some urban shadow projects I’ve developed:
Architectural shadow studies focus on how buildings interact with light throughout the day. I’ve photographed the same buildings at different times to show how their shadows change and evolve, creating a visual narrative of time and light.
Street shadow photography captures the interaction between people and urban shadows. I’ve created images where people’s shadows interact with architectural shadows, creating complex and often surreal compositions.
Abstract urban shadows look for patterns and shapes created by urban elements. I’ve found that fire escapes, bridges, and staircases create fascinating shadow patterns that can be shot as abstract compositions.
Nature Shadow Projects
Nature provides endless opportunities for shadow photography, and I’ve developed several projects that focus specifically on natural shadows:
Forest shadow studies explore how light filters through trees to create complex shadow patterns. I’ve photographed forests at different times of day and in different seasons to show how the shadow patterns change.
Water and shadows capture the interaction between light, shadow, and water. I’ve created images where shadows fall on water surfaces, creating distorted and often surreal reflections.
Plant shadow portraits focus on the shadows cast by individual plants and flowers. I’ve discovered that different plants create uniquely beautiful shadow patterns, from the delicate shadows of ferns to the bold shadows of palm leaves.
Common Mistakes to Avoid
In my journey with shadow photography, I’ve made plenty of mistakes. Learning from these errors has been crucial to my development as a photographer. Here are the most common mistakes I see photographers make with shadows, and how to avoid them.
Overexposing Shadows
One of the biggest mistakes I made early on was trying to brighten shadows too much. I was afraid of losing detail, so I would lift the shadows until they lost their dramatic impact. I’ve learned that sometimes it’s okay to let shadows go completely black—this can actually make your images more powerful and dramatic.
The key is to find the right balance. I now ask myself: “Does this shadow need detail, or would it be more effective as a pure black shape?” Often, the answer is that the shadow is more effective when it’s allowed to be dark and mysterious.
Ignoring Shadow Direction
I used to pay attention only to my subjects, not considering where their shadows would fall. This led to many images where shadows were distracting or unflattering. I’ve learned to always consider shadow direction when composing my shots.
Now, I visualize where the shadows will fall before I take the shot. I ask myself: “Where will the shadows be, and how will they affect my composition?” This simple question has dramatically improved my shadow photography.
Inconsistent Light Sources
When I was starting with artificial lighting, I would often mix different types of lights without considering their color temperatures. This created shadows with different color casts that looked unnatural and distracting.
I’ve learned to either use lights with the same color temperature or to intentionally use colored gels for creative effect. Consistency in light quality is crucial for creating professional-looking shadow photography.
Forgetting About Backgrounds
Early in my shadow photography journey, I would focus so much on the shadows that I would neglect the background. This led to images where the background was cluttered or distracting, taking away from the shadow effects.
Now, I always consider the background as an integral part of the composition. I look for clean, simple backgrounds that won’t compete with the shadows, or I use backgrounds that actually enhance the shadow effects.
Frequently Asked Questions
What makes a good shadow photo?
A good shadow photo uses shadows intentionally to create mood, depth, or visual interest. The shadows should serve a purpose—whether they’re framing the subject, creating patterns, adding drama, or simplifying the composition. I’ve found that the best shadow photos have a clear reason for using shadows, rather than just having them by accident.
How do I avoid flat images in shadow photography?
Flat images usually result from even, diffused lighting that doesn’t create enough contrast. To avoid this, I use directional lighting that creates clear shadows and highlights. I also pay attention to the ratio between light and dark areas in my composition, ensuring there’s enough contrast to create depth and dimension.
Can I shoot shadows on cloudy days?
Absolutely! Cloudy days create soft, diffused shadows that can be beautiful and subtle. While you won’t get the dramatic hard shadows of a sunny day, cloudy days are perfect for gentle, moody shadow photography. I’ve shot some of my favorite shadow images on overcast days, especially for portraits and nature scenes.
What’s the best time for outdoor shadow photography?
The best times are during golden hour (first hour after sunrise, last hour before sunset) when the low sun creates long, dramatic shadows. Midday sun is also great for high-contrast shadow work. I’ve found that each time of day offers unique shadow opportunities—golden hour for length and softness, midday for sharpness and contrast.
How do I create patterns in shadows?
Creating patterns in shadows is one of my favorite techniques! I use objects with repetitive structures like lace, grids, fences, or even kitchen utensils. Position these objects between your light source and your subject, and they’ll cast beautiful shadow patterns. I’ve discovered that almost any object can create interesting patterns if you experiment with different angles and distances.
Do I need expensive gear for shadow photography?
Not at all! I’ve created stunning shadow images with everything from smartphone cameras to professional DSLRs. The key is understanding light and composition, not having expensive gear. I often tell beginners to start with natural light and simple objects—you’ll be amazed at what you can create with just a window and some household items.
Why go black and white with shadow photography?
Black and white removes the distraction of color, allowing viewers to focus purely on the interplay between light and shadow. I’ve found that black and white emphasizes the graphic qualities of shadows, making patterns, textures, and shapes more prominent. It’s especially effective for high-contrast shadow work where the drama comes from the light-dark relationship.
How do I edit shadows without losing detail?
The key is to shoot in RAW format, which gives you more flexibility in post-processing. I use the shadows slider in Lightroom to recover detail, but I’m careful not to lift them so much that they lose their impact. For more precise control, I use adjustment brushes or Photoshop layers to dodge and burn specific areas, maintaining detail where I need it while preserving the overall shadow effect.
What’s the difference between a silhouette and a shadow?
A silhouette is when your subject becomes a dark shape against a brighter background, while a shadow is the dark area cast by an object blocking light. In silhouette photography, the subject itself is dark, whereas in shadow photography, you’re often capturing the shadow that the subject casts. I use both techniques, but they create very different visual effects.
How can I add color to shadows?
I love adding color to shadows using colored gels on my lights or through post-processing. In Lightroom, I use split toning to add different colors to highlights and shadows, or I use color grading tools for more precise control. I’ve discovered that subtle color in shadows can add mood and interest without being overwhelming.
Happy shooting, and may your shadows always be dramatic and your vision always clear!