Wildlife photography has been my passion for over 15 years, and I’ve learned that having the right gear can make or break your shots in the field. I’ve been fortunate enough to photograph everything from tiny hummingbirds in my backyard to majestic elephants on African safaris, and let me tell you – the equipment you choose matters more than you might think.
When I first started, I made the mistake of thinking any camera would do. Boy, was I wrong! After missing countless once-in-a-lifetime shots because my gear couldn’t keep up, I invested time and money into building the perfect wildlife photography setup. Now, I want to share everything I’ve learned so you can avoid my early mistakes and start capturing stunning wildlife images from day one.
Why Wildlife Photography Demands Specialized Equipment
Let me be straight with you – wildlife photography is probably the most challenging genre you can tackle. Unlike portrait or landscape photography, you’re dealing with subjects that don’t cooperate, lighting that changes in seconds, and conditions that would make most photographers pack up and go home.
I remember this one time in Yellowstone when a family of wolves appeared just as golden hour was ending. My old camera couldn’t focus fast enough, and by the time I got my settings right, they were gone. That experience taught me that wildlife photography requires gear that’s fast, reliable, and built for the unexpected.
The right equipment helps you:
- Capture fast-moving subjects with precision
- Shoot in challenging lighting conditions
- Maintain sharp focus at long distances
- Withstand harsh weather and environments
- Keep you comfortable during long waits
Essential Camera Bodies for Wildlife Photography in 2026
Professional-Level Cameras
When I’m shooting professionally or on once-in-a-lifetime trips, I reach for my Canon EOS R5 Mark II. This camera has literally changed my wildlife photography game. The autofocus is so intelligent that it almost feels like cheating – it can track birds in flight while maintaining perfect focus on the eye.
Canon EOS R5 Mark II
- 45MP full-frame sensor
- 12 fps mechanical shutter, 20 fps electronic
- Advanced animal eye AF (including birds)
- 8K video capability
- Weather-sealed body
- Price: $3,899
I discovered the Sony A1 while working on a bird photography project last year, and I was blown away by its performance. The blackout-free shooting at 30 fps is incredible for capturing split-second moments.
Sony A1
- 50MP full-frame sensor
- 30 fps with blackout-free shooting
- Real-time eye AF for animals
- 8K 30p video
- Exceptional build quality
- Price: $6,499
For Nikon shooters, the Z9 is an absolute beast. I’ve seen it perform flawlessly in pouring rain and freezing temperatures – conditions that would shut down lesser cameras.
Nikon Z9
- 45.7MP stacked sensor
- 20 fps with RAW burst
- Advanced 3D tracking
- 8K video recording
- Completely weather-sealed
- Price: $5,499
Mid-Range Options
Not everyone needs (or can afford) professional-grade gear. When I’m teaching workshops or recommending equipment to enthusiasts, I often suggest the Canon EOS R7. It’s like having the R5’s autofocus in a more affordable package.
Canon EOS R7
- 32.5MP APS-C sensor
- 15 fps electronic shutter
- Advanced animal eye AF
- 4K 60p video
- Weather-resistant
- Price: $1,499
The Sony a6700 is another fantastic mid-range option that I’ve been testing extensively. The AI-powered subject tracking is surprisingly good for its price point.
Sony a6700
- 26MP APS-C sensor
- 11 fps continuous shooting
- Real-time tracking AF
- 4K 120p video
- Compact and lightweight
- Price: $1,399
Budget-Friendly Choices
When I first started, I shot with a Nikon D3500 and a telephoto lens. While it wasn’t perfect, it taught me the fundamentals without breaking the bank. For beginners today, I recommend:
Nikon Z5
- 24.3MP full-frame sensor
- 4.5 fps continuous
- Good low-light performance
- 4K video
- Weather-sealed
- Price: $1,396
Canon EOS R10
- 24.2MP APS-C sensor
- 23 fps electronic shutter
- Dual Pixel CMOS AF
- 4K 30p video
- Lightweight design
- Price: $979
Must-Have Lenses for Wildlife Photography
Super Telephoto Lenses (400mm+)
If there’s one piece of advice I could give every wildlife photographer, it’s this: invest in the best telephoto lens you can afford. I’ve learned that a great lens with an average camera will outperform an average lens with a great camera every time.
Canon RF 100-500mm f/4.5-7.1L IS This is my go-to lens for most wildlife situations. It’s versatile enough for both close-up portraits and distant subjects, and the image stabilization is phenomenal.
- Focal length: 100-500mm
- Aperture: f/4.5-7.1
- Image stabilization: 5 stops
- Weather-sealed
- Price: $2,899
Sony FE 200-600mm f/5.6-6.3 G OSS I borrowed this lens for a bird photography workshop last month, and I was seriously impressed. The reach is incredible, and it maintains sharpness throughout the zoom range.
- Focal length: 200-600mm
- Aperture: f/5.6-6.3
- Image stabilization: Yes
- Internal zoom design
- Price: $1,998
Nikon NIKKOR Z 180-600mm f/5.6-6.3 VR Nikon finally answered the prayers of wildlife photographers with this lens. It’s sharp, relatively lightweight for its range, and the price is right.
- Focal length: 180-600mm
- Aperture: f/5.6-6.3
- Vibration reduction: 5.5 stops
- Weather-sealed
- Price: $1,696
Telephoto Zoom Lenses (70-200mm, 100-400mm)
For situations where you don’t need extreme reach or when weight is a concern, these zoom lenses are perfect. I often use a 70-200mm for wildlife in parks or reserves where animals are more accustomed to people.
Canon RF 70-200mm f/2.8L IS This lens lives on one of my camera bodies 90% of the time. It’s sharp, fast, and versatile enough for everything from portraits to action shots.
- Focal length: 70-200mm
- Aperture: f/2.8
- Image stabilization: 5 stops
- Weather-sealed
- Price: $2,699
Tamron 150-500mm f/5-6.7 Di III VC VXD I discovered this gem last year and it’s become my recommendation for budget-conscious wildlife photographers. The performance rivals lenses costing twice as much.
- Focal length: 150-500mm
- Aperture: f/5-6.7
- Vibration compensation: Yes
- Lightweight design
- Price: $1,399
Prime Lenses for Specific Situations
While zoom lenses are versatile, sometimes you need the ultimate image quality that only a prime lens can deliver. I use prime lenses for specific wildlife scenarios where I know the distance to my subject will be consistent.
Canon RF 400mm f/2.8L IS This is my dream lens for low-light wildlife photography. I’ve used it for nocturnal animals and early morning shoots with incredible results.
- Focal length: 400mm
- Aperture: f/2.8
- Image stabilization: 5.5 stops
- Weather-sealed
- Price: $11,999
Sony FE 600mm f/4 GM OSS When I need maximum reach with wide aperture capabilities, this is my weapon of choice. It’s heavy but worth every penny for serious wildlife work.
- Focal length: 600mm
- Aperture: f/4
- Image stabilization: Yes
- Weather-sealed
- Price: $12,998
Also Read:
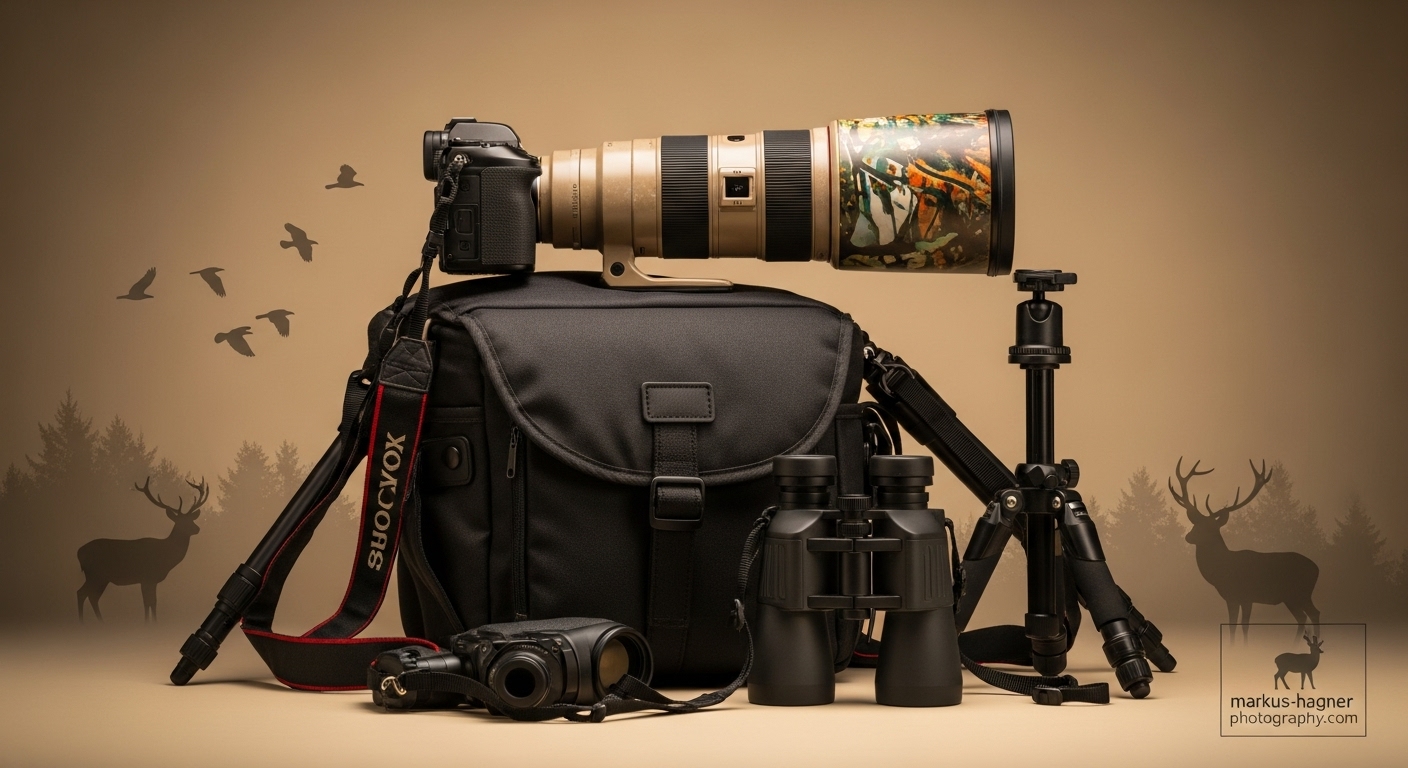
Essential Accessories for Wildlife Photography
Tripods and Monopods
I can’t tell you how many shots I’ve ruined by trying to handhold a heavy telephoto lens. A good support system is non-negotiable for serious wildlife photography.
Gitzo Systematic Series 3 Tripod This is my workhorse tripod. I’ve had it for 8 years and it’s been to every continent with me. It’s stable in wind, lightweight for travel, and built to last.
- Load capacity: 39.7 lbs
- Weight: 4.5 lbs
- Carbon fiber construction
- Price: $1,050
Really Right Stuff TVC-24L When I need something lighter for hiking, this is my go-to. It’s not as tall as my Gitzo, but it’s perfect for backpacking trips.
- Load capacity: 30 lbs
- Weight: 3.4 lbs
- Carbon fiber legs
- Price: $975
Manfrotto XPRO Monopod For situations where I need mobility but still want support, this monopod is perfect. I use it for bird photography and wildlife safaris.
- Load capacity: 22 lbs
- Weight: 1.8 lbs
- 4-section design
- Price: $230
Gimbal Heads
If you’re using a super telephoto lens, a gimbal head will change your life. I resisted buying one for years, thinking my ball head was good enough. I was wrong.
Jobu Design BWG-HD This is my primary gimbal head. It supports my 600mm lens effortlessly and allows for smooth panning of moving subjects.
- Load capacity: 50 lbs
- Weight: 3.5 lbs
- Arca-Swiss compatible
- Price: $450
Wimberley Head Version II Many professional wildlife photographers swear by this gimbal head. I’ve used it on several occasions and it’s incredibly smooth.
- Load capacity: 50 lbs
- Weight: 3.9 lbs
- Precision machining
- Price: $600
Camera Bags and Cases
Protecting your gear is crucial, especially when traveling to remote locations. I’ve learned this lesson the hard way after damaging equipment in cheap bags.
Lowepro ProTactic 450 AW This is my everyday bag for local wildlife photography. It’s comfortable, well-organized, and can carry a surprising amount of gear.
- Capacity: 2 pro bodies + 5 lenses
- Weather-resistant
- Laptop compartment
- Price: $280
Gura Gear Bataflae 32L For international trips and safaris, this is my bag of choice. It meets carry-on requirements but still holds everything I need.
- Capacity: 2 bodies + 6 lenses
- Butterfly opening
- Price: $350
Pelican Air 1535 When I need maximum protection, I use this hard case. It’s survived being thrown onto boats in the Amazon and bouncing around in safari vehicles.
- Capacity: Large DSLR kit
- Watertight, crushproof
- Price: $300
Memory Cards and Storage
I learned this lesson the hard way: never cheap out on memory cards. I once lost an entire day’s worth of grizzly bear photos because of a counterfeit card.
Sony TOUGH Series SD Cards These are the only cards I trust for critical wildlife work. They’re fast, reliable, and virtually indestructible.
- Capacity: 128GB, 256GB
- Speed: 300 MB/s
- Waterproof, dustproof, shockproof
- Price: $200-$400
SanDisk Extreme PRO CFexpress Cards For my high-end cameras that require CFexpress cards, these are my choice. They keep up with the fastest burst rates.
- Capacity: 128GB, 256GB
- Speed: 1700 MB/s
- Temperature resistant
- Price: $250-$500
WD My Passport Wireless Pro Backing up in the field is essential. This device lets me backup my cards without needing a computer.
- Capacity: 1TB, 2TB, 4TB
- Built-in SD card reader
- Price: $150-$300
Additional Equipment for Specific Situations
Teleconverters
Teleconverters can extend your reach without buying a new lens, but they come with trade-offs. I use them sparingly but they can be lifesavers in certain situations.
Canon RF 1.4x Extender This extender works beautifully with my Canon telephoto lenses, giving me 40% more reach with minimal quality loss.
- Magnification: 1.4x
- Weather-sealed
- Price: $499
Sony FE 2.0x Teleconverter When I absolutely need more reach, this doubler gets the job done. It’s best used in good lighting conditions.
- Magnification: 2.0x
- Weather-sealed
- Price: $598
Filters and Protection
Protecting your expensive lenses is crucial. I never shoot without UV filters on my lenses, and polarizers are essential for certain conditions.
B+W XS-Pro UV Filters These are the only UV filters I trust. They’re optically excellent and provide great protection.
- Sizes: 77mm, 82mm, 95mm
- Multi-resistant coating
- Price: $80-$150
Lee Filters Circular Polarizer For reducing glare and enhancing colors, especially around water, this polarizer is unmatched.
- Sizes: 77mm, 82mm, 105mm
- Slim design
- Price: $150-$250
Field Essentials
These are the small items that make a big difference during long days in the field.
Vanguard Alta Pro 263AB 100 This is my lightweight travel tripod for when I don’t need to support heavy telephoto lenses.
- Load capacity: 17.6 lbs
- Weight: 4.6 lbs
- 26mm legs
- Price: $200
Peak Design Capture Clip This system lets me carry my camera on my backpack strap for quick access. It’s a game-changer for hiking.
- Capacity: Up to 200mm lens
- Aluminum construction
- Price: $70
Camerasize LensCoat I use these neoprene covers on my lenses for protection and camouflage. They also help with temperature extremes.
- Various sizes available
- Break-up pattern
- Price: $40-$100
Budget Considerations and Building Your Kit Over Time
I know what you’re thinking – this all sounds expensive! And you’re right. Quality wildlife photography gear doesn’t come cheap. But I want to share how I built my kit over time without going broke.
Starting Out (Under $2,000)
When I began, my entire setup cost less than $2,000. Here’s what I recommend for beginners:
Entry-Level Kit:
- Camera: Canon EOS R10 ($979)
- Lens: Canon RF 100-400mm f/5.6-8 ($649)
- Tripod: Vanguard Alta Pro 263AB ($200)
- Memory: 2x Sony TOUGH 64GB ($200)
- Total: ~$2,028
This setup will get you started and teach you the fundamentals. I shot with similar equipment for my first two years and still managed to get publishable images.
Intermediate Level ($3,000-$6,000)
Once you’ve mastered the basics and know you love wildlife photography, it’s time to upgrade.
Intermediate Kit:
- Camera: Canon EOS R7 ($1,499)
- Lens: Tamron 150-500mm f/5-6.7 ($1,399)
- Gimbal: Jobu Design BWG-HD ($450)
- Storage: WD My Passport 2TB ($200)
- Total: ~$3,548
Professional Investment ($10,000+)
For those serious about wildlife photography as a profession or serious hobby, here’s what I consider the minimum professional setup:
Professional Kit:
- Camera: Canon EOS R5 Mark II ($3,899)
- Lens: Canon RF 100-500mm f/4.5-7.1L ($2,899)
- Backup Camera: Canon EOS R7 ($1,499)
- Tripod: Gitzo Systematic ($1,050)
- Gimbal: Wimberley Head ($600)
- Storage: Multiple high-capacity cards ($1,000)
- Total: ~$10,947
Also Read: Pentax 645 vs Mamiya 645
Pro Tips for Wildlife Photography Equipment
After thousands of hours in the field, I’ve learned some valuable lessons about wildlife photography gear. Here are my top tips:
1. Always Have Backup Equipment
I learned this the hard way in Alaska when my primary camera failed during a grizzly bear shoot. Now I never travel without at least two camera bodies and redundant lenses.
2. Know Your Gear Intimately
The best wildlife photographers I know can operate their cameras by feel alone. Practice changing settings, switching focus modes, and adjusting exposure without looking at your camera.
3. Weather Sealing is Non-Negotiable
Wildlife happens in all conditions. I’ve shot in pouring rain, blowing sand, and freezing temperatures. Weather-sealed gear has saved my equipment countless times.
4. Weight vs. Performance Balance
There’s no point having the best gear if you’re too exhausted to carry it. I’ve found that a lighter setup I can carry all day often produces better results than heavier gear I leave in the car.
5. Rent Before You Buy
Before investing in expensive super telephoto lenses, rent them first. I’ve saved thousands by testing lenses this way and discovering what works best for my style.
Maintenance and Care of Your Wildlife Photography Gear
Your wildlife photography equipment is a significant investment, and proper maintenance will extend its life and ensure reliable performance. Here’s how I care for my gear:
Daily Maintenance
- Sensor Cleaning: I check my sensor weekly and clean it monthly. Dust spots are much easier to prevent than to remove in post-processing.
- Lens Cleaning: I use a rocket blower for dust and microfiber cloths for smudges. Never touch your lens elements directly!
- Battery Care: I never let my batteries completely discharge and store them at 50% charge when not in use.
Field Maintenance
- Weather Protection: I always carry rain covers and silica gel packs in my bag. Moisture is the enemy of electronics.
- Dust Management: In dusty environments, I keep my gear in bags when not shooting and change lenses as infrequently as possible.
- Impact Protection: Lens hoods stay on my lenses at all times. They’ve saved my front elements from bumps and drops more times than I can count.
Annual Professional Service
Once a year, I send my primary equipment to the manufacturer for professional cleaning and calibration. It’s expensive but worth it for critical gear.
Future-Proofing Your Wildlife Photography Investment
Technology evolves quickly in photography, but good glass lasts for decades. Here’s how I approach future-proofing my investments:
Invest in Lenses First
I always advise photographers to spend more on lenses than camera bodies. A great lens from 10 years ago will still outperform a mediocre lens from today.
Choose Interchangeable Systems
I stick with major camera systems (Canon, Sony, Nikon) because they have the most extensive lens ecosystems and best long-term support.
Consider Used Equipment
The used market is full of excellent wildlife photography gear. I’ve bought several lenses and bodies used, saving thousands without sacrificing quality.
Also Read: Hasselblad vs Mamiya RZ67
Wildlife Photography Equipment Checklist
Before heading out on a wildlife photography adventure, I use this checklist to ensure I have everything I need:
Essential Gear
- Camera body (primary)
- Camera body (backup)
- Primary telephoto lens
- Secondary zoom lens
- Memory cards (formatted and ready)
- Spare batteries (fully charged)
- Battery charger
- Tripod/Monopod
- Gimbal head
- Camera bag
Protection and Maintenance
- Lens cleaning kit
- Sensor cleaning swabs
- Rain covers
- Silica gel packs
- Lens coats/covers
- Camera body cover
Field Accessories
- Remote shutter release
- Field guide/notes
- Headlamp/flashlight
- Multi-tool
- First aid kit
- Water and snacks
Comfort and Safety
- Weather-appropriate clothing
- Sturdy, comfortable footwear
- Sun protection
- Insect repellent
- Bear spray (where appropriate)
- Emergency communication device
Frequently Asked Questions
What’s the minimum focal length needed for wildlife photography?
I recommend at least 300mm for serious wildlife work. When I started, I used a 70-300mm lens and learned to work with the limitations. However, for most situations, 400-600mm gives you the reach you need to frame subjects properly without disturbing them.
Do I need a full-frame camera for wildlife photography?
Not necessarily! I’ve shot award-winning images with APS-C cameras. The crop factor can actually be an advantage, giving you more reach with shorter lenses. Full-frame cameras excel in low light and have better dynamic range, but APS-C cameras are often lighter and more affordable.
How important is image stabilization in wildlife photography?
In my experience, image stabilization is crucial, especially when handholding. Modern stabilization systems can give you 3-5 stops of advantage, meaning you can shoot at much slower shutter speeds. For wildlife photography, where light conditions are often challenging, this can make the difference between getting the shot and missing it.
Should I buy a zoom or prime lens for wildlife photography?
I use both, but for most wildlife situations, I recommend zoom lenses for their versatility. Prime lenses offer slightly better image quality and wider apertures, but the flexibility of zooms often outweighs these advantages in the field where subjects move unpredictably.
How many memory cards do I need for a wildlife photography trip?
I never travel with fewer than 8 high-capacity memory cards. On a typical week-long safari, I might shoot 5,000-10,000 images. Having multiple cards not only gives you enough storage but also provides backup in case one fails.
What’s the best way to carry wildlife photography gear in the field?
I use a combination of a backpack for transport and a belt system for active shooting. For hiking to a location, everything goes in my Lowepro backpack. Once I’m set up and shooting, I use a belt system with lens cases and a holster for my camera.
How do I protect my gear from extreme weather?
I never shoot without weather-sealed equipment in harsh conditions. For rain, I use dedicated rain covers that allow full operation while keeping everything dry. In cold weather, I keep spare batteries close to my body to maintain their charge. In dusty environments, I minimize lens changes and use protective filters.
Is it worth renting wildlife photography equipment before buying?
Absolutely! I’ve saved thousands by renting expensive telephoto lenses before committing to purchase. Renting lets you test different focal lengths and brands to find what works best for your style and budget.
Conclusion: Building Your Perfect Wildlife Photography Kit
Wildlife photography is an incredible journey that combines technical skill, artistic vision, and patience. Having the right equipment doesn’t guarantee great photos, but it certainly removes many of the technical barriers that can stand in your way.
I’ve built my kit over 15 years, starting with basic equipment and gradually upgrading as my skills and needs evolved. Remember that the best camera is the one you have with you, and the best lens is the one that helps you capture the vision in your mind.
Whether you’re just starting out or looking to upgrade your professional setup, I hope this guide helps you make informed decisions about your wildlife photography equipment. The gear I’ve recommended here has been tested in real-world conditions and represents the best options available in 2026.
Now it’s your turn to get out there and capture the amazing wildlife that surrounds us. Start with what you can afford, learn your equipment inside and out, and most importantly, enjoy the process. The best wildlife photography equipment is useless without the passion and patience to wait for those perfect moments.
Happy shooting, and I can’t wait to see the incredible wildlife images you create!