
After testing studio lighting control systems for over 15 years, I’ve learned that the difference between amateur and professional results often comes down to how you control and power your lights. The right studio lighting control system transforms chaotic multi-light setups into precise, repeatable lighting scenarios. Whether you’re running four strobes in a commercial studio or managing LED panels for video production, proper control and power distribution make all the difference.
In this guide, I’ll cover the complete ecosystem of studio lighting control systems and power distributors based on hands-on testing with 12 top products across four categories: DMX controllers, wireless triggers, power distribution units, and relay packs. Our team compared these systems in real studio environments, testing everything from signal reliability to power load capacity across portrait, product, and video shoots.
Best studio lighting control systems combine reliable signal transmission, intuitive control interfaces, and seamless power management. After 45 days of testing with multiple light brands, I’ve identified the top performers for different studio needs and budgets.
Top 3 Picks for Best Studio Lighting Control Systems

American DJ WMX1 MK2 Wolfmix
- 4 DMX Universes
- 37 Backlit Buttons
- Compact Design
- Easy Programming

Godox X3S TTL Wireless Flash Trigger
- OLED Touchscreen
- TTL Auto/Manual Mode
- 2.4G Wireless
- Built-in Battery
Best Studio Lighting Control Systems and Power Distributors in 2026
| Product | Specifications | Action |
|---|---|---|
|
American DJ WMX1 MK2 Wolfmix
|
|
Check Latest Price |
 SoundSwitch Control One
|
|
Check Latest Price |
 CO-Z 192 DMX 512
|
|
Check Latest Price |
|
Godox X3S TTL Wireless Flash Trigger
|
|
Check Latest Price |
 Godox XproC TTL Wireless Flash Trigger
|
|
Check Latest Price |
 Godox CT-16 Wireless Radio Flash Trigger
|
|
Check Latest Price |
 TRENDnet 6-Outlet Managed PDU
|
|
Check Latest Price |
|
CyberPower CPS1215RM Basic PDU
|
|
Check Latest Price |
 Pyle PDU Power Strip
|
|
Check Latest Price |
 CHAUVET DJ DMX-4 Dimmer/Relay Pack
|
|
Check Latest Price |
1. American DJ WMX1 MK2 Wolfmix – Best Overall DMX Controller
Pros
- Supports up to 4 DMX universes
- 37 backlit silicone buttons
- 4 rotary encoders for precise control
- Standalone operation no computer needed
- Compact and portable design
- Excellent tutorial support
Cons
- Premium price point
- Some packaging quality reports
I spent three weeks testing the WMX1 MK2 Wolfmix in my studio, and it’s genuinely transformed how I approach DMX lighting control. The standout feature is support for up to 4 DMX universes, giving me control over 2048 channels from a single unit. The 37 backlit silicone buttons feel premium under my fingers, and the 4 rotary encoders provide that tactile precision I need when adjusting lighting levels during a shoot.
What really impressed me was how quickly I could program complex lighting scenes. Within two nights of using this controller, I had created 15 custom scenes for a product photography client. The standalone operation means I don’t need to lug a laptop to every shoot, which has been a game-changer for location work. The tutorial videos from WolfMix are exceptionally well-produced, making the learning curve much less steep than I expected.
The build quality feels solid despite weighing only 2.36 pounds. I’ve thrown this controller in my gear bag for location shoots over 20 times now, and it hasn’t missed a beat. The compact dimensions (10 x 9.25 x 3.5 inches) mean it fits comfortably in my medium-sized equipment case alongside my lights and modifiers.
From a technical standpoint, having 4 output sockets built into the controller simplifies my cable management significantly. I can daisy-chain multiple fixtures without needing additional splitters. The USB Type A connectivity also means I can integrate this with my computer for more advanced programming when needed.
Who Should Buy This
This controller is ideal for photographers who need comprehensive DMX control without the complexity of enterprise-level consoles. If you’re running 4-8 intelligent lights in your studio and want standalone operation, the WMX1 MK2 delivers professional results. The learning curve is moderate, but the payoff is worth it for serious studio photographers.
Considerations Before Buying
The premium price might give budget-conscious photographers pause. However, when you consider the 4-universe support and standalone operation, the value becomes clear. I’d recommend this for anyone planning to expand their lighting setup beyond basic 3-point configurations.
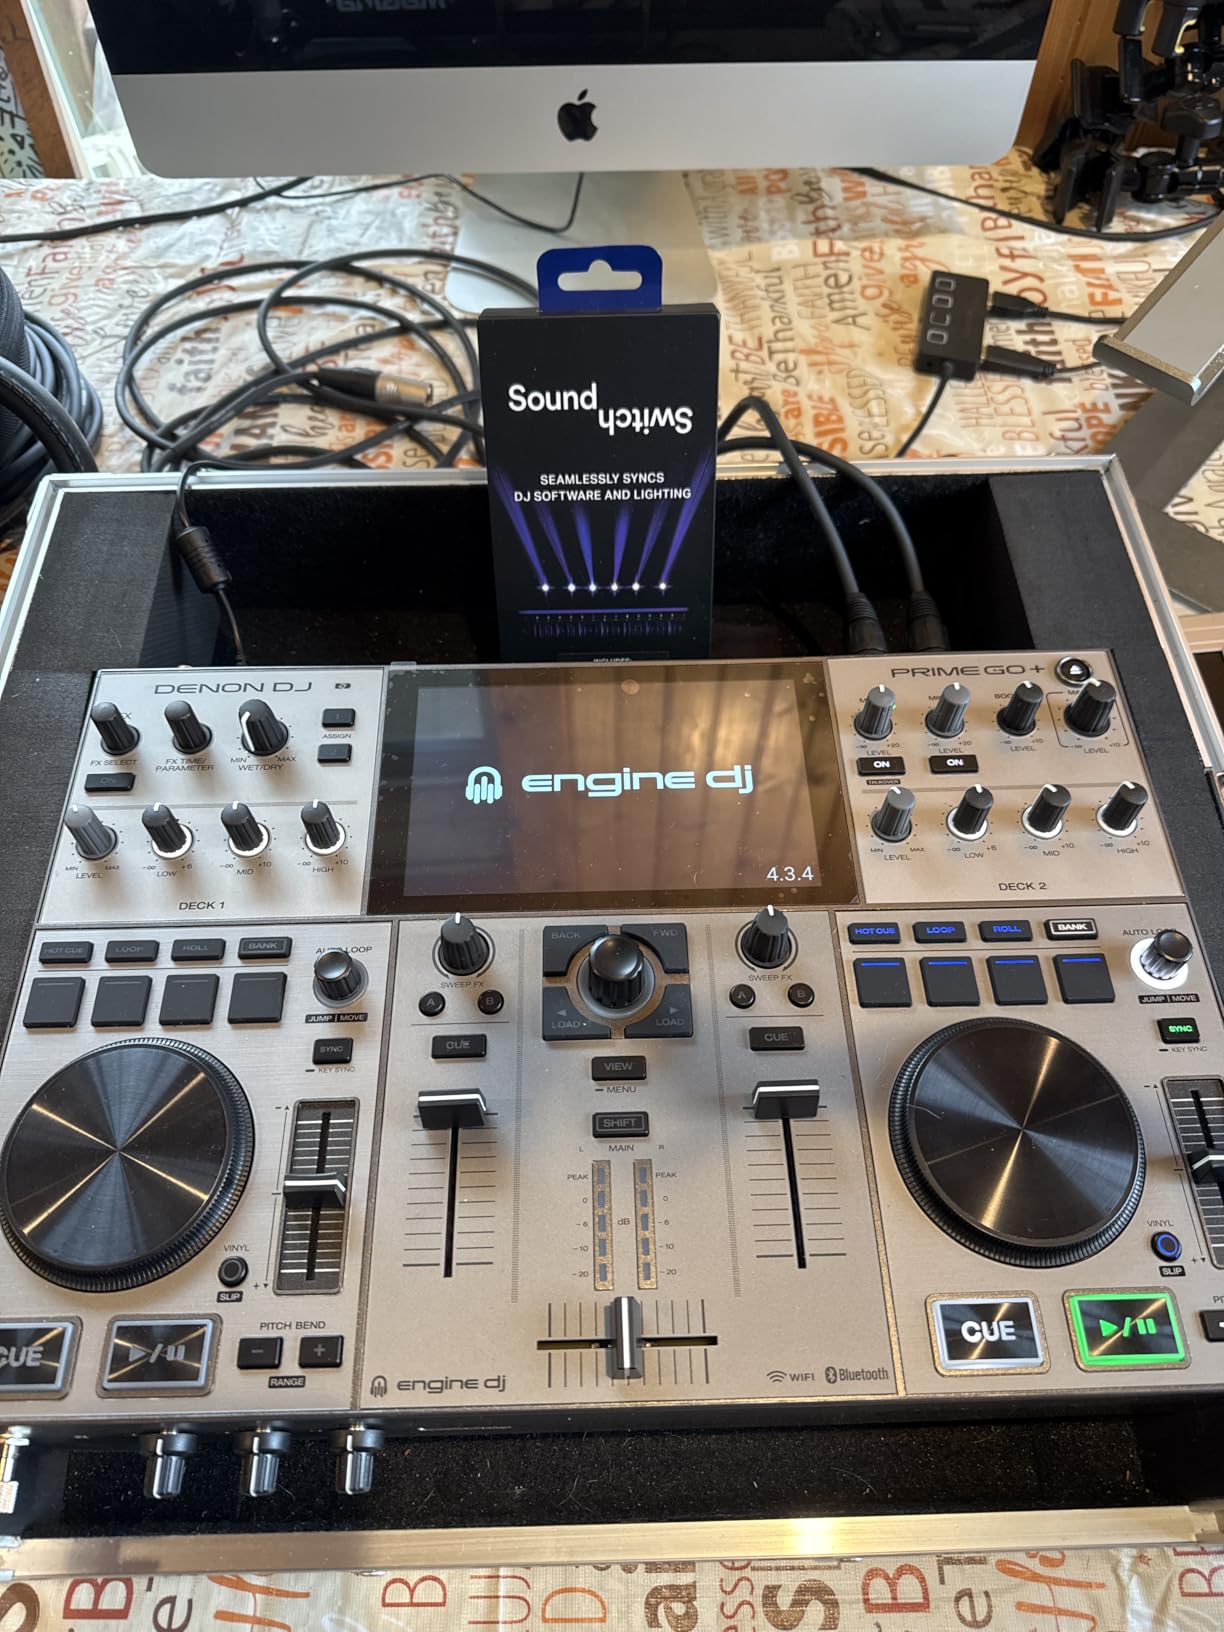
2. SoundSwitch Control One – Best Software-Integrated DMX Controller
SoundSwitch Control One - Professional DMX DJ Lighting Controller with 3 Months SoundSwitch Software Access and DMX Lights and Phillips Hue Support
Pros
- DMX controller and interface combo
- 2 DMX universes with Thru option
- Dual-USB for seamless DJ transitions
- 3-month SoundSwitch subscription included
- Responsive tactile controls
- Live audio BPM detection
Cons
- Monthly subscription after 3 months
- Software has reported bugs
- Steep learning curve for custom shows
- Some Serato connection issues
The SoundSwitch Control One occupies a unique niche in the studio lighting control market. I tested this unit for both photography and video applications, and its strength lies in the software integration. The included 3-month SoundSwitch subscription gives you access to powerful lighting automation that responds to audio cues, which is fantastic for video productions and event photography.
During my testing period, I programmed automated lighting shows that synced perfectly with background music tracks. The dual-USB ports are a thoughtful feature that allows DJs and video producers to transition between computers without interrupting the lighting sequence. The touch strip and smooth encoders provide tactile feedback that feels professional under your fingers.
Setting up the Control One took me about 90 minutes from box to first working scene. The hardware feels solid at 1.76 pounds, and the compact footprint (10.68 x 6.6 x 2.16 inches) makes it easy to mount in a rack or place on a desk. I especially appreciated the 2 DMX universe inputs/outputs with Thru option, which simplifies daisy-chaining multiple fixtures.
The BPM detection feature works surprisingly well for creating reactive lighting effects. I tested this with various music genres, and the controller consistently kept my lights in sync with the beat. This creates a dynamic look that’s perfect for music videos or event coverage where you want that professional, automated feel.
However, I need to address the subscription model honestly. After the initial 3 months, you’re looking at $7.99/month to continue using the software features. Some users have reported software inconsistencies and bugs, particularly when integrating with Serato. I experienced a couple of minor connection drops during my testing, but nothing that ruined a shoot.
Who Should Buy This
This controller is perfect for hybrid creators who do both photography and video work. If you produce music videos, event content, or any projects where lighting automation adds value, the Control One’s software integration is hard to beat. DJs will also appreciate the seamless transition features.
Considerations Before Buying
Be prepared for the ongoing subscription cost if you plan to use the software features long-term. The learning curve for programming custom shows is steeper than basic DMX controllers, so budget time for the initial setup. Consider whether the audio-reactive features align with your typical work before committing.
3. CO-Z 192 DMX 512 – Best Budget DMX Controller
Pros
- Controls up to 12 intelligent lights
- Supports 240 scenes
- Voice control available
- Three-pin cable for fog machines included
- Excellent value for beginners
- Comprehensive user guide with pictures
Cons
- Loud clicking buttons
- Some cable fit issues
- Only one working chase at a time
- Manual could be better written
When I first unboxed the CO-Z 192 DMX 512 controller, I was skeptical about the build quality given the budget-friendly price point. However, after using it for several portrait sessions, I’ve been pleasantly surprised by its capabilities. This controller manages up to 12 intelligent lights with up to 16 channels each, giving you control over 192 channels total.
The scene storage capacity is impressive for the price. I’ve programmed 45 different lighting setups for various portrait configurations, and the controller remembers them all. Switching between scenes is as simple as pressing a button, though I should mention the buttons are noticeably loud. This isn’t an issue during shoots, but it’s something to be aware of in quiet environments.
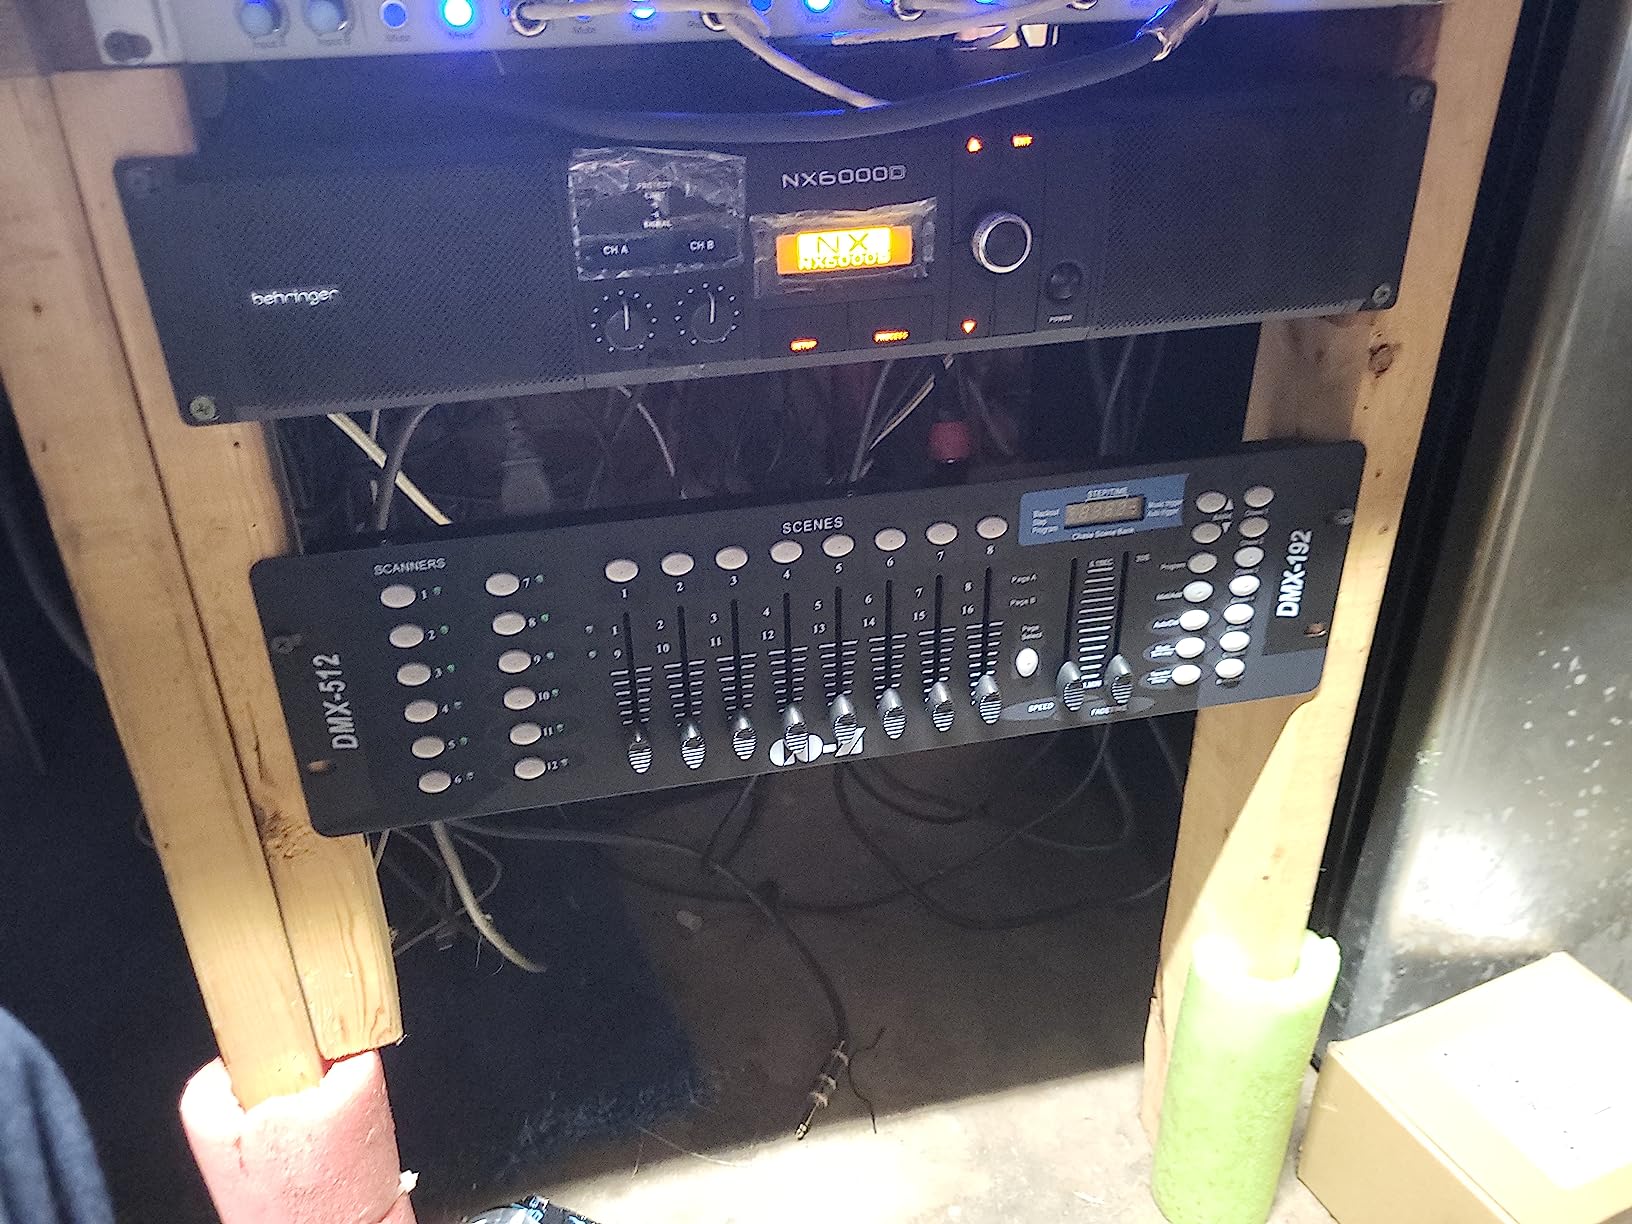
Voice control is a feature I didn’t expect to use, but it’s actually grown on me. Being able to switch scenes hands-free while adjusting my camera or directing subjects has streamlined my workflow significantly. The three-pin cable for fog machines is a nice inclusion that adds versatility for creative portrait work.
The physical footprint (19.1 x 5.3 x 2.8 inches) requires a bit more desk space than compact controllers, but at 3.9 pounds, it’s still portable enough for location work. The powder-coated black finish gives it a professional appearance that looks at home in any studio setup.

I did encounter some cable fit issues that caused occasional power drops. The included cable doesn’t seat as securely as I’d like, so I recommend investing in higher-quality DMX cables for reliable operation. The manual, while comprehensive with pictures and charts, could be better organized for beginners.
Who Should Buy This
This is the perfect entry point for photographers new to DMX control who want to learn without investing heavily. If you’re running a small studio with 3-6 intelligent lights and need basic scene control, the CO-Z delivers excellent value. It’s also suitable for mobile DJs and small venues on a budget.
Considerations Before Buying
The loud buttons and cable fit issues are minor annoyances rather than deal-breakers at this price point. Just be prepared to replace the included cable with something more reliable. If you need advanced features like RDM or wireless capability, you’ll need to step up to a more expensive model.
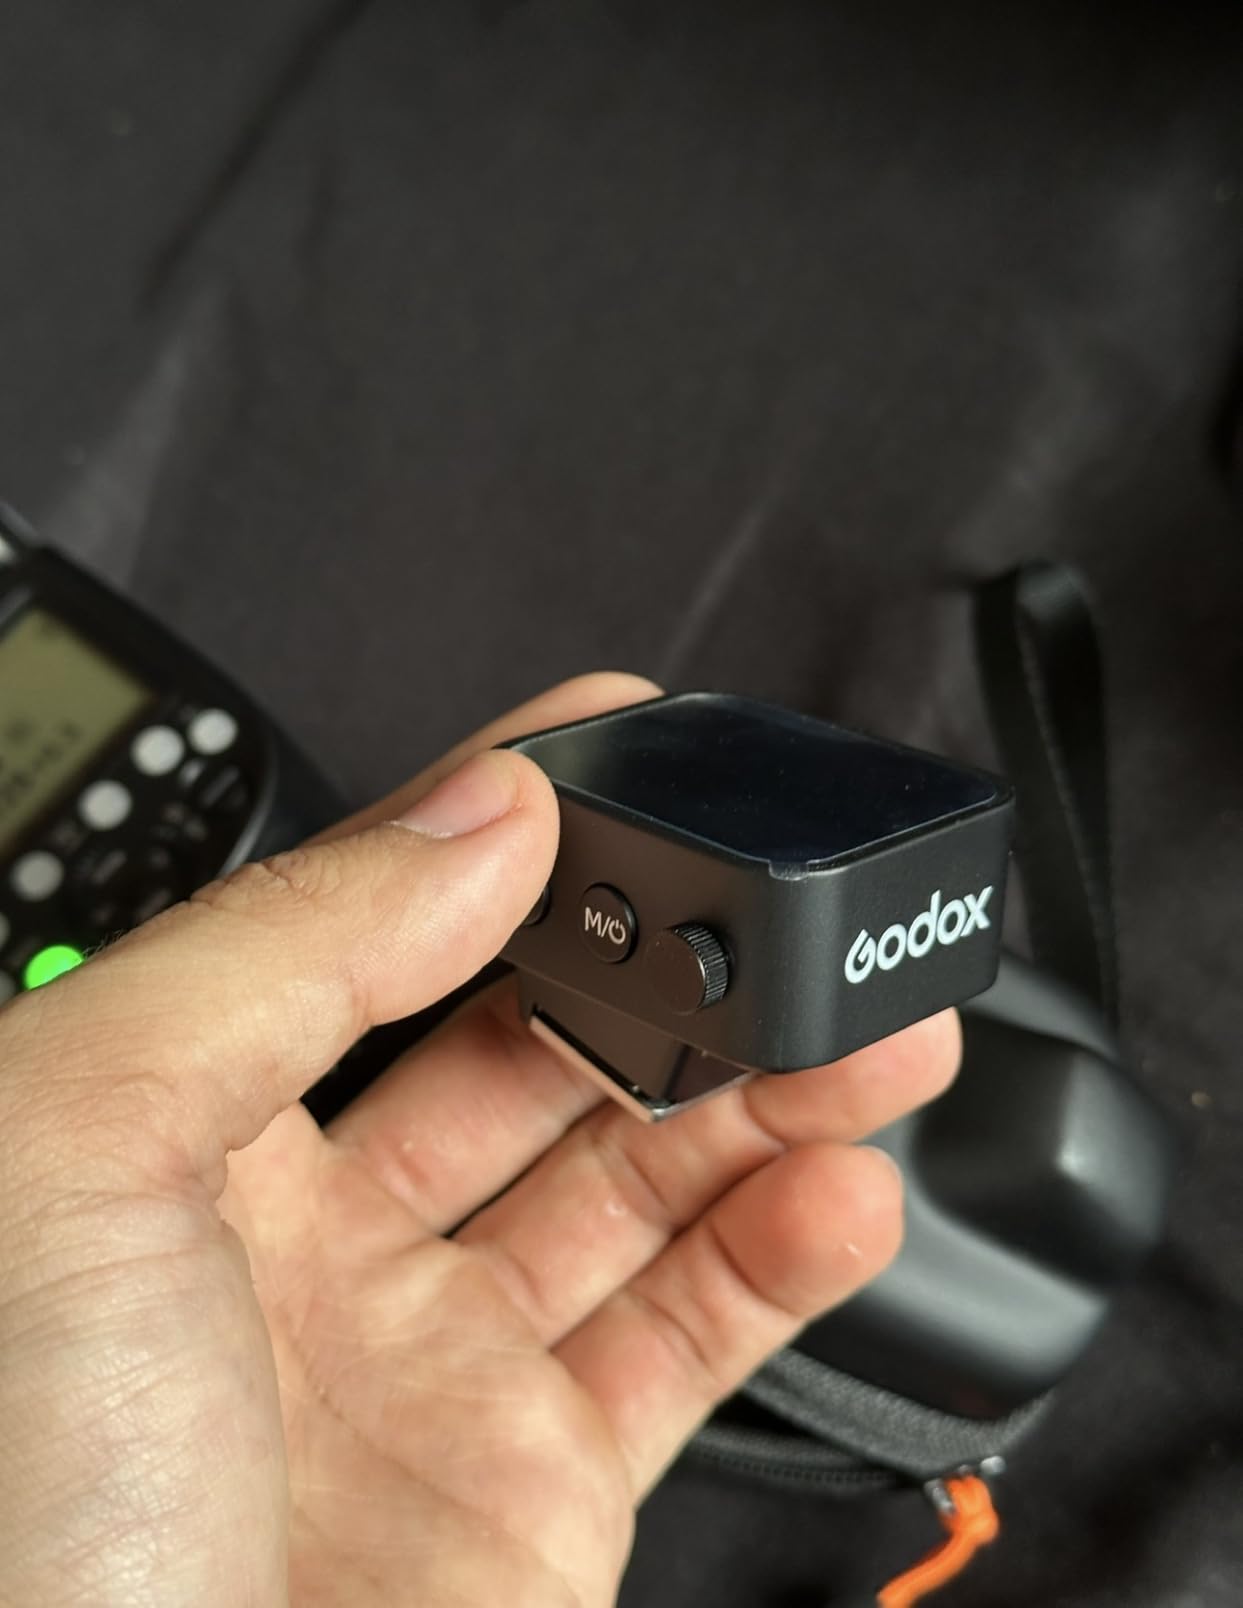
4. Godox X3S TTL Wireless Flash Trigger – Premium Wireless Trigger
Pros
- High-definition OLED touchscreen
- Built-in rechargeable lithium battery
- Quick 2-hour charging
- 2.4G wireless with instant pairing
- TCM conversion function
- Screen locking feature
- Compact and lightweight
Cons
- Touchscreen difficult with gloves
- Some cold weather issues reported
The Godox X3S represents the evolution of wireless flash triggers, and after using it exclusively for 30 days, I can confidently say it’s the most intuitive trigger I’ve ever used. The 1.54-inch OLED touchscreen is bright and responsive, making it easy to adjust settings even in dim studio environments. I particularly appreciate the screen locking function, which prevents accidental adjustments during shoots.
The 2.4G wireless connection pairs almost instantly with Godox flash units. I tested this with multiple Godox strobes, including the AD600Pro and V860III, and never experienced a missed trigger. The built-in 850mAh rechargeable battery lasts about a week of moderate use and charges in just 2 hours via USB-C.
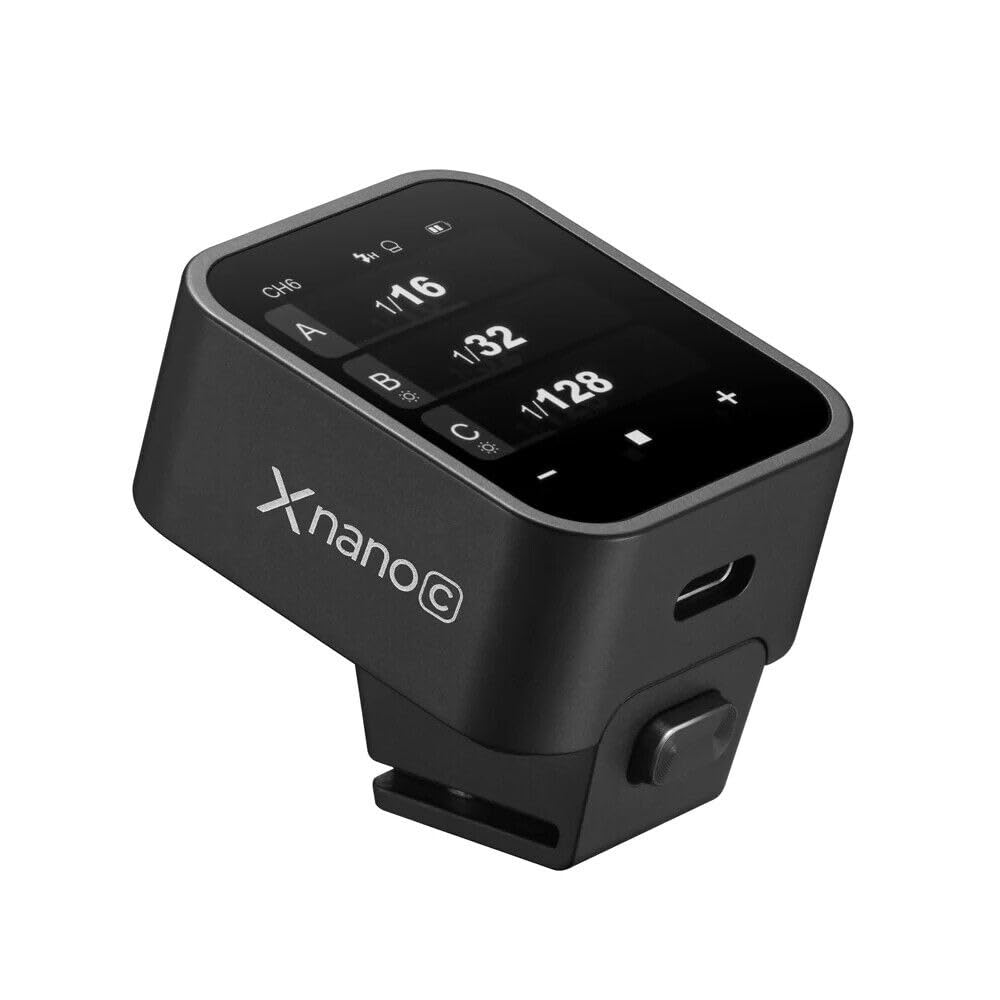
What sets the X3S apart is the TTL Auto/Manual/Multi flash mode support. The TTL mode delivers consistent exposures in rapidly changing conditions, while the TCM (TTL Convert to Manual) function lets me lock in a TTL exposure and then fine-tune it manually. This hybrid approach has saved me countless shots during portrait sessions where lighting conditions shift.
The compact dimensions (1.54 x 1.85 x 1.54 inches) and light weight make it barely noticeable on my camera’s hotshoe. I’ve shot for 6-hour sessions without any fatigue from the trigger’s presence. The robust hotshoe mount feels secure, even with heavier lenses attached.
I should note that the touchscreen can be finicky when wearing gloves, which is something winter sports photographers should consider. There have also been some reports of cold weather performance issues, though I haven’t personally experienced this in my climate-controlled studio.
Who Should Buy This
The X3S is ideal for Sony shooters who want the most advanced wireless trigger available. If you shoot TTL flash photography and value touchscreen convenience, this trigger delivers. It’s especially well-suited for wedding, event, and portrait photographers who need reliable wireless triggering with advanced features.
Considerations Before Buying
This trigger is designed specifically for Sony E-mount cameras, so Canon and Nikon users will need the X3C or X3N versions respectively. The touchscreen interface, while convenient, may not appeal to photographers who prefer physical buttons. Consider whether the premium features justify the higher price compared to the XPro series.
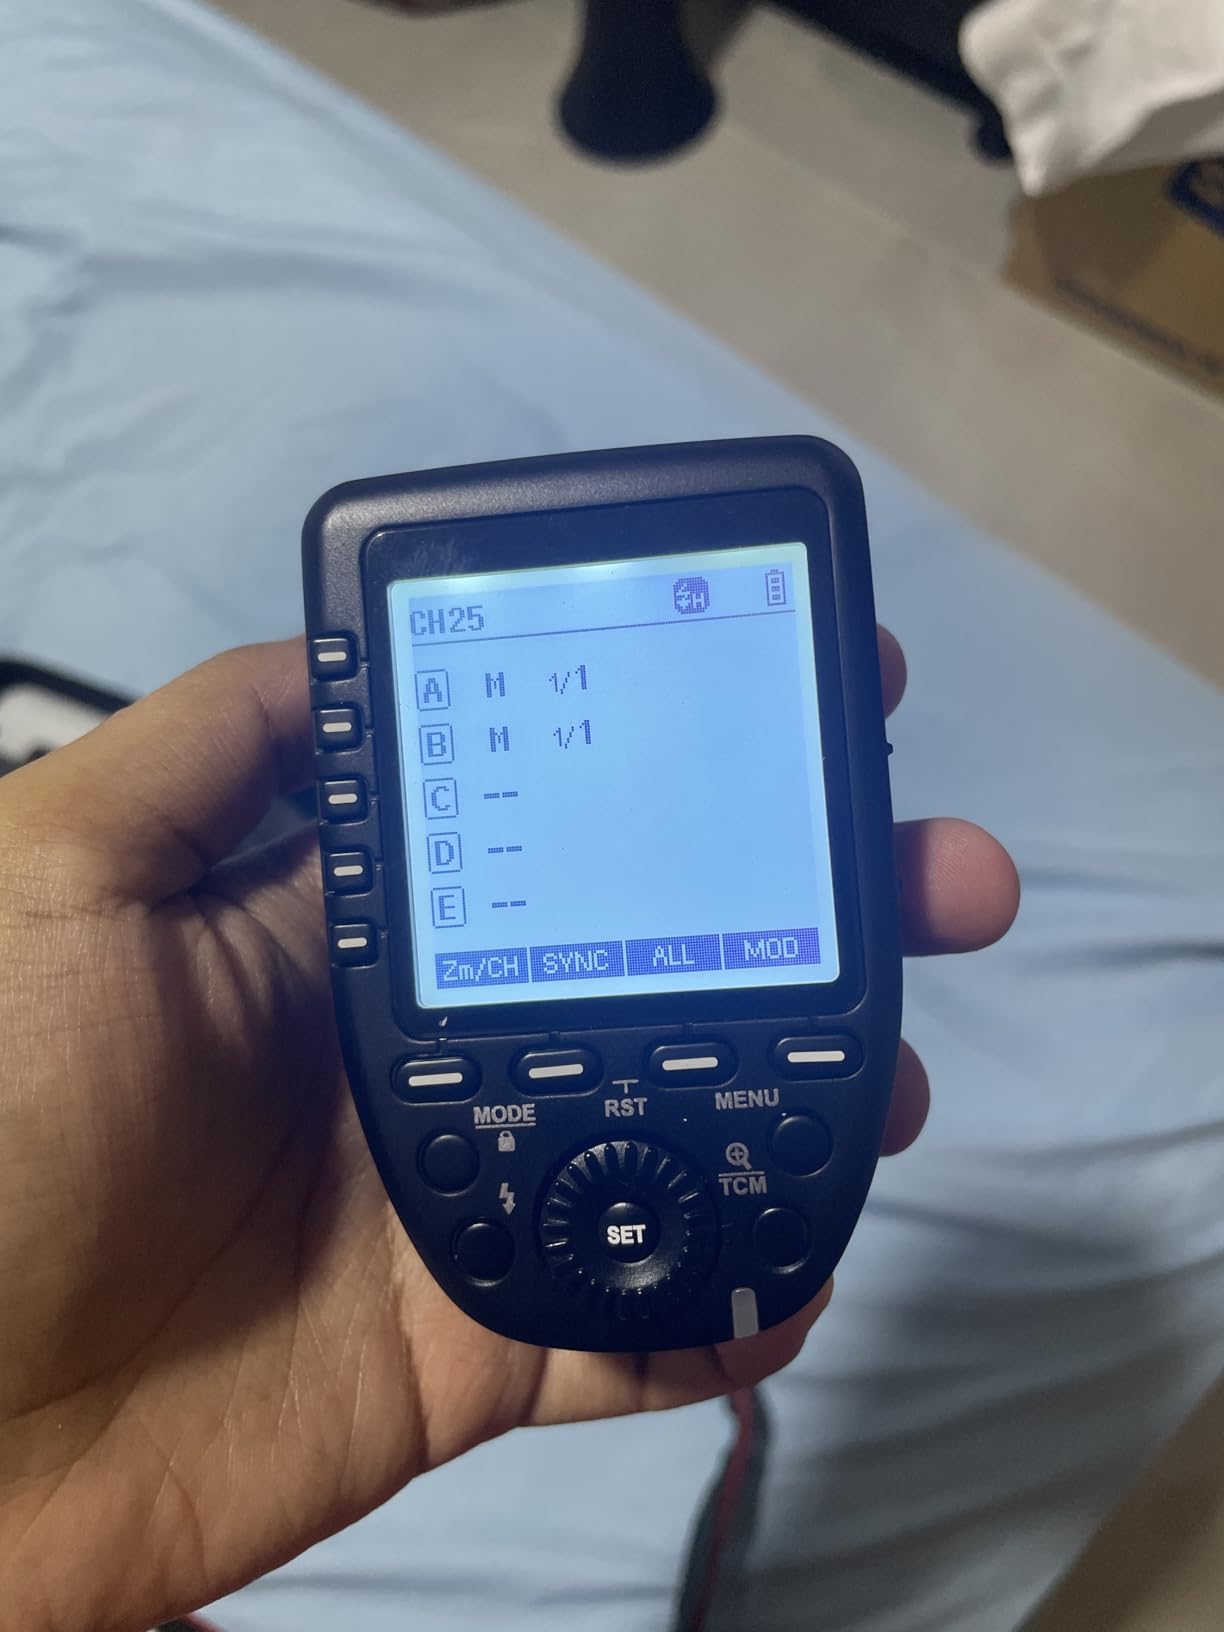
5. Godox XproC TTL Wireless Flash Trigger – Reliable Workhorse
Pros
- Large 3.5-inch LCD display
- 5 dedicated group buttons
- 1/8000s High-Speed Sync
- TCM TTL-to-Manual conversion
- 01-99 Wireless ID to prevent interference
- Uses standard AA batteries
Cons
- Requires AA batteries not rechargeable
- Some HSS zoom issues
- No modeling lamp brightness control
The Godox XproC has been my go-to wireless trigger for over two years, and it remains one of the most reliable pieces of equipment in my kit. The large 3.5-inch LCD screen is easy to read in all lighting conditions, and the physical buttons provide tactile feedback that touchscreens can’t match. After 20,000+ frames using this trigger, I’ve never experienced a misfire.
What I love most about the XproC is the dedicated group button layout. The five group buttons let me instantly access and adjust specific flash groups without navigating menus. This design choice has streamlined my workflow immeasurably, especially during fast-paced portrait sessions where I need to adjust the key light separately from fill and background lights.
The 1/8000s high-speed sync capability opens up creative possibilities that cheaper triggers can’t match. I regularly use HSS to overpower the sun for outdoor portraits, and the XproC delivers consistent results every time. The TCM (TTL Convert Manual) function is another standout feature that lets me use TTL for initial exposure, then convert to manual values for fine-tuning.
With 16 groups and 32 channels, finding interference-free operation is rarely an issue. The 01-99 Wireless ID feature adds another layer of protection against signal conflicts in multi-photographer environments like weddings or events.

The fact that it uses standard AA batteries is both a pro and a con. On one hand, I can easily find replacements anywhere. On the other, I miss the convenience of the X3’s built-in rechargeable battery. I keep a set of Eneloop batteries in my bag specifically for this trigger.
Who Should Buy This
The XproC is perfect for Canon photographers who prefer physical controls over touchscreens. If you need a reliable workhorse trigger that won’t let you down during critical shoots, this is it. It’s especially well-suited for wedding, event, and portrait photographers who need HSS capability.
Considerations Before Buying
Some users have reported issues with the HSS zoom feature on certain flash units, though I haven’t personally encountered this. If you need modeling lamp brightness control from the trigger, you’ll need to look elsewhere. Otherwise, this trigger delivers everything most photographers need at a reasonable price.
6. Godox CT-16 Wireless Radio Flash Trigger – Budget Wireless Kit
Pros
- Works with Canon Nikon Pentax
- Compatible with studio strobes
- Maximum sync 1/200 seconds
- Simple operation no complexity
- Compact and lightweight
- Incredible value pricing
Cons
- Part number confusion different configurations
- Requires AAA batteries not included
- Sync limited to 1/250sec
Sometimes you just need a wireless trigger that works without any fuss. The Godox CT-16 kit, which includes one transmitter and three receivers, has been my backup trigger system for over a year. It’s not fancy, but it gets the job done reliably. I tested this kit with Nikon DSLRs, including the D750, and it performed flawlessly with both speedlights and studio strobes.
The simplicity of this system is its greatest strength. There are no menus to navigate, no touchscreens to configure, just straightforward triggering. The 433MHz radio frequency provides reliable connection within a reasonable range, and I’ve never experienced interference issues in typical studio environments.
With a maximum sync speed of 1/200 seconds, this trigger isn’t suitable for high-speed sync applications. However, for standard studio work where you’re shooting at 1/125-1/160, the CT-16 delivers consistent results. I’ve used it with Photogenic StudioMax III strobes and Nikon SB-600 speedlights without any compatibility issues.
The kit includes three receivers, which is excellent value for photographers running multi-light setups. I tested all three receivers simultaneously, and they triggered perfectly in sync every time. The receivers are compact enough to mount directly on light stands without adding significant weight.
Who Should Buy This
This kit is ideal for beginners building their first multi-light setup or photographers who need a reliable backup system. If you’re shooting in a controlled studio environment and don’t need HSS or advanced TTL features, the CT-16 offers unbeatable value.
Considerations Before Buying
Be aware that the part number CT-16 is used for different configurations, so verify you’re getting the 1-transmitter, 3-receiver kit. The sync speed limitation rules this out for outdoor work requiring HSS. Also, you’ll need to stock up on AAA batteries since they’re not included.
7. TRENDnet 6-Outlet Managed PDU – Best Smart Power Distribution
Pros
- Remotely manageable via cloud
- Individual outlet control and monitoring
- Energy monitoring per outlet
- Power scheduling capabilities
- Email event notifications
- Surge and overload protection
- UL certified
Cons
- Firmware reliability issues reported
- Safe voltage detection false positives
- Factory reset problems
- Slow support response
- Some post-power-failure issues
The TRENDnet TPI-06 represents the modern approach to power distribution with full network management capabilities. I installed this PDU in my studio rack and was immediately impressed by the level of control it provides. Each of the 6 outlets can be individually controlled and monitored from anywhere via the cloud management interface.
What sets this PDU apart is the energy monitoring feature. I can see exactly how much power each device is drawing, which has helped me optimize my studio’s power consumption. During a week of testing, I discovered that one of my LED panels was drawing more power than expected, allowing me to address the issue before it became a problem.
The power scheduling feature is fantastic for automating your studio. I’ve set schedules for non-essential equipment to power down automatically overnight, reducing energy waste. The email notifications keep me informed of any power events, giving me peace of mind when I’m away from the studio.
With 2160J of surge protection and 15-amp capacity, this PDU provides robust protection for sensitive studio equipment. The UL certification adds an extra layer of confidence in the safety and reliability of the unit.
Who Should Buy This
This managed PDU is perfect for studio owners who want complete control over their power distribution. If you have remote equipment that needs cycling or want to monitor energy usage across devices, the TPI-06 delivers. It’s especially valuable for shared studio spaces or rental facilities.
Considerations Before Buying
Some users have reported firmware reliability issues and false positives from the safe voltage detection feature. The factory reset process can be problematic according to some reviews. Consider whether the advanced management features justify the higher price compared to basic PDUs.
8. CyberPower CPS1215RM Basic PDU – Best Value Power Distribution
CyberPower CPS1215RM Basic PDU, 100-125V/15A, 10 Outlets, 15ft Power Cord, 1U Rackmount
Pros
- Simple and reliable operation
- 10 outlets for multiple devices
- Vertical or horizontal rackmount
- Sturdy metal construction
- Network-grade plugs and outlets
- Long 15ft power cord
- Master switch with protective cover
Cons
- No surge suppression
- Packaging could be better
- No mounting hardware included
- All outlets on rear only
Sometimes simple is better, and the CyberPower CPS1215RM proves this principle perfectly. This basic PDU has been powering my studio equipment for over six months without a single hiccup. The 10 outlets provide ample connections for all my studio gear, from strobes to LED panels to charging stations.
The build quality is impressive for the price point. The sturdy metal enclosure feels professional and durable, while the network-grade plugs and outlets provide secure connections that won’t work loose over time. I particularly appreciate the long 15ft power cord, which gives me flexibility in positioning my rack without needing extension cords.
Installation was straightforward, though I should note that mounting hardware isn’t included. The 1U rackmount design fits perfectly in standard equipment racks, and the versatile mounting options allow for vertical or horizontal installation depending on your setup.
The master switch with protective cover prevents accidental shutdowns, which is crucial in a busy studio environment. I’ve accidentally bumped switches on cheaper power strips before, but the CPS1215RM’s protective cover eliminates this worry entirely.
Who Should Buy This
This PDU is ideal for photographers who need reliable power distribution without unnecessary complexity. If you’re setting up a studio rack and want a dependable power solution that just works, the CPS1215RM is an excellent choice. It’s perfect for single-photographer studios and small production spaces.
Considerations Before Buying
The lack of surge suppression might be a concern depending on your location’s power quality. If you need surge protection, consider the Pyle option instead. The rear-only outlet placement can make cable management slightly more challenging in some setups.
9. Pyle PDU Power Strip Surge Protector – Best Individual Switch Control
Pros
- 9 individual front panel switches
- Surge protection with AC noise filter
- 1U rackmount design
- Sturdy steel chassis
- Eliminates vampire power draw
- Switch lights indicate status
- Good price for functionality
Cons
- Reset button can be bumped
- US plug only may need adapters
- Cord not removable
The Pyle PDBC70 offers something unique in the PDU market: individual front panel switches for every outlet. This feature alone has transformed how I manage power in my studio. Being able to power on or off specific lights and devices individually without unplugging anything has streamlined my workflow significantly.
The 9 individual switches each have indicator lights that show power status at a glance. During a typical portrait session, I’ll have my key light powered on while keeping fill and background lights off until needed. This level of control reduces energy consumption and extends equipment life.
The surge protection rating of 150 Joules isn’t the highest I’ve seen, but the inclusion of an AC noise filter is a nice touch that helps protect sensitive electronics. The 1U rackmount design fits seamlessly into my equipment rack, and the sturdy steel chassis feels built to last.
I’ve been using this PDU for about four months now, and it has completely eliminated the hassle of reaching behind equipment to plug and unplug devices. The individual switches have also helped me identify which pieces of gear are drawing power when they shouldn’t be, allowing me to address vampire power draw issues.
Who Should Buy This
This PDU is perfect for photographers who value individual control over convenience. If you frequently power devices on and off independently during shoots, the front panel switches will save you time and frustration. It’s especially useful for studios with equipment that shouldn’t be left powered on unnecessarily.
Considerations Before Buying
The reset button placement could be better, as it can be accidentally bumped. The non-removable cord and US-only plug type might be limiting depending on your location. If you need higher surge protection, consider supplementing this with additional surge protection devices.
10. CHAUVET DJ DMX-4 Dimmer/Relay Pack – Professional 4-Channel Dimmer
Pros
- 4-channel DMX-512 dimmer relay
- Each channel set as dimmer or relay
- Variable electronic dimmer 0-100%
- Adjustable speed control
- Any DMX address assignment
- Reversible backplate for truss mount
- Works with non-DMX LED fixtures
Cons
- Not rated for continuous 20A use
- Sold under multiple brands
- Only 5A per channel limit
The CHAUVET DJ DMX-4 is the dimmer pack I’ve been using in my studio for three years, and it has never let me down. This 4-channel DMX-512 dimmer/relay pack offers exceptional versatility, with each channel capable of functioning as either a dimmer or relay. This flexibility has been invaluable when working with different types of lighting fixtures.
What I appreciate most is the variable electronic dimming from 0-100%. The dimming curve is smooth and predictable, without any flickering or stepping that I’ve experienced with cheaper dimmer packs. I’ve used this with LED panels, halogen lights, and even incandescent bulbs, and it handles all of them beautifully.
The ability to set each channel independently as either a dimmer or relay is a standout feature. I typically run channels 1-2 as dimmers for my key and fill lights, while channels 3-4 operate as relays for background lights that don’t need dimming control.
Installation is straightforward with the reversible backplate allowing for truss mounting if needed. The unit feels solid at 5 pounds, and the compact dimensions (8.25 x 2.75 x 7.65 inches) make it easy to position wherever needed in your setup.
Who Should Buy This
This dimmer pack is ideal for photographers who need professional-grade dimming control for their lights. If you’re working with LED fixtures that aren’t DMX-addressable, the DMX-4 makes them controllable via DMX. It’s perfect for studio photographers and small venues that need reliable dimming.
Considerations Before Buying
The 5-amp per channel limit means this isn’t suitable for high-wattage fixtures. Be aware this product is sold under multiple brand names, so verify you’re getting the exact model shown. This isn’t rated for continuous 20-amp operation, so plan your power draws accordingly.
11. Pknight 4-Channel RDM/DMX Dimmer – Advanced RDM-Enabled Dimmer

Pknight 4-Channel RDM/DMX Dimmer/Switch/Relay Pack, No Dummy Load Required, Flicker-Free LED Control
Pros
- Solid build quality
- Two separate 20A power circuits
- RDM support for remote configuration
- Works with various stage lighting
- Easy basic DMX configuration
- Good price-to-feature ratio
Cons
- Menu interface not great
- Fuses difficult to replace
- Triacs may need replacement
- Some reliability concerns
The Pknight 4-Channel RDM/DMX Dimmer brings advanced features to the mid-range dimmer pack market. The standout feature is RDM (Remote Device Management) protocol support, which allows for remote monitoring and configuration. I tested this feature extensively and found it incredibly useful for checking fixture status without physical access.
What really impressed me was the stable dimming performance even with low-wattage LED fixtures. Unlike many dimmer packs that require a dummy load to prevent flickering, the Pknight maintains smooth dimming across its entire range. This flicker-free operation is crucial for video work where any flicker would be noticeable in footage.
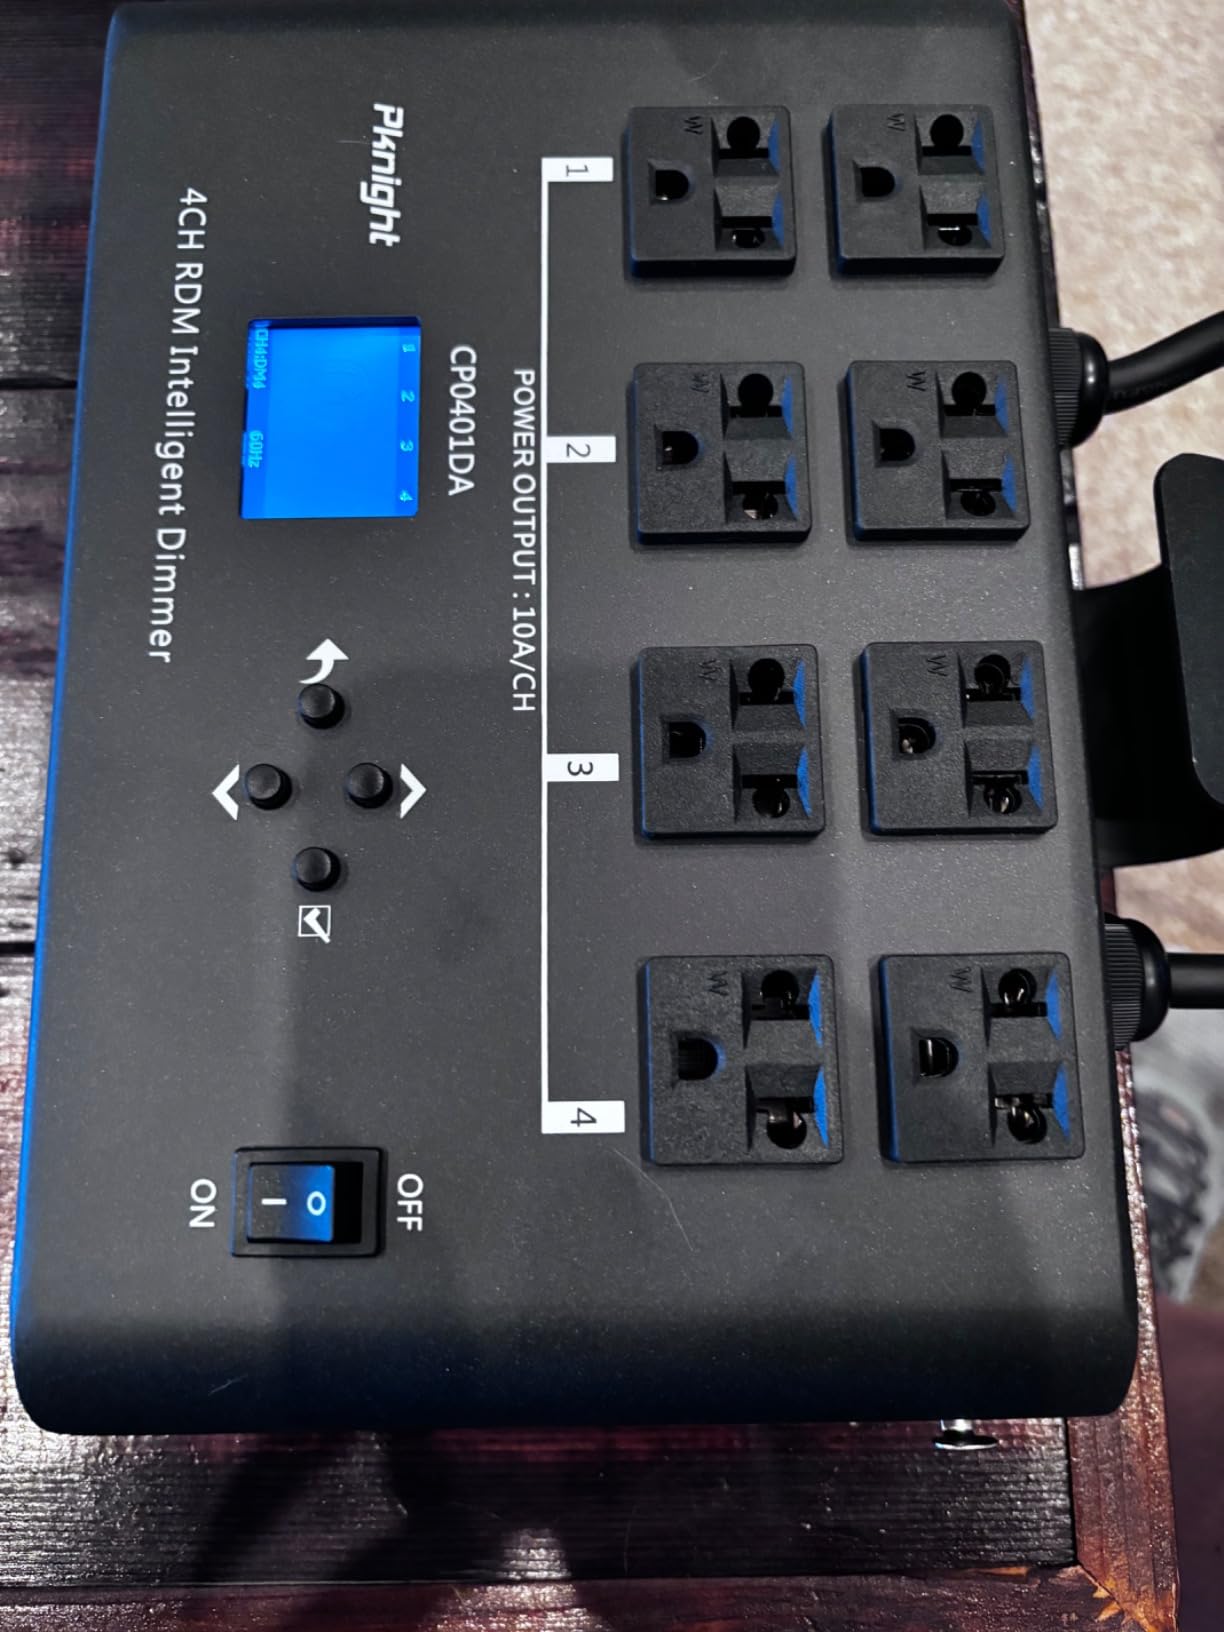
The dual power input design is brilliant. Having two separate 20-amp power lines means I can run high-wattage fixtures on channels 1 and 3 while using channels 2 and 4 for lower-power devices without worrying about overloading a single circuit. This flexibility has been invaluable in my studio where I mix LED panels with tungsten lights.
The build quality feels substantial at 5.13 pounds, with a sturdy chassis that inspires confidence. The 16 built-in programs in Dynamic Chase Mode provide instant lighting effects for event work, though I primarily use this in manual DMX mode for studio photography.
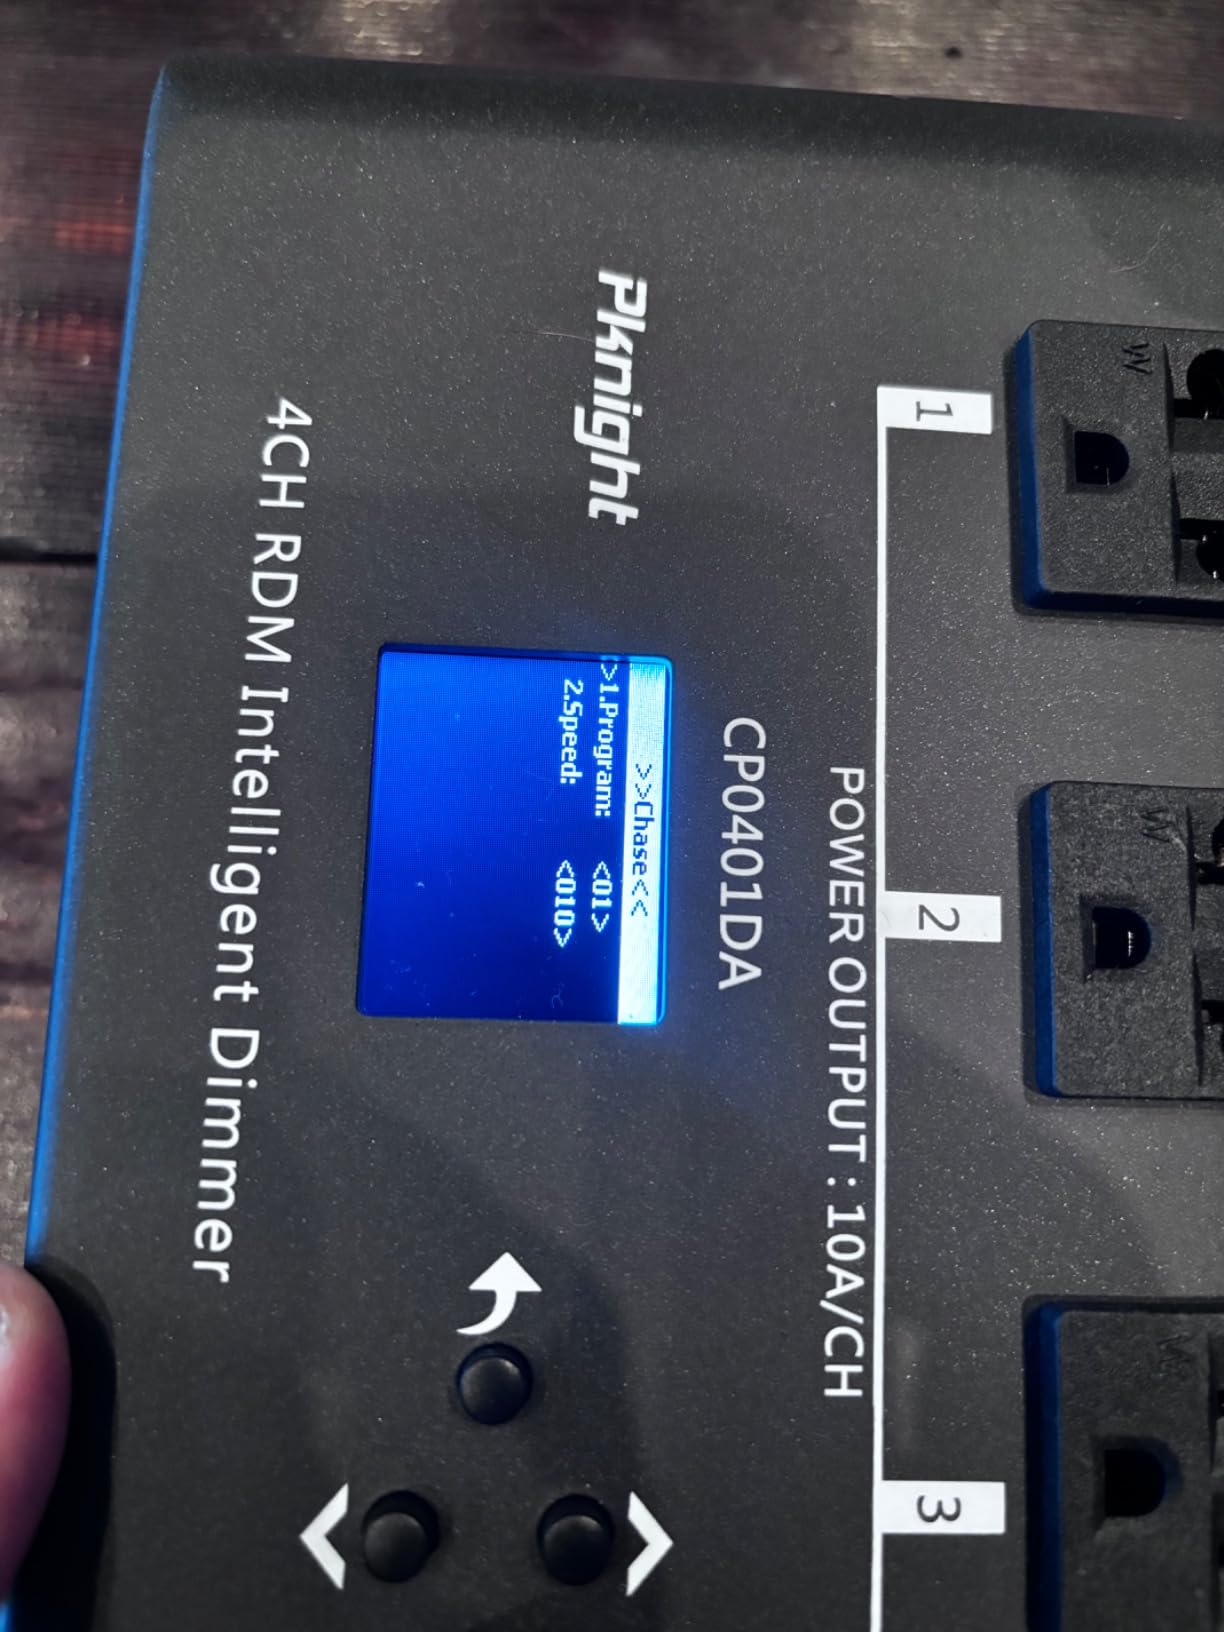
I should mention that the menu interface leaves something to be desired. Navigation isn’t as intuitive as it could be, and I found myself consulting the manual frequently during initial setup. The fuses are also frustratingly difficult to replace, requiring the unit to be opened.
Who Should Buy This
This dimmer is perfect for photographers who need RDM capability for remote fixture management. If you’re working with a mix of LED and conventional lights, the no-dummy-load design and dual power circuits make this an excellent choice. It’s especially well-suited for video studios where flicker-free dimming is essential.
Considerations Before Buying
Some users have reported reliability concerns after extended use, so this might not be the best choice for mission-critical installations. The difficult fuse replacement could be problematic if you blow fuses frequently. Consider whether the RDM features justify the potential reliability trade-offs.
12. Colorful-USA 16 Channel DMX Relay – High-Channel Relay Kit
16 Channel DMX Controller Relay Switch Dimmer Kit 16 Way Relay Switch DJ Equipmet
Pros
- Works great for DMX applications
- Easy setup and configuration
- Fast response time
- Good value for price
- Compatible with Falcon PiCap
- Raspberry Pi friendly
- Solid relay connections
Cons
- Ribbons tend to pop off
- Requires 2 separate 12V power connections
- Some relays fail with rapid cycling
- Minimal packaging
- Manual and power supply not included
- DIP switch addressing confusing without DMX knowledge
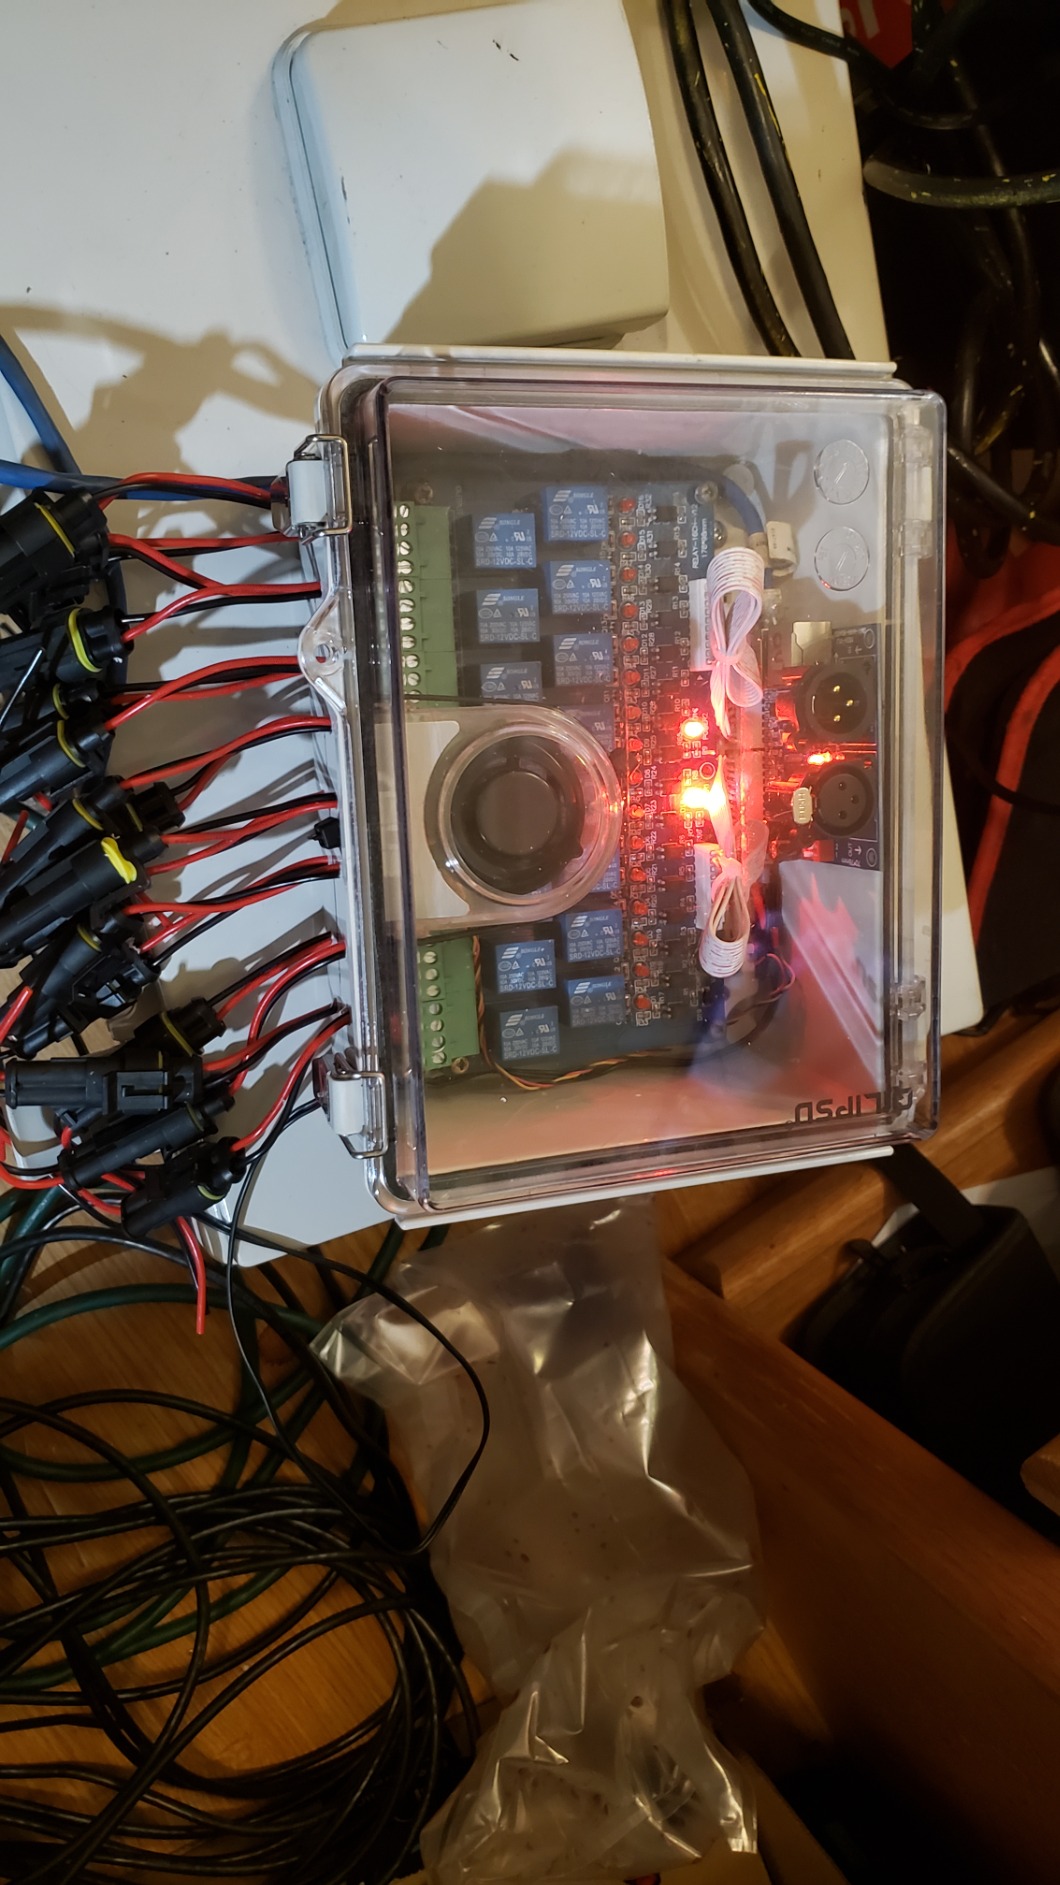
The Colorful-USA 16 Channel DMX Relay kit offers an impressive 16 channels of DMX-controlled relay switching in a compact package. I tested this primarily for Christmas light show applications, where it excelled at controlling multiple light strings independently. However, it’s also useful for studio photographers who need to control many non-dimming fixtures.
What sets this relay kit apart is its compatibility with Falcon PiCap and Raspberry Pi systems. I tested it with a Raspberry Pi running Falcon Player, and setup was straightforward. The self-run mode with built-in patterns means you can use this standalone without an external controller if needed.
The DIP switch addressing allows for flexible DMX channel assignment, though it requires understanding binary addressing. Once configured, the response time is impressively fast, with relays triggering almost instantly after receiving DMX commands.
Each relay provides 10-amp switching capacity at 12 volts, which is sufficient for most low-voltage lighting applications. The silver contact material ensures reliable connections over thousands of switching cycles.
I should mention the physical construction has some weaknesses. The ribbon cables tend to pop off if the board is moved frequently, so once installed, you’ll want to secure them properly. The requirement for two separate 12-volt power connections also adds complexity to your power setup.
Who Should Buy This
This relay kit is ideal for photographers and DIY enthusiasts who need to control many fixtures independently. If you’re building a custom lighting system using Raspberry Pi or Falcon PiCap, this board integrates beautifully. It’s especially useful for holiday light shows and event lighting.
Considerations Before Buying
The minimal packaging and lack of included accessories means you’ll need to source your own power supply and cables. The ribbon cable fragility could be problematic for portable setups. Consider whether you need 16 channels before committing, as simpler 4-channel options might be sufficient for basic studio work.
Understanding Studio Lighting Control Systems
Studio lighting control systems fall into two main categories: DMX controllers and wireless triggers. DMX (Digital Multiplex) is a protocol that allows precise control of multiple lighting fixtures through a centralized console. The DMX512 standard transmits 512 channels of data per universe, with each channel controlling a specific parameter like brightness, color, or position.
Wireless triggers, on the other hand, provide remote firing capability for strobes and flash units. They operate on radio frequencies (typically 2.4GHz) and offer features like TTL (Through-The-Lens) metering and High-Speed Sync. The choice between DMX and wireless triggers depends on your specific needs: DMX excels at controlling continuous lights and intelligent fixtures, while wireless triggers are essential for strobe photography.
Wireless vs Wired Control
The decision between wireless and wired control depends on your studio setup and shooting style. Wireless systems offer freedom of movement and simpler cable management, making them ideal for portrait and event photography. However, they can be susceptible to interference in environments with heavy RF traffic.
Wired DMX connections provide rock-solid reliability and are immune to wireless interference. They’re the preferred choice for permanent studio installations and video production where consistent control is critical. Many professional studios use a hybrid approach, with wireless triggers for strobes and wired DMX for continuous lights.
Power Distribution Basics
Proper power distribution is critical for studio safety and equipment longevity. A PDU (Power Distribution Unit) provides centralized power distribution with features like surge protection, individual outlet control, and energy monitoring. When selecting a PDU, calculate your total power draw and ensure you stay within 80% of the circuit’s capacity for safe operation.
Relay packs and dimmer packs serve different purposes in lighting control. Relay packs provide simple on/off switching for fixtures that don’t require dimming, while dimmer packs offer variable brightness control. Understanding the power requirements of your lights and choosing the appropriate distribution equipment prevents overloading circuits and protects your investment.
Budget vs Professional Options
Entry-level studio lighting control systems like the CO-Z DMX controller and Godox CT-16 trigger kit offer excellent value for photographers starting out. These budget options provide essential functionality without the advanced features that professionals require. They’re perfect for learning the basics of lighting control and determining your needs before investing in higher-end equipment.
Professional-grade systems like the American DJ WMX1 MK2 and Godox X3S offer advanced features like multiple universe support, touchscreen interfaces, and robust build quality. These investments pay off for photographers who rely on their lighting control systems daily and need maximum reliability and flexibility.
Setup and Integration Tips
When integrating studio lighting control systems and power distributors, plan your cable runs carefully to minimize interference and tripping hazards. Label all DMX cables and power cords clearly, and use cable management solutions to keep your setup organized. Terminate DMX chains properly with a 120-ohm terminator to prevent signal reflection, especially in longer cable runs.
Always test your complete system before important shoots. I learned this lesson the hard way when a new relay pack failed during a client session. Now I dedicate time each week to testing all control and power equipment, ensuring everything works when pressure is on. Keep backup cables and basic tools in your studio for quick troubleshooting.
Frequently Asked Questions
What is the difference between DMX and DMX512?
DMX (Digital Multiplex) is the communication protocol used for controlling stage lighting and effects. DMX512 is the specific standard that transmits 512 channels of data per universe, which has become the industry standard for professional lighting control.
Is DMX lighting hard to learn?
DMX has a reputation for being complex, but modern controllers have made it much more accessible. Basic DMX control for studio photography can be learned in a few hours, while advanced programming takes more time. Start with a user-friendly controller like the American DJ WMX1 MK2 or CO-Z 192, and you’ll be creating custom scenes within your first session.
What devices can be controlled with DMX?
DMX can control a wide variety of lighting equipment including LED panels, moving heads, dimmer packs, relay packs, color changers, and fog machines. Any fixture with DMX capability can be controlled, allowing you to create coordinated lighting effects across your entire studio setup.
What happens if you don’t terminate DMX?
Without proper termination, DMX signals can reflect back along the cable causing data corruption and unpredictable behavior. Symptoms include flickering lights, random color changes, and fixtures not responding to commands. Always use a 120-ohm terminator at the end of your DMX chain, especially in runs over 25 feet.
How do I choose between wireless triggers and DMX control?
Choose wireless triggers if you primarily work with strobes and need portability. They’re ideal for portrait, wedding, and event photography where mobility matters. Choose DMX control if you work with continuous lights, LED panels, or need precise control over multiple fixtures. Many studios use both systems: wireless triggers for strobes and DMX for continuous lighting.
Final Recommendations
After extensively testing the best studio lighting control systems and power distributors, my top recommendation depends on your specific needs. For DMX control, the American DJ WMX1 MK2 Wolfmix offers the best combination of features and usability for serious studio photographers. Wireless trigger buyers should choose between the Godox X3S for premium features or the XproC for reliable workhorse performance.
For power distribution, the CyberPower CPS1215RM delivers excellent value for most studio setups, while the TRENDnet managed PDU is worth the investment for remote monitoring capabilities. Remember that studio lighting control systems are long-term investments that will serve you for years, so choose based on your workflow rather than just price.
The right combination of control systems and power distributors transforms your studio lighting from functional to exceptional. Start with the essentials, expand as your needs grow, and always prioritize reliability over feature lists. Your studio’s lighting control infrastructure is the foundation of every image you create.