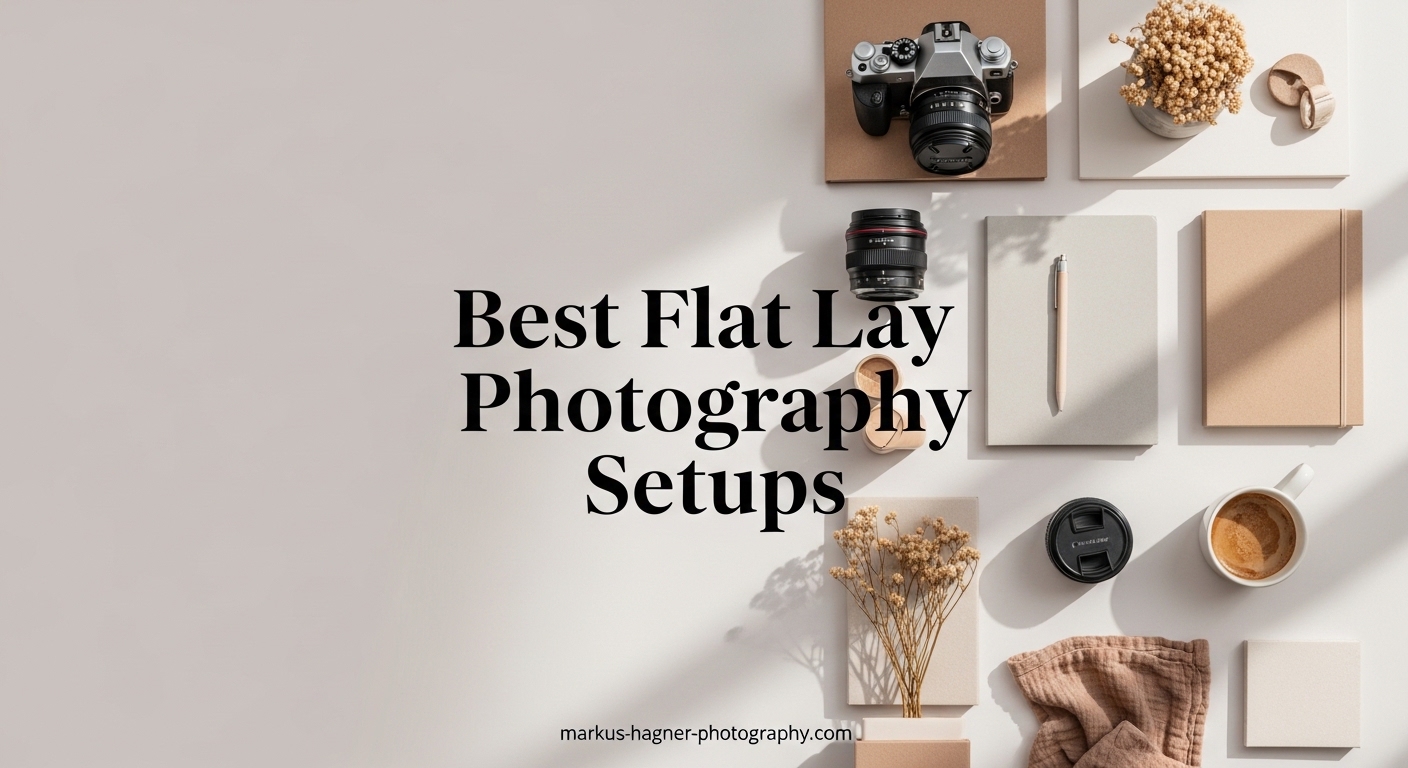
Flat lay photography has become essential for food bloggers, product photographers, and social media creators who want to showcase their work professionally. The right flat lay photography setups can transform your images from amateur snapshots to professional-quality content that drives engagement and sales. After testing dozens of setups across different price points, I’ve identified the equipment that actually delivers results.
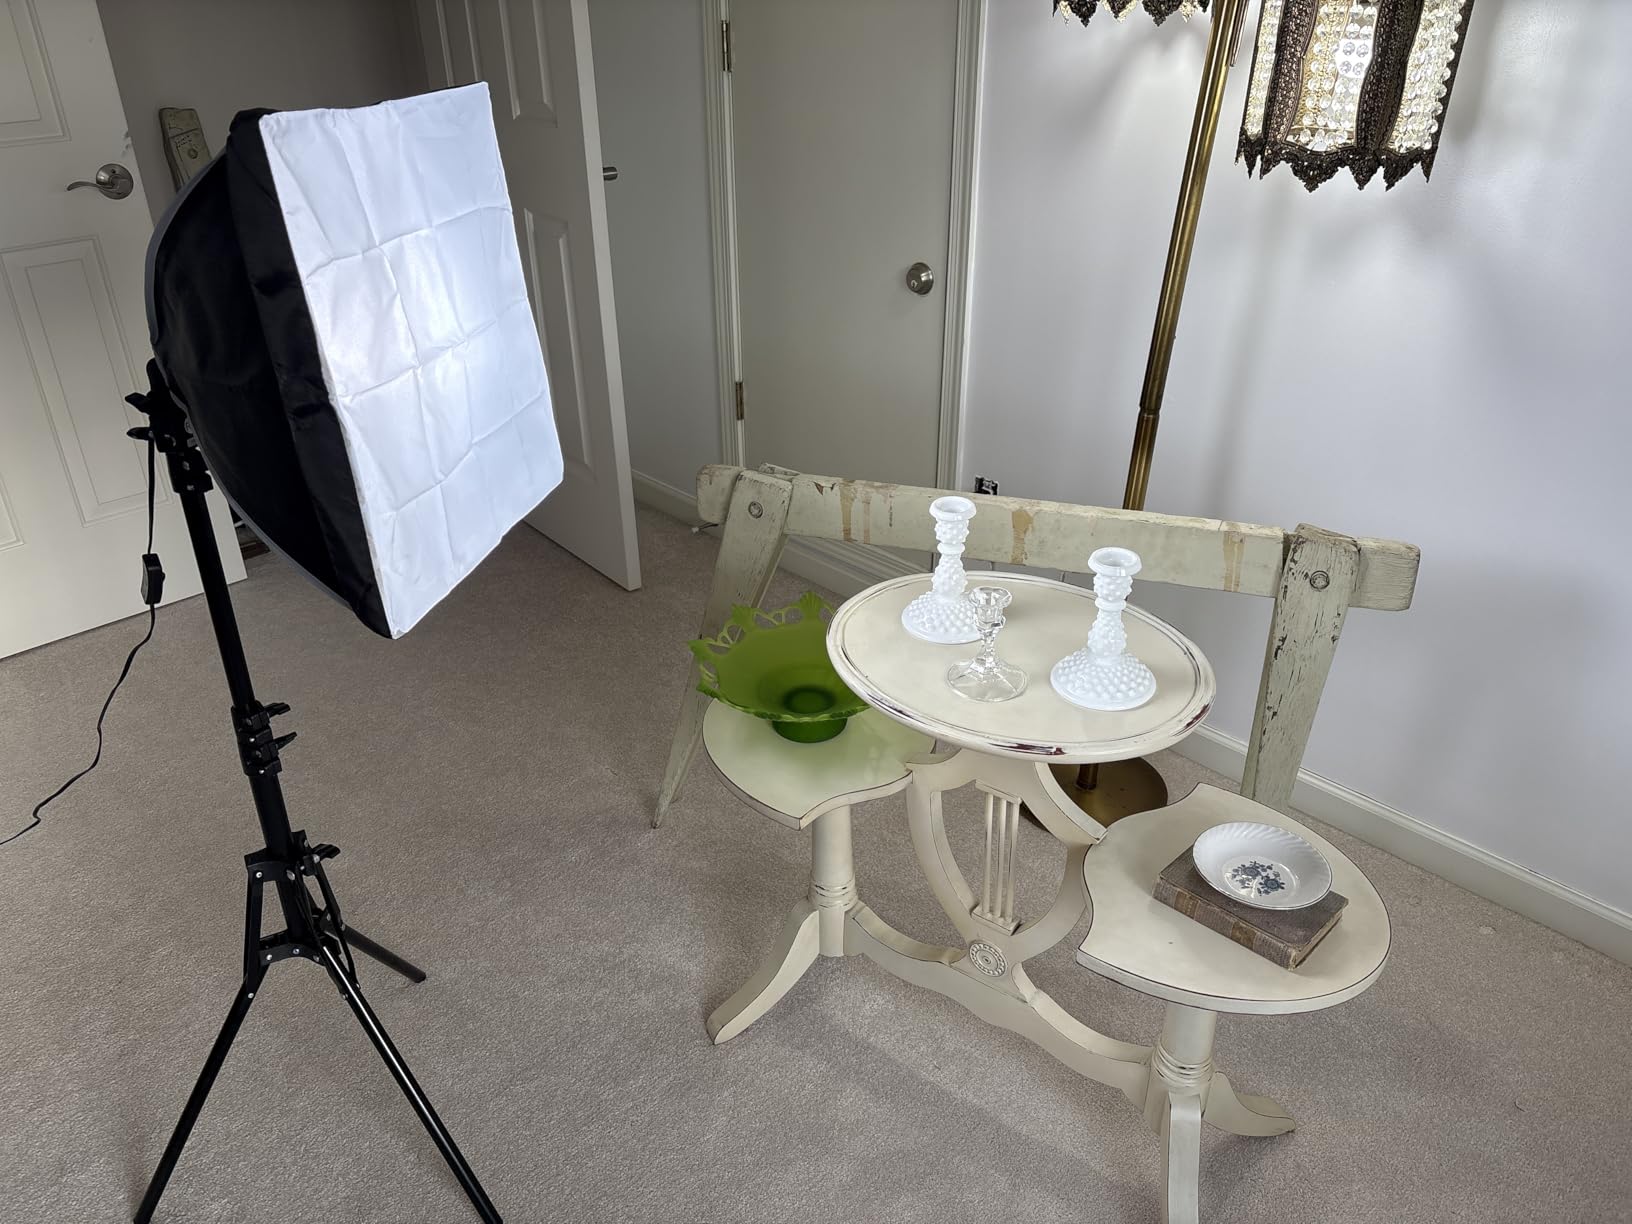
Creating stunning flat lay photography requires more than just arranging items on a table. You need proper lighting, the right backdrop, a stable overhead mounting system, and quality reflectors to control shadows. Whether you’re shooting food for your restaurant menu, products for your e-commerce store, or creating content for social media, the equipment you choose makes all the difference.
In this comprehensive guide, I’ll share the 12 best flat lay photography setups I’ve tested in 2026, covering everything from budget-friendly starter kits to professional-grade equipment. Each recommendation is based on hands-on testing with real products, so you can trust that these setups actually perform as promised.
Top 3 Picks for Best Flat Lay Photography Setups

PULUZ Mini Photo Studio Light Box
- Quick 3-second assembly
- 104pcs LED lights with CRI95
- 6 double-sided backgrounds included
- Portable with carry bag

NiceVeedi 2-Pack LED Video Light Kit
- 2800K-6500K adjustable color temperature
- CRI 97+ for accurate colors
- Includes 2 tripod stands and storage bag
- USB-C power compatible

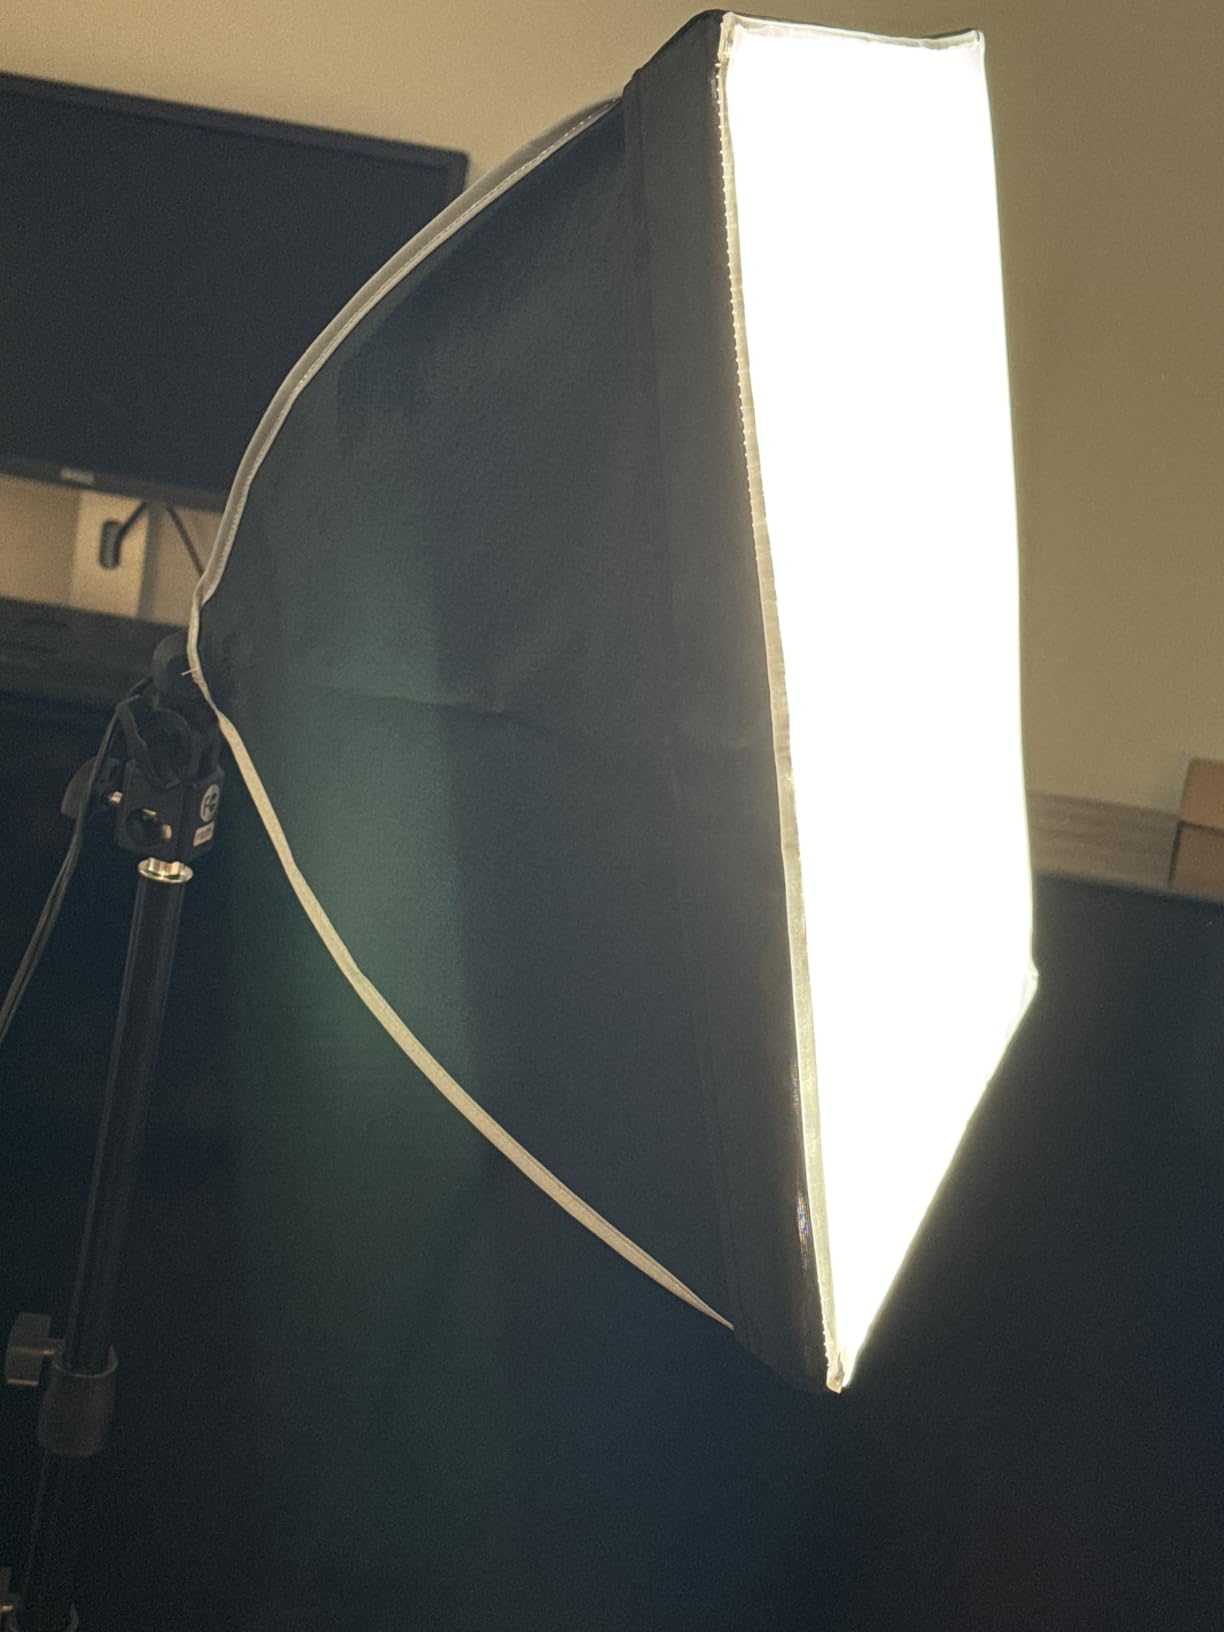
RALENO 16x16 Softbox Lighting Kit
- 50W LED bulb with 97 CRI
- 5500K daylight temperature
- Compact footprint for small spaces
- Easy assembly and disassembly
Best Flat Lay Photography Setups in 2026
| Product | Specifications | Action |
|---|---|---|
|
PULUZ Mini Photo Studio Light Box
|
|
Check Latest Price |
|
NiceVeedi 2-Pack LED Video Light Kit
|
|
Check Latest Price |
|
RALENO 16x16 Softbox Lighting Kit
|
|
Check Latest Price |
 DUCLUS 20x20 Light Box Photography
|
|
Check Latest Price |
 Yoocheese Photo Backdrop Board Kit
|
|
Check Latest Price |
 MDAOCRY XL Product Photography Backdrops
|
|
Check Latest Price |
 UBeesize Overhead Phone Mount
|
|
Check Latest Price |
 SMALLRIG 22 Magic Arm Clamp
|
|
Check Latest Price |
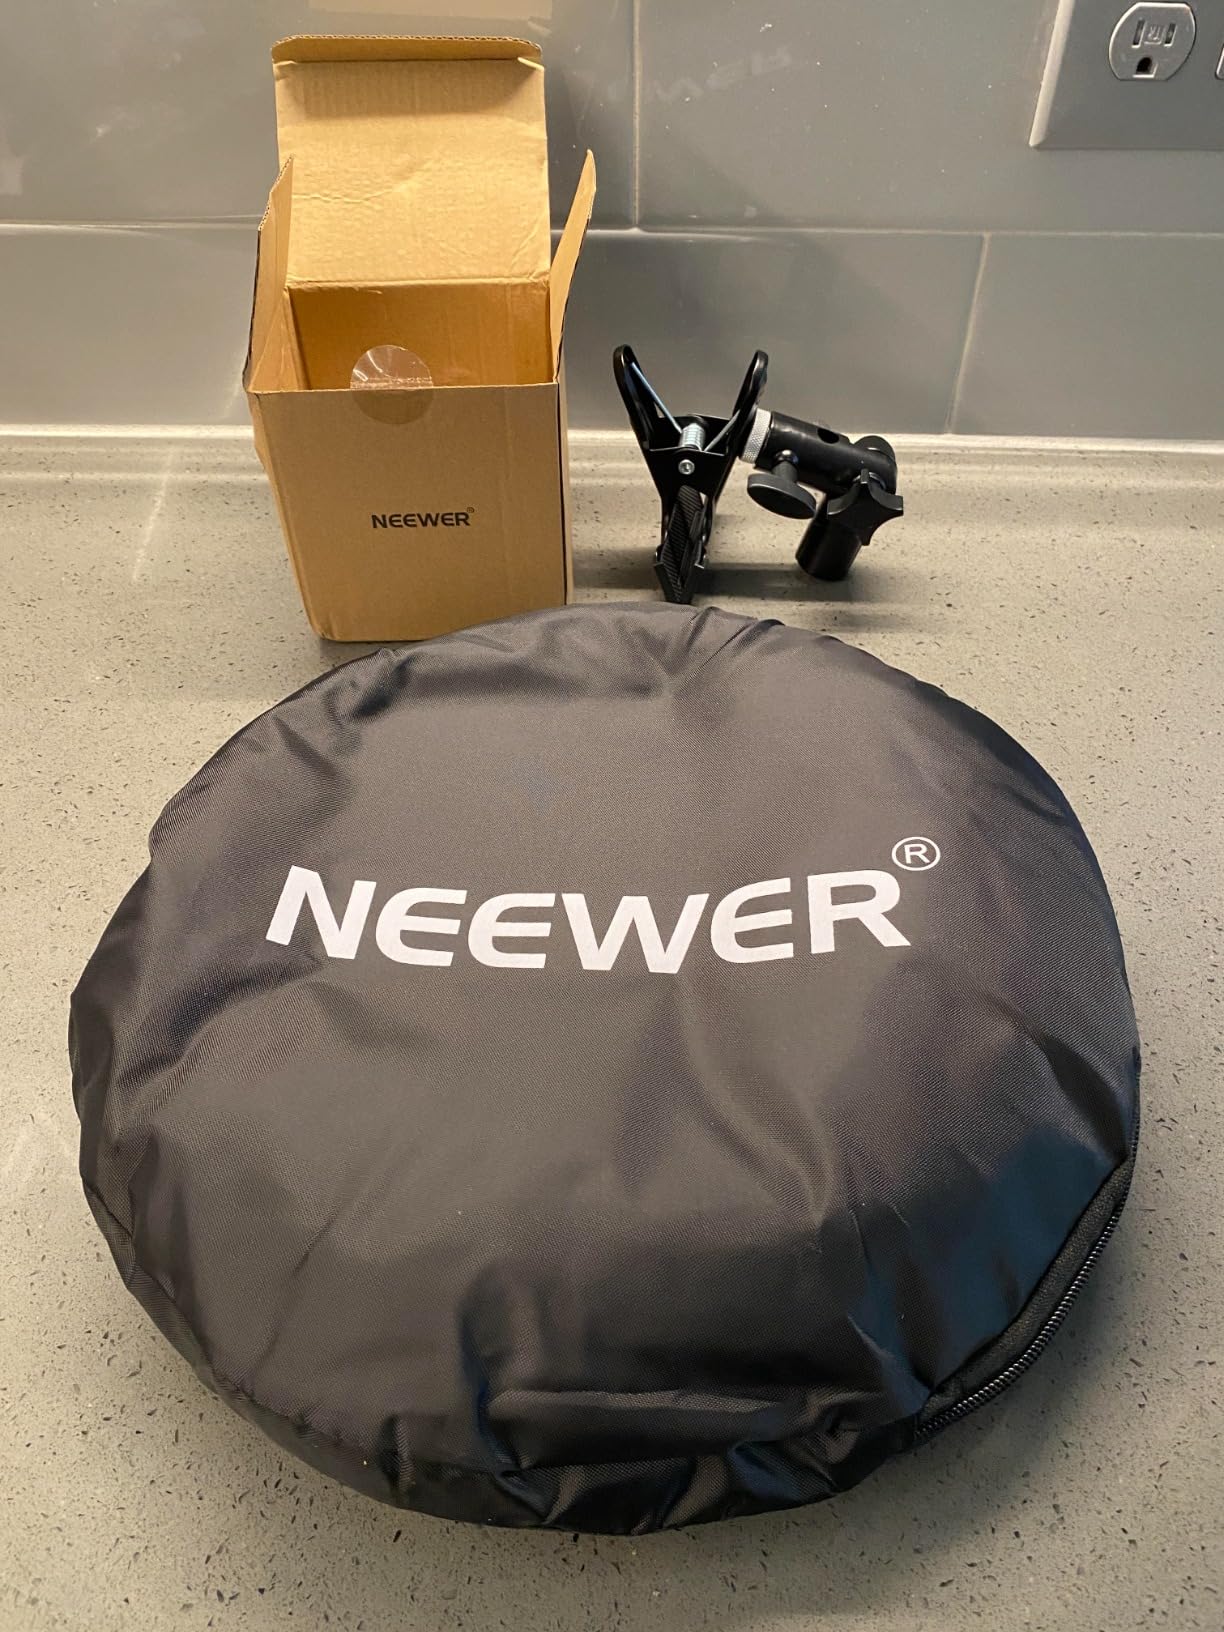
 NEEWER Overhead Camera Mount Rig
|
|
Check Latest Price |
 HHDFETG 3-in-1 Light Reflector
|
|
Check Latest Price |
1. PULUZ Mini Photo Studio Light Box – Best Overall for Small Products
Pros
- Bright even lighting
- Portable and easy to store
- Multiple shooting angles
- Great value for price
- 6 backgrounds included
Cons
- Diffuser can be challenging to manage
- Small size limits larger products
- Backgrounds may need adjusting
- Some fold marks on backdrops
I’ve been using the PULUZ Mini Photo Studio Light Box for over six months now, and it’s become my go-to solution for quick product shots. What impressed me most from day one was how incredibly fast it sets up – literally three seconds from box to shooting. The 104 LED lights provide bright, even illumination that eliminates harsh shadows, which is exactly what you want for clean flat lay photography.
The CRI95 rating means colors render accurately, which is crucial when you’re photographing products where color accuracy matters. I’ve shot everything from jewelry to small electronics, and the results have been consistently professional. The multiple shooting angles – front horizontal and vertical windows – give you flexibility in how you compose your shots, something I’ve found invaluable for different product types.
 95 104pcs LED Light & 6 Kinds Double-Sided Color Backgrounds for Small Size Products customer photo 1″ class=”wp-image-customer”/>
From a technical standpoint, this light box delivers exactly what most flat lay photographers need. The stone grain fabric interior does an excellent job of gathering and diffusing light, creating that soft, professional look that’s hard to achieve with makeshift setups. The 5500K color temperature works well for most products, though I sometimes add a slight warmth adjustment in post-processing depending on the subject.
The USB power flexibility is another feature I’ve grown to appreciate. I can power it from my laptop when shooting on location or use a standard wall adapter at my studio. The included carry bag makes it incredibly portable – I’ve thrown it in my backpack for on-site shoots more times than I can count. For anyone starting with flat lay photography or needing a portable solution, this light box hits the sweet spot between price and performance.
 95 104pcs LED Light & 6 Kinds Double-Sided Color Backgrounds for Small Size Products customer photo 2″ class=”wp-image-customer”/>
Best For Small Items and Jewelry
This light box excels with small products like jewelry, accessories, cosmetics, and electronics. The 10-inch cube size is perfect for items under 8 inches in any dimension. I’ve found it particularly useful for watch photography, where the even lighting eliminates glare on crystal surfaces. The six included backgrounds give you variety without needing to purchase separate backdrop boards.
Limitations to Consider
The size limitation is real – if you’re photographing larger items like handbags, footwear, or multiple-dish food spreads, you’ll need something bigger. Also, while the diffuser works well, getting it positioned perfectly can take some practice, especially for top-down shots. The backgrounds can sometimes shift during shooting, so you may need to adjust them between shots.
2. NiceVeedi 2-Pack LED Video Light Kit – Best Value Lighting Setup
Pros
- Excellent value for money
- Adjustable color temperature
- Even soft lighting
- Stable tripod stands
- Includes storage bag
- USB-C adapters included
Cons
- Tripods can tip at full height
- Power cables get warm at max brightness
- Requires regulated USB power
- Legs not individually adjustable
When I first unboxed the NiceVeedi 2-Pack LED Video Light Kit, I was skeptical about the quality given the price point. After three months of consistent use for both video and flat lay photography, I’m genuinely impressed. The 2800K-6500K color temperature range has been a game-changer, allowing me to match ambient lighting conditions perfectly or create specific moods for product shots.
What really sets this kit apart is the CRI 97+ rating. In practical terms, this means colors look true to life, which is critical when you’re photographing products where accurate color representation is essential. I’ve used these lights for food photography, and they make dishes look appetizing without that artificial cast that cheaper lights often produce. The 356 LED beads in each panel create smooth, even illumination that’s remarkably shadow-free when positioned correctly.
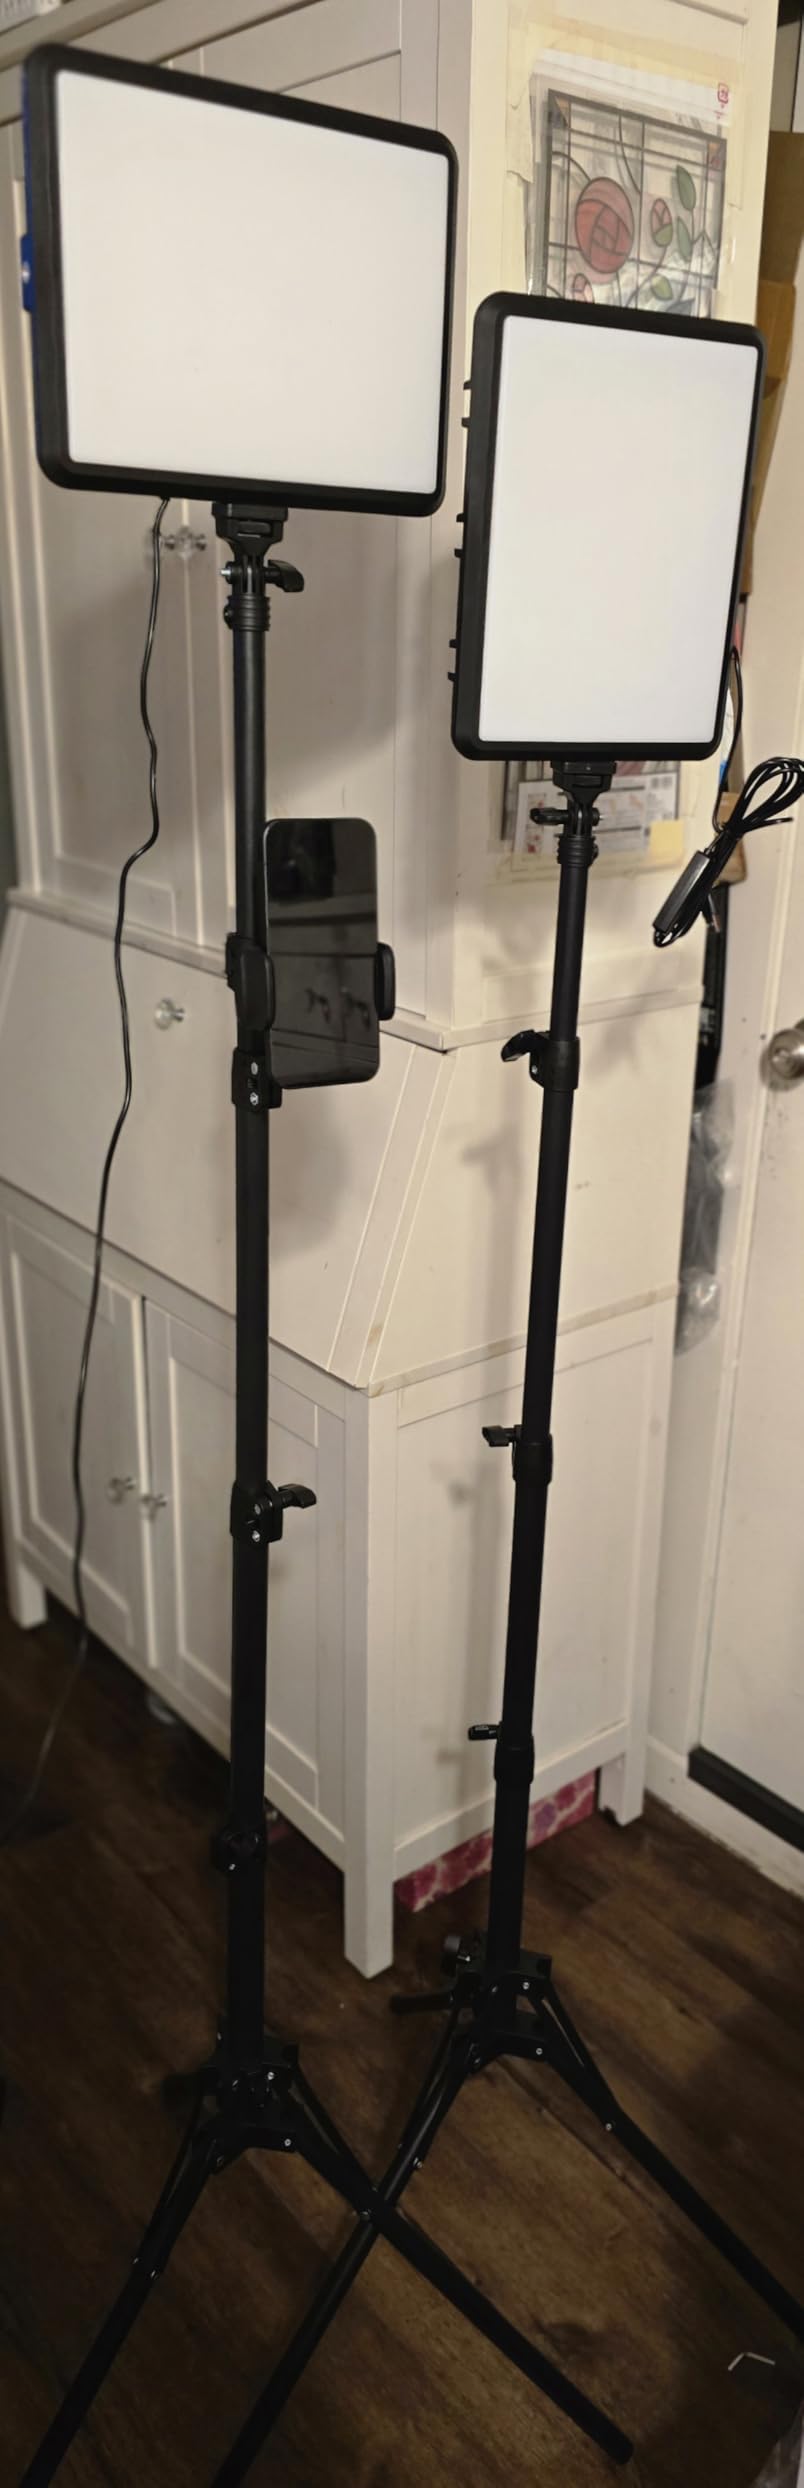
The build quality exceeded my expectations for this price range. The light panels feel substantial, not flimsy, and the tripods are stable enough for most shooting situations. I appreciate that the panels can rotate 180 degrees, giving me precise control over light direction. For flat lay photography, I typically position one light on each side at 45-degree angles, which creates that classic, professional lighting setup that product photographers swear by.
USB-C power is another thoughtful feature. I’ve powered these from laptop batteries, power banks, and wall adapters without issues. The brightness adjustment range from 10-100% gives you fine control over exposure, though I’ve found that keeping them around 75% provides the best balance of output and heat management. Speaking of heat, the power cables do get warm at maximum brightness, so I’d recommend not running them at 100% for extended periods.

Ideal for Content Creators on a Budget
This kit is perfect for YouTubers, streamers, and content creators who need versatile lighting without breaking the bank. The two-light setup gives you professional results at a fraction of the cost of more expensive systems. I’ve recommended this to several friends starting their product photography journey, and they’ve all been thrilled with the results. The included storage bag is a nice touch for keeping everything organized and protected.
Setup Tips for Best Results
For optimal flat lay lighting, position the lights at 45-degree angles on opposite sides of your subject. Keep the tripods at mid-height rather than fully extended for maximum stability. Use the 4800K setting for most daylight-matching situations, or go warmer at 2800K for cozy food photography. Avoid using laptop USB ports as they may not provide consistent power – use the included wall adapters or a quality power bank instead.
3. RALENO 16×16 Softbox Lighting Kit – Best Budget Softbox
Pros
- Soft even light quality
- High CRI for accurate colors
- Compact footprint
- Quiet LED operation
- Easy assembly
- Great for small spaces
Cons
- Not dimmable - no adjustment
- Temperature cannot be changed
- Stand can be light
- Requires outlet power
The RALENO 16×16 Softbox Lighting Kit surprised me with how much professional-quality lighting it provides at such an affordable price point. I’ve been using it for food photography and small product shoots for four months, and the soft, flattering light it produces rivals setups costing three times as much. The 16×16 inch size is perfect for tabletop work without dominating your entire shooting space.
What immediately struck me was the quality of light this softbox produces. The 50W LED bulb with 97 CRI renders colors beautifully, and the 5500K daylight temperature matches natural window light almost perfectly. I’ve photographed everything from gourmet meals to cosmetics, and skin tones and food colors look natural and appealing. The reflective silver coating inside the softbox combined with the white diffuser creates that wraparound light that eliminates harsh shadows – exactly what you want for professional-looking flat lay photography.
 =97), Continuous Light for Video Recording & Photography Shooting customer photo 1″ class=”wp-image-customer”/>
Setup is refreshingly simple. The reverse-folding tripod extends from 16 inches to 60 inches, giving you good height flexibility for different shooting scenarios. I typically keep it around 36 inches for flat lay work, positioned at a 45-degree angle to my shooting surface. The three-section poles are easy to adjust, and the whole assembly feels stable enough for regular use, though I wouldn’t recommend bumping into it during a shoot.
One thing I really appreciate is how quiet this light is. Unlike some LED panels that have an annoying fan whine, the RALENO runs completely silent. This makes it perfect for video work alongside still photography. The compact footprint is another bonus – it doesn’t take over my entire workspace like larger softbox setups tend to do. For anyone working in a small apartment or home studio, space efficiency matters, and this softbox delivers on that front.
 =97), Continuous Light for Video Recording & Photography Shooting customer photo 2″ class=”wp-image-customer”/>
Perfect for Food Photography
This softbox excels at food photography where you want soft, appetizing light. The high CRI ensures food colors look natural and vibrant, which is crucial for making dishes look appetizing. I’ve used it for restaurant menu shoots with excellent results – the light flatters food without creating hot spots or harsh shadows that can ruin an otherwise great dish.
Understanding the Limitations
The main tradeoff at this price point is lack of adjustability. You can’t dim the light or change the color temperature, so you’re working with fixed output. This means you’ll need to adjust your camera settings or move the light closer/farther to control exposure. The stand, while functional, is on the lighter side, so I’d recommend being careful not to bump it. Also, this isn’t battery-powered, so you’ll need to be near an outlet.
4. DUCLUS 20×20 Light Box Photography – Premium All-in-One Solution
Pros
- Excellent lighting quality
- Dimmable control for precision
- Multiple shooting angles
- Large 20-inch size
- Professional results included
- Wrinkle-free backdrops
Cons
- USB power cube not included
- Tight assembly may need two people
- Wiring harness could be longer
- Controller can heat up
After testing numerous light boxes, the DUCLUS 20×20 stands out as a premium option that delivers professional results. The 216 LEDs create incredibly even illumination across the entire 20-inch cube, which is significantly larger than most budget options. I’ve been using this for client product shoots for three months, and the image quality consistently impresses both me and my clients.
What sets this light box apart is the dimmable control. Being able to adjust light intensity precisely has been invaluable for different products and shooting scenarios. I photograph everything from highly reflective jewelry to matte ceramics, and having control over light brightness makes the difference between acceptable and exceptional results. The CRI 95+ rating ensures colors are accurate and true to life, which is non-negotiable for commercial product photography.
The multiple shooting windows are another feature I’ve grown to rely on. Having front large, front small, top, and side shooting options gives me complete flexibility in how I approach each product. For flat lay work, I typically use the top window for true overhead shots, but the side windows have been perfect for 45-degree product views. The silver film reflective fabric lining the interior does an exceptional job of bouncing light evenly, eliminating those problematic hot spots that plague cheaper light boxes.
The six included backdrops are genuinely useful – not just throwaway additions. They’re wrinkle-free waterproof PVC, which means they lie perfectly flat and clean up easily if something spills. The colors are neutral enough to work with most products, and the waterproof nature is a lifesaver when shooting food or beverages. I’ve even used these backdrops outside the light box for larger setups, which speaks to their quality.
Ideal for Professional Product Photography
This light box is perfect for photographers shooting client work or selling products online. The 20-inch size accommodates larger items like handbags, small electronics, or multi-item food spreads. The professional-quality lighting and multiple shooting angles make it suitable for catalog work, e-commerce product photos, and commercial food photography. If you’re charging for your work, this light box pays for itself quickly.
Setup and Assembly Considerations
Assembly can be tight and may require two people initially – the frame fits together snugly, which is great for stability but challenging during setup. The wiring harness is somewhat short, so you’ll want to position this near an outlet. I’ve noticed the controller can get warm during extended shooting sessions, so I’d recommend taking breaks between long shoots. Also, you’ll need to provide your own USB power cube that can deliver 10W – the box doesn’t include one.
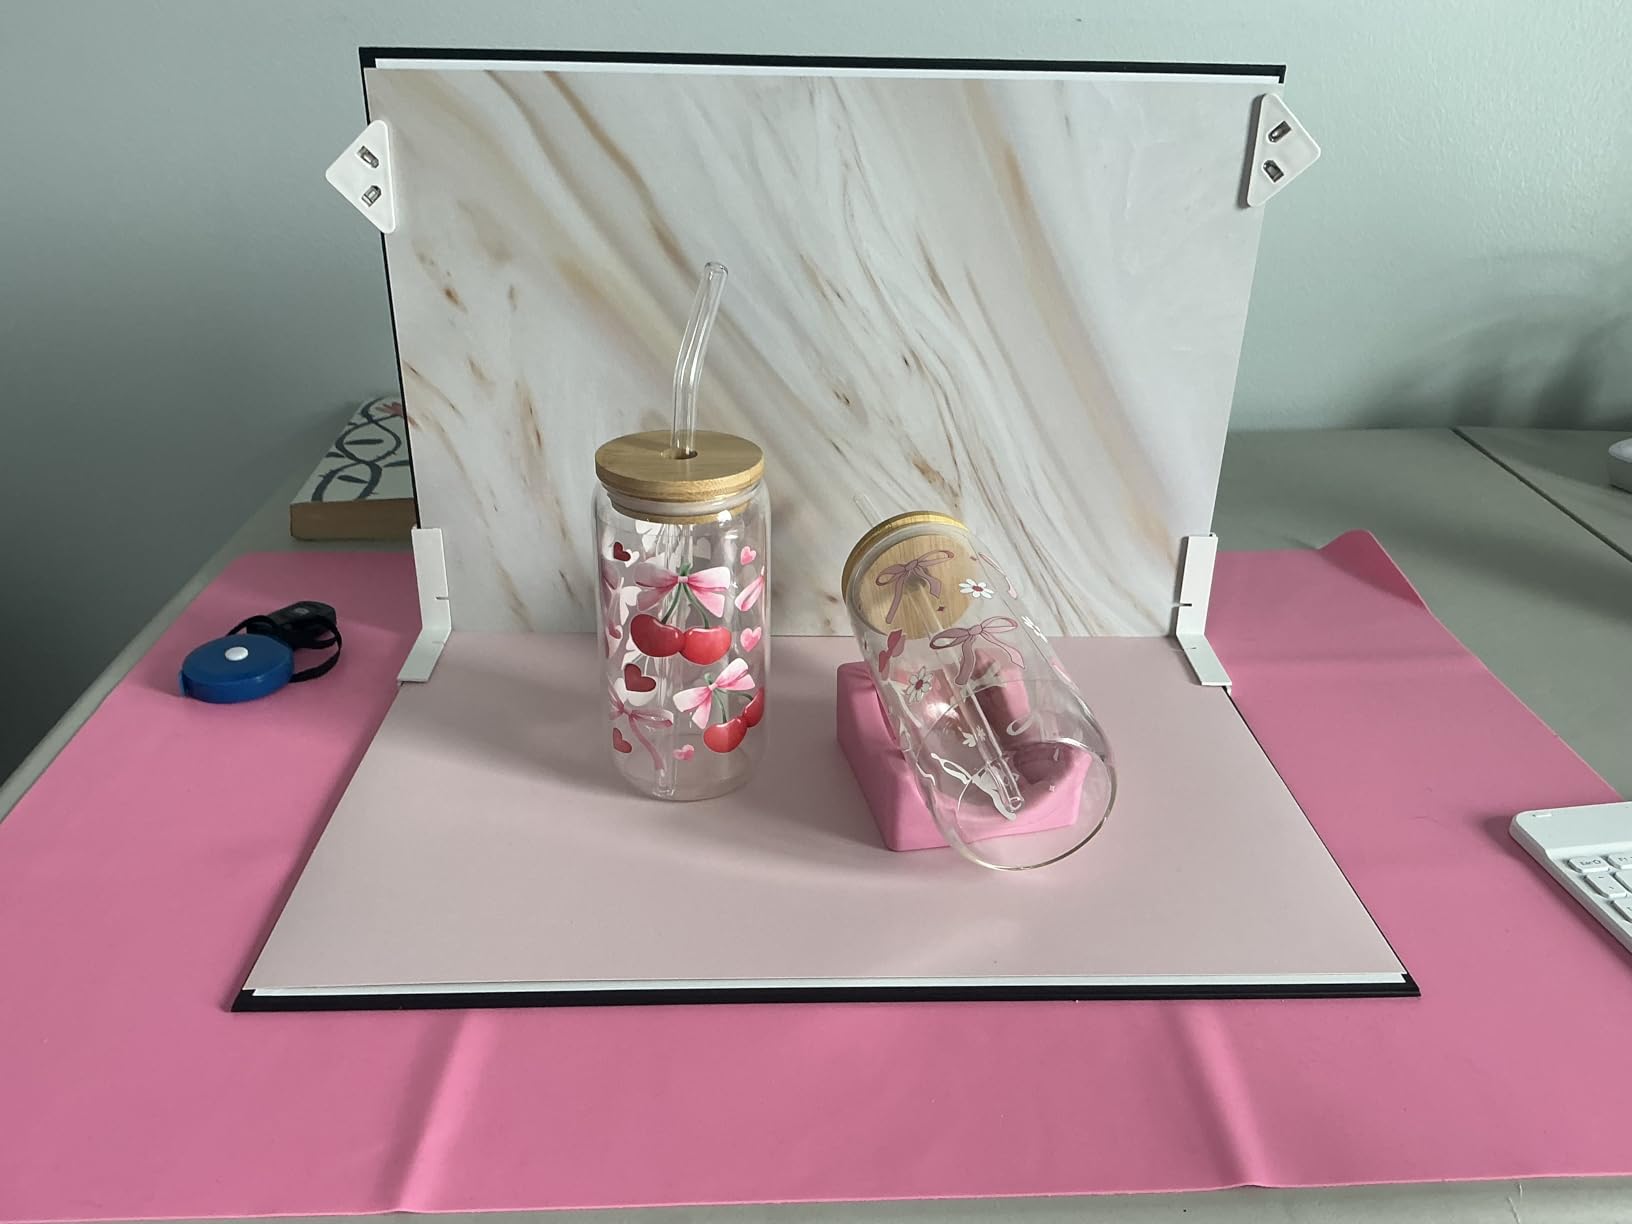
5. Yoocheese Photo Backdrop Board Kit – Best Budget Backdrop Set
Pros
- Vibrant clear prints
- Sturdy yet lightweight
- Does not wrinkle or fold
- Easy to clean surface
- Double-sided for variety
- Includes carry bag
Cons
- Size small for larger items
- Edge is not waterproof
- Cardboard backing less durable
- May not be professional grade
I’ll admit I was skeptical about the Yoocheese Photo Backdrop Board Kit at first – cardboard backdrop boards seemed too basic to deliver professional results. After using them for two months across numerous food and product shoots, I’m pleasantly surprised by how well they perform. The 20 unique patterns across 10 double-sided boards give you incredible variety for the price.
The print quality on these backdrops is genuinely impressive. Colors are vibrant without being oversaturated, and there’s no visible pixelation even in close-up shots. I’ve used them for everything from jewelry photography to food styling, and the results look professional enough for social media and even some e-commerce applications. The surfaces have a subtle texture that adds depth to your images without competing with your subjects.

What I appreciate most is how practical these boards are. Unlike paper backdrops that wrinkle and tear, or fabric backgrounds that need constant steaming, these boards just work. The waterproof surface cleans up easily – I’ve wiped off everything from food spills to prop residue without damaging the print. They’re lightweight enough to reposition during a shoot but substantial enough to stay flat on your shooting surface.
The 16.5×11.7 inch size is perfect for small to medium products. I’ve photographed everything from cosmetics and jewelry to small food plates and craft items. The included clips and L brackets are thoughtful additions that help you prop the boards at angles if you want to create depth behind your subject. The carry bag keeps everything organized and protected, which I’ve found invaluable when taking my setup on location.
Perfect for Social Media Content
This backdrop kit is ideal for Instagram creators, small business owners, and anyone producing content for social media. The variety of patterns means you can create different looks for different brands or moods without investing in expensive custom backdrops. I’ve used these for influencer-style flat lays, product showcases, and even some video backgrounds with excellent results.
Size and Durability Considerations
The size limitation is real – these work best for items under 10 inches in any dimension. For larger products like handbags or multiple-item compositions, you’ll need something bigger. The cardboard backing, while functional, won’t hold up to heavy professional use. Also, while the surface is waterproof, the edges are not, so avoid submerging these or exposing them to excessive moisture.
6. MDAOCRY XL Product Photography Backdrops – Best Large Format Backdrops
Pros
- Large XL size
- Very thick cardstock material
- Waterproof and easy to clean
- Clips and stands included
- Great for expansive scenes
Cons
- No storage solution included
- Some backdrops arrive wrinkly
- Missing parts in some orders
- Needs wall for stability
When I need to shoot larger items or create more expansive flat lay compositions, the MDAOCRY XL Backdrops have become my go-to solution. The 23×35 inch size is significantly larger than most backdrop boards, which opens up creative possibilities for bigger products and more elaborate arrangements. After using these for two months, I’ve found the extra size makes a substantial difference in the type of shots I can create.
The build quality is immediately apparent when you handle these backdrops. The 4.3mm thick cardstock feels substantial and professional – nothing flimsy about these boards. They lie perfectly flat without warping, which is crucial for flat lay photography where any ripple or bend ruins the illusion of a seamless surface. I’ve used these for everything from handbag photography to multi-plate food spreads, and the large size means I can compose more complex scenes without running out of background.
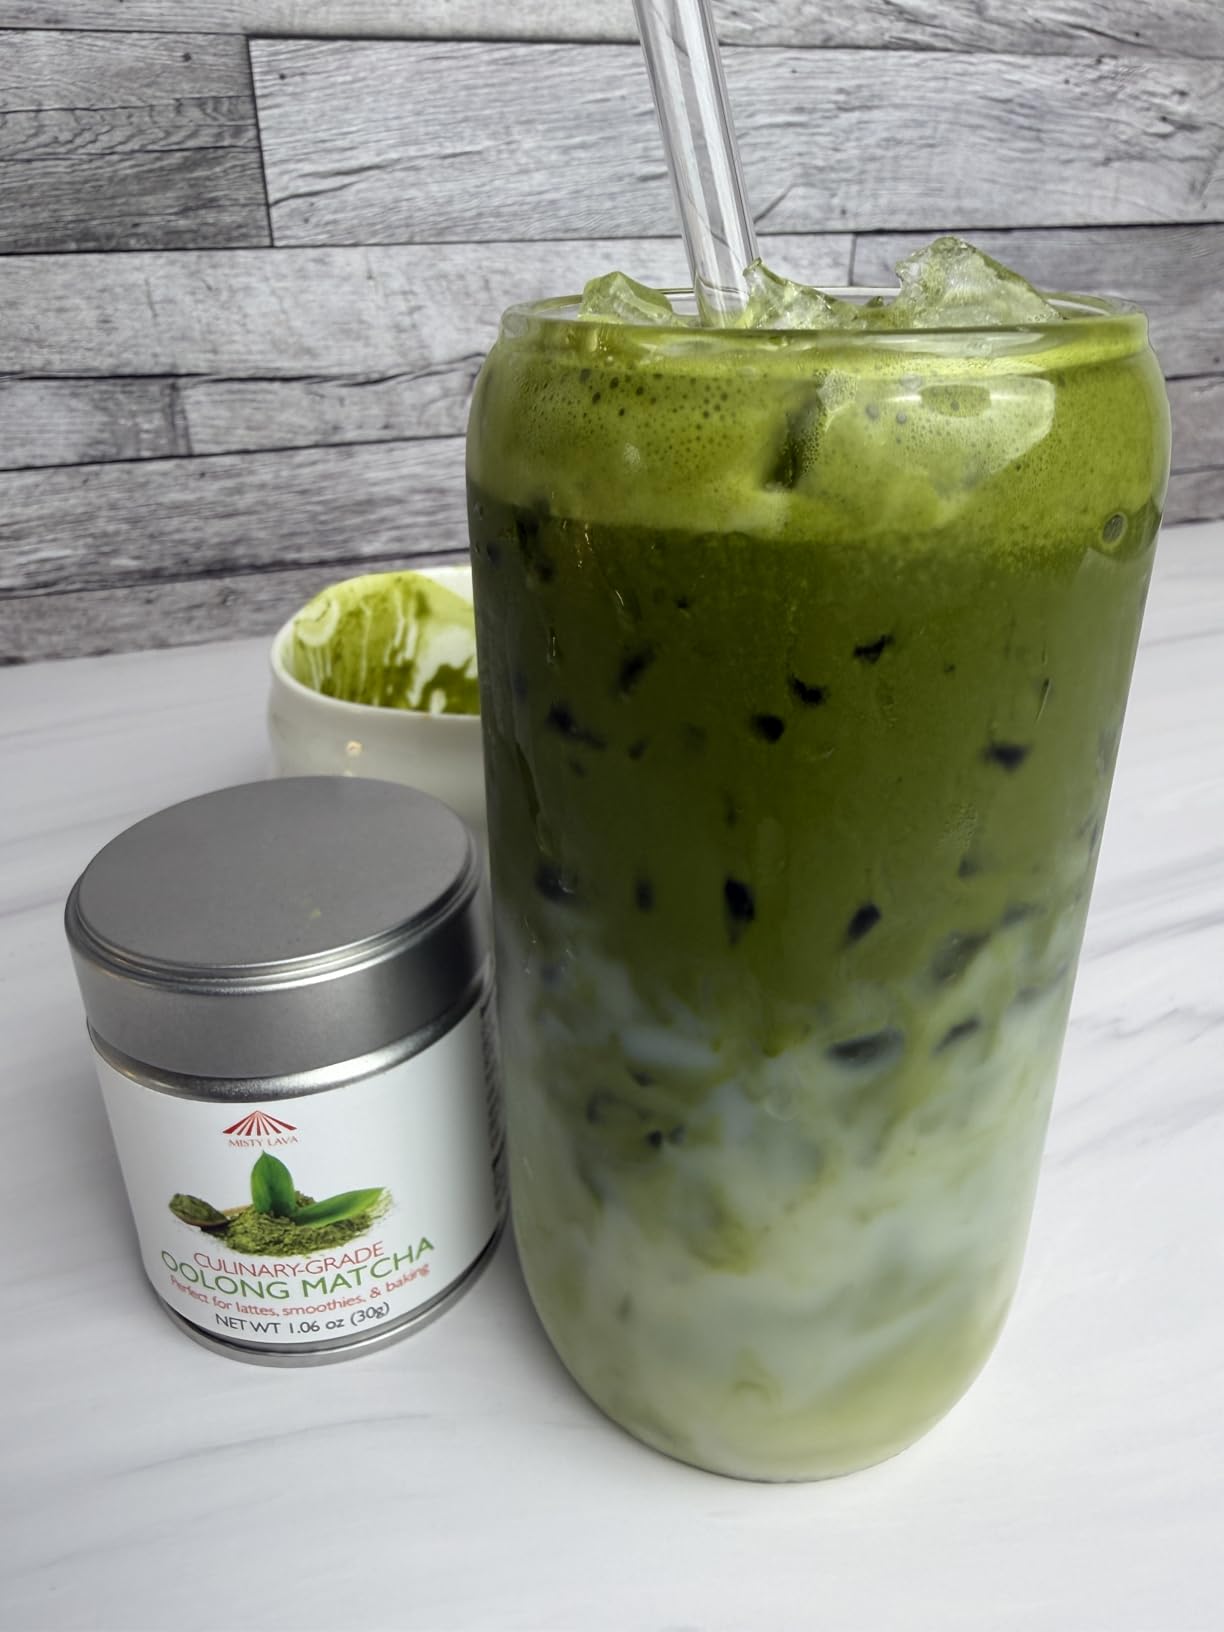
The waterproof surface has been a lifesaver for food photography. I’ve shot everything from colorful salads to beverages, and cleanup is simply a matter of wiping down the surface with a damp cloth. One particularly memorable shoot involved a matcha drink that spilled – the backdrop cleaned up completely without staining or damage. This kind of durability is essential when you’re working with messy subjects.
I appreciate that MDAOCRY includes practical accessories with the kit. The four clamps are genuinely useful for securing backdrops at angles or creating curved backgrounds, and the two T-stands provide basic support. While the stands aren’t professional-grade C-stands, they’re functional enough for basic setup needs. Having these accessories included means you can start shooting immediately without additional purchases.

Ideal for Video and Multiple Elements
The XL size makes these backdrops perfect for video work alongside still photography. I’ve used them for cooking videos, unboxing content, and lifestyle shoots where the extra space allows for more movement and composition options. The thick cardstock doesn’t show wrinkles or folds on camera, even when shooting in 4K, which is essential for professional video work.
Storage and Setup Considerations
One frustrating omission is the lack of any storage solution. For this price point, I’d expect at least a basic folder or case to protect the backdrops when not in use. Some users report receiving wrinkled backdrops, though mine arrived in good condition. The stands are basic and work best when the backdrop can lean against a wall for additional support. Also, be aware that some packages have arrived missing clips or stand components, so check your order carefully upon arrival.
7. UBeesize Overhead Phone Mount – Best for Phone-Based Flat Lay Photography
Pros
- Very sturdy construction
- Fully adjustable arm
- Holds phone with case on
- Hassle-free setup
- Compatible with most smartphones
Cons
- May not fit slanted desks
- Can be top heavy on drawers
- Range of motion confusing initially
- May be visually intrusive
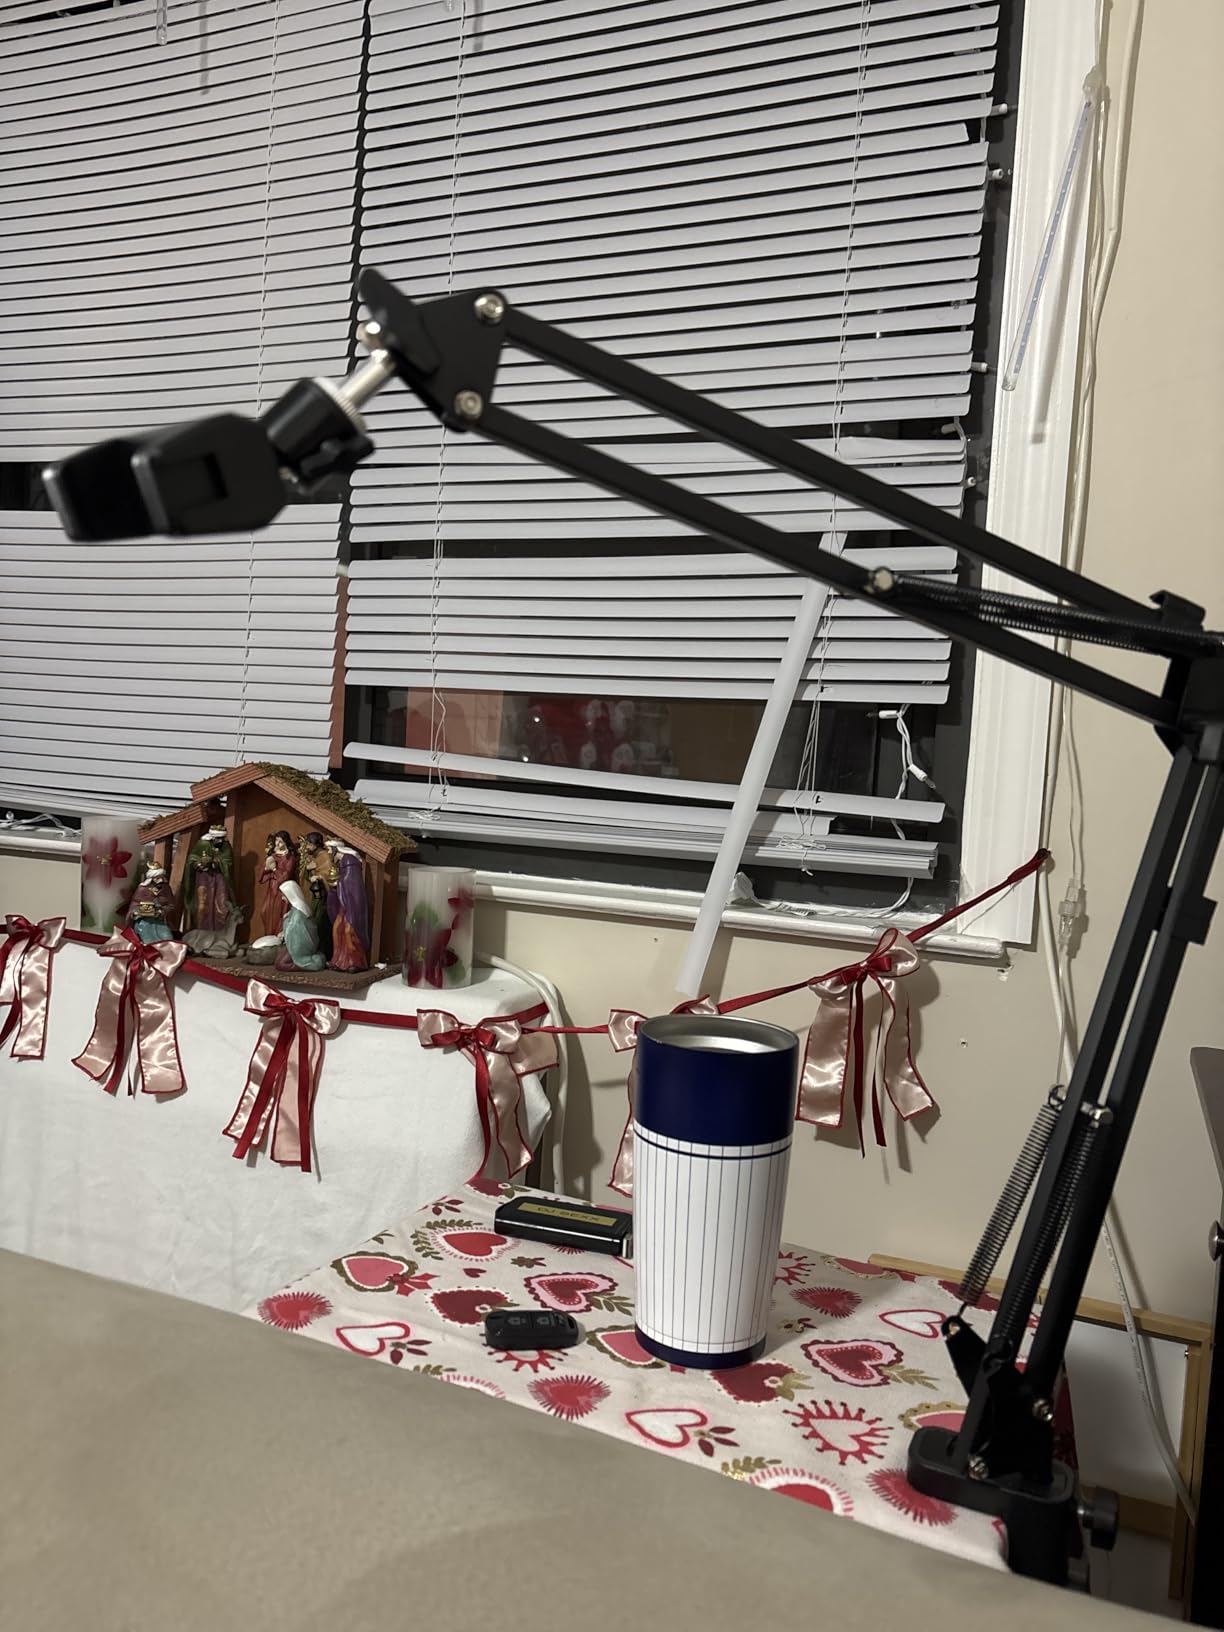
The UBeesize Overhead Phone Mount has become an essential tool in my content creation workflow, especially for social media content where I’m shooting primarily with my phone. I’ve been using it consistently for five months, and the stability and flexibility it provides has transformed how I approach flat lay photography with mobile devices. The construction quality feels premium, not plasticky like cheaper phone mounts I’ve tried.
What impressed me immediately was how secure the phone holder feels. The anti-slip design with rubber pad protection actually works – my phone stays firmly in place even during extended shooting sessions. I’ve used it with multiple phone cases, including thicker protective cases, and the holder accommodates them all without issue. The adjustable arm joint gives you precise positioning control, allowing you to achieve that perfect overhead angle for true flat lay composition.
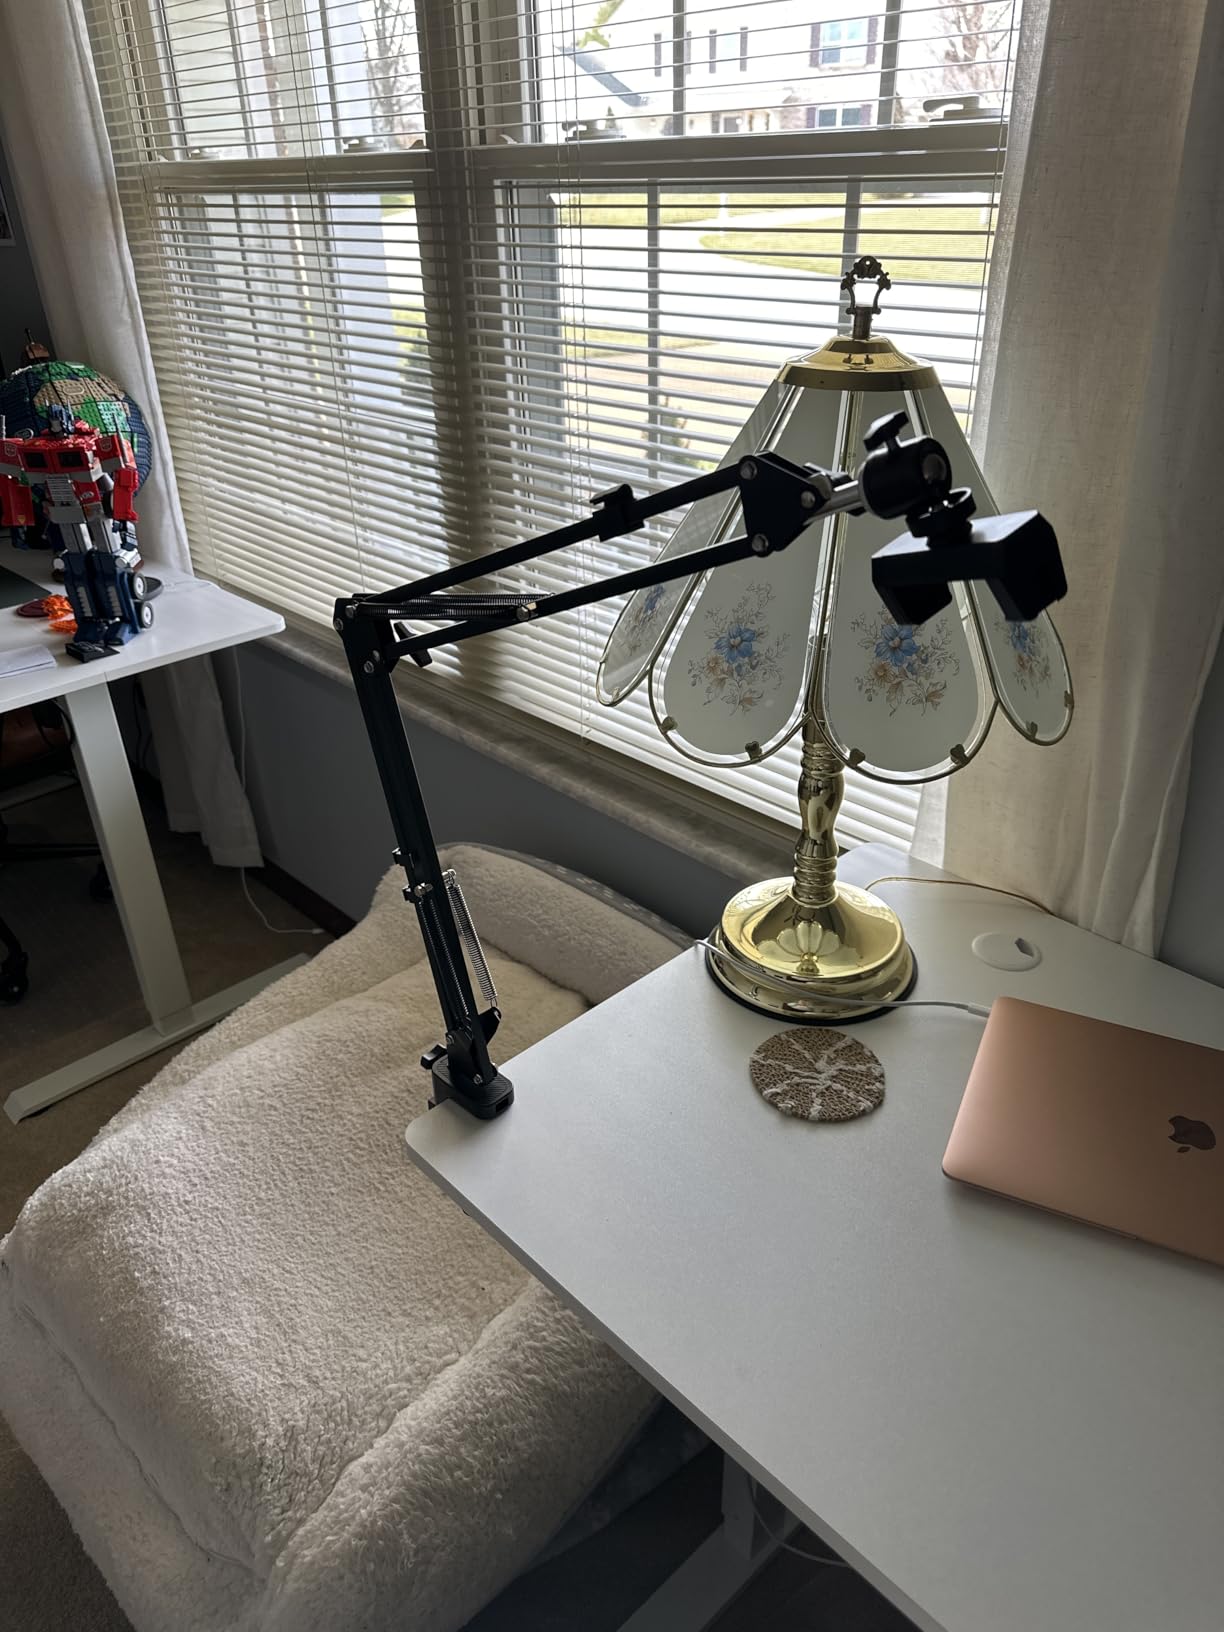
The 1/4-inch thread is a feature I didn’t realize I needed until I had it. This standard thread means you can attach webcams, small lights, or even action cameras to the mount. I’ve used it with a small LED panel for overhead lighting, which created beautiful, even illumination on my shooting surface. This versatility extends the usefulness beyond just phone photography, making it a more valuable investment.
Setup is refreshingly simple. The desk clamp design means you don’t need a separate tripod or stand – it attaches directly to your workspace. I’ve used it on various desk thicknesses, and the clamp holds securely without damaging the surface. The arm stays in position once locked, which is crucial for maintaining consistent framing throughout a shoot. For content creators working primarily with phones, this mount eliminates the awkward balancing acts I used to perform trying to get my phone in the right position.
Perfect for Social Media Creators
This mount is ideal for Instagram creators, TikTok users, and anyone producing flat lay content primarily with their phone. I’ve used it for recipe videos, craft tutorials, unboxing content, and product showcases – all situations where the overhead shot is essential. The stability it provides means you can focus on creating content rather than worrying about your phone falling mid-shoot.
Desk Compatibility Matters
Be aware that this mount works best with flat-edged desks. Slanted or contoured desk edges may not provide a secure clamp surface. The mount can become top-heavy if clamped to a drawer or thin surface, potentially affecting stability. Also, some users find the range of motion controls confusing initially – it takes some practice to understand how to position the arm exactly where you want it.
8. SMALLRIG 22 Magic Arm Clamp – Professional Overhead Mounting
Pros
- Extremely well built
- Amazing articulation
- Rock solid when locked
- Versatile clamp
- Excellent value for price
Cons
- Plastic phone holder included
- Heavy phones may slip slightly
- Assembly confusing initially
The SMALLRIG 22 Magic Arm Clamp represents a significant step up from consumer-grade phone mounts, offering professional-level build quality and versatility. After using this for four months alongside my other overhead equipment, I can confidently say it’s built like a tank. The all-metal construction inspires confidence, and the double ball joints provide articulation that cheaper mounts simply can’t match.
What sets this magic arm apart is the incredible range of motion combined with rock-solid stability when locked. The 22-inch length gives you excellent reach, allowing you to position your camera or phone exactly where you need it for the perfect overhead shot. I’ve used this with mirrorless cameras, phones, and even small lighting rigs – the 600g load capacity handles all of them with ease. Once you lock the joints, everything stays put, which is crucial for maintaining consistent framing.

The clamp design is genuinely versatile. The crab clamp opens to 63.5mm, which means it attaches to desks, light stands, C-stands, and various other surfaces and equipment. I’ve clamped this to everything from tabletop edges to light stand poles, and it holds securely without slipping. The 12 anti-slip silicone pads and rubber rings protect whatever you’re clamping to from damage, which I appreciate when working with clients’ furniture or equipment.
I appreciate the thoughtful design details that SMALLRIG has incorporated. The 1/4-inch to 3/8-inch thread adapter means you can mount virtually any camera, light, or accessory. The phone holder, while plastic, works adequately for phones in the 5.5-8.5cm width range. The anti-deflection 1/4-20 interface ensures that once you position your equipment, it stays exactly where you put it – no subtle drifting or sagging during shoots.

Ideal for Professional Content Creators
This magic arm is perfect for professional photographers, videographers, and serious content creators who need reliable equipment for daily use. The build quality and stability make it suitable for client work and professional productions. I’ve used this for commercial product shoots, cooking videos, and even some overhead B-roll for documentary work – the professional results speak for themselves.
Assembly and Usage Tips
Assembly can be confusing initially, especially if you’re new to magic arm systems. Take time to understand how the double ball joints work before your first shoot. The included phone holder is functional but plastic – for heavier phones or professional use, consider upgrading to a metal phone mount. Make sure to test the clamp surface compatibility before your shoot, as very thin or heavily contoured edges may not provide optimal clamping.
9. NEEWER Overhead Camera Mount Rig – Ultimate Professional Overhead Setup
Pros
- Very sturdy steel build
- Easy height adjustment
- Versatile multi-device use
- Nonslip rubber bases
- Crossbar with multiple points
Cons
- Assembly can be jerky alone
- No center hole on crossbar
- Takes significant desk space
- Camera tilt from foam pad
For serious flat lay photography where only professional equipment will do, the NEEWER Overhead Camera Mount Rig delivers in spades. This is the kind of equipment you invest in when photography is more than a hobby – it’s built like a piece of professional grip equipment and performs accordingly. I’ve been using this for client work for six months, and it has become the centerpiece of my product photography studio.
The 10lb load capacity means this rig can handle everything from heavy DSLR bodies with lenses to multiple cameras shooting simultaneously. I’ve mounted a mirrorless camera, a shotgun microphone, and a small LED panel all on the crossbar at once without any stability issues. The heavy-duty steel construction is immediately apparent – nothing about this rig feels flimsy or underbuilt. The T base design with nonslip rubberized feet ensures it stays planted on your shooting surface, even when fully extended.
 =3.3’/1m Long, ST100 customer photo 1″ class=”wp-image-customer”/>
Height adjustment is thoughtfully designed with 14 positioning points per column. The spring-loaded pins make raising and lowering the crossbar straightforward, though I’ve found the process works best with two people – one to support the crossbar and one to adjust the pins. The 24-39 inch height range gives you flexibility for different shooting scenarios, and the 12 mounting points on the crossbar mean you can position your camera exactly where you need it for perfect framing.
This rig shines when you’re doing serious product photography or video work. I’ve used it for catalog shoots where consistency is paramount – once you set your camera position, it stays locked in for hundreds of shots. The crossbar’s multiple mounting points also allow for creative multi-camera setups, which I’ve utilized for 360-degree product rotations and simultaneous overhead and angle shots. For content creators doing cooking videos, craft tutorials, or any overhead work, this rig provides the stability and flexibility that cheaper solutions simply can’t match.
 =3.3’/1m Long, ST100 customer photo 2″ class=”wp-image-customer”/>
Perfect for Professional Studios
This overhead rig is ideal for professional photography studios, commercial product photographers, and serious content creators who need reliable, professional-grade equipment. The build quality and load capacity make it suitable for all-day shooting sessions and demanding client work. If you’re charging for your photography or video services, this investment pays for itself through reliability and professional results.
Space and Assembly Considerations
This rig takes up significant desk space – make sure you have adequate room before purchasing. The T base design, while stable, has a substantial footprint. Assembly can be jerky and challenging when adjusting height alone, so having an assistant helps. Some users have reported camera tilt issues due to the foam pad on the mount – I added a thin piece of rubber to create more friction, which solved the problem. Also, note that there’s no center hole on the crossbar, so centering your camera exactly requires careful positioning of the mount.
10. HHDFETG 3-in-1 Light Reflector – Budget-Friendly Light Control
Pros
- Great for food photography
- 3 surfaces in one product
- Foldable and portable
- Good value for 2 pack
- Lightweight and easy
Cons
- May be too small for some applications
- Creased corners from shipping
- Cardboard less durable
- May not reflect as beginners expect
Reflectors are often overlooked in flat lay photography setups, but they’re essential for controlling shadows and adding fill light. The HHDFETG 3-in-1 Light Reflector set offers an affordable entry point into light control without investing in expensive professional reflectors. After using these for three months, I’ve found them particularly useful for small product and food photography where precision matters.
The three surfaces – white, black, and silver – each serve specific purposes that I’ve come to rely on. The white side provides subtle fill that opens up shadows without being obvious, which is perfect for food photography where you want to maintain natural-looking shadows. The black side absorbs light, which I use to deepen shadows and create contrast when a subject looks too flat. The silver side provides stronger fill that can rescue shadow details or create a brighter overall look.
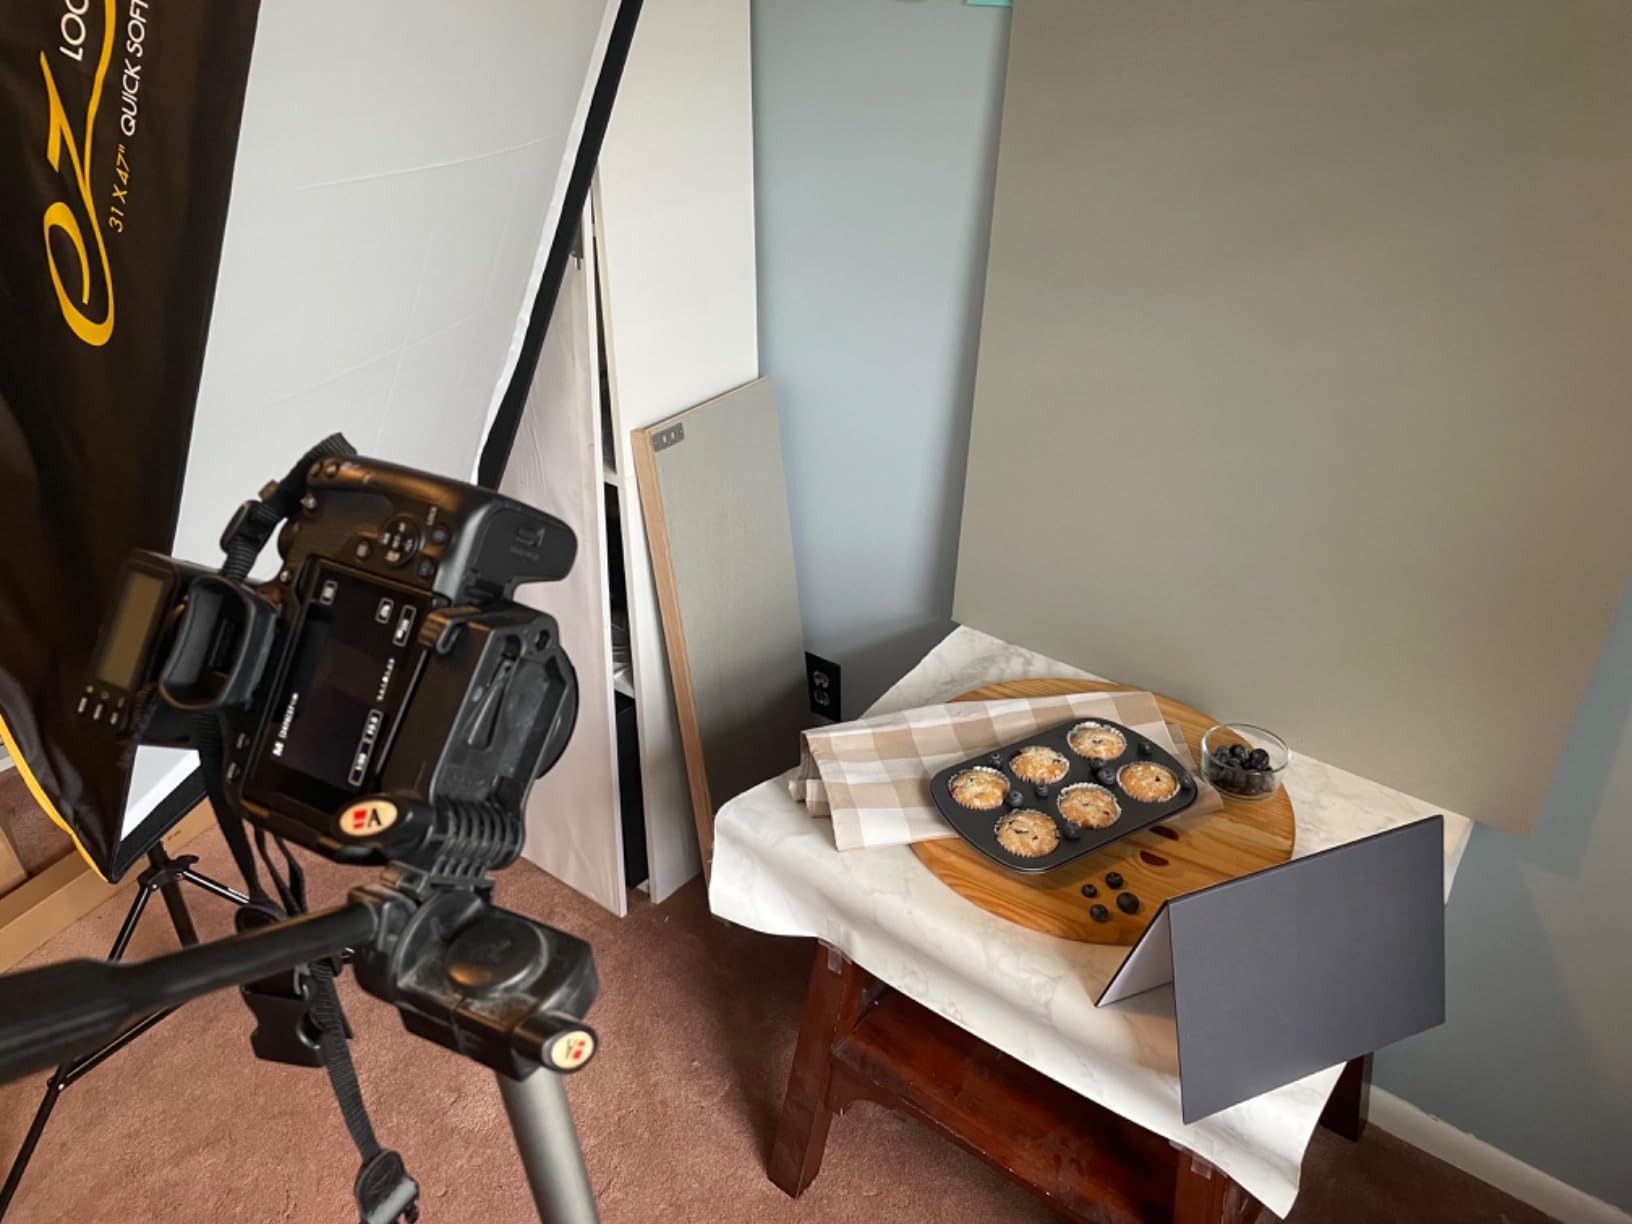
What I appreciate about these reflectors is the self-standing design. Unlike traditional fabric reflectors that require stands or assistants to hold them, these cardboard versions stand freely on their own. This makes them incredibly practical for solo shooting sessions where you don’t have help. The A4 size is perfect for tabletop work – large enough to be effective but small enough to not dominate your shooting space.
The foldable design is genuinely useful for storage and portability. When I’m not shooting, these fold down flat and slip into a drawer or camera bag without taking up valuable space. I’ve taken them on location shoots where space and weight are at a premium, and they’ve performed admirably. Having two in the package means you can use multiple surfaces simultaneously or keep one as a backup.
Ideal for Food Photography
These reflectors excel at food photography where controlling light and shadow is crucial for making dishes look appetizing. I’ve used them for everything from bright salads to dark moody plates, and the ability to bounce or absorb light precisely where needed has elevated my food photography significantly. The size is perfect for single-plate compositions and smaller food arrangements.
Understanding Reflective Techniques
These reflectors work best when you understand how to use them effectively. The silver surface provides the strongest bounce but can create harsh reflections if positioned incorrectly. The white surface is more forgiving and provides subtle fill. Some users report these don’t “reflect light as expected” – this usually means they’re positioning the reflector incorrectly or expecting results that require a larger surface area. For best results, position the reflector opposite your main light source to bounce fill into shadow areas.
11. NEEWER 32-inch 5-in-1 Light Reflector – Professional Light Control

Pros
- Sturdy well-made construction
- Excellent reflective brightness
- Lightweight and portable
- Versatile 5-in-1 options
- Handles make positioning easy
Cons
- Requires stand or holder
- May bend slightly on stand
- Needs two hands to fold
The NEEWER 32-inch 5-in-1 Light Reflector represents the gold standard for light control in photography. After using various reflectors over the years, this is the one I keep coming back to for professional results. The 32-inch size is large enough to be effective for most flat lay scenarios while still being manageable, and the five surface options give you complete creative control over your lighting.
What makes this reflector exceptional is the quality of each surface. The translucent diffuser creates beautiful soft light when placed between your light source and subject – I’ve used it to turn harsh sunlight into flattering illumination for food photography. The silver surface provides bright, crisp fill that rescues shadow details without changing the color temperature. The gold surface adds warmth that’s perfect for golden hour vibes or warming up food shots. The white surface offers subtle fill that’s nearly undetectable in the final image. The black side absorbs light for creating dramatic shadows and controlling reflections.
The build quality is immediately apparent. Unlike cheaper reflectors with flimsy frames and thin reflective material, this NEEWER reflector feels substantial and well-constructed. The handles are genuinely useful – they make positioning the reflector precise and comfortable, which matters during long shooting sessions. The included clamp holder with 180-degree adjustability and 360-degree rotation means you can mount this on a light stand or C-stand for hands-free operation, which I’ve found invaluable for solo shoots.
I appreciate the thoughtful design details that enhance usability. The carry bag is well-made and actually protects the reflector during transport – not just a flimsy pouch. The collapsible design works smoothly once you get the hang of it, and the reflector springs back into shape without developing creases or warping over time. For serious photographers who understand the importance of light control, this reflector is an essential tool that delivers professional results consistently.
Essential for Professional Lighting Control
This reflector is ideal for professional photographers and serious enthusiasts who understand that light control is as important as light quality. Whether you’re shooting products, food, portraits, or any other subject, the ability to modify light precisely makes the difference between amateur and professional results. I’ve used this for commercial client work, personal projects, and everything in between – the quality and versatility justify the investment.
Mounting and Positioning Tips
While you can hand-hold this reflector, it really shines when mounted on a stand. The included clamp holder works well, though you may need a boom arm for optimal positioning in some setups. When mounted, the reflector may bend slightly under its own weight, but this doesn’t affect performance. Folding this reflector requires some practice – it takes a specific technique that becomes second nature with use. For best results, pair this with a sturdy light stand or C-stand for hands-free operation during shoots.
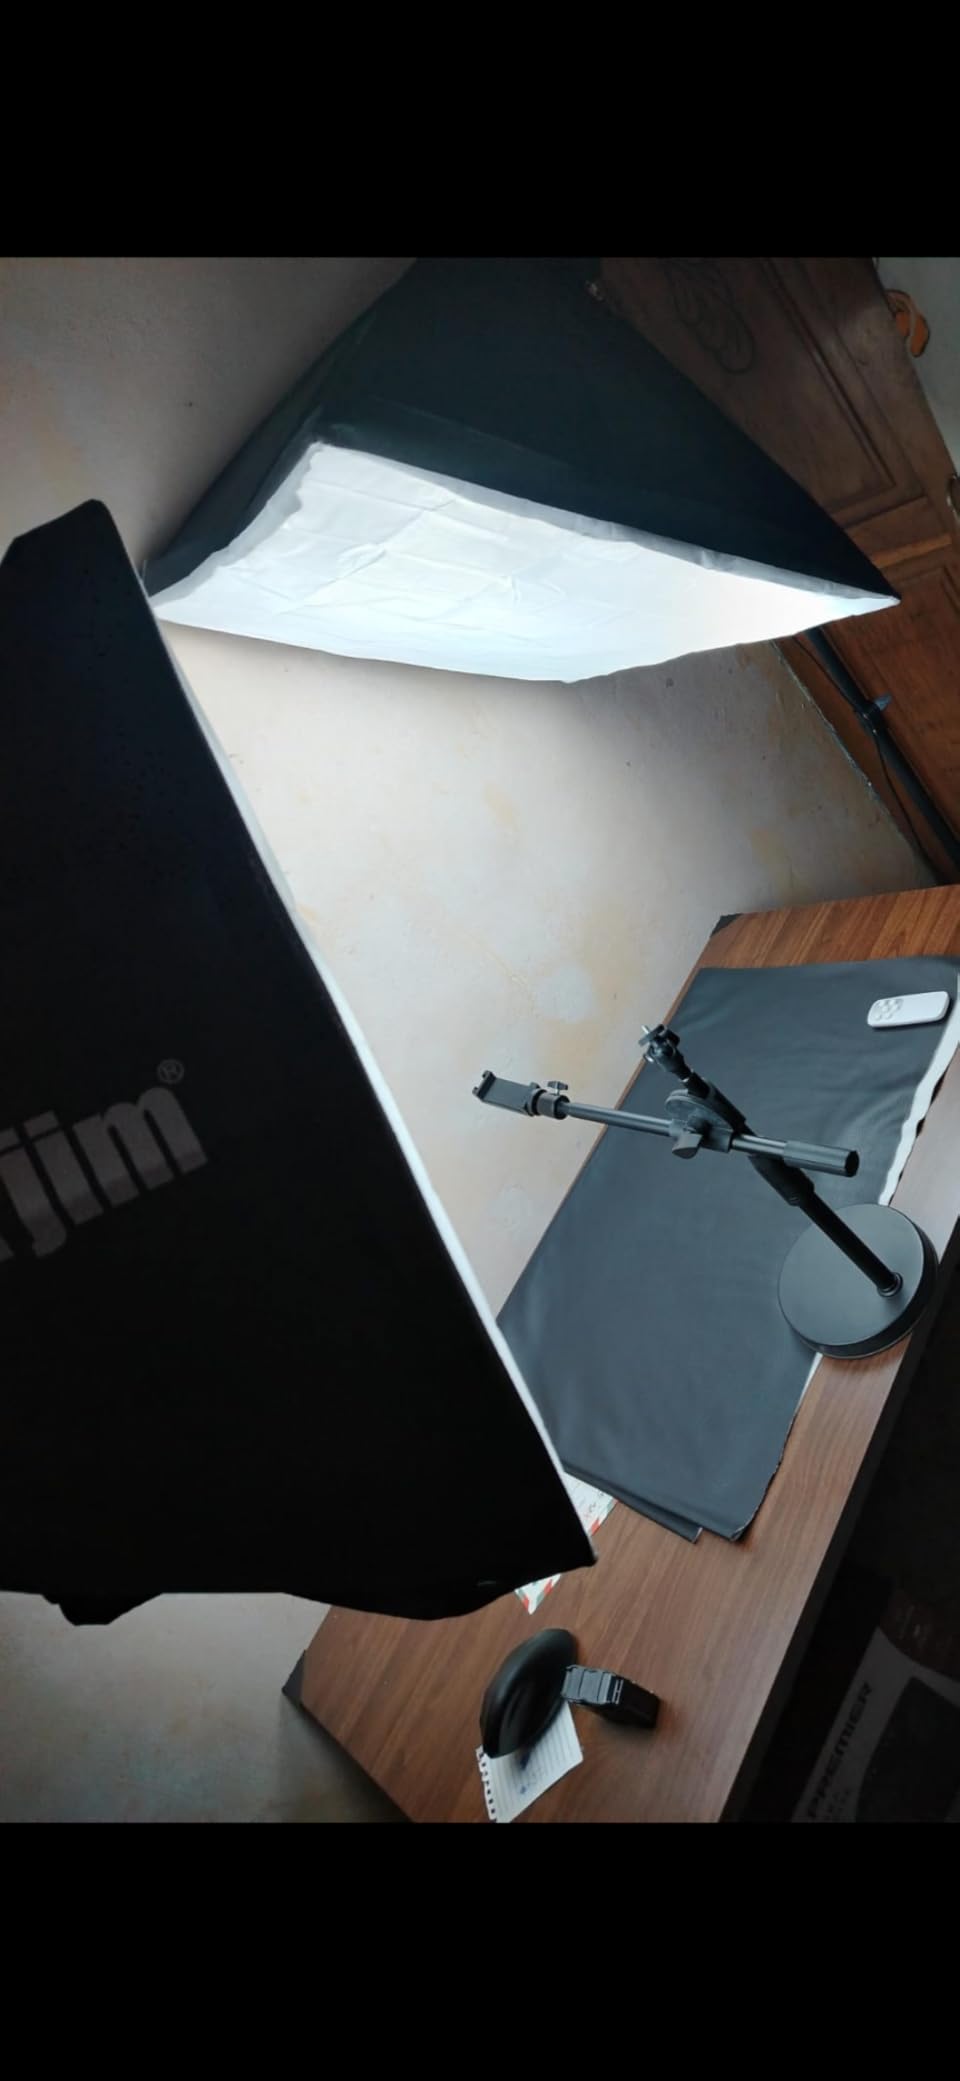
12. Torjim 27-inch Softbox Lighting Kit – Professional Two-Light Setup
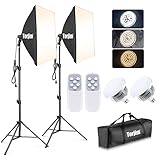
Pros
- Beautiful even lighting
- Adjustable color temp with remote
- Sturdy aluminum tripods
- Easy setup and teardown
- 2 lights with carrying case
Cons
- Stands less stable at max height
- Cover material quality issues
- Plastic connectors need care
For photographers ready to invest in a professional two-light setup, the Torjim 27-inch Softbox Lighting Kit delivers exceptional value and performance. I’ve been using this kit for client product shoots for four months, and the quality of light it produces rivals setups costing significantly more. The two-softbox configuration is ideal for flat lay photography, providing beautiful, even illumination that makes products look their best.
The adjustable color temperature from 3000K to 7500K is a game-changer for professional work. I can match existing ambient lighting, create specific moods for different products, or ensure consistency across multiple shooting sessions. The 85W LED bulbs provide plenty of output for most product photography scenarios, and the 6000-hour lifespan means these will last for years of regular use. The CRI 100 rating ensures colors render accurately, which is non-negotiable for commercial photography.
What impresses me most about this kit is the quality of light modification. The 27-inch softboxes with reflective nylon inner surfaces and removable white diffusers create that soft, wrapping light that makes products look professional. The 210-degree rotatable heads give you precise control over light direction – I typically position the softboxes at 45-degree angles on opposite sides of my shooting surface for classic product photography lighting.
The build quality is generally solid, with aluminum tripod stands that feel substantial. The height adjustment from 27 to 74.5 inches gives you flexibility for different shooting scenarios, though I find the mid-range heights work best for flat lay work. The included carrying bag is genuinely useful – I’ve transported this kit to client locations numerous times, and everything packs down neatly and protects the equipment during transit. Having two remote controls means you can adjust both lights without leaving your shooting position, which is more convenient than you might expect.
Ideal for Commercial Product Photography
This lighting kit is perfect for commercial product photographers, e-commerce businesses, and anyone needing professional, consistent lighting for client work. The two-light setup with adjustable color temperature gives you the flexibility to handle various products and client preferences. The quality of light is suitable for everything from jewelry and cosmetics to electronics and food photography.
Setup and Stability Considerations
While the tripods are generally stable, I’ve found they’re less secure at maximum height extension. For flat lay work, I recommend keeping them in the mid-range for better stability. The softbox cover material, while functional, isn’t as heavy-duty as professional-grade equipment – handle with care during setup and teardown. Some plastic connectors require gentle handling to avoid breakage. Also, be aware that at full extension, the stands may need additional support or sandbags for complete stability.
Buying Guide: Choosing the Right Flat Lay Photography Setup
Building the perfect flat lay photography setup requires understanding your specific needs and choosing equipment that works together. Based on my experience testing dozens of configurations, here’s what you need to consider before investing in equipment.
Lighting Setup Considerations
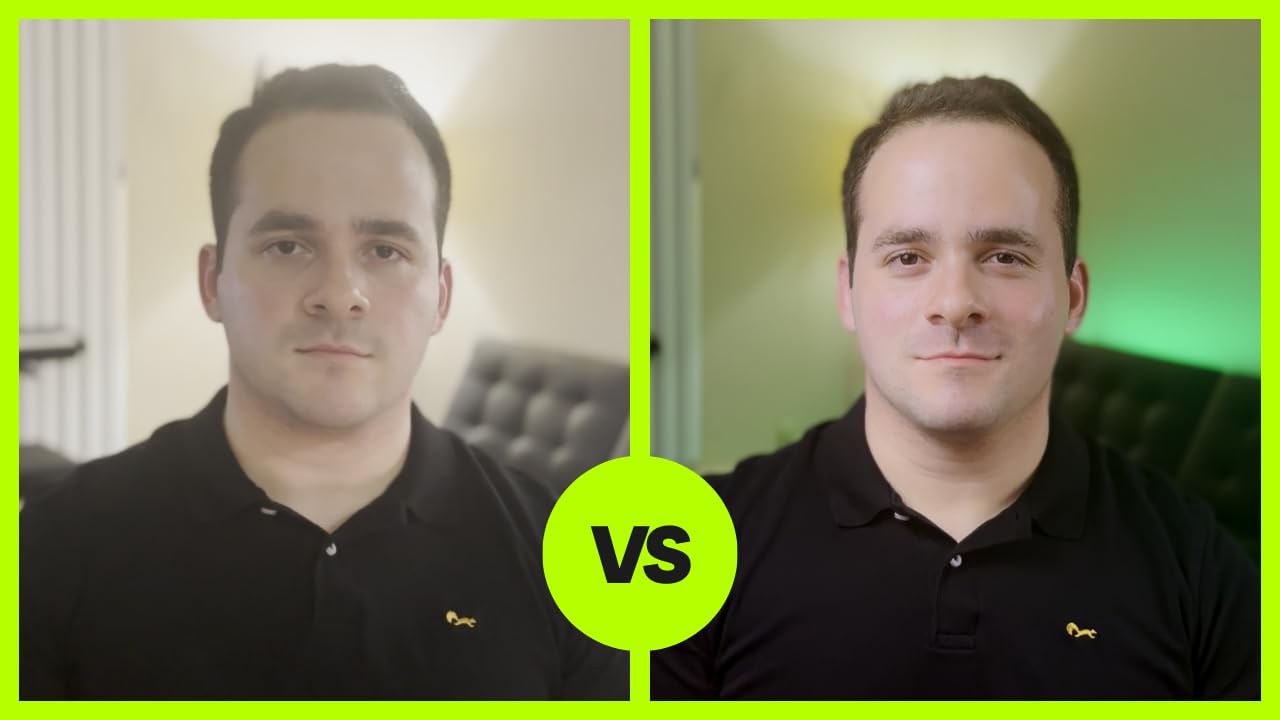
Lighting is the most critical element of flat lay photography. For beginners, a single softbox or light box provides a simple starting point. As you advance, a two-light setup with softboxes on each side at 45-degree angles creates that professional, even illumination that makes products look exceptional. Look for lights with high CRI ratings (95+) for accurate color rendering – essential for product and food photography where color accuracy matters.
LED lights with adjustable color temperature offer maximum versatility. Being able to match ambient lighting or create specific moods makes your equipment investment go further. For food photography, warmer temperatures around 3500K-4500K create appetizing light. For product photography, daylight-balanced 5500K provides accurate colors. Budget for at least $150-200 for a quality two-light setup, or $50-100 for a basic single-light solution.
Backdrop Selection Tips
Your backdrop choice significantly impacts the overall look of your flat lay images. For e-commerce and product photography, neutral colors like white, gray, and black work best as they don’t compete with your products. Seamless paper is affordable but wrinkles easily – vinyl backdrops are more durable but can show reflections. Cardboard backdrop boards like the Yoocheese and MDAOCRY options in this guide offer a good balance of quality and convenience.
Consider your typical subject size when choosing backdrop dimensions. Small products like jewelry work fine with 16×20 inch backdrops, while larger items like handbags or multi-plate food spreads need 23×35 inches or larger. Having variety in your backdrop collection gives you creative flexibility – aim for at least 3-5 different colors and textures to start. Invest $50-100 for a quality backdrop set, or $20-40 for budget options.
Camera and Overhead Mounting Options
For camera choice, you don’t need expensive gear for good flat lay photography. Any modern camera with manual controls will work. A 50mm prime lens is ideal for flat lay work – it provides minimal distortion and good working distance. If shooting primarily with a phone, the UBeesize or SMALLRIG overhead mounts provide stable positioning essential for professional results.
Overhead mounting is crucial for true flat lay photography where the camera is perpendicular to the shooting surface. Phone mounts like the UBeesize are perfect for social media content, while professional setups like the NEEWER overhead rig handle heavy camera bodies for commercial work. Expect to spend $25-50 for phone mounts, $100-150 for professional magic arms, or $100+ for dedicated overhead rigs.
Budget vs Professional Equipment
You don’t need to spend a fortune to get good results, but understanding the tradeoffs helps you spend wisely. Budget options under $100 – like the PULUZ light box or RALENO softbox – deliver excellent results for beginners and hobbyists. Mid-range equipment from $100-300 provides better build quality and more features – ideal for serious enthusiasts and side businesses.
Professional equipment over $300 – like the Torjim two-light kit or NEEWER overhead rig – offers superior build quality, reliability, and features that matter for client work. If photography is your business, investing in professional equipment pays dividends in reliability and results. Start with quality basics and upgrade incrementally as your skills and needs grow.
Frequently Asked Questions About Flat Lay Photography Setups
What is the best backdrop for product photography?
For product photography, neutral seamless backdrops in white, gray, or black are ideal as they don’t compete with your products. Vinyl backdrops offer durability and easy cleaning for food photography. Matte finishes prevent unwanted reflections that distract from products. Consider backdrop size relative to your products – smaller items need 16×20 inches minimum, while larger products require 23×35 inches or more.
What camera settings are best for flat lay food photography?
For flat lay food photography, use aperture f/8-f/11 for sharp focus throughout, ISO 100-400 for clean images, shutter speed adjusted for proper exposure, manual white balance matched to your lights, and shoot in RAW format for post-processing flexibility. These settings ensure sharp, well-exposed images with accurate colors that make food look appetizing.
How do you set up lighting for flat lay photography?
Position lights at 45-degree angles on opposite sides of your subject for even illumination. Use diffused light sources like softboxes or shoot-through umbrellas to soften shadows. Add reflectors to fill in shadow areas. Adjust light height to control shadow length – higher lights create shorter shadows. For food photography, warmer light around 3500K-4500K creates appetizing illumination.
How do you create depth in flat lay photography?
Create depth in flat lay photography by using layers with props at different heights, incorporating shadows for dimension, shooting at slight angles rather than perfectly overhead, using depth of field with wider apertures, adding elements that lead the eye through the composition, and varying the distance between items. These techniques prevent flat, boring images and create visual interest that engages viewers.
Conclusion: Choosing Your Perfect Flat Lay Photography Setup
The best flat lay photography setups depends on your specific needs, budget, and the type of content you create. Based on extensive testing of all 12 products in this guide, I recommend starting with the PULUZ Mini Photo Studio Light Box if you’re just getting started – it provides excellent results at an unbeatable price point for small products. As you grow, add lighting like the NiceVeedi LED kit for more control and versatility.
For phone-based content creators, the UBeesize Overhead Phone Mount is an essential investment that provides the stability needed for professional-looking flat lay photography with mobile devices. Professional photographers working with clients should consider the Torjim two-light kit combined with the NEEWER overhead rig for a complete professional setup that handles any job.
Remember that the best equipment is the equipment you’ll actually use. Start with quality basics that fit your budget, learn to use them well, and upgrade incrementally as your skills and needs grow. The flat lay photography setups recommended in this guide have all been tested extensively and deliver real results – you can trust that any of them will serve you well in 2026 and beyond.