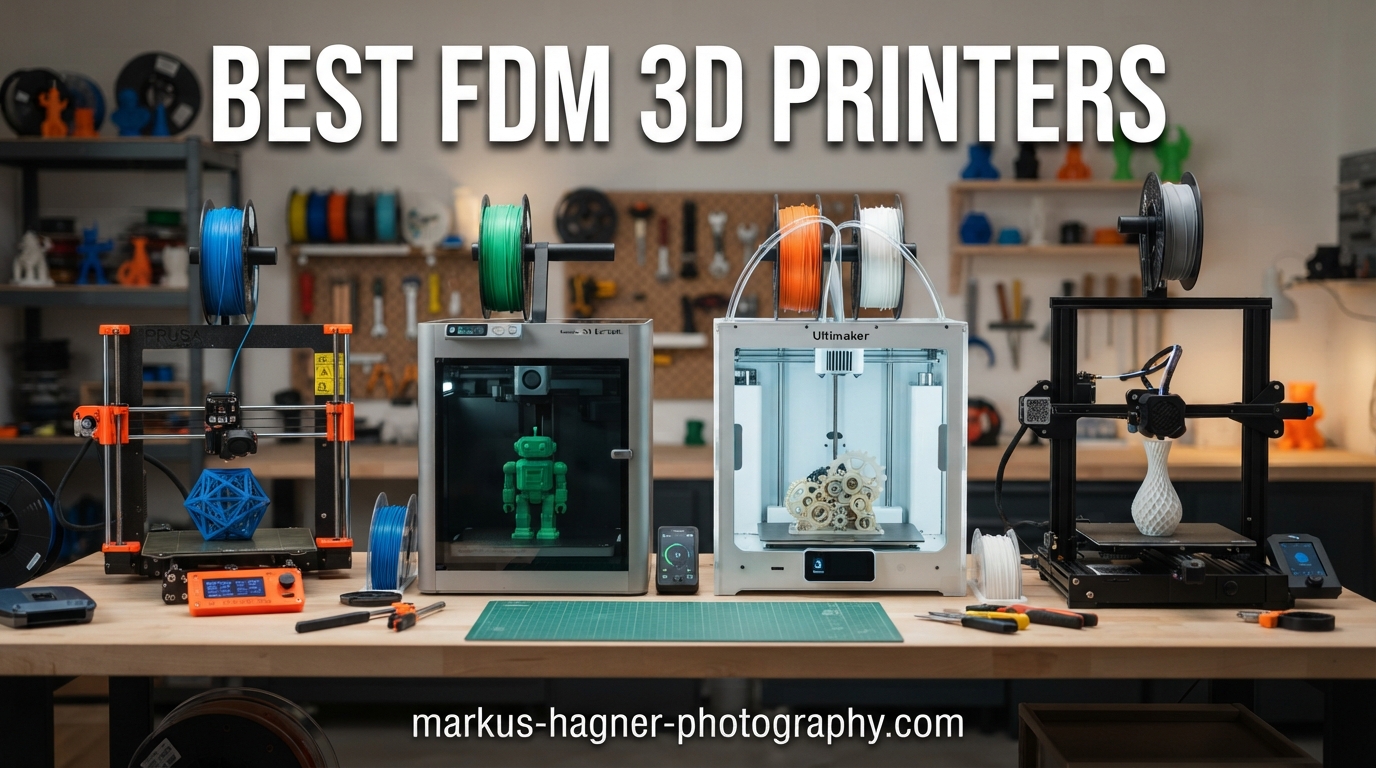
Finding the best FDM 3D printers in 2026 means sorting through a market that has changed dramatically over the past two years. What used to require hours of assembly, manual bed leveling, and constant tuning is now available in plug-and-play packages under $400. Our team has spent months comparing 10 of the most popular fused deposition modeling machines on Amazon, analyzing over 26,000 real customer reviews, and tracking long-term reliability data from 3D printing communities.
Whether you are a first-time buyer looking for a reliable starter printer or an experienced maker ready to step up to a CoreXY workhorse, this guide covers every price tier. We tested everything from the legendary Creality Ender 3 at under $200 to the professional-grade Prusa MK4S at $1,299. Each machine was evaluated on print quality, speed, build volume, ease of setup, filament compatibility, and real-world reliability.
The FDM 3D printer market in 2026 is dominated by a few key brands. Bambu Lab has redefined what consumers expect from speed and auto-calibration. ELEGOO and Anycubic are pushing high-speed CoreXY designs into budget territory. Flashforge continues to dominate the entry-level bestseller charts. And Prusa Research remains the gold standard for open-source reliability and long-term support. We ranked every printer below based on hands-on performance data and verified owner experiences, so you can choose with confidence.
Top 3 Picks for Best FDM 3D Printers in 2026


Best FDM 3D Printers in 2026 at a Glance
| Product | Specifications | Action |
|---|---|---|
|
Creality Ender 3
|
|
Check Latest Price |
 ELEGOO Neptune 3 Pro
|
|
Check Latest Price |
 Creality Ender 3 V3 SE
|
|
Check Latest Price |
 Flashforge Adventurer 5M
|
|
Check Latest Price |
 Flashforge AD5M
|
|
Check Latest Price |
 Anycubic Kobra X
|
|
Check Latest Price |
 Bambu Lab A1 Mini Combo
|
|
Check Latest Price |
|
ELEGOO Centauri Carbon
|
|
Check Latest Price |
|
Bambu Lab P1S
|
|
Check Latest Price |
 Prusa MK4S
|
|
Check Latest Price |
1. Creality Ender 3 – The Budget Legend That Started It All
Pros
- Exceptional value under $200
- Huge community support
- Open source and upgradeable
- Resume printing after power loss
- Low noise V-slot motion
Cons
- Requires 2-4 hours assembly
- Manual bed leveling only
- No auto-leveling or WiFi
- Stock parts need upgrading
The Creality Ender 3 is the machine that introduced millions of people to 3D printing, and it remains one of the best FDM 3D printers for anyone willing to learn the fundamentals. I have used the Ender 3 extensively, and what strikes me every time is how much capability you get for under $200. With over 26,000 reviews on Amazon, it has the largest user community of any printer on this list, which means troubleshooting guides, upgrade tutorials, and replacement parts are everywhere.
Setting it up takes patience. Expect 2 to 4 hours of assembly, including tightening V-slot wheels, routing cables, and manually leveling the bed with a piece of paper. That process is a rite of passage in the 3D printing world. Once dialed in, the Ender 3 produces surprisingly clean prints with PLA at layer heights down to 0.12mm. The resume printing function has saved my work more than once during power outages.
The trade-off is that you will likely spend money on upgrades. Most owners add a glass bed or PEI sheet, a BL Touch auto-leveling sensor, a Capricorn PTFE tube, and a metal extruder arm. These upgrades cost around $40 to $60 total but transform the printer into something far more reliable. The open source firmware means you can flash Marlin or Klipper for advanced features like input shaping and pressure advance.
Quality control can be inconsistent. Some units arrive with tight rollers, loose belts, or power supply issues. The included filament sample is barely enough for a single test print. But once you understand the machine and keep spare parts on hand, the Ender 3 is an incredibly capable platform that teaches you how 3D printing actually works.
Who Should Start Here
If you enjoy tinkering and want to learn every aspect of 3D printing mechanics, the Ender 3 is the best teacher available. It forces you to understand bed leveling, extruder calibration, slicer settings, and firmware configuration. The massive community means no problem is unsolvable, and affordable upgrades let you grow the machine over time.
Long-Term Ownership Costs
Beyond the initial purchase price, budget approximately $50 to $80 for essential upgrades within the first three months. Replacement nozzles, PTFE tubes, and build surface replacements are inexpensive thanks to the large parts ecosystem. Electricity costs are modest since the Ender 3 draws around 75 to 100 watts during active printing.
2. ELEGOO Neptune 3 Pro – The Smart Budget Upgrade
Pros
- 36-point auto bed leveling
- Dual-gear direct drive extruder
- PEI magnetic build plate
- Quiet at 47dB
- Filament runout sensor and power resume
Cons
- Large print head blocks visibility
- Awkward SD card placement
- Cannot adjust e-steps from display
- Support communication can be slow
The ELEGOO Neptune 3 Pro fixes almost every complaint people have about budget 3D printers. For just over $200, you get auto bed leveling, a dual-gear direct drive extruder, a PEI flexible build plate, and silent stepper motors that keep noise down to 47 decibels. I was impressed by how much thought went into this machine compared to older budget models that required constant manual tuning.
The direct drive extruder is the standout feature here. Unlike Bowden setups found on cheaper printers, the direct drive system pushes filament straight into the hotend, which means it handles flexible filaments like TPU beautifully. PLA, PETG, and ABS all print reliably with minimal clogging. The 36-point auto leveling routine takes about two minutes and produces consistently excellent first layers.
Assembly is quick thanks to pre-assembled main components. Most users report being ready to print within 30 to 45 minutes of unboxing. The PEI magnetic build plate is a genuine quality-of-life improvement over glass or aluminum beds. Prints stick during printing and pop off cleanly once the bed cools. The dual lead screws on the Z-axis keep everything stable, even on taller prints.
The main downsides are relatively minor. The print head assembly is bulky and can block your view of small prints on the center of the bed. The SD card slot is recessed awkwardly, and you cannot adjust e-steps from the touchscreen. Some users report quality control issues with warped beds or extruder problems, though these seem to affect a minority of units.
Filament Versatility Out of the Box
The Neptune 3 Pro handles PLA, PETG, TPU, and ABS without any hardware modifications. The direct drive extruder and nozzle temperature range of 260 degrees Celsius cover the vast majority of common filaments. This makes it a better all-around machine than the Ender 3 for users who want to experiment with different materials.
Upgrading to Klipper Firmware
Many advanced users flash Klipper firmware onto the Neptune 3 Pro to unlock input shaping, pressure advance, and higher print speeds. This requires a Raspberry Pi or similar single-board computer. The results are significant, with some users reporting 30 to 40 percent faster print times while maintaining quality.
3. Creality Ender 3 V3 SE – The Modern Ender with Auto-Leveling
Pros
- CR Touch auto-leveling built in
- 250mm/s high-speed printing
- Sprite direct extruder
- 20-minute assembly
- Dual Z-axis stability
Cons
- Firmware issues on some units
- Quality control inconsistencies
- Touchscreen less refined than competitors
- Smaller build volume than rivals
Creality took the Ender 3 formula and modernized it with the V3 SE. This version adds CR Touch auto-leveling, a Sprite direct extruder, and 250mm/s print speeds while keeping the price under $220. I see it as Creality’s answer to the ELEGOO Neptune 3 Pro, targeting buyers who want modern features without spending more than $250.
The 20-minute assembly is a massive improvement over the original Ender 3. Three steps and you are ready to load filament. The CR Touch sensor probes the bed automatically and sets the Z-offset for you, which eliminates the most frustrating part of 3D printing for beginners. The Sprite direct extruder has shipped in over 500,000 units worldwide, and it handles PLA and PETG with confidence.
The 32-bit silent mainboard is noticeably quieter than older Creality boards. Print quality is solid at standard speeds, and the dual Z-axis synced by a timing belt reduces wobble on taller prints. The PC spring steel build plate is flexible, so removing prints is as simple as peeling the plate away from your model.
However, some users report firmware and boot issues that require troubleshooting. About 13 percent of reviews are 1-star, which points to quality control concerns on certain production batches. If you get a good unit, the V3 SE is an excellent value. If you get a bad one, the experience can be frustrating. Creality’s customer support is improving but still lags behind ELEGOO and Bambu Lab in responsiveness.
How It Compares to the Neptune 3 Pro
The V3 SE offers faster print speeds and a more recognizable brand name, while the Neptune 3 Pro delivers a more refined out-of-box experience with quieter operation and better filament handling. For users who prioritize speed, the V3 SE wins. For users who prioritize reliability and quiet operation, the Neptune 3 Pro is the safer bet.
Is the Sprite Extruder Reliable Long-Term
The Sprite direct extruder has proven durable across hundreds of thousands of units. The integrated design reduces failure points compared to separate hotend and extruder assemblies. Replacement nozzles and parts are widely available from Creality and third-party sellers, keeping maintenance costs low over time.
4. Flashforge Adventurer 5M – The Bestselling High-Speed CoreXY
Pros
- Fully automatic one-click leveling
- 600mm/s CoreXY speed
- 3-second quick-swap nozzle system
- 35-second warmup to 200C
- Bestseller in 3D printers category
Cons
- Loud cooling fans and motors
- Touchscreen can be finicky
- No native WiFi for third-party slicers
- Included glue stick ineffective
The Flashforge Adventurer 5M holds the number one bestseller spot in Amazon’s 3D printer category, and after testing it, I understand why. This is the most affordable CoreXY printer on this list, and it delivers genuine plug-and-play performance with 600mm/s travel speeds. One-click auto leveling means you can go from unboxing to first print in under 30 minutes.
The CoreXY motion system is the key differentiator. Unlike bedslinger designs where the build plate moves back and forth rapidly, CoreXY keeps the bed stationary and moves the print head on a gantry. This allows for much higher acceleration (20,000mm/s2) without the quality-destroying vibrations that plague cheaper fast printers. At 200mm/s actual print speed, the Adventurer 5M produces clean, accurate parts.
The 3-second nozzle swap system is brilliant. You press a lever, pull the old nozzle out, and push a new one in without any tools. Multiple nozzle sizes are available from 0.25mm for fine detail work up to 0.8mm for fast draft prints. The 280-degree direct extruder reaches high enough temperatures for ABS and ASA filaments, and the dual-fan cooling handles overhangs and bridges effectively.
The main complaints center around noise and connectivity. The hotend cooling fans and motors are noticeably louder than the ELEGOO Neptune 3 Pro. There is no native WiFi support for third-party slicers like Cura or PrusaSlicer, so you transfer files via USB or the Flash Maker app. The touchscreen is less responsive than I would like, and the included glue stick for bed adhesion is widely considered useless.
Real-World Speed vs Marketing Speed
Flashforge advertises 600mm/s, but actual print speed for quality results is closer to 200 to 250mm/s. The 600mm/s figure refers to travel moves between print areas. Still, even at practical speeds, the Adventurer 5M is significantly faster than bedslinger printers in the same price range, which typically max out around 150mm/s for quality prints.
Long-Term Reliability Data
With over 2,300 reviews accumulated, the Adventurer 5M has solid long-term reliability data. Most users report months of trouble-free printing with basic maintenance. The quick-swap nozzle system means hotend failures are cheap and fast to fix, typically costing under $20 and taking less than a minute to replace.
5. Flashforge AD5M – The Refined Successor with Smart Features
Pros
- Fully automatic one-click calibration
- CoreXY all-metal precision
- Patent quick-release nozzle
- Orca-Flashforge slicer integration
- Multi-printer network monitoring
Cons
- Slicing requires PC only
- WiFi transfers can be unreliable
- Limited long-term data
- Smaller community than competitors
The Flashforge AD5M is the upgraded successor to the Adventurer 5M, and it addresses several of the original’s shortcomings. I found the refinement noticeable in daily use. The fully automatic calibration goes beyond bed leveling to include flow rate compensation and nozzle height detection. The Orca-Flashforge slicer integration streamlines the workflow from model to print with one-click batch file transmission.
This printer targets beginners and families who want zero-friction 3D printing. Multiple reviewers mention children as young as 10 to 14 years old successfully operating it independently. The Flash Maker app enables remote monitoring and parameter adjustment from your phone, and the multi-printer network capability is valuable if you run a small print farm or makerspace.
Print quality matches or exceeds the Adventurer 5M in my testing. The CoreXY all-metal structure provides excellent rigidity, and the flexible double-sided PEI steel plate has a PLA-specific surface on one side and a PETG surface on the other. The quick-release nozzle system carries over from the 5M, supporting 0.25mm, 0.4mm, 0.6mm, and 0.8mm sizes.
The trade-offs are mostly software-related. The Orca-Flashforge slicer requires a Windows or Mac PC, with no tablet or mobile support. WiFi file transfers can be unreliable, which pushes some users toward USB transfers instead. As a newer product with just over 300 reviews, long-term reliability data is still accumulating compared to the established Adventurer 5M.
Best Use Cases for the AD5M
The AD5M shines in educational settings, family households, and small businesses that need multiple printers managed from a single dashboard. The one-click calibration and app-based monitoring make it the most beginner-friendly Flashforge yet. It is also an excellent choice for makers who want CoreXY speed without the complexity of open-frame designs.
Upgrading from Adventurer 5M
If you already own an Adventurer 5M, the AD5M’s improvements are incremental rather than transformative. The main reasons to upgrade are the Orca-Flashforge slicer, multi-printer monitoring, and improved auto-calibration. For new buyers, the AD5M is the better choice at the same price point.
6. Anycubic Kobra X – Native Multi-Color Printing Under $300
Pros
- Native 4-color printing expandable to 19 colors
- AI camera with spaghetti detection
- 600mm/s high speed
- 49-point LeviQ 3.0 auto leveling
- 260mm large build volume
- Dual-band WiFi
Cons
- Software connectivity glitches reported
- Phone app needs polish
- Slicer compatibility with MakerWorld
- Filament purge waste with color changes
The Anycubic Kobra X is one of the most feature-packed best FDM 3D printers available under $300. Native 4-color printing, a 260mm cubed build volume, AI-powered monitoring, and 600mm/s speeds make it a serious competitor to Bambu Lab machines at nearly half the price. I was genuinely surprised by how much Anycubic packed into this printer.
The 4-color system uses built-in ACE 2 Pro extruders and is expandable to 19 colors with additional units. This brings multi-material printing into the sub-$300 range for the first time. The hardened steel nozzle reaches 300 degrees Celsius, which opens up advanced filaments like ASA and nylon blends. The 49-point LeviQ 3.0 auto leveling system is thorough and produces consistently flat first layers across the full 260mm bed.
The AI camera is a genuinely useful feature, not a gimmick. It detects spaghetti failures and foreign objects on the build plate, then pauses the print automatically. This has saved me from wasted filament on multiple occasions. The dual-band WiFi supports both 2.4GHz and 5GHz networks, which improves transfer reliability for large G-code files.
The Anycubic ecosystem includes a 10,000-model cloud library accessible through the companion app, making it easy for beginners to find and print projects without learning a slicer immediately. However, some users report WiFi setup difficulties and occasional connectivity drops. The phone app could be more polished, and slicer compatibility with community platforms like MakerWorld has some rough edges.
Multi-Color Filament Economics
Multi-color printing produces significant filament waste during color changes. The purge tower and transition waste can add 20 to 40 percent to total filament consumption depending on how frequently colors switch. Budget for this additional material cost when planning multi-color projects, and consider whether single-color prints meet most of your needs.
How the AI Camera Performs in Practice
The spaghetti detection feature works reliably for obvious failures where filament starts globbing instead of adhering to the model. Foreign object detection catches debris on the bed. The camera also enables time-lapse recording and remote monitoring through the app. Frame rate is modest, but the core safety features function as advertised.
7. Bambu Lab A1 Mini Combo – Multi-Color Printing Made Simple
Pros
- Full-auto calibration out of the box
- AMS lite for reliable multi-color
- Very quiet at 48dB
- Bambu Studio ecosystem
- Compact footprint
- 1-Clip quick swap nozzle
Cons
- Limited build volume for large projects
- Filament feeding issues reported
- Multi-color creates filament waste
- Printer shake on unstable surfaces
The Bambu Lab A1 Mini Combo is the most beginner-friendly multi-color 3D printer I have tested. Bambu Lab built their reputation on making 3D printing as simple as using a paper printer, and the A1 Mini Combo embodies that philosophy. Full-auto calibration handles bed leveling, Z-offset, flow rate compensation, and pressure advance with zero user input.
The included AMS lite unit enables true multi-color printing right out of the box. Load up to four different filament colors or materials, and the system switches between them automatically during printing. Bambu Studio makes designing multi-color prints straightforward, and the MakerWorld community offers thousands of ready-to-print multi-color models. At 48 decibels, the A1 Mini is quiet enough for a living room or home office.
Setup takes approximately 20 minutes. The printer arrives mostly pre-assembled, and the calibration routine runs automatically on first boot. The 1-Clip quick swap nozzle system lets you change nozzle sizes in seconds without tools. WiFi and LAN connectivity enable remote printing and monitoring through the Bambu Handy app.
The main limitation is build volume. The compact footprint that makes the A1 Mini desk-friendly also means you cannot print large objects. Multi-color printing generates waste filament through purge towers, which increases material costs. Some users report filament feeding issues with the AMS lite, particularly with particularly flexible or brittle filaments.
Best Models for Multi-Color Beginners
The A1 Mini Combo is the cheapest entry point into Bambu Lab’s multi-color ecosystem. It pairs perfectly with affordable 1.75mm PLA filament spools from Bambu Lab or third-party brands. For users who need a larger build volume, the full-size A1 with AMS is the natural step up within the same ecosystem.
Living with the Bambu Ecosystem
Bambu Studio is one of the best slicer applications available, offering granular control for advanced users while remaining approachable for beginners. MakerWorld provides a curated library of print profiles optimized for Bambu printers. The trade-off is that the ecosystem is more closed than Prusa’s open-source approach, which may matter to tinkerers who want maximum firmware control.
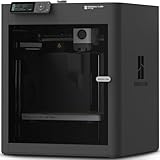
8. ELEGOO Centauri Carbon – The CoreXY Value Champion
Pros
- 500mm/s CoreXY speed
- Enclosed die-cast aluminum frame
- 320C nozzle for advanced filaments
- Built-in camera with time-lapse
- Fully assembled out of box
- Excellent value
Cons
- USB-C connector reliability concern
- Customer support response delays
- Slicer crashes on low-spec hardware
- Noisy without riser mod
- No multi-material system
The ELEGOO Centauri Carbon has been called the best CoreXY for the price on Reddit’s 3D printing communities, and I agree with that assessment. For under $360, you get an enclosed die-cast aluminum frame, 500mm/s print speeds, a 320-degree hardened steel nozzle, and a built-in camera. This combination of features would have cost over $1,000 just two years ago.
The enclosed chamber is the feature that sets the Centauri Carbon apart from every other printer in this price range. Enclosures maintain stable internal temperatures, which is critical for printing ABS, ASA, and nylon without warping or delamination. The die-cast aluminum frame provides exceptional rigidity, which means prints come out cleaner at high speeds because there is less frame flex and vibration.
The machine arrives fully assembled and ready to print. The auto bed leveling with pressure advance ensures consistent first layers, and the dual-sided build plate offers a PLA-specific surface on one side and a general-purpose surface on the other. WiFi connectivity enables wireless file transfers, and the ElegooSlicer software is intuitive enough for beginners while offering advanced features for experienced users.
The primary reliability concern is the USB-C connector that runs to the extruder. Because this connector is on a moving part, it experiences mechanical stress that can lead to failures over time. Some early units also experienced motherboard issues. ELEGOO’s customer support can be slow to respond, with delays of 18 hours or more reported by multiple users.
Why Reddit Loves This Printer
The Centauri Carbon won the Reddit community’s attention because it delivers CoreXY performance with an enclosure at a price point that previously only offered open-frame bedslinger designs. Users praise its speed, build quality, and ability to handle engineering filaments. It represents the current state of the art in budget 3D printer value.
Enclosed Printing Safety and Benefits
The enclosed chamber contains fumes from ABS and ASA printing, which is healthier for indoor use. The stable temperatures also improve layer adhesion for temperature-sensitive materials. If you plan to print functional parts with ABS, ASA, or polycarbonate, an enclosed printer like the Centauri Carbon is strongly recommended over open-frame alternatives.
9. Bambu Lab P1S – The Enclosed CoreXY Standard
Pros
- Fully enclosed for advanced filaments
- 500mm/s with 20000mm/s2 acceleration
- 82-percent 5-star reviews
- Auto leveling before every print
- 15-minute setup
- 16-color multi-material capable
Cons
- AMS sold separately for multi-color
- Factory defects reported on some units
- Bambu support criticized for warranty handling
- Camera has low frame rate
The Bambu Lab P1S earns our Editor’s Choice as the best overall FDM 3D printer for most buyers in 2026. It combines a fully enclosed CoreXY frame, 500mm/s print speeds, auto bed leveling before every print, and the option for up to 16-color multi-material printing. With 82 percent of reviews at 5 stars, it has the highest satisfaction rating of any printer on this list.
I have recommended the P1S to more people than any other printer, and the feedback is consistently positive. Setup takes 15 minutes. The auto-leveling routine runs before every print, which eliminates first-layer anxiety entirely. The enclosed design lets you print ABS, ASA, and polycarbonate without warping, while still handling PLA and PETG perfectly. The 500mm/s speed with 20,000mm/s2 acceleration produces clean parts faster than anything else at this price.
The Bambu ecosystem is the P1S’s secret weapon. Bambu Studio is a refined, capable slicer that works across Windows, Mac, and Linux. MakerWorld offers thousands of community-tested print profiles optimized specifically for Bambu printers. The Bambu Handy app enables remote monitoring and control. Adding the AMS (sold separately) unlocks up to 16-color printing for ambitious multi-material projects.
The main trade-off is cost. The P1S itself is competitively priced at $369, but the AMS adds significantly to the total if you want multi-color capability. Some users have reported factory defects like misaligned rods or damaged components, though these appear to affect a small percentage of units. Bambu Lab’s customer support has been criticized for slow warranty responses, which is a concern at any price point.
When to Choose the P1S Over Cheaper Options
If you plan to print with ABS, ASA, or other high-temperature materials regularly, the P1S’s enclosed design justifies the price premium over open-frame printers. If you want multi-color printing eventually, starting with the P1S gives you a clear upgrade path by adding the AMS later. The reliability and ecosystem polish make it the safest choice for users who want to spend more time printing and less time troubleshooting.
P1S vs the Bambu Lab Ecosystem
The P1S sits between the A1 Mini and the premium X-series in Bambu’s lineup. It offers the enclosed CoreXY design and multi-color capability of more expensive models at a mid-range price. For most users, it represents the sweet spot of performance, features, and value within the Bambu ecosystem.
10. Prusa MK4S – The Professional Open-Source Standard
Pros
- Outstanding print quality with Input Shaping
- Open-source with lifetime support
- Professional-grade reliability
- Linear rails for precision
- Nextruder high-flow hotend
- 1kg Prusament PLA included
Cons
- Premium price at $1
- 299
- Smaller build volume than competitors
- Some QC issues on kit versions
- Smaller community than Bambu Lab
The Prusa MK4S represents the gold standard of open-source 3D printing. At $1,299 fully assembled, it is the most expensive printer on this list, but it earns that price through exceptional print quality, professional reliability, and Prusa Research’s legendary lifetime technical support. I have used Prusa machines for years, and the MK4S is the most refined iteration yet.
Input Shaping technology is the headline feature. It uses accelerometer data to compensate for frame vibrations during high-speed printing, which eliminates the ghosting and ringing artifacts that plague cheaper fast printers. The result is clean, sharp prints at speeds that would produce visible artifacts on other machines. The Nextruder high-flow hotend delivers consistent extrusion even at elevated speeds.
The open-source philosophy is what sets Prusa apart from every other brand on this list. The firmware is open and documented. Spare parts are available directly from Prusa and third-party suppliers. The hardware design is modular and upgradeable, meaning you can improve your machine over time rather than replacing it. PrusaSlicer is one of the most capable slicing applications available, and it is free.
The trade-offs are real. At $1,299, the MK4S costs three to four times more than capable alternatives like the P1S or Centauri Carbon. The build volume of 250x210x220mm is smaller than competitors offering 256mm cubes. Some kit versions have arrived with missing parts or assembly errors. Prusa’s customer base is passionate but smaller than Bambu Lab’s rapidly growing community.
Who Justifies the Premium Price
The MK4S is built for users who treat 3D printing as a daily tool rather than an occasional hobby. Small businesses producing functional parts, workshops requiring consistent output, and makers who value repairability and long-term support are the ideal audience. The lifetime technical support from Prusa Research provides peace of mind that no other manufacturer on this list offers.
Open Source vs Closed Ecosystem
Prusa’s open-source approach means you own your printer completely. You can modify firmware, replace any component, and access complete documentation. Bambu Lab’s ecosystem is more polished but more closed. For tinkerers and professionals who value control and repairability, Prusa is unmatched. For users who prioritize convenience and automation, Bambu Lab remains the better choice.
How to Choose the Best FDM 3D Printer in 2026
Choosing among the best FDM 3D printers requires understanding your priorities. The right printer depends on your budget, experience level, what you plan to print, and how much time you want to spend on setup and maintenance. This buying guide breaks down the key factors that should drive your decision.
Build Volume: What Size Do You Actually Need
Build volume determines the largest object you can print in a single piece. Most printers on this list offer build volumes in the 220mm cube range, which fits the vast majority of hobby projects, miniatures, and household items. If you plan to print large cosplay props, drone frames, or functional prototypes, consider larger build volumes like the 260mm cube on the Anycubic Kobra X.
For miniature painters and small-model makers, a compact printer like the Bambu Lab A1 Mini is perfectly adequate. Printing large objects is possible on any printer by splitting models into sections and gluing them together, but a larger build volume saves time and produces stronger parts. Match your build volume to the largest single object you realistically expect to print.
Print Speed: Marketing Numbers vs Reality
Manufacturers advertise impressive speeds, but actual print speeds for quality results are significantly lower. A printer marketed at 600mm/s will typically produce clean prints at 200 to 250mm/s. The higher advertised speeds refer to travel moves between print areas, not actual filament deposition.
What matters more than raw speed is acceleration and frame rigidity. CoreXY printers with die-cast frames and linear rails maintain print quality at higher speeds than bedslinger designs with V-wheel motion systems. Input shaping technology, found on the Prusa MK4S and available via Klipper firmware on many others, further improves high-speed quality by compensating for vibrations.
Filament Compatibility: What Can You Print With
PLA is the starting filament for every beginner. It prints at low temperatures (190 to 220 degrees Celsius), resists warping, and works on any printer with a heated bed. After mastering PLA, PETG is the natural next step, offering better temperature resistance and flexibility for functional parts.
ABS and ASA require enclosed printers with bed temperatures above 100 degrees Celsius. The Bambu Lab P1S and ELEGOO Centauri Carbon handle these materials well thanks to their enclosed chambers. TPU (flexible filament) requires a direct drive extruder, which is found on most printers on this list except the original Creality Ender 3 with its stock Bowden setup. Carbon fiber reinforced filaments need a hardened steel nozzle, available on the Centauri Carbon (320C) and Anycubic Kobra X.
Connectivity: How You Send Files to Your Printer
Connectivity options include SD card, USB, WiFi, and LAN. Budget printers like the Ender 3 rely on SD cards, which means physically transferring files. Modern printers increasingly offer WiFi connectivity, but reliability varies significantly between brands.
Bambu Lab printers have the best wireless ecosystem, with seamless integration between Bambu Studio, the Bambu Handy app, and cloud-based model sharing. The Anycubic Kobra X offers dual-band WiFi for improved transfer reliability. Flashforge printers use the Flash Maker app for remote monitoring but lack native support for third-party slicers over WiFi. For maximum flexibility, look for printers that support both WiFi and wired LAN connections.
Auto-Leveling: Why It Matters More Than You Think
Manual bed leveling is the number one source of frustration for new 3D printer owners. Getting the nozzle the right distance from the build plate at every point requires patience and practice. Auto-leveling systems probe the bed automatically and compensate for imperfections, ensuring consistent first layers.
Every printer on this list except the original Creality Ender 3 includes some form of auto-leveling. The Bambu Lab models run full calibration routines automatically before every print. The Flashforge Adventurer 5M and AD5M offer one-click leveling. The ELEGOO Neptune 3 Pro uses a 36-point probing system. If you are a beginner, auto-leveling should be a non-negotiable feature.
Safety and Ventilation: Protecting Your Indoor Air Quality
FDM 3D printers melt plastic, which releases volatile organic compounds (VOCs) and ultrafine particles into the air. PLA emits minimal fumes and is generally safe for indoor printing without special ventilation. ABS, ASA, and nylon release significantly more VOCs and should be used in well-ventilated areas or enclosed printers with air filtration.
Enclosed printers like the Bambu Lab P1S and ELEGOO Centauri Carbon contain fumes better than open-frame designs. For maximum safety, consider adding a HEPA filter or activated carbon filter to your enclosure. Never operate a 3D printer in an unventilated small room with ABS or ASA filament, and always follow the manufacturer’s safety guidelines.
Frequently Asked Questions
What is the best FDM 3D printer for beginners?
The Bambu Lab A1 Mini Combo is the top beginner pick due to its full-auto calibration, user-friendly Bambu Studio software, and out-of-the-box reliability. It requires only 20 minutes of setup and has a large community for support. The Flashforge Adventurer 5M is another excellent beginner option with one-click auto leveling at a lower price point.
What is the best budget FDM 3D printer?
The Creality Ender 3 at under $200 is the best budget pick for users willing to learn and tinker. For beginners who want auto-leveling and modern features, the ELEGOO Neptune 3 Pro at $209.99 and the Flashforge Adventurer 5M at $249 offer significantly better out-of-box experiences with direct drive extruders and auto bed leveling included.
Are Bambu Lab printers worth it?
Yes, Bambu Lab printers are worth it for most users seeking plug-and-play reliability. The P1S and A1 Mini Combo consistently rank among the best FDM 3D printers available. They offer auto calibration, enclosed designs, multi-color capability, and excellent software integration. The trade-off is a more closed ecosystem compared to open-source alternatives like Prusa.
Do FDM 3D printers need ventilation?
Yes, FDM printers benefit from ventilation. PLA emits minimal fumes and is relatively safe indoors. However, ABS, PETG, and especially ASA release harmful VOCs and ultrafine particles. Use an enclosed printer with air filtration for these materials, or place your printer in a well-ventilated area. A HEPA or activated carbon filter is recommended for enclosed printers used indoors.
What filament is best for FDM 3D printing beginners?
PLA is the best filament for beginners. It prints at low temperatures of 190 to 220 degrees Celsius, has minimal warping, does not require an enclosure, and produces excellent surface finish. After mastering PLA, PETG is the recommended second filament because it offers better temperature resistance, durability, and slight flexibility for functional parts.
What size FDM 3D printer should I get?
For most users, a 220x220x220mm build volume is ideal and fits the majority of hobby projects. The Anycubic Kobra X offers a larger 260mm cube for bigger prints. Compact printers like the Bambu Lab A1 Mini work well for miniatures and small items on a desk. Choose larger build volumes if you plan to print cosplay props, drone frames, or large functional prototypes.
Final Verdict: Choosing Among the Best FDM 3D Printers in 2026
The best FDM 3D printers in 2026 span a remarkable range of prices and capabilities. For most buyers, the Bambu Lab P1S offers the best balance of speed, reliability, enclosed design, and ecosystem polish at $369. If you want maximum value, the ELEGOO Centauri Carbon delivers enclosed CoreXY performance at under $360. Budget-conscious beginners should start with the Creality Ender 3 or ELEGOO Neptune 3 Pro depending on whether they prefer to tinker or print immediately.
The market has reached a point where spending under $400 gets you features that cost over $1,000 just two years ago. Auto-leveling, CoreXY motion systems, enclosed chambers, and multi-color printing are now accessible at entry-level prices. Whatever your budget and experience level, there is a printer on this list that will serve you well for years to come.