Editing a series of photos can feel like a juggling act. You spend 20 minutes perfecting one image, then struggle to recreate that same look across the rest of your set. The colors shift, the exposure feels off, and suddenly your cohesive photo series looks disjointed. If this sounds familiar, you are not alone. Learning how to use Reference View in Lightroom can transform your editing workflow and give you the consistency you have been chasing.
Reference View is one of those Lightroom Classic features that feels like a secret weapon once you discover it. Instead of constantly switching between photos or trying to remember what your “hero” image looked like, you can keep it visible while you edit. This side-by-side comparison lets you match colors, exposure, and overall aesthetic in real time.
In this guide, I will walk you through everything you need to know about Reference View. You will learn how to enable it, set reference photos, use it within a complete editing workflow, and troubleshoot common issues that trip up most photographers. By the end, you will have the tools to keep your edits consistent across any photo set.
What is Reference View in Lightroom Classic?
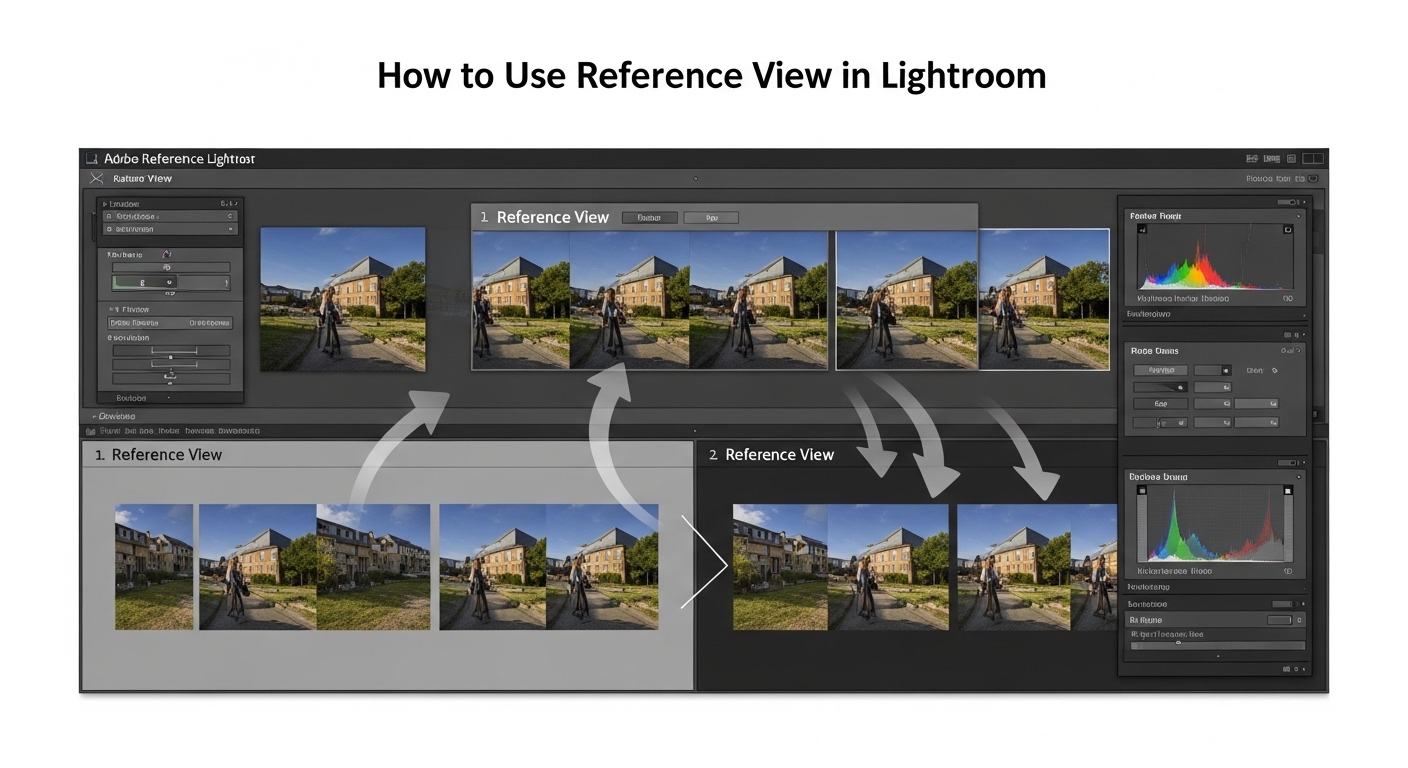
Reference View in Lightroom Classic is a Develop module viewing mode that displays two images simultaneously: a static reference photo on one side and an active, editable photo on the other. This split-screen setup lets you compare your current edit against a chosen reference image in real time, making it invaluable for matching colors, exposure, white balance, and overall aesthetic across a series of photos.
The reference photo remains static while you make adjustments to the active photo. You cannot edit the reference directly within Reference View, but you can zoom, pan, and read RGB or LAB color values from it. This creates a constant visual anchor that helps you maintain consistency without constantly switching between images.
Here is the key terminology you need to understand:
Reference photo: The static image displayed on the left (or top) that serves as your visual target. This is the look you are trying to match.
Active photo: The editable image displayed on the right (or bottom) that you are actively adjusting.
R|A icon: The toolbar indicator showing Reference View is active, with R representing Reference and A representing Active.
Why does this matter? Wedding photographers use Reference View to keep reception photos consistent across different lighting setups. Portrait photographers use it to match skin tones across a session. Landscape photographers use it to maintain a cohesive color palette across a series shot at different times of day. Any time you need your edits to feel unified, Reference View helps you get there faster.
How to Enable and Use Reference View in Lightroom?
Getting started with Reference View takes just a few seconds once you know where to look. Here is the step-by-step process.
Step 1: Open Your Photos in the Develop Module
Start by selecting the photos you want to edit and opening the Develop module. Reference View only works in the Develop module, so make sure you are not in Library or any other module. You can select multiple photos in the filmstrip at the bottom of the screen.
Step 2: Activate Reference View
There are three ways to enable Reference View:
Keyboard shortcut: Press Shift+R. This is the fastest method and worth memorizing if you use Reference View frequently.
Toolbar button: Click the R|A icon in the toolbar below the preview area. If you do not see the toolbar, press T to toggle it on.
View menu: Go to View > Reference View > Enable.
Once activated, your preview area splits into two panes. The left pane shows “Reference” and the right pane shows “Active.”
Step 3: Set Your Reference Photo
With Reference View enabled, you need to choose which photo will serve as your reference. Right-click on any photo in the filmstrip and select “Set as Reference Photo” from the context menu. Alternatively, you can drag a photo from the filmstrip directly into the Reference pane.
The photo you choose should represent the look you want to achieve across your entire set. Many photographers edit one “hero” image first, then set it as the reference for matching the rest of the series.
Step 4: Lock the Reference Photo
By default, your reference photo stays in place when you navigate between images. However, if you want to ensure it never changes accidentally, click the lock icon in the toolbar. A closed lock means the reference is locked and will persist even when you switch modules or collections.
This lock feature is essential for long editing sessions. Without it, you might lose your reference when switching to the Library module to check something, forcing you to set it up again.
Step 5: Choose Your View Layout
Reference View offers two layout options:
Side-by-side (Left/Right): The reference photo appears on the left, and the active photo appears on the right. This is the default layout and works well for most situations.
Top/Bottom: The reference photo appears above the active photo. This layout can be useful for images with different aspect ratios or when working on a wider monitor.
To switch layouts, click the view options in the toolbar or use the View menu.
Step 6: Match Your Active Photo to the Reference
Now comes the actual editing. Make adjustments to your active photo while keeping the reference visible. You can:
Match exposure by comparing the overall brightness between the two images.
Match white balance by checking that skin tones or neutral areas look consistent.
Match contrast and tone curves by observing the distribution of highlights and shadows.
Use the histogram as a secondary reference. While Reference View does not overlay the reference histogram, you can visually compare the active photo’s histogram to what you see in the reference image.
Practical Workflow Examples for Consistent Edits
Understanding the mechanics of Reference View is one thing. Knowing how to use it in real-world scenarios is another. Here are three practical workflows that show Reference View in action.
Workflow 1: Matching Raw Files to In-Camera JPEG
Many photographers shoot Raw+JPEG to get the best of both worlds. The in-camera JPEG often has appealing color science and processing that can be hard to replicate in post. Reference View makes this matching process much easier.
First, set your in-camera JPEG as the reference photo. Then open the corresponding Raw file as your active photo. The JPEG shows you exactly what the camera produced, giving you a target for your Raw processing.
Use Reference View to match the white balance, exposure, and overall color treatment. You can zoom into specific areas to compare skin tones or check color values. This approach is especially useful for photographers who love their camera’s JPEG engine but still want the flexibility of Raw.
Workflow 2: Wedding Photography Series
Wedding photographers often shoot hundreds of images across different lighting conditions throughout the day. Keeping these consistent is critical for delivering a cohesive album.
Start by selecting your best image from each lighting scenario. Edit this “hero” image until it looks perfect, then set it as your reference. Now work through the other images from that same scenario, using Reference View to match exposure, white balance, and color grading.
For example, reception photos taken under mixed lighting can vary wildly. Reference View lets you anchor your edits to one image that captures the mood you want. As you edit each subsequent photo, you can instantly see whether it matches or needs adjustment.
Workflow 3: Long-Term Project Consistency
Some photography projects span months or even years. A documentary series, a 365 project, or a long-term portrait study all benefit from visual consistency. The challenge is maintaining the same editing style across different sessions and even different cameras.
Reference View helps here too. Create a collection of your project images and set your most representative shot as the reference. Lock it in place. Now, every time you sit down to edit new additions to the project, you have that visual anchor reminding you of the style you established.
This approach prevents style drift, where your editing slowly changes over time without you realizing it. With Reference View, you can check new edits against your original vision.
Using RGB and LAB Values for Precise Matching
Visual comparison is powerful, but sometimes you need more precision. Reference View lets you read RGB and LAB color values from both images.
Hover over any area of the reference photo to see its color values in the toolbar or Info panel. Then hover over the same area of your active photo to compare. This is useful for matching specific colors, like product photography where brand colors must be accurate.
LAB values can be particularly helpful because they separate lightness from color. If your L values match but your A and B values differ, you know the issue is color, not exposure.
Monitoring the Histogram
While Reference View does not display the reference histogram alongside the active histogram, you can still use the histogram as a matching tool. Observe the tonal distribution in your reference image, then watch how your active photo’s histogram compares as you make adjustments.
Look for similar peak positions and overall shapes. A histogram that is shifted left or right indicates an exposure mismatch. Different curve shapes suggest contrast differences.
Advanced Reference View Techniques
Once you are comfortable with the basics, these advanced techniques will help you get even more from Reference View.
Combining Reference View with Sync Settings
Reference View and Sync Settings are a powerful combination. Use Reference View to perfect your hero image, then sync those settings to similar photos in your set. Reference View ensures your hero is right, and Sync Settings applies that look efficiently.
Here is the workflow I recommend:
Edit your hero image while using Reference View if you have an external reference.
Select the hero image and all similar photos in the filmstrip.
Click the Sync button and choose which settings to copy.
Use Reference View to fine-tune each image individually.
This combination gives you both efficiency and precision. Bulk processing handles the heavy lifting, while Reference View handles the fine details.
Using Virtual Copies as References
Virtual copies let you create multiple edit versions of the same photo without duplicating the file. You can use virtual copies as reference photos, which opens up interesting possibilities.
Create a virtual copy of your image and edit it with an extreme look you want to emulate. Set this virtual copy as your reference. Now edit the original photo to match that look. This is useful for exploring creative directions without committing to them.
Creating Presets from Matched Images
Once you have matched an image to your reference and achieved the look you want, save it as a preset. Right-click on the image or use the Presets panel to create a new develop preset.
This preset becomes a starting point for future images in the same style. You can even combine this with Reference View: apply the preset to a new image, then use Reference View to fine-tune the match.
Matching to External Reference Images
Sometimes your reference is not part of your photo library at all. You might want to match the look of an image you found online, a mood board image, or work from another photographer.
Import that external image into Lightroom as you would any photo. You do not need to edit it; just have it available in your catalog. Now you can set it as your reference and match your photos to that external look.
This is particularly useful for commercial work where clients provide reference images showing the mood or style they want.
Reference View vs Other Consistency Methods
Reference View is not the only tool for maintaining consistency. Here is how it compares to other methods:
Sync Settings: Applies identical settings to multiple photos. Fast and efficient, but does not account for differences in exposure or white balance between shots. Best for photos taken in identical conditions.
Auto Sync: Automatically applies any adjustment to all selected photos in real time. Powerful but risky if you make a mistake. Reference View gives you more control.
Copy/Paste Settings: Manual method for transferring settings between images. Useful for selective application but requires more clicks.
Develop Presets: Saved settings you can apply to any image. Great for establishing a baseline look, but images still need individual adjustment.
Reference View complements all these methods. Use it to establish your target look, then use sync or presets to apply it broadly. Return to Reference View for fine-tuning.
Troubleshooting Common Reference View Issues
Even experienced Lightroom users encounter issues with Reference View. Here are the most common problems and how to solve them.
Reference Photo Looks Different in Reference View
Some users notice that their reference photo appears different when viewed in Reference View compared to the normal Develop view. This is usually related to color profile or soft proofing settings.
Check that soft proofing is either on or off for both views consistently. Soft proofing changes color rendering to simulate output, which can create visible differences.
Also verify that both images are using the same color profile. If one image has a different profile applied, the colors will not match.
Crop Tool Exits Reference View
This is a known limitation, not a bug. When you activate the crop tool, Lightroom switches out of Reference View because the crop interface takes over the preview area.
The workaround is simple: crop your images before using Reference View, or accept that you will need to reactivate Reference View after cropping. Press Shift+R to jump back in quickly.
Reference Clears When Switching Modules
If your reference photo disappears when you switch to the Library module and back, check the lock icon. An unlocked reference can clear when you change contexts.
Click the lock icon to lock your reference in place. A closed lock indicates the reference is preserved across module switches.
Color Matching Not Working as Expected
If you are using Reference View to match colors but the results feel off, consider these factors:
Images shot under different lighting will never match perfectly. Reference View helps you get close, but physics still applies.
Camera profiles and white balance differences can create subtle color shifts that are hard to overcome with global adjustments.
Try matching exposure and contrast first, then work on color. Sometimes what looks like a color problem is actually a tonal problem.
Use the RGB or LAB values for objective comparison. Your eyes can be fooled by surrounding colors, but the numbers do not lie.
Frequently Asked Questions
What is Reference View in Lightroom?
Reference View is a viewing mode in Lightroom Classic’s Develop module that displays two images side by side: a static reference photo and an active photo you are editing. This allows you to match the look, color, and exposure of one image to another in real time. Press Shift+R to activate it.
How do I apply the same edits to multiple photos in Lightroom?
Select your edited photo along with the photos you want to match, then click the Sync button in the Develop module. Choose which settings to copy and click Synchronize. For automatic syncing, enable Auto Sync from the Settings menu. You can also copy settings with Ctrl+Shift+C (Cmd+Shift+C on Mac) and paste with Ctrl+Shift+V (Cmd+Shift+V).
How do I edit photos so they all look the same?
Start by editing your best image to perfection. Set it as your reference photo in Reference View (Shift+R). Then work through your other images, using the reference as a visual guide. For efficiency, sync your settings to similar photos, then use Reference View to fine-tune individual images that need adjustment.
How do I sync edits in Lightroom?
In the Develop module, select the photo with your desired edits, then select the additional photos you want to sync. Click the Sync button at bottom right. In the dialog, check the settings you want to copy and click Synchronize. For live syncing, Ctrl-click (Cmd-click on Mac) the Sync button to enable Auto Sync.
What is the shortcut for Reference View in Lightroom?
Press Shift+R to enable Reference View in Lightroom Classic’s Develop module. Press Shift+R again to exit Reference View and return to the normal Loupe view. You can also click the R|A icon in the toolbar below the preview area.
Conclusion
Reference View transforms the way you approach editing consistency in Lightroom Classic. Instead of guessing whether your images match, you can see them side by side and adjust in real time. The Shift+R shortcut makes it accessible whenever you need it, and the lock feature keeps your reference in place across long editing sessions.
Start by mastering the basics: enabling Reference View, setting your reference photo, and using the side-by-side comparison to match exposure and color. Then integrate it with sync settings and presets for a complete consistency workflow. Whether you are editing wedding photos, portrait series, or long-term documentary projects, Reference View helps you deliver a cohesive final product.
The best way to learn Reference View is to use it. Open your next photo set, pick your hero image, and start matching. You will wonder how you ever edited without it.