Losing a photo library is every photographer’s nightmare. I learned this the hard way when a hard drive failed during a wedding season, taking months of client work with it. That experience taught me one thing: automatic cloud backup isn’t optional, it’s essential. In this guide, I’ll walk you through exactly how to set up automatic cloud backup for your photo library using two of the most popular services for photographers: Backblaze and CrashPlan.
Whether you’re a professional photographer with terabytes of RAW files or an enthusiast building a family archive, this guide covers everything you need to protect your work. I’ll share real-world experiences from my own setup and insights from photographers who have used both services extensively.
Why Automatic Cloud Backup Matters for Photographers?
Before diving into setup instructions, let’s address why automatic cloud backup deserves a spot in every photographer’s workflow. The answer comes down to one simple reality: manual backup fails. We get busy, we forget, we think “I’ll do it tomorrow.” Tomorrow becomes next week, and next week becomes never, until disaster strikes.
The 3-2-1 Backup Rule Explained
The 3-2-1 backup rule is the gold standard for data protection, and it’s especially relevant for photographers. Here’s what it means: maintain 3 copies of your data, on 2 different types of media, with 1 copy stored off-site. Cloud backup satisfies that critical off-site requirement, protecting your photos against fire, flood, theft, or any disaster that could destroy your local equipment.
For photographers, this rule translates to keeping your working files on your main computer (copy 1), a local backup on an external drive or NAS (copy 2), and an off-site backup in the cloud (copy 3). The automatic nature of cloud backup services means this third copy happens without any effort on your part after initial setup.
Cloud Backup vs Cloud Storage vs Cloud Syncing
This distinction trips up many photographers, so let’s clear it up. Cloud backup services like Backblaze and CrashPlan automatically copy files from your computer to secure servers and maintain them for recovery purposes. Cloud storage services like Amazon S3 or Google Cloud Storage provide raw storage space you manage manually. Cloud syncing services like Dropbox or iCloud Drive synchronize files across devices but aren’t designed for comprehensive backup.
For photo backup, you want a true cloud backup service. These services handle everything automatically, maintain version history, and are designed specifically for disaster recovery. Syncing services might share your latest edits across devices, but they won’t protect you if you accidentally delete files or your computer gets stolen.
Why Photographers Need Different Backup Solutions
Photographers face unique challenges that general backup advice doesn’t address. RAW files are large, often 30-80MB each, meaning a single shoot can consume gigabytes. A professional photo library can easily reach multiple terabytes. Lightroom catalogs contain not just the catalog file itself but preview data, sidecar files, and smart preview collections that all need protection.
Many photographers also work with external drives containing archived projects, portable drives used during travel, and multiple computers for different purposes. Any backup solution for photographers needs to handle these complexities gracefully.
Backblaze vs CrashPlan: Which Is Right for Your Photo Library?
Both Backblaze and CrashPlan serve photographers well, but they take different approaches. Understanding these differences helps you choose the right service for your specific workflow.
Feature Comparison
Here’s how the two services stack up for photography use cases:
Backblaze: Offers unlimited backup storage for a single computer at a straightforward annual price. The service backs up continuously in the background, includes external drive support, and provides options for restore by mail or web download. Backblaze excels at simplicity. Install it, configure a few settings, and it handles everything automatically.
CrashPlan: Also offers unlimited storage but with more granular control over backup behavior. You can set specific backup schedules, control bandwidth usage with precision, and manage file retention policies. CrashPlan provides more features for power users who want fine-tuned control over their backup process.
Real-World Performance for Photo Libraries
From forum discussions and my research, photographers report significantly different experiences with each service. Backblaze users consistently praise upload speeds, often describing the service as “set it and forget it.” One photographer with a 3TB library reported completing initial backup in about 3 weeks with Backblaze, compared to 6 months with CrashPlan on the same connection.
CrashPlan users appreciate the granular control, particularly for bandwidth management during working hours. Professional photographers who need to maintain network performance for client work value the ability to throttle backup speeds precisely. The trade-off is more complexity in setup and configuration.
External Drive Handling
Both services support external hard drives, which is critical for photographers with archived projects. Backblaze requires external drives to be connected at least once every 30 days to remain in the backup set. CrashPlan keeps files from unplugged drives for longer periods depending on your retention settings.
For photographers who rotate through multiple archive drives, this difference matters. If you have seasonal drives that only connect occasionally, CrashPlan’s more flexible retention might suit your workflow better.
Pricing Overview
Backblaze Personal Backup costs approximately $9 per month or $99 per year for unlimited backup on one computer. CrashPlan for Small Business runs about $10 per month per device with unlimited storage. Both services offer similar value, though Backblaze’s annual pricing provides slight savings.
Which Should You Choose?
Choose Backblaze if you want simplicity, faster upload speeds, and don’t need granular control over backup behavior. It’s ideal for photographers who want a reliable “set it and forget it” solution that just works.
Choose CrashPlan if you need precise control over backup schedules, bandwidth usage, or file retention policies. It’s better for professional photographers who must manage network resources carefully or have complex requirements around drive rotation.
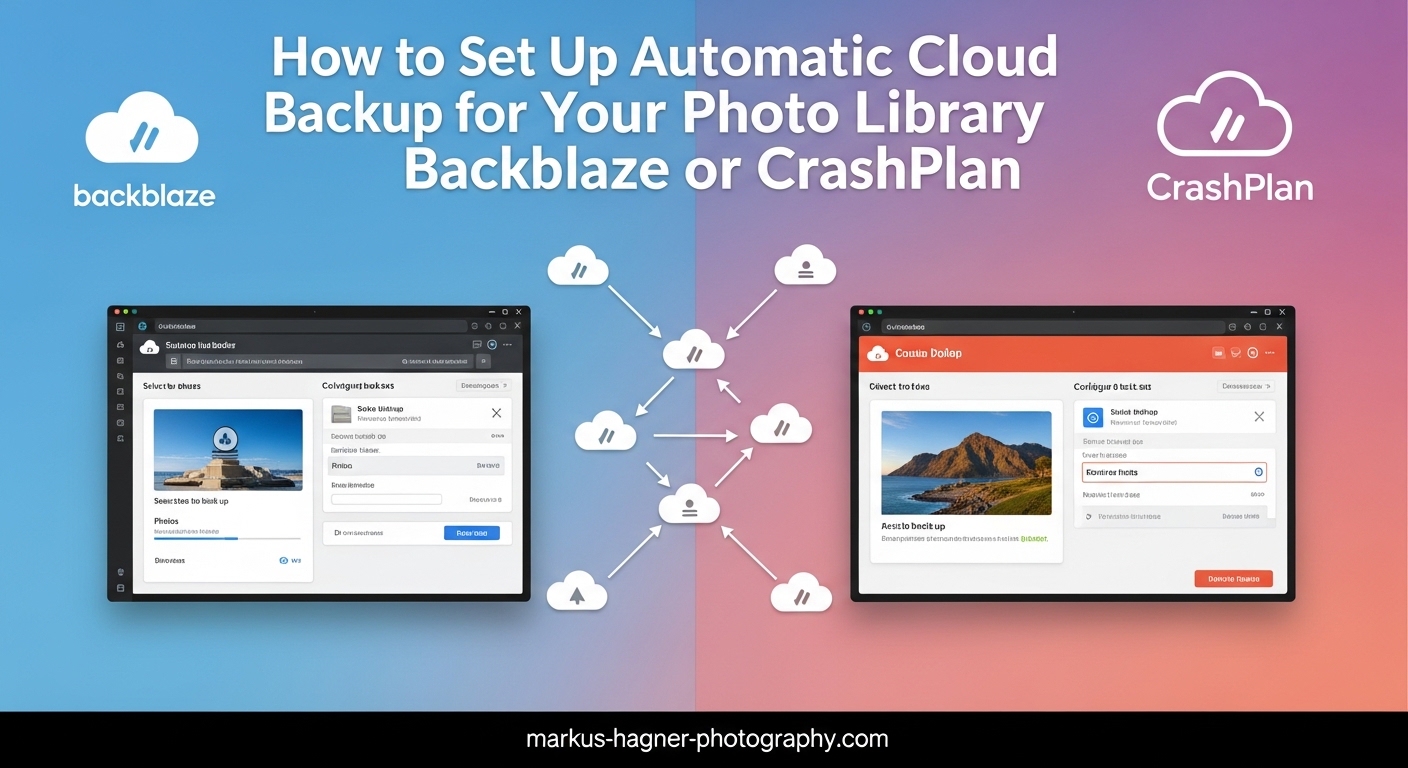
How to Set Up Backblaze for Your Photo Library
Setting up Backblaze for photo backup takes about 15-20 minutes. Follow these steps to get your automatic cloud backup running.
Step 1: Create Your Backblaze Account
Visit the Backblaze website and sign up for a Personal Backup account. You’ll need to provide an email address and create a password. Backblaze offers a free trial period, so you can test the service before committing. I recommend using an email address you check regularly, as Backblaze sends important notifications about backup status.
Step 2: Download and Install the Backblaze Client
After creating your account, download the Backblaze client for your operating system. The installer is straightforward on both Mac and Windows. Run the installer and follow the prompts. During installation, Backblaze will ask for your account credentials to link the software to your account.
Step 3: Configure Backup Settings for Your Photo Library
Once installed, Backblaze opens its preferences panel. By default, Backblaze backs up your entire computer except for system files and applications. For photographers, you’ll want to verify your photo folders are included.
Click on “Settings” in the Backblaze control panel, then navigate to the backup selection area. Verify that your photo storage locations are included. This typically includes your Pictures folder, any external drives containing photos, and custom folders where you store RAW files or Lightroom catalogs.
Step 4: Set Up External Drive Backup
If you store photos on external hard drives, connecting them before or during setup ensures they’re included in the initial backup configuration. Backblaze automatically detects connected external drives and adds them to the backup set.
Important note: Backblaze requires external drives to be connected at least once every 30 days. If a drive remains disconnected longer, Backblaze will remove it from the backup set to manage storage. For photographers with archive drives, set a calendar reminder to connect these drives monthly.
Step 5: Configure Performance Settings
Navigate to the performance settings in Backblaze preferences. Here you can adjust how aggressively Backblaze uses your internet connection. For photographers with large libraries, the initial backup can take weeks, so finding the right balance matters.
If you work from home and need full bandwidth during business hours, consider reducing backup speed during work times. Backblaze runs continuously by default, but you can schedule specific backup windows or throttle bandwidth to preserve network performance.
Step 6: Verify Backup Is Working
After setup completes, Backblaze begins scanning your files and uploading them. The control panel shows current backup status, including the number of files remaining and estimated completion time. For large photo libraries, initial backup can take several weeks depending on your upload speed.
To verify everything is working correctly, wait about an hour after setup, then check the Backblaze control panel. You should see files being uploaded and progress being made. If backup isn’t progressing, check your firewall settings or internet connection.
Step 7: Test the Restore Process
Before relying on any backup service, test the restore process. I recommend restoring a small folder of photos to verify the system works as expected. In the Backblaze control panel, click “Restore” and select a small folder of images. Download them and verify the files open correctly.
This step might seem unnecessary, but it’s critical. Discovering restore problems when you actually need your backup is too late. Spending 30 minutes now confirming restore works correctly provides peace of mind.
How to Set Up CrashPlan for Your Photo Library
CrashPlan setup involves more configuration options than Backblaze, giving you greater control over backup behavior. Here’s how to set it up for photo backup.
Step 1: Create Your CrashPlan Account
Visit the CrashPlan website and sign up for the Small Business plan, which provides unlimited backup for each device. Like Backblaze, you’ll provide an email address and create credentials. CrashPlan offers a trial period for testing.
Step 2: Download and Install the CrashPlan Client
Download the CrashPlan client for your operating system. The installer walks you through setup, including entering your account credentials. CrashPlan installs as a background service that manages backup operations continuously.
Step 3: Configure Backup Selection
After installation, CrashPlan opens its management interface. Unlike Backblaze, CrashPlan doesn’t automatically select your entire computer for backup. You’ll need to manually select which folders to include.
Click “Manage Files” to open the file selection interface. Navigate to your photo storage locations and check the boxes next to folders containing your images. Include your Pictures folder, custom photo storage folders, and any external drives with photo archives. Also include your Lightroom catalog location, typically in your Pictures folder by default.
Step 4: Configure Backup Schedule
CrashPlan allows precise scheduling of backup operations. Access the backup settings and navigate to the schedule configuration. You can set backup to run continuously, during specific hours, or only at certain times of day.
For photographers who need full bandwidth during editing sessions, consider scheduling backup for overnight hours only. This ensures your cloud backup doesn’t compete with your editing workflow for network resources.
Step 5: Set Bandwidth Controls
One of CrashPlan’s strengths is granular bandwidth control. In the network settings, you can set specific upload and download speed limits. You can also configure different limits for “away” versus “present” status, allowing full-speed backup when you’re not at your computer.
For large photo libraries, this control is valuable. During initial backup, you might allow unlimited bandwidth to complete the process faster. Once initial backup finishes, throttle bandwidth to preserve network performance for daily work.
Step 6: Configure File Retention
CrashPlan offers more flexible file retention than Backblaze. In retention settings, you can specify how long to keep deleted files and how many versions of modified files to maintain. For photographers, longer retention provides better protection against accidental deletion or unwanted edits.
Consider setting deleted file retention to at least 90 days, giving you three months to realize you’ve accidentally deleted important images. Version history should be set to maintain multiple versions, protecting against accidental overwrites or edits you later regret.
Step 7: Add External Drives
Connect any external drives containing photos, then return to the file selection interface. External drives appear in the navigation panel, allowing you to select specific folders for backup. CrashPlan maintains files from unplugged drives according to your retention settings, so archive drives can remain disconnected without losing their backup status.
Step 8: Verify and Test
As with Backblaze, verify that backup is progressing by checking the CrashPlan dashboard. The interface shows backup status, speed, and estimated completion time. After letting backup run for an hour, confirm progress is being made.
Test the restore process by selecting a small folder of images and restoring them. CrashPlan offers web restore for small files or desktop restore for larger selections. Verify restored files open correctly before trusting the system with your photo library.
Photography-Specific Backup Considerations
General backup advice doesn’t always address the unique needs of photographers. Here are specific considerations for backing up photo libraries effectively.
Backing Up RAW Files
RAW files deserve special attention in any backup strategy. These files represent your original captures, the foundation of all your edited work. Losing RAW files means losing the ability to re-edit images as your skills improve or trends change.
Both Backblaze and CrashPlan handle RAW files without issue. The primary consideration is storage space and upload time. A typical RAW file ranges from 30-80MB, so a library of 10,000 images could reach 500GB or more. Plan for extended initial backup times and ensure your internet connection can handle sustained uploads.
Lightroom Catalog Backup
Your Lightroom catalog is just as important as your image files. This catalog contains all your organization, keywords, collections, and editing history. Losing it means losing years of organizational work.
Include your Lightroom catalog folder in backup selection. On Mac, this is typically in ~/Pictures/Lightroom/. On Windows, check your Pictures folder. Include both the catalog file (.lrcat) and the accompanying preview folders. The catalog itself is relatively small, but previews can grow large depending on your settings.
Consider Lightroom’s built-in catalog backup feature as an additional layer. Configure Lightroom to back up the catalog on exit, storing these backups in a folder included in your cloud backup. This provides multiple recovery points for your catalog.
Managing External Drives
Many photographers use external drives for archived projects or additional storage. Both services support external drives, but with different requirements.
Backblaze requires external drives to connect at least once every 30 days. Set calendar reminders for drives you don’t use regularly. When connecting archive drives, give Backblaze time to scan and update the backup before disconnecting.
CrashPlan maintains files from unplugged drives according to retention settings. For photographers who rotate through archive drives seasonally, configure retention to keep files for extended periods. This allows drives to remain disconnected for months without losing backup protection.
Strategies for Large Library Initial Upload
Photographers with multi-terabyte libraries face a significant challenge: initial backup can take months on typical home internet connections. Here are strategies to manage this process.
First, prioritize your most important work. Both services allow you to select specific folders for backup. Start with your current projects and most valuable archives. Add older archives once initial priority folders complete backup.
Second, consider bandwidth management carefully. During initial upload, maximize available bandwidth by running backup overnight and during work hours if possible. Once initial backup completes, throttle bandwidth to preserve network performance.
Third, be patient and consistent. Interrupting the backup process resets progress on partial uploads. Let backup run continuously, even if slowly, to make steady progress toward completion.
Multiple Computer Workflows
Photographers often use multiple computers: a desktop for editing, a laptop for travel, perhaps a separate machine for business tasks. Each computer requires its own backup subscription with both services.
For cost management, consider which machines contain irreplaceable photo files. Your editing desktop likely contains your primary photo library and needs full backup. A business laptop might only need selective backup of documents, not comprehensive photo backup.
Troubleshooting Common Backup Issues
Even well-configured backup systems occasionally encounter problems. Here are solutions to common issues photographers face.
Backup Not Running
If backup stops progressing, first check that the service is running. Both Backblaze and CrashPlan run as background services. On Mac, check Activity Monitor. On Windows, check Task Manager. If the service isn’t running, restart it from the application menu or system reboot.
Firewall settings can block backup software. Check your firewall configuration and ensure the backup application has permission to access the network. Both services need outbound internet access to upload files.
Full hard drives can also stop backup. Both services need temporary space to prepare files for upload. Ensure your system drive has adequate free space, typically at least 10GB for backup operations.
Slow Upload Speeds
Upload speed issues usually stem from internet connection limitations or service throttling. First, run a speed test to verify your actual upload bandwidth. Many home connections have significantly lower upload speeds than download speeds.
Both services compress and deduplicate data before upload, which can temporarily slow apparent progress during processing. This is normal behavior and usually resolves as backup continues.
If speeds remain consistently slow, check for bandwidth throttling in service settings. Both Backblaze and CrashPlan allow speed limiting. Ensure this isn’t configured too restrictively.
External Drive Not Recognized
If an external drive isn’t appearing in backup selection, try reconnecting it. For Backblaze, drives must be connected during backup configuration or manually added. Open Backblaze settings, navigate to backup selection, and verify the drive appears.
For CrashPlan, click “Refresh” in the file selection interface after connecting drives. If drives still don’t appear, check that the file system is supported. Both services support common formats like NTFS, HFS+, and APFS, but may have issues with unusual configurations.
Restoring Files
When you need to restore files, both services offer multiple options. For small restores, web download is fastest. Access the restore interface through the service’s website or application, select files, and download them directly.
For large restores, consider the mail option. Both Backblaze and CrashPlan offer to ship a hard drive with your data. This costs extra but is much faster than downloading terabytes of data. The drive typically arrives within a few days and can be returned for a refund.
Always verify restored files before trusting them. Open images in your editing software to confirm they’re not corrupted. Check file counts and sizes against your records to ensure complete restoration.
Verifying Backup Integrity
Periodically verify your backup contains what you expect. Both services allow browsing backed-up files through their interfaces. Check that recent photos appear in the backup and that folder structures match your local organization.
Perform test restores of random files every few months. This confirms the backup system works end-to-end and gives you confidence in your protection. Make this part of your regular maintenance routine.
Frequently Asked Questions
What is the 3-2-1 backup rule?
The 3-2-1 backup rule is a data protection strategy that recommends maintaining 3 copies of your data on 2 different types of storage media, with 1 copy stored off-site. For photographers, this typically means keeping your working files on your computer, a local backup on an external drive or NAS, and an off-site backup in the cloud. This approach protects against hardware failure, theft, natural disasters, and accidental deletion.
Does Backblaze backup external hard drives?
Yes, Backblaze backs up external hard drives connected to your computer. The service automatically detects connected external drives and includes them in your backup set. However, external drives must be connected at least once every 30 days to remain in the backup. If a drive stays disconnected longer, Backblaze removes it from the backup set to manage storage efficiently.
How long does initial backup take for large photo libraries?
Initial backup time depends entirely on your library size and upload speed. For a 1TB photo library on a typical 20Mbps upload connection, expect 5-7 days of continuous uploading. A 5TB library on the same connection could take a month or more. Photographers with multi-terabyte libraries often report initial backup times of several weeks to months. Once initial backup completes, ongoing backups of new files happen much faster.
Can I use both Backblaze and CrashPlan together?
Yes, you can run both services simultaneously for redundancy. Some photographers use this approach for maximum protection, with one service as primary backup and another as secondary. Both services run independently in the background. The main consideration is bandwidth usage, as both services will upload data simultaneously. Consider staggering schedules or throttling bandwidth to manage network resources effectively.
What happens if I delete a photo from my computer?
Both services maintain deleted files for a retention period before removing them from backup. Backblaze keeps deleted files for 30 days on the standard plan. CrashPlan offers configurable retention, allowing you to set how long deleted files remain available for restore. If you accidentally delete a photo, restore it within the retention period to recover it permanently.
Is cloud backup safe for my photos?
Yes, cloud backup services use strong encryption to protect your files during transfer and storage. Both Backblaze and CrashPlan encrypt data before it leaves your computer and maintain encryption on their servers. For additional security, both services offer private encryption key options that prevent even the service provider from accessing your files. Your photos remain private and secure throughout the backup process.
Final Thoughts on Protecting Your Photo Library
Setting up automatic cloud backup for your photo library is one of the most important steps you can take as a photographer. Whether you choose Backblaze for its simplicity and speed or CrashPlan for its granular control, the key is taking action before you need the backup.
Remember these essential points: follow the 3-2-1 backup rule, test your restore process, verify backups regularly, and maintain connected external drives according to service requirements. Your photos represent irreplaceable memories and professional work. They deserve reliable protection.
Start your backup setup today. The initial backup will take time, but once it’s running, you’ll have peace of mind knowing your photo library is protected against whatever challenges come your way.