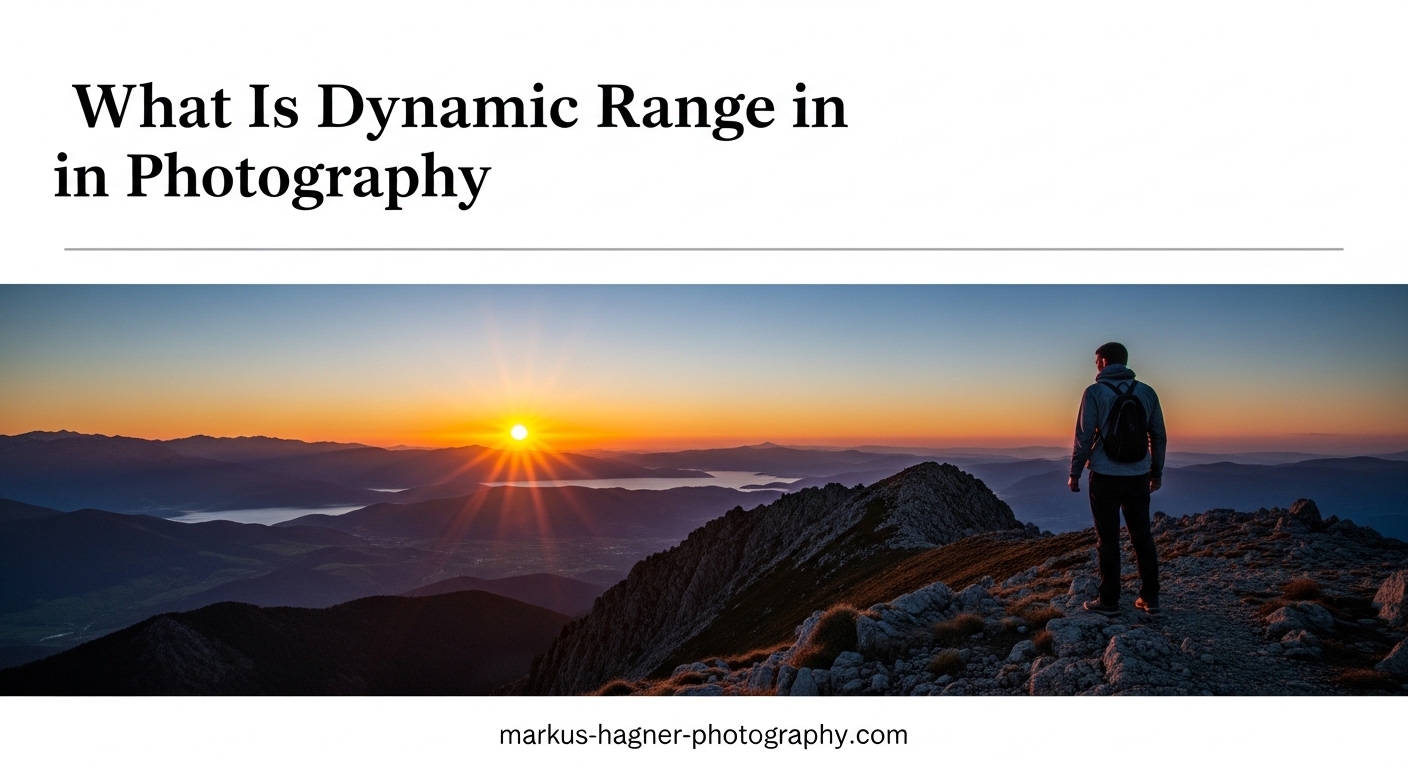
You set up the perfect landscape shot — crisp foreground rocks, dramatic sky, golden light breaking over the ridge. You press the shutter, check the back of the camera, and your heart sinks. The sky is a washed-out white blaze and the rocks are pitch black. That frustrating gap between what your eyes saw and what your camera recorded comes down to one thing: dynamic range in photography.
Understanding how dynamic range works — and more importantly, how to work around its limits — is one of the biggest skills jumps you can make as a photographer. I’ve spent years chasing light in landscapes and portraits, and mastering this concept changed how I shoot, how I expose, and how I edit.
In this guide, I’ll walk through exactly what dynamic range means, why your camera struggles with it, and every practical technique I use to get detail in both shadows and highlights.
What Is Dynamic Range in Photography?
Dynamic range in photography is the ratio between the darkest shadow and the brightest highlight that a camera sensor can capture in a single exposure while still retaining visible detail. Think of it as the full tonal spectrum — from pure black to pure white — that your camera can record without losing information at either end.
When a scene exceeds your camera’s dynamic range, one of two things happens: shadows go completely black (clipped shadows), or highlights blow out to pure white (blown highlights). Neither extreme holds any recoverable detail.
How Dynamic Range Is Measured: Stops and EV
Dynamic range is measured in stops (also called EV, or Exposure Values). Each stop represents a doubling or halving of light. If your camera has a dynamic range of 12 stops, that means it can record a scene where the brightest area is 4,096 times brighter than the darkest area — all in one shot.
In practical terms, more stops means more latitude. A camera with 14 stops of dynamic range can capture a brightly lit window alongside a shadowed interior far more easily than one with only 10 stops.
Here’s a simple way to picture it: imagine a dial with 14 notches, each representing a stop of light. Anything that falls within those 14 notches gets recorded. Anything outside — either too bright or too dark — gets clipped.
The Human Eye vs Your Camera
Your eyes can handle roughly 20 stops of dynamic range in a given scene, and your visual system adapts constantly as you scan the scene. Your camera captures a static single exposure and can typically manage between 10 and 15 stops depending on the sensor.
That gap explains almost every frustrating high-contrast photo you’ve ever taken. Your brain stitched together a seamless scene; your camera recorded a fixed slice of it.
Modern mirrorless cameras like the Sony A7R V or Nikon Z8 push toward 15 stops at base ISO. Older DSLRs from ten years ago often topped out around 11–12 stops. Smartphone cameras using computational HDR can simulate a wider range, but they do so by blending multiple exposures algorithmically — which is a different process than a single-capture wide dynamic range sensor.
Why Dynamic Range Matters for Your Photos?
Dynamic range matters because it determines how much tonal information your camera captures in a single frame. In low-contrast scenes — overcast days, indoor studio setups, flat light — dynamic range is rarely an issue. The real challenge hits when contrast is high: bright skies with dark foregrounds, backlit portraits, candle-lit rooms with windows behind subjects.
Reading the Histogram to Spot Dynamic Range Problems
The histogram is your best in-camera tool for understanding dynamic range. It shows the distribution of tones from pure black on the left to pure white on the right. A spike crammed against the right wall means blown highlights. A spike jammed against the left means clipped shadows.
I make a habit of checking the histogram immediately after every exposure in tricky lighting. The camera’s blinking highlight warning (sometimes called “the blinkies”) shows you which specific parts of the frame are overexposed — an equally useful tool.
How Genre Affects Your Dynamic Range Needs
Not every type of photography is equally challenged by dynamic range. Landscape photography is where it hurts most — bright skies versus dark land are a classic conflict. Wedding and portrait photography battles backlit subjects and window light. Street photography deals with mixed artificial and natural light sources in the same frame. Understanding your genre’s specific dynamic range demands helps you decide which techniques to prioritize.
How to Maximize Dynamic Range in Camera?
The best place to fight for dynamic range is before you press the shutter. Post-processing can recover some detail, but you can only recover what was actually captured. These are the techniques I return to again and again.
1. Shoot at Base ISO
Your camera’s base ISO (typically ISO 100 or ISO 64 depending on the model) is where sensor dynamic range is at its highest. Every time you raise the ISO, you’re amplifying the signal — including noise — which compresses the tonal range your sensor can resolve.
If you’re in a high-contrast scene, stay at base ISO whenever your other settings allow it. For landscape work on a tripod, this is almost always possible. For handheld low-light work, you’ll need to find a balance, but keeping ISO as low as feasible preserves the most shadow recovery headroom.
2. Expose to the Right (ETTR)
Expose to the right (ETTR) means pushing your exposure as bright as possible without clipping the highlights. The right side of the histogram holds more tonal information in a RAW file — pushing exposure toward that edge packs in more data even if the image looks slightly overexposed on the back of the camera.
The key is to stop just before the histogram touches the right wall. In post-processing, you pull back the exposure and gain noticeably cleaner shadow detail with less noise than you’d get from underexposing and pushing up later. I use this technique almost every time I shoot landscapes at sunrise or sunset.
3. Exposure Bracketing
Exposure bracketing means taking multiple shots of the same scene at different exposure values — typically one stop apart — to capture the full dynamic range across a series of frames rather than in a single shot.
A basic bracket might include three exposures: one for the midtones, one underexposed by 2 stops to retain highlight detail, and one overexposed by 2 stops to capture shadow detail. You then blend these frames in post-processing.
Most cameras today have an automatic bracketing (AEB) mode that fires all three frames with one shutter press. Use a tripod to ensure the frames align perfectly for blending.
4. Use a Graduated Neutral Density Filter
A graduated ND filter (grad ND) is a piece of glass or resin that is dark on one half and clear on the other, with a gradual transition in between. You position the dark half over the bright part of the scene — usually the sky — to bring it closer in brightness to the foreground.
This physically compresses the dynamic range of the scene before it reaches your sensor, which means you can expose for both sky and land in a single frame. Hard-edge grad NDs work well for flat horizons; soft-edge versions handle uneven skylines with trees or mountains.
I carry a 3-stop hard-edge and a 2-stop soft-edge grad ND as standard kit for any landscape session. They reduce the blending work in post-processing significantly.
5. Use Fill Flash or a Reflector
When shooting portraits or subjects against a bright background, you can compress the dynamic range by adding light to the shadow side rather than letting it go dark. A small reflector bounces ambient light back onto your subject’s face. An off-camera flash or on-camera fill flash lifts the shadows to match the bright background.
Wedding photographers rely heavily on this technique for backlit outdoor portraits. By lighting the subject to match the sky, they bring the whole scene within the camera’s dynamic range in a single exposure.
6. Wait for Better Light
Sometimes the most effective dynamic range tool is patience. Midday sun creates the harshest contrast — bright direct light with deep hard shadows. The hour after sunrise and the hour before sunset (the golden hour) delivers softer, lower-contrast light where the dynamic range of the scene naturally compresses to fit within what most cameras can handle.
Overcast days are dynamic range gold. The cloud cover acts as a giant diffuser, reducing contrast across the entire scene. Landscape photographers who consistently nail detail in both sky and ground often shoot in soft light by design, not accident.
RAW vs JPEG and Dynamic Range
Shooting RAW gives you significantly more dynamic range headroom than JPEG. A RAW file from a modern camera stores 12–14 bits of data per channel. That means between 4,096 and 16,384 distinct tonal levels per channel — a huge amount of recoverable information in the shadows and highlights.
A JPEG is compressed to 8 bits, which gives you only 256 tonal levels per channel. Once the camera bakes those highlights or shadows into the JPEG, the data is gone. You cannot pull back what isn’t there.
This distinction matters most in high-contrast situations. I shoot RAW exclusively for anything involving challenging light. If you’re photographing an evenly lit still life in a studio with controlled lighting, JPEG can be fine — the dynamic range gap is irrelevant when the scene doesn’t challenge it.
For high-contrast shooting — landscapes, backlit portraits, interiors with windows — RAW is not optional if you want to recover detail. The extra file size and editing time is absolutely worth it.
Recovering Dynamic Range in Post-Processing
Even with great in-camera technique, post-processing is where dynamic range work often gets finished. The tools available in Lightroom, Capture One, and Camera Raw have become remarkably powerful. I’ve recovered what looked like destroyed highlights and brought back shadow detail that I thought was gone — all from a single RAW file.
The Four Core Sliders in Lightroom
In Lightroom’s Develop module, four sliders do the heavy dynamic range lifting: Highlights, Shadows, Whites, and Blacks. Start with Highlights and pull it left to bring back sky detail. Move to Shadows and push it right to open up the dark areas. The Whites and Blacks sliders set the absolute endpoints of your tonal range.
A common starting point I use on high-contrast RAW files: Highlights all the way to -100, Shadows up to +60 or +70, then fine-tune from there. The Auto button in Lightroom’s tone panel has gotten surprisingly capable in recent versions and often gets you 80% of the way there instantly.
HDR Merging in Lightroom and Photoshop
If you shot a bracket, Lightroom’s Photo Merge feature (Photo > Photo Merge > HDR) blends multiple exposures into a single 32-bit DNG file that holds an enormous amount of tonal data. This gives you incredible latitude in post — far more than any single RAW file.
The key to natural-looking HDR is tone mapping: the process of compressing a 32-bit HDR image back into a range that looks natural on screen. Use subtle tone mapping settings. The “HDR look” that gives the technique a bad reputation comes from overdone local contrast, over-saturated colors, and halos around edges. Restraint produces results that look like a technically perfect single exposure.
Luminosity Masks for Precise Blending
Luminosity masks are selection tools in Photoshop that select pixels based on their brightness value. They allow you to blend two exposures in a way that perfectly follows the natural tonal boundaries in the image — no halos, no obvious transitions.
For example, you might blend a properly exposed sky from your darker bracket onto a properly exposed foreground from your lighter bracket, using a luminosity mask to ensure the blend follows exactly where sky meets land. This is how many professional landscape photographers handle their dynamic range work. It takes more time than Lightroom’s HDR merge but produces cleaner, more natural results in complex scenes.
Local Adjustments for Targeted Recovery
Both Lightroom and Capture One offer masking tools that let you apply tone adjustments to specific areas of the frame. Lightroom’s AI-powered Sky mask and Subject mask can select those areas in one click, then you apply Highlights reduction only to the sky or Shadows boost only to the subject.
This targeted approach is more precise than global tone adjustments and avoids the muddy midtones that can come from pulling every slider to the extreme across the whole image.
Camera Sensor Dynamic Range: What to Know
Not all cameras perform equally when it comes to dynamic range. Sensor size plays a real role: full-frame sensors generally outperform crop sensors, which outperform small sensors like those in smartphones — at equivalent ISO values. Larger photosites capture more light, which translates to a greater difference between the minimum detectable signal and the maximum before saturation.
Modern Camera Capabilities
Contemporary full-frame mirrorless cameras from Sony, Nikon, and Canon routinely measure at 14–15 stops of dynamic range at base ISO according to DXO Mark testing. This is a substantial improvement over cameras from a decade ago that topped out around 11–12 stops. The practical difference: modern cameras can recover several stops of shadow detail that would have been irreversible noise on older bodies.
Mid-range APS-C cameras today often deliver 12–13 stops, which is more than adequate for most shooting situations. You don’t need a flagship body to handle challenging light well — the skill and technique matter more than the last stop of sensor performance.
Fujifilm’s DR Settings Explained
Fujifilm cameras include a unique feature called Dynamic Range settings: DR100, DR200, and DR400. These don’t expand what the sensor captures — instead, they shift the metering to underexpose by one or two stops, then apply a tone curve that recovers the highlights in-camera. DR400 effectively underexposes by 2 stops and lifts the midtones and shadows back up, protecting highlight detail at the cost of requiring a higher minimum ISO. It’s a useful tool for JPEG shooters, but RAW shooters have more control in post-processing anyway.
Smartphones and Computational HDR
Modern smartphones use computational photography to simulate wide dynamic range. The iPhone’s and Google Pixel’s HDR modes capture multiple exposures at the moment of pressing the shutter and merge them on-device using machine learning. The results are impressive for casual shooting, though they can look over-processed and lack the fine control a dedicated camera with RAW files gives you.
Dynamic Range in Different Photography Genres
Understanding dynamic range needs to be practical, not just theoretical. The way it affects your work depends heavily on what you shoot.
Landscape Photography
Landscape photography has the most demanding dynamic range requirements of any genre. The classic problem is a bright sky against a darker land — often a difference of 8–10 stops or more. This is the genre where graduated ND filters, exposure bracketing, and base ISO discipline matter most. Golden hour shooting compresses the problem naturally. Midday shooting almost always requires some form of dynamic range management.
Portrait and Wedding Photography
Backlit portraits and reception rooms with windows create classic dynamic range challenges in portrait and wedding work. Fill flash and reflectors are the working professional’s main tools here, compressing the scene’s contrast before it reaches the sensor. When flash isn’t possible or appropriate, RAW files and targeted shadow recovery in post-processing do the work.
Street Photography
Urban street shooting mixes artificial light sources, reflections, deep shade, and direct sun all in one frame. Most street photographers accept some clipping as part of the aesthetic — high-contrast, graphic imagery can be a deliberate choice. When detail in the shadows matters, shooting at base ISO and exposing for the midtones with RAW capture gives maximum recovery latitude in post.
Astrophotography
Astrophotography presents an extreme case: capturing both starlight and a lit foreground means dealing with a massive tonal gap. Most astro photographers shoot separate exposures for the sky and the foreground, blending them in post. Star trackers allow long foreground exposures while the sky exposure is optimized for the stars. Dynamic range here is solved by composition and blending rather than any single-frame technique.
The Zone System: Ansel Adams’ Approach to Dynamic Range
Long before digital sensors and post-processing software, Ansel Adams and Fred Archer developed the Zone System in the early 1940s as a precise method for pre-visualizing and controlling tonal range in photography. The system divides the full tonal scale into eleven zones, from Zone 0 (pure black) to Zone X (pure white), with Zone V representing middle gray.
The power of the Zone System was that it taught photographers to look at a scene and mentally place different tonal values onto specific zones before exposure. Then by adjusting development time, they could expand or compress the tonal range to fit the paper’s ability to reproduce it — the film-era equivalent of what we now do with RAW processing sliders.
The core lesson that still applies today: understand the tonal range of your scene before you expose, not after. Whether you’re placing zones on film or reading a histogram in the field, the underlying discipline is the same. Look at the scene, identify the brightest and darkest areas that matter, and make a deliberate decision about how to handle them.
Quick Tips to Maximize Dynamic Range: A Summary
- Always shoot RAW in high-contrast situations for maximum recovery latitude
- Use base ISO (ISO 100 or ISO 64) whenever possible to preserve sensor dynamic range
- Apply expose-to-the-right (ETTR) technique to minimize shadow noise
- Bracket your exposures in 2-stop increments for extreme contrast scenes
- Use a graduated ND filter to physically compress the dynamic range before it hits the sensor
- Add fill flash or a reflector when shooting backlit portraits to bring the scene within your camera’s range
- Shoot during golden hour or overcast conditions to reduce scene contrast naturally
- Use Lightroom’s Highlights and Shadows sliders as your first recovery tools in post
- Try HDR merging in Lightroom for bracketed sequences — keep tone mapping subtle
- Learn luminosity masks in Photoshop for advanced blending with zero halos
Frequently Asked Questions
How do you improve dynamic range in photography?
Improve dynamic range by shooting RAW at base ISO, using expose-to-the-right (ETTR) technique, and bracketing exposures in challenging light. In post-processing, use Lightroom’s Highlights and Shadows sliders to recover tonal detail from a single RAW file, or merge a bracketed sequence into an HDR image for maximum latitude.
What is dynamic range measured in?
Dynamic range is measured in stops (also called EV, or Exposure Values). Each stop represents a doubling or halving of light intensity. A camera with 14 stops of dynamic range can record a scene where the brightest area is 16,384 times brighter than the darkest — all in one exposure.
What does 15 stops of dynamic range mean?
15 stops of dynamic range means a camera can capture a scene where the brightest recordable area is 2 to the power of 15 — or 32,768 times — brighter than the darkest recordable area in a single shot. In practical terms, this is exceptional performance that allows significant shadow recovery in post-processing without destructive noise.
Do professional photographers use HDR?
Yes, many professional landscape photographers use HDR merging regularly for high-contrast scenes. However, professional HDR looks nothing like the over-processed look associated with early HDR photography. Pros use subtle tone mapping that produces images appearing as a single, technically perfect exposure — you would never know it came from multiple frames.
What is the difference between dynamic range and contrast?
Dynamic range refers to the total tonal span a camera sensor can record — from its darkest shadow to its brightest highlight. Contrast describes the relationship between tonal values within a specific image. A scene can have very high contrast (big difference between bright and dark areas) that exceeds a camera’s dynamic range, or moderate contrast that falls comfortably within it.
Should I shoot RAW for better dynamic range?
Yes. RAW files store 12 to 14 bits of data per channel — thousands of tonal levels — compared to the 256 levels per channel in an 8-bit JPEG. That extra data is what makes shadow and highlight recovery possible in post-processing. In high-contrast situations like landscapes, backlit portraits, or interior-with-windows shots, RAW is the difference between recovering detail and losing it permanently.
Understanding and Mastering Dynamic Range in Photography
Dynamic range in photography is one of those concepts that sounds technical but connects directly to real results in the field. The camera’s inability to see the full range your eyes do is a fixed constraint — but knowing that constraint means you can plan around it.
Start with the basics: shoot RAW, stay at base ISO, and check your histogram after every exposure in high-contrast light. Build from there with ETTR, exposure bracketing, and graduated ND filters. The photographers who consistently nail challenging light aren’t using magic — they’re applying these techniques deliberately, every time.
The next time you face a bright sky over a dark foreground, try setting up a 3-shot bracket and merging them in Lightroom. It takes 10 minutes and you’ll immediately see what working with extended dynamic range looks like in practice. That first successful HDR merge tends to stick with you for a long time.