If you have spent any time diving deep into photography technical discussions, you have likely encountered the term “ISO invariance.” This concept has become increasingly important as camera sensors have evolved, yet many photographers still do not fully understand how it works or how it should influence their shooting technique. Understanding ISO invariance can fundamentally change how you approach exposure, giving you more flexibility in challenging lighting conditions and helping you achieve better image quality in post-processing.
In this comprehensive guide, we will explore what ISO invariance actually means, how it works from a technical standpoint, and most importantly, how you can use this knowledge to improve your photography across different genres. Whether you shoot landscapes, portraits, wildlife, or astrophotography, understanding ISO invariance will help you make better exposure decisions and get more from your camera’s dynamic range capabilities.
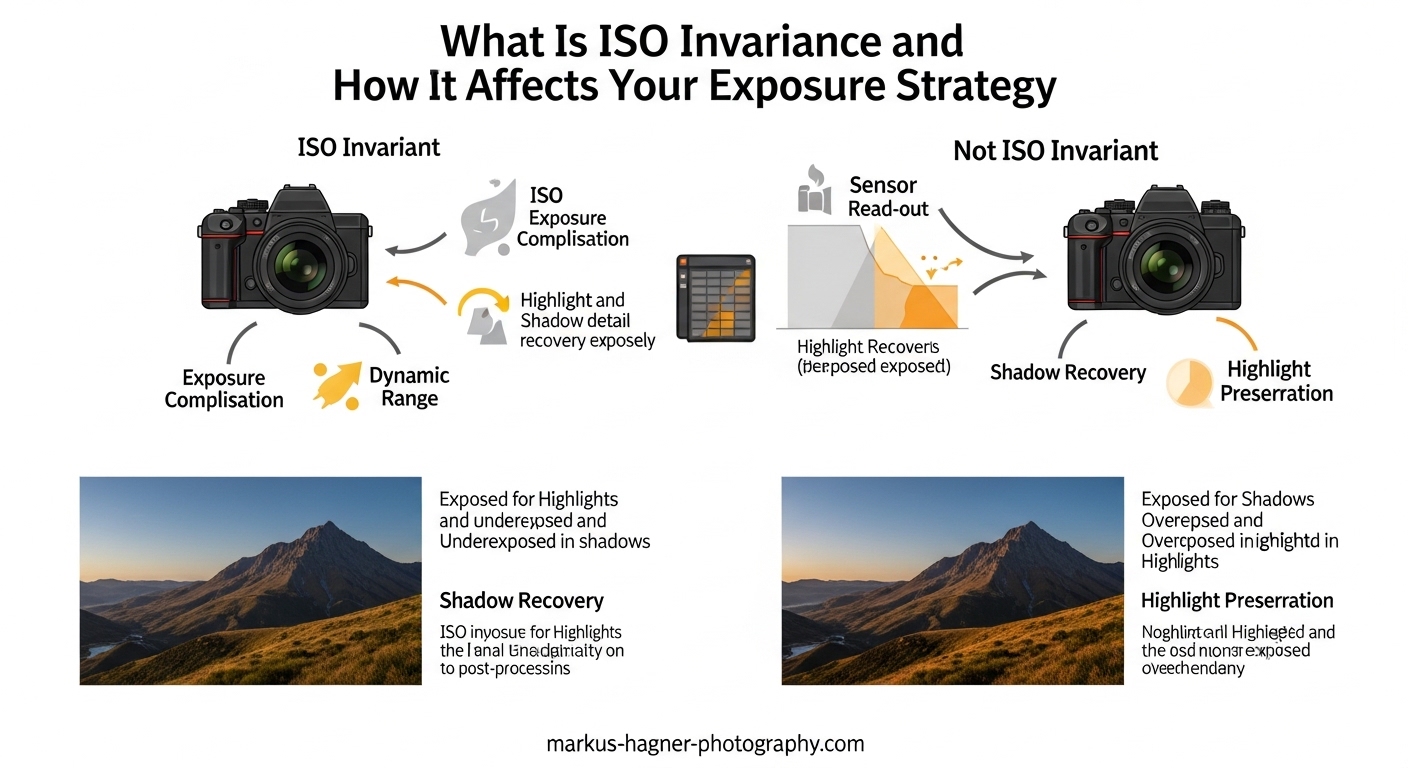
What Is ISO Invariance?
ISO invariance is a characteristic of a camera sensor where raising the ISO setting in post-processing produces the same image quality as raising the ISO in the camera. In simpler terms, once your camera reaches its ISO-invariant point, it no longer matters whether you increase ISO before taking the photo or after in your editing software. The resulting image will look virtually identical.
To understand why this matters, you need to understand how digital camera sensors capture light. When you take a photograph, your camera’s sensor records light that hits each pixel. The amount of light captured depends on the exposure settings you use: aperture, shutter speed, and ISO. The ISO setting controls how much the signal from the sensor is amplified before being converted to a digital image.
At the camera’s base ISO (often ISO 100 or ISO 64), the sensor captures the maximum amount of light data without any amplification. This produces the cleanest possible RAW files with the most dynamic range. As you increase ISO, the camera amplifies the signal, which brightens the image but also amplifies any noise present in the signal. The key insight of ISO invariance is that there comes a point where the noise introduced by in-camera amplification is equal to the noise that would be introduced if you simply brightened the image in post-processing.
Once you are in the ISO-invariant range, you can safely underexpose your RAW files and brighten them later without sacrificing image quality. This gives you more flexibility in your exposure strategy, particularly in high-contrast scenes where you need to protect highlights while still capturing detail in the shadows.
The ISO-invariant point varies significantly between camera models. Some cameras become ISO invariant at ISO 400, while others may not become ISO invariant until ISO 1600 or higher. Generally speaking, newer cameras and full-frame sensors tend to have better ISO invariance characteristics than older models or smaller sensors.
How ISO Invariance Works: The Technical Details
To fully appreciate ISO invariance, it helps to understand what happens inside your camera when you change the ISO setting. The process involves several stages, and where the ISO “gain” is applied makes a significant difference to your final image quality.
When light hits your camera’s sensor, each pixel collects photons in a well (essentially a tiny capacitor). The number of photons collected depends on the light intensity and the exposure time. Each photon that hits a pixel has a chance of being converted into an electron, and these electrons accumulate in the pixel well. The capacity of these wells determines the maximum dynamic range your sensor can capture.
After the exposure is complete, the electrons in each pixel well are read out by the sensor’s electronics. This is where read noise comes into play. Read noise is the inherent noise added by the sensor electronics during the read-out process. It occurs at two main stages: the front-end (before amplification) and the back-end (after amplification).
The ISO setting determines how much analog amplification is applied to the signal before it reaches the analog-to-digital converter (ADC). At low ISO settings (below the base ISO), the camera may actually reduce the signal, which can introduce additional noise. At the base ISO (often called unity gain), no amplification is applied, and the sensor captures the maximum possible data.
As you increase ISO above the base, the camera applies more analog amplification to the signal. This brightens the image but also amplifies the read noise. The important thing to understand is that the read noise itself has two components: noise that occurs before the amplification (front-end read noise) and noise that occurs after (back-end read noise).
Front-end read noise gets amplified along with your image signal, which means it becomes relatively less significant as you increase ISO. Back-end read noise, however, stays constant regardless of your ISO setting. Once the amplified signal becomes significantly stronger than the front-end read noise, any additional amplification (whether in-camera or in post) will introduce the same amount of additional noise. This is the point at which your camera becomes ISO invariant.
Understanding this technical foundation helps explain why shooting at base ISO and brightening in post can produce results identical to shooting at a higher ISO. The sensor has captured the same amount of light data in both cases, and any additional brightness adjustment happens after the data has been captured.
Understanding Noise Sources in Your Photos
To make the most of ISO invariance, you need to understand the different sources of noise that affect your photographs. There are two primary types of noise that concern photographers: photon noise and read noise.
Photon noise, also known as shot noise, is inherent to the nature of light itself. Light travels in discrete packets called photons, and the arrival of these photons follows quantum mechanical probabilities. In any given exposure, the number of photons hitting each pixel will vary slightly from the expected average, creating a random variation in brightness that appears as noise in your image. Photon noise is proportional to the square root of the number of photons captured, meaning it becomes more noticeable in darker areas of your image where fewer photons were captured.
Photon noise is unavoidable and represents the fundamental limit of image quality determined by the laws of physics. You cannot eliminate photon noise, but you can reduce it by capturing more light through longer exposures, wider apertures, or lower ISO settings.
Read noise, on the other hand, comes from your camera’s electronics. It is added to your image signal during the process of reading out the data from the sensor. Read noise includes thermal noise (caused by heat in the sensor), dark current (electrons that accumulate even without light), and electronic noise from the amplification and conversion process.
The relationship between photon noise and read noise is crucial to understanding ISO invariance. In well-exposed areas of your image, photon noise typically dominates because you have captured enough light that the random variation in photon arrival is the primary source of noise. In underexposed areas (shadows), read noise can become more prominent because the signal level is lower.
When your camera is ISO invariant, it means that the read noise in the shadows has been reduced to the point where photon noise dominates. At this point, whether you amplify the signal in-camera or in post-processing makes no difference to the noise level. The image will have the same amount of noise in either case.
This understanding leads to a key insight: you cannot create detail in your shadows that was not captured by the sensor. If you underexpose too much and try to recover in post, you will simply be amplifying noise that was already present. The benefit of ISO invariance is not that you can create better shadow detail, but rather that you do not lose any quality when you need to underexpose to protect your highlights.
Analog vs Digital Amplification: What Photographers Need to Know
One of the most important distinctions in understanding ISO invariance is the difference between analog and digital amplification. This difference is fundamental to why ISO invariance works and when it matters for your photography.
When you increase ISO in your camera, the signal goes through analog amplification before being converted to a digital signal by the ADC. This analog amplification happens before any quantization occurs, which means it can preserve more of the original sensor data. The analog amplifier can make subtle distinctions in the signal that might be lost in the digital domain.
Once the signal has been converted to a digital format by the ADC, any additional changes to the brightness happen through digital processing. This includes raising ISO beyond the native range (extended ISO), as well as any adjustments you make in post-processing software like Lightroom or Capture One.
The key insight is that analog amplification, while it does amplify noise, can preserve more useful data than digital manipulation. This is why shooting at higher native ISO values can sometimes produce better results than heavily processing a base ISO file, particularly in the shadow areas.
However, once you are in the ISO-invariant range, the additional analog amplification no longer provides any benefit. The signal has already been amplified enough to overcome the front-end read noise, and any further brightening will add the same amount of noise regardless of whether it happens in the camera or in post-processing.
Dual native ISO is a related concept that builds on these principles. Some modern cameras have two native ISO settings, typically a low base ISO (like ISO 100) and a higher native ISO (like ISO 800 or ISO 1600). At these different native ISO settings, the camera’s sensor and electronics are optimized differently, providing cleaner output at both ends of the sensitivity range.
When a camera has dual native ISO, it may also exhibit ISO invariance characteristics between these two native points. For example, a camera with dual native ISO at 100 and 1600 might be ISO invariant from ISO 400 to ISO 6400, meaning you can freely underexpose and recover within this range without quality loss. Understanding whether your camera has dual native ISO and what its ISO invariance characteristics are can help you make better exposure decisions.
How ISO Invariance Affects Dynamic Range
Dynamic range is one of the most important technical characteristics of a camera sensor, and understanding ISO invariance can help you maximize the dynamic range you capture in your photographs. Dynamic range is the ratio between the brightest and darkest tones your camera can record in a single exposure, typically measured in stops.
When you shoot at base ISO, your camera captures the maximum possible dynamic range. The sensor has collected the full range of light data without any amplification, giving you the most flexibility in post-processing for recovering shadows and highlights. As you increase ISO, the dynamic range typically decreases because the camera is discarding some of the darker data in favor of being able to capture brighter highlights.
This is where ISO invariance becomes crucial for your exposure strategy. Because you can safely underexpose at base ISO and recover in post when operating in the ISO-invariant range, you can effectively preserve more dynamic range in challenging lighting situations.
The technique of deliberately underexposing to protect highlights and then recovering in post is often called “expose to the right” or ETTR. This approach is based on the principle that your camera sensor captures more highlight detail than shadow detail, so it is better to risk losing some shadow data (which can be recovered with less penalty in the ISO-invariant range) than to risk clipping your highlights (which cannot be recovered at all).
However, ETTR and the benefits of ISO invariance only apply when you are working within the ISO-invariant range. If you underexpose too much and need to push your file beyond the ISO-invariant point, you will start to see significant quality loss. The key is to know your camera’s ISO-invariant range and stay within it when using this technique.
It is also important to understand that while ISO invariance allows you to recover shadows with less penalty, it does not allow you to recover highlight detail that was clipped during the capture. The dynamic range of your sensor is fixed at each ISO setting, and no amount of post-processing can recover data that was not recorded. This is why properly exposing for your highlights remains crucial, even when shooting at base ISO with the intention of recovering shadows.
The practical implication is this: use ISO invariance to your advantage in high-contrast scenes where you cannot achieve proper exposure for both highlights and shadows simultaneously. Shoot at base ISO, underexpose to protect your highlights, and then recover in post. Just be sure you are within your camera’s ISO-invariant range, and avoid pushing the exposure too far.
Practical ISO Invariance Recommendations for Every Genre
Understanding ISO invariance is one thing, but applying it to your photography is where the real value lies. Different photography genres present different challenges, and your approach to ISO invariance should reflect these varied requirements.
Landscape Photography
Landscape photographers often work in high-contrast situations, particularly when shooting scenes that include both bright skies and darker foregrounds. The good news is that landscape photography typically involves shooting from a tripod, which means you have complete control over your shutter speed and can use longer exposures to capture more light.
For landscape photography, the recommendation is to shoot at your camera’s base ISO (typically ISO 100 or ISO 64) for maximum dynamic range. If you encounter a scene with very bright highlights that threaten to clip, you can use a graduated neutral density filter to balance the exposure, or you can intentionally underexpose and recover in post if your camera is ISO invariant.
When using ISO invariance in landscape work, aim to underexpose by no more than 2-3 stops. This keeps you well within the ISO-invariant range on most cameras and ensures you can recover shadow detail without significant quality loss. Remember that while you can recover shadows, you cannot recover clipped highlights, so always ensure your brightest areas are properly exposed.
Wildlife Photography
Wildlife photography presents unique challenges because you often cannot control the lighting and need fast shutter speeds to freeze action. Additionally, many wildlife situations require you to use longer telephoto lenses, which limits your maximum aperture.
For wildlife photography, the primary concern is getting a properly exposed image, which often means accepting higher ISO settings. However, understanding your camera’s ISO invariance can still help. If you are using a modern camera with good ISO invariance characteristics, you can shoot at a moderate ISO and underexpose slightly if needed to maintain faster shutter speeds, knowing that you can recover in post without significant quality loss.
The key for wildlife work is to know your camera’s ISO-invariant threshold and stay above it. If your camera becomes ISO invariant at ISO 800, for example, you can safely shoot at ISO 800 and above without worrying about the penalty of raising ISO in post versus in-camera. This gives you more flexibility to prioritize shutter speed over perfect exposure.
Portrait Photography
Portrait photographers typically have more control over their lighting situation, which makes ISO invariance less critical but still relevant. If you are shooting in a studio environment with controlled lighting, you can always use base ISO and adjust your lights or aperture to achieve proper exposure.
However, if you are shooting portraits in natural light, particularly in outdoor situations with mixed lighting, understanding ISO invariance can help. You may need to open your aperture wider or accept higher ISO values to maintain faster shutter speeds for sharp focus on your subject.
The recommendation for portrait work is similar to wildlife: know your camera’s ISO-invariant point and prioritize getting the shot. If you need to raise ISO to maintain proper shutter speed for sharp images, do so without hesitation on modern cameras that have good ISO invariance characteristics.
Astrophotography and Night Photography
Astrophotography is where ISO invariance becomes particularly relevant, as you are often working in very low light and need to push your camera’s capabilities to the limit. Whether you are shooting the Milky Way, star trails, or deep sky objects, understanding ISO invariance helps you get the best possible results.
For astrophotography, the key is understanding that different ISO settings will produce different amounts of noise in your final image. Modern cameras typically perform best at higher ISO values (ISO 1600-6400) for night work, and many modern sensors become ISO invariant around ISO 800-1600.
The practical approach for astrophotography is to shoot at your camera’s optimal high ISO (the native ISO that produces the cleanest results) rather than worrying too much about ISO invariance. Modern AI-powered noise reduction tools in software like Lightroom and Topaz Labs can handle much of the noise that would have been problematic in the past, making high ISO astrophotography more accessible than ever.
Action and Sports Photography
Action and sports photography requires fast shutter speeds above all else, which often means accepting higher ISO values. The good news is that modern cameras with good ISO invariance allow you to push the ISO higher without the quality penalty that older cameras exhibited.
For action photography, the recommendation is simple: use the ISO necessary to get the shot. If you need ISO 6400 to maintain 1/2000 second shutter speed, use it. On modern cameras with good ISO invariance, the difference between ISO 6400 in-camera and ISO 1600 in post (brightened 2 stops) will be minimal to imperceptible.
The key is knowing your camera’s ISO-invariant threshold and understanding that above this point, you have flexibility in how you achieve your exposure. Prioritize getting the shot with proper shutter speed, and trust your camera’s ISO invariance capabilities to deliver usable results.
Common Myths About ISO Invariance
As with any technical topic, ISO invariance has attracted its share of misconceptions and myths. Understanding what is true and what is not will help you make better decisions in the field.
Myth 1: ISO invariance means ISO doesn’t matter anymore. This is not true. While ISO invariance gives you more flexibility in post-processing, it does not mean you can ignore ISO settings. You still want to use the appropriate ISO for your situation, and understanding your camera’s ISO-invariant range helps you make informed decisions. Additionally, while shadow recovery is unaffected in the ISO-invariant range, you still lose dynamic range as you increase ISO, so base ISO remains optimal when possible.
Myth 2: You should always underexpose to maximize dynamic range. This is an oversimplification. While underexposing within the ISO-invariant range can help in high-contrast situations, it is not a universal recommendation. In normal lighting conditions with good exposure, proper exposure is still the goal. The ISO invariance benefit applies specifically when you cannot achieve proper exposure for both highlights and shadows simultaneously.
Myth 3: ISO invariance and dual native ISO are the same thing. These are related but distinct concepts. Dual native ISO refers to a sensor feature where the camera has two optimized base ISO settings, while ISO invariance describes the range where post-processing ISO adjustments produce the same results as in-camera adjustments. A camera can have dual native ISO without being ISO invariant across its entire range, and vice versa.
Myth 4: AI noise reduction makes ISO invariance irrelevant. Modern AI-powered noise reduction has certainly changed the calculus for high ISO photography, but ISO invariance remains relevant. First, AI noise reduction works best on files with more captured data. Second, ISO invariance still provides benefits for dynamic range capture in high-contrast situations. Third, for professional work where you need the cleanest possible files, understanding ISO invariance helps you optimize your technique.
The reality is that ISO invariance is a useful technical concept that gives you more flexibility in challenging situations. It is not a magic solution that changes everything about how you shoot, but rather a tool that can help in specific situations. Understanding when to use this knowledge and when to rely on traditional exposure techniques will make you a better photographer.
Frequently Asked Questions
What is ISO invariance in simple terms?
ISO invariance means that when you shoot at certain ISO settings (typically at or above the base ISO), raising the ISO in post-processing produces the same image quality as raising it in the camera. The camera’s sensor captures the maximum amount of light data at these settings, and any additional ISO adjustment happens digitally without degrading image quality.
Is my camera ISO invariant?
Most modern cameras become ISO invariant somewhere between ISO 400-1600, depending on the model. To test your camera, take two identical exposures: one at base ISO and one at a higher ISO, then brighten the base ISO image in post. If they look similar, your camera is ISO invariant at that higher setting. Sony, Nikon, and Fujifilm cameras tend to have good ISO invariance, while some older or entry-level cameras may not benefit as much.
Does ISO invariance mean I should always underexpose?
No, ISO invariance doesn’t mean you should always underexpose. While you can safely underexpose when shooting at ISO-invariant settings and recover shadows in post, you should still aim for proper exposure when possible. The key is understanding when ISO invariance benefits you: in high-contrast scenes where you need to protect highlights, or when shooting in low light where you want to maximize dynamic range.
What is the difference between ISO invariance and dual native ISO?
ISO invariance and dual native ISO are related but different concepts. ISO invariance refers to the range of ISO settings where raising ISO in post produces the same result as raising it in-camera. Dual native ISO is a sensor feature where the camera has two optimal ISO settings (usually a low and high base ISO), providing cleaner images at both ends of the spectrum. Some cameras with dual native ISO also benefit from ISO invariance between those native points.
Should I change my shooting style based on ISO invariance?
Yes, understanding ISO invariance can improve your shooting technique. For ISO-invariant cameras, you can use the exposure triangle more flexibly: shoot at base ISO for cleanest files, then underexpose and recover in post when you need to protect highlights. However, this doesn’t mean changing everything—proper exposure remains the goal, but you now have more flexibility in how you achieve it.
Conclusion
ISO invariance is a powerful concept that can help you get better results from your camera, particularly in challenging lighting conditions. By understanding how your camera’s sensor captures light and how ISO settings affect the image data, you can make more informed decisions about exposure and post-processing.
The key takeaways are these: First, know your camera’s ISO-invariant range by testing or researching its characteristics. Second, use this knowledge strategically in high-contrast situations where you need to protect highlights while capturing shadow detail. Third, remember that ISO invariance gives you flexibility but does not replace proper exposure technique. Fourth, different photography genres have different requirements, so adapt your approach accordingly.