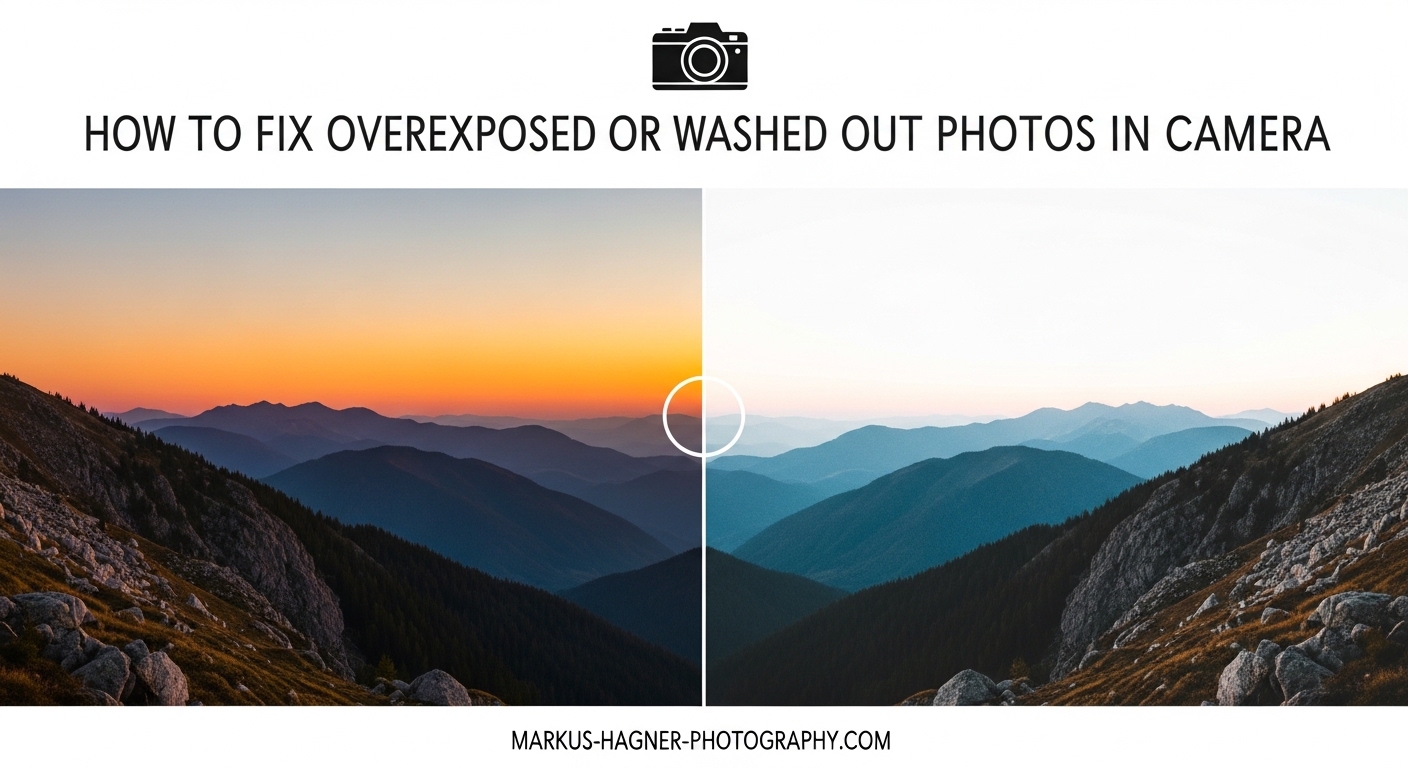
Nothing ruins a great shot faster than checking your LCD and seeing washed out, overly bright images. I have been there countless times, especially when shooting in harsh midday sun or dealing with backlit subjects. The good news is that most overexposed photos can be prevented with the right camera settings, and many can even be salvaged in post-processing.
In this guide, I will show you exactly how to fix overexposed photos using both in-camera techniques and editing software. We will cover the exposure triangle, how to read your histogram, specific camera settings to adjust, and when each solution works best. By the end, you will have a complete toolkit for handling any exposure challenge.
What Is Overexposure and Why Does It Happen?
Overexposure occurs when too much light reaches your camera sensor, causing your image to appear overly bright. The brightest parts of your photo, called highlights, become blown out and lose all detail. Once detail is clipped in these areas, it cannot be recovered. That is why understanding exposure is so critical for every photographer.
The three elements that control exposure form what we call the exposure triangle: ISO, aperture, and shutter speed. ISO controls your sensor’s sensitivity to light. Aperture determines how wide the lens opening is. Shutter speed controls how long the sensor is exposed to light. When any of these settings allow too much light, overexposure happens.
Common causes of overexposed photos include shooting in bright sunlight without adjusting settings, using automatic mode in high-contrast scenes, metering off the wrong part of your subject, and forgetting to adjust exposure compensation. Many beginners also leave their cameras on default settings regardless of lighting conditions.
There is an important difference between intentional high-key photography and accidental overexposure. High-key images are deliberately bright and airy, with intentional exposure choices made for artistic effect. Overexposed photos, on the other hand, are mistakes that result in lost detail and poor image quality.
How to Read Your Camera’s Histogram
The histogram is one of the most valuable tools for identifying overexposure, yet many photographers ignore it completely. This graph shows the distribution of tones in your image from pure black on the left to pure white on the right. Understanding how to read it will transform your ability to judge exposure accurately.
When your histogram shows a large spike pushed against the right edge, you have overexposure. This means highlights are being clipped and detail is being lost. A well-exposed image typically shows a balanced distribution without spikes touching either edge. The shape varies based on your subject, but you want to avoid clipping on either side.
Most cameras also offer highlight alerts, often called blinkies, which flash in areas where detail has been lost. Enable this feature in your camera menu. When reviewing images, any flashing areas indicate overexposed highlights. A few small blinkies on specular highlights like sun reflections are usually acceptable, but large flashing areas mean you need to adjust your exposure.
One important note: your camera’s LCD screen can be misleading. It often displays images brighter than they actually are, especially in daylight when you cannot see the screen clearly. Trust your histogram over what you see on the back of your camera. The histogram gives you objective data about your exposure.
How to Fix Overexposed Photos in Camera
The best way to handle overexposure is to get it right in-camera. Fixing exposure issues during editing often degrades image quality and cannot recover clipped highlights. Here is my step-by-step approach for correcting overexposure while shooting.
Step 1: Lower Your ISO
Your first adjustment should always be ISO because it has no creative impact on your image. Lower ISO means less sensitivity to light, which directly reduces exposure. If you are at ISO 400, try dropping to ISO 100, which is the native ISO for most cameras. Going below your camera’s base ISO can actually reduce dynamic range, so stay at the minimum native setting.
I see many photographers leave their ISO on Auto even in bright conditions. This is a recipe for overexposure. In daylight, set your ISO manually to the lowest native value and leave it there. Only increase ISO when you cannot achieve proper exposure with shutter speed and aperture adjustments in low light situations.
Step 2: Increase Shutter Speed
A faster shutter speed reduces the amount of time light hits your sensor, darkening your exposure. If you are shooting at 1/125 second and images are overexposed, try 1/250, 1/500, or faster. Each doubling of shutter speed cuts light in half, reducing exposure by one stop.
The trade-off with faster shutter speeds is motion blur considerations. For moving subjects, you actually want faster speeds to freeze action. For stationary subjects, you have more flexibility. If you are handholding your camera, maintain at least 1/focal length as your minimum shutter speed. For example, with a 50mm lens, use at least 1/50 second.
Step 3: Close Down Your Aperture
Higher f-numbers mean smaller lens openings, letting in less light. Moving from f/2.8 to f/5.6 cuts light in half. Going to f/8 cuts it in half again. This is often the best adjustment when you want to maintain a specific shutter speed for motion or when you are already at your lowest ISO.
The compromise with smaller apertures is depth of field. Closing down increases the area in focus, which may or may not fit your creative vision. For portraits where you want blurry backgrounds, you might prefer to adjust shutter speed or ISO instead. For landscapes, smaller apertures like f/8 to f/11 often work perfectly.
Be aware that extremely small apertures like f/22 can introduce diffraction, which softens your image. Most lenses perform best around f/8 to f/11. Stay in this range when possible and adjust other settings first.
Step 4: Use Exposure Compensation
When shooting in aperture priority or shutter priority mode, exposure compensation tells your camera to intentionally underexpose from what its meter suggests. If your images consistently come out overexposed, dial in negative compensation. Start with -0.3 to -0.7 EV and adjust based on results.
Many photographers find exposure compensation confusing because the direction seems counterintuitive. Negative values darken your image, positive values brighten it. In bright conditions or with backlit subjects, negative compensation is often necessary because camera meters try to average everything to middle gray.
The key is checking your results and adjusting. Take a test shot, review the histogram, and dial in compensation until the histogram shows no highlight clipping. Once you find the right value for a given lighting situation, it usually remains consistent throughout that shooting session.
Step 5: Switch Metering Modes
Your camera’s metering mode determines which parts of the scene it uses to calculate exposure. The three main modes are matrix or evaluative metering, center-weighted metering, and spot metering. Each has strengths for different situations.
Matrix or evaluative metering analyzes the entire frame and compares it to thousands of stored exposure patterns. This works well for evenly lit scenes but can struggle with high contrast. Center-weighted metering prioritizes the middle of the frame, useful when your subject is centrally located.
Spot metering measures only a small area, typically 2-5% of the frame centered on your focus point. This is the most precise option for challenging lighting. For backlit subjects, spot meter off your subject’s face to ensure proper exposure there, even if the background blows out. This gives you control over what matters most in your image.
Switching to spot metering transformed my results with backlit portraits and high-contrast landscapes. The key is metering off the right tone. If you spot meter off something very bright, your image will be underexposed. Meter off a mid-tone for best results.
Step 6: Use ND Filters for Bright Conditions
Neutral density filters act like sunglasses for your lens, reducing light without affecting color. These are essential when you want to use wide apertures in bright sunlight for shallow depth of field, or when you need slow shutter speeds for motion blur effects like silky waterfalls.
ND filters come in various strengths measured in stops. A 3-stop ND filter reduces light by 8 times, while a 6-stop filter reduces it by 64 times. For bright daylight portraits with wide apertures, a 3-stop filter is often sufficient. For long exposures in daylight, you might need 6 or even 10 stops.
Variable ND filters let you adjust strength by rotating the filter, offering flexibility in changing conditions. Quality matters here because cheap ND filters can introduce color casts and reduce sharpness. Invest in quality filters from reputable brands.
Using Exposure Bracketing as Insurance
Even experienced photographers use exposure bracketing in challenging lighting. Auto Exposure Bracketing (AEB) automatically captures multiple shots at different exposures. Typically this means one shot at metered exposure, one underexposed, and one overexposed. You choose the exposure difference between shots, usually 1/3 to 2 stops.
Set up bracketing through your camera’s drive menu. Most cameras let you choose both the number of frames and the exposure increment. For most situations, three frames at 1-stop intervals provides good coverage without filling your card too quickly.
Bracketing is invaluable for high-contrast scenes where you cannot capture the full dynamic range in a single exposure. It also provides insurance against metering errors. When you review your bracketed shots, you can select the best exposure or blend multiple frames for HDR processing.
I use bracketing for landscape photography, real estate interiors, and any situation with challenging lighting. It takes more card space and requires more time selecting images later, but the peace of mind is worth it for important shots.
How to Fix Overexposed Photos in Post-Processing
Sometimes you cannot fix exposure in-camera. Perhaps you did not notice the problem until later, or the lighting changed unexpectedly. The good news is that many overexposed images can be improved significantly in editing software like Lightroom, Photoshop, or other RAW processors.
RAW vs JPEG: Why File Format Matters
File format dramatically impacts your ability to recover overexposed images. RAW files contain all the data your sensor captured, giving you tremendous flexibility for exposure adjustments. JPEG files are processed and compressed in-camera, throwing away data and limiting recovery options.
With RAW files, you can often recover 1-2 stops of overexposure, sometimes more. The highlights retain gradation and detail that can be brought back. JPEG files, however, have far less latitude. What looks blown out in a JPEG might have been recoverable in RAW.
This is why I always shoot RAW for important work. The file sizes are larger and processing takes more time, but the safety net is invaluable. If you must shoot JPEG, expose more conservatively to protect highlights.
Basic Exposure Adjustments
Start your recovery with the basic exposure controls in your editing software. The exposure slider adjusts the overall brightness of your image. Pull it down to darken overexposed shots. Do not overdo it though, as heavy adjustments can introduce noise and unnatural tonal transitions.
The highlights slider specifically targets the brightest parts of your image. Lowering highlights can recover detail in bright skies or reflections without affecting mid-tones and shadows. This is often more effective than the overall exposure slider for overexposure recovery.
The whites slider controls the brightest point in your image. Reducing whites can help tame overexposure while maintaining contrast. Work with highlights and whites together, as they affect different parts of the tonal range.
A typical recovery workflow involves reducing exposure slightly, then dropping highlights significantly, and adjusting whites to taste. Watch your histogram as you work to ensure you are not introducing new problems.
Advanced Recovery Techniques
When basic adjustments are not enough, several advanced tools can help recover overexposed images. The dehaze tool, available in Lightroom and similar software, was designed for atmospheric haze but works remarkably well for blown-out skies. It adds contrast and saturation to washed out areas.
Tone curves give you precise control over different tonal ranges. By pulling down the highlights portion of the curve, you can target overexposed areas specifically. The curve lets you create adjustments impossible with simple sliders.
Understand that there are limits to recovery. If highlights are completely clipped, meaning the histogram shows a spike against the right edge, no amount of processing can bring back detail that was never captured. This is why getting exposure right in-camera remains so important.
For severely overexposed areas, sometimes the best approach is accepting the limitation and working with what you have. Consider whether the overexposure can become part of your creative vision, or whether converting to black and white might hide the problem.
Selective Adjustments for Problem Areas
Not all overexposure needs global correction. Often specific areas like bright skies need attention while the rest of the image is fine. This is where adjustment brushes, gradient filters, and luminosity masks become invaluable.
The adjustment brush lets you paint exposure changes onto specific areas. For a bright sky behind a properly exposed subject, use the brush to reduce exposure and highlights just in that area. The graduated filter works similarly but applies changes across a gradient, perfect for skies.
Luminosity masks, available in Photoshop and some other programs, create selections based on brightness values. You can target only the brightest pixels for adjustment, leaving everything else untouched. This provides the most natural-looking recovery for severely overexposed areas.
When to Convert to Black and White
Sometimes an overexposed color photo can be salvaged as a black and white image. Color casts from highlight recovery become irrelevant in monochrome. The high-key look that might seem like a mistake in color can appear intentional and artistic in black and white.
Black and white conversion is not giving up. It is recognizing that some images work better without color. Overexposed areas that look harsh and wrong in color might create interesting high-contrast areas in black and white. This is especially true for portraits and architectural subjects.
How to Prevent Overexposed Photos
Prevention is always better than correction. Here are the strategies I use to avoid overexposure before it happens.
Quick Checklist Before Shooting
Develop a pre-shoot routine that includes exposure checks. Verify your ISO is at its lowest setting for the conditions. Check your metering mode and switch if needed for your subject. Confirm exposure compensation is set appropriately, or reset to zero if you changed it for a previous shot.
Take a test shot and review both the image and histogram before shooting in earnest. This takes seconds but catches problems early. Make adjustments and shoot again until the histogram shows proper exposure without highlight clipping.
Handling Harsh Sunlight
Midday sun creates the most challenging exposure conditions. The light is intense and contrast is extreme. When possible, schedule shoots for golden hour or overcast days. When you must shoot at noon, look for open shade or use reflectors and diffusers to modify the light.
If shooting in direct sun is unavoidable, underexpose slightly to protect highlights. It is easier to brighten shadows than recover clipped highlights. Use spot metering on your subject and ignore the background if necessary.
Backlit Subject Strategies
Backlit situations often confuse camera meters. The bright background causes the camera to underexpose the subject, or if you expose for the subject, the background blows out. Decide which is more important and meter accordingly.
For silhouettes, meter on the bright background and let the subject go dark. For portraits where the subject matters most, spot meter on their face and accept that the background might overexpose. You can also use fill flash or reflectors to balance the exposure.
Golden Hour vs Midday Shooting
The golden hours, shortly after sunrise and before sunset, offer the best natural light for photography. The light is warmer, softer, and lower in intensity, making exposure easier to manage. Colors are more saturated and contrast is manageable.
Midday light is harsh and unflattering. Shadows are deep and highlights are easily clipped. If you must shoot at midday, look for shade, use diffusers, or embrace the high-contrast look as a creative choice. Otherwise, save important shoots for better lighting conditions.
Frequently Asked Questions
How to fix an extremely overexposed photo?
For severely overexposed images, start by reducing exposure and highlights sliders in your RAW processor. Use the dehaze tool to add contrast to washed areas. Apply selective adjustments with adjustment brushes to target only overexposed regions. If shooting RAW, you can typically recover 1-2 stops of overexposure. For JPEG files, recovery options are limited. Consider converting to black and white if color recovery creates unnatural results.
How to fix washed out photos?
Washed out photos lack contrast and appear flat. Increase contrast and clarity sliders to add punch. Reduce highlights and whites to recover bright areas. Use the dehaze tool specifically designed for this problem. Adjust the tone curve to create an S-curve for more contrast. If the issue is global, basic adjustments work well. For selective washed areas, use graduated filters or adjustment brushes.
Can you recover blown out highlights?
It depends on whether the highlights are truly clipped or just very bright. Check your histogram. If it shows a spike against the right edge, detail is permanently lost and cannot be recovered. However, many apparently blown highlights still contain recoverable data, especially in RAW files. Use the highlights and whites sliders to bring back detail. Completely clipped highlights have no data to recover, which is why proper in-camera exposure matters.
How to fix a washed out photo on iPhone?
Open the photo in the Photos app and tap Edit. Reduce exposure by sliding the light icon left. Lower brilliance and highlights for washed areas. Increase contrast to add depth. For more control, use third-party apps like Lightroom Mobile or VSCO, which offer highlight recovery tools similar to desktop software. Shooting in RAW format on newer iPhones gives significantly more recovery latitude than HEIC or JPEG.
Is it better to underexpose or overexpose?
Generally, slight underexposure is preferable to overexposure because you can recover shadow detail but cannot recover clipped highlights. This approach, called exposing to the right (ETTR), means pushing exposure as bright as possible without clipping highlights. However, extreme underexposure introduces noise when brightened. The ideal is proper exposure, but if you must err, lean slightly toward underexposure to protect highlight detail.
Conclusion
Learning how to fix overexposed photos transformed my photography. The combination of understanding the exposure triangle, reading histograms correctly, and knowing which camera settings to adjust gives you control over every lighting situation. Remember that prevention through proper in-camera technique always beats correction in post-processing.
The key takeaways are simple: shoot RAW whenever possible, learn to read your histogram, practice with exposure compensation, and use the right metering mode for your subject. When you do encounter overexposure, start with basic exposure and highlight adjustments before moving to advanced techniques like dehaze and tone curves.
Most importantly, practice these techniques regularly. Exposure management becomes instinctive with experience. The next time you encounter harsh sunlight or a backlit subject, you will know exactly which adjustments to make. Your photos will thank you for it.