Hey there! I’m so excited to share my ultimate guide to long exposure portraits with you. As a professional photographer who’s spent countless hours experimenting with this fascinating technique, I’ve discovered that long exposure portraits can transform ordinary shots into extraordinary works of art. Whether you’re looking to add subtle movement to your portraits or create dramatic, eye-catching effects, this comprehensive guide will give you everything you need to master long exposure portraits.
What Are Long Exposure Portraits?
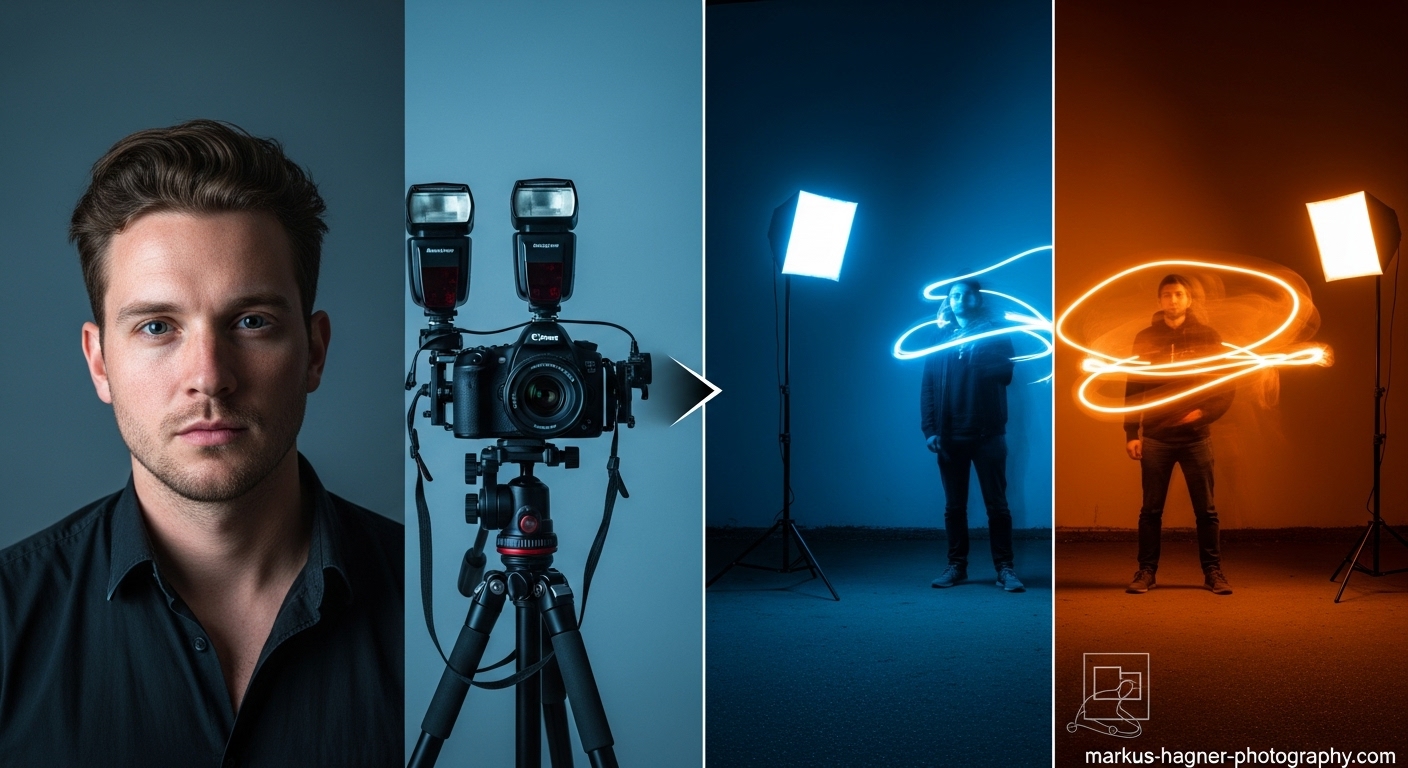
Let me start by explaining what long exposure portraits actually are. Unlike regular portraits where we freeze a moment in time, long exposure portraits involve keeping your camera shutter open for an extended period—anywhere from a fraction of a second to several minutes. This allows us to capture movement and create stunning visual effects that simply aren’t possible with standard portrait techniques.
I remember the first time I tried long exposure portraits. I was experimenting in my studio, trying to find a way to add some visual interest to what felt like a routine portrait session. When I saw those first images with the perfect balance of sharp subject detail and beautiful motion blur, I was hooked! The technique opened up a whole new world of creative possibilities for my portrait work.
Why Long Exposure Portraits Are Worth Learning
You might be wondering, “Why should I bother learning this technique?” Let me tell you, long exposure portraits offer several incredible benefits:
Creative Expression: Long exposure techniques allow you to express creativity in ways that standard portraits simply can’t match. You can convey motion, emotion, and atmosphere in a single frame.
Stand Out from the Crowd: In today’s saturated photography market, long exposure portraits help your work stand out. Clients love unique images that capture their personality in an artistic way.
Versatility: This technique works in almost any environment—studio, outdoor, daytime, nighttime. You’re never limited by location or lighting conditions.
Technical Growth: Mastering long exposure portraits will make you a better photographer overall. You’ll gain a deeper understanding of light, motion, and camera mechanics.
Emotional Impact: There’s something magical about long exposure portraits that evokes emotion in viewers. The combination of sharp detail and ethereal movement creates images that people can’t stop looking at.
Essential Gear for Long Exposure Portraits
Before we dive into the techniques, let me share the essential gear you’ll need. I’ve learned through experience that having the right equipment makes all the difference in long exposure photography.
Camera Requirements
DSLR or Mirrorless Camera: You’ll need a camera that allows full manual control over shutter speed, aperture, and ISO. While you can technically do long exposures with some advanced smartphones, I recommend using a dedicated camera for the best results.
Manual Mode Capability: Your camera must have a manual mode that allows you to set shutter speeds longer than 30 seconds. Most cameras offer a “bulb mode” for exposures longer than 30 seconds.
Good Low-Light Performance: Since many long exposure portraits are done in lower light conditions, a camera with good high ISO performance will give you more flexibility.
Lenses for Long Exposure Portraits
Prime Lenses: I love using prime lenses like 50mm f/1.8 or 85mm f/1.4 for long exposure portraits. The wide apertures allow more light in and create beautiful background separation.
Zoom Lenses: Versatile zoom lenses like 24-70mm f/2.8 are excellent for long exposure portraits because they allow you to adjust your composition without moving the camera.
Wide-Angle Lenses: For environmental long exposure portraits, wide-angle lenses like 16-35mm f/2.8 can capture more of the surroundings and create dramatic perspective effects.
Stabilization Equipment
Sturdy Tripod: This is non-negotiable for long exposure portraits. I recommend investing in a quality tripod that can handle wind and other environmental factors. I’ve learned the hard way that cheap tripods lead to blurry images and frustration.
Remote Shutter Release: A remote shutter release or cable release allows you to trigger the shutter without touching the camera, eliminating camera shake. Some advanced models even include intervalometers for timed exposures.
Tripod Head: A good tripod head with smooth movement makes it easier to fine-tune your composition. I prefer ball heads for their versatility and ease of use.
Lighting Equipment
Off-Camera Flash: For flash-based long exposure portraits, you’ll need at least one off-camera flash. I recommend starting with a speedlight that can be triggered remotely.
Continuous Lighting: LED panels or continuous lights are excellent for creating ambient light effects during long exposures.
Light Modifiers: Softboxes, umbrellas, and snoots help you control the quality and direction of your light. I’ll explain how to use these effectively in the techniques section.
Color Gels: Gels allow you to add creative color effects to your long exposure portraits. They’re especially useful for creating mood and atmosphere.
Filters and Accessories
Neutral Density (ND) Filters: ND filters are like sunglasses for your camera, reducing the amount of light entering the lens. They’re essential for long exposure portraits in bright conditions.
ND Filter System: A filter holder system allows you to stack multiple filters and adjust them easily during shoots.
Lens Cleaning Kit: Long exposures mean your lens is exposed to the elements for extended periods. Keep it clean with a good lens cleaning kit.
Extra Batteries: Long exposures drain batteries quickly, especially in cold conditions. Always carry spares.
Understanding the Technical Foundation
Before we dive into specific techniques, let me explain the technical foundation of long exposure portraits. Understanding these concepts will help you master the technique more quickly.
The Exposure Triangle in Long Exposures
Shutter Speed: This is the most critical setting in long exposure portraits. Shutter speeds can range from 1/4 second to several minutes, depending on the effect you want to achieve.
Aperture: Your aperture controls two things: the amount of light entering the camera and depth of field. For long exposure portraits, I typically use apertures between f/2.8 and f/8, depending on how much background blur I want.
ISO: Keep your ISO as low as possible (100-400) to minimize noise in your long exposure images. Higher ISOs can create grainy images, especially in longer exposures.
Balancing Ambient and Flash Light
One of the key concepts in long exposure portraits is understanding how to balance ambient light with flash light. Here’s how I think about it:
Ambient Light Exposure: This is the continuous light that’s present during the entire exposure. It’s what creates the motion blur and atmospheric effects in your images.
Flash Exposure: The flash provides a brief burst of light that freezes your subject at a specific moment. This is what creates the sharp detail in your portraits.
The Magic Ratio: The key to successful long exposure portraits is finding the right balance between ambient and flash light. Too much ambient light and your subject will be blurry. Too much flash and you’ll lose the atmospheric effects.
Also Read: Tamron 17-28 Vs Sigma 14-24 Sony
Rear Curtain Sync vs. Front Curtain Sync
This is a crucial concept that many photographers overlook. Let me explain the difference:
Front Curtain Sync: The flash fires at the beginning of the exposure. This can look unnatural because the motion trails appear in front of your moving subject.
Rear Curtain Sync: The flash fires at the end of the exposure, just before the shutter closes. This creates a more natural look with motion trails appearing behind your subject.
I almost always use rear curtain sync for my long exposure portraits. It creates a more pleasing visual flow and looks more natural to the viewer’s eye.
Long Exposure Portrait Techniques
Now let’s dive into the specific techniques I’ve developed and perfected over years of shooting long exposure portraits. I’ll start with the basics and progress to more advanced methods.
Technique 1: The Classic Studio Long Exposure
This is the foundation technique that all other long exposure portrait methods build upon. It’s perfect for adding subtle movement and atmosphere to your studio portraits.
Setup:
- Place your camera on a sturdy tripod
- Position your subject at least 6 feet from the background
- Set up one main light with a modeling lamp (LED modeling lamps work best)
- Add a second light for background illumination if desired
Camera Settings:
- Shutter Speed: 0.5-2 seconds
- Aperture: f/2.8-f/5.6
- ISO: 100-200
- White Balance: Daylight or custom
- Focus: Manual focus on your subject’s eyes
- Drive Mode: Single shot with remote release
- Flash Sync: Rear curtain sync
Step-by-Step Process:
- Set up your tripod and compose your shot
- Turn on your modeling lamp and adjust its brightness
- Set your camera to manual mode and dial in the settings above
- Focus manually on your subject’s eyes
- Take a test shot without flash to check ambient exposure
- Add flash and adjust power until subject is properly exposed
- Take the final shot, instructing your subject to remain still during the exposure
Pro Tips:
- Use LED modeling lamps instead of tungsten to avoid color casts
- Keep your subject as still as possible during the exposure
- Experiment with different shutter speeds to control the amount of ambient light visible
- Use a snoot or grid to control spill light on the background
Common Problems and Solutions:
- Subject too blurry: Reduce shutter speed or increase flash power
- Background too dark: Increase modeling lamp brightness or add background light
- Colors look off: Check white balance and ensure consistent light sources
- Images too grainy: Lower ISO and ensure proper exposure
Technique 2: Environmental Long Exposure Portraits
This technique is perfect for outdoor portraits where you want to incorporate the environment and natural elements into your images.
Setup:
- Scout locations with interesting natural elements (trees, water, clouds)
- Use a sturdy tripod that can handle outdoor conditions
- Consider using ND filters for bright daylight conditions
- Bring reflectors or portable lighting if needed
Camera Settings:
- Shutter Speed: 1-30 seconds (depending on wind and movement)
- Aperture: f/8-f/16 for maximum depth of field
- ISO: 100-200
- White Balance: Daylight or cloudy
- Focus: Manual focus
- Drive Mode: Single shot with remote release
- Filters: ND filter as needed
Step-by-Step Process:
- Arrive at location during golden hour for best lighting
- Set up tripod and compose your shot
- Attach ND filter if shooting in bright conditions
- Set camera to manual mode and dial in settings
- Take test shots to check exposure and adjust as needed
- Position your subject and instruct them to hold very still
- Take the shot, using a remote release to avoid camera shake
Pro Tips:
- Windy days can create interesting effects with hair and clothing
- Moving water creates beautiful silky effects with longer exposures
- Cloud movement adds drama to sky backgrounds
- Use natural elements as framing devices for your subject
Common Problems and Solutions:
- Too much camera shake: Use heavier tripod or add weight to tripod
- Subject movement: Choose calmer days or use faster shutter speeds
- Overexposed sky: Use ND filters or shoot during golden hour
- Underexposed subject: Use fill flash or reflector
Technique 3: Night Long Exposure Portraits
Night long exposure portraits are among the most dramatic and eye-catching. This technique combines long exposure with flash to create stunning nighttime images.
Setup:
- Choose a location with interesting ambient light or night sky
- Use two tripods—one for camera, one for off-camera flash
- Set up radio triggers for off-camera flash
- Bring a flashlight for focusing and painting with light
Camera Settings:
- Shutter Speed: 10-30 seconds
- Aperture: f/2.8-f/8
- ISO: 800-3200 (depending on available light)
- White Balance: Tungsten or custom
- Focus: Manual focus using flashlight
- Drive Mode: Single shot with remote release
- Flash Sync: Rear curtain sync
Step-by-Step Process:
- Arrive at location after dark and set up camera tripod
- Compose your shot and focus using flashlight
- Set camera to manual mode and dial in settings
- Set up off-camera flash on second tripod
- Test ambient exposure without flash
- Test flash power and position
- Take final shot with rear curtain sync
Pro Tips:
- Use higher ISOs to capture starlight or city ambient light
- Experiment with colored gels on your flash for creative effects
- Light painting with flashlights can add interesting elements
- City lights create beautiful light trails in longer exposures
Common Problems and Solutions:
- Images too noisy: Use lower ISO and longer exposures
- Flash not powerful enough: Move flash closer or use multiple flashes
- Focus issues: Use autofocus assist or manual focus with flashlight
- Color casts: Set custom white balance or shoot in RAW
Technique 4: Motion Blur Portraits
This technique creates artistic portraits where the subject is intentionally blurred to convey movement and emotion.
Setup:
- Use a relatively dark environment
- Set up continuous lighting or modeling lamps
- Choose clothing and props that will create interesting blur patterns
- Use a neutral background to emphasize the motion
Camera Settings:
- Shutter Speed: 1/4-2 seconds
- Aperture: f/4-f/8
- ISO: 200-800
- White Balance: Custom for lighting
- Focus: Manual focus on starting position
- Drive Mode: Continuous shooting
- Stabilization: Tripod or monopod
Step-by-Step Process:
- Set up lighting and background
- Position your subject and explain the movement
- Set camera on tripod and compose shot
- Set manual focus on subject’s starting position
- Use continuous shooting mode
- Have subject perform movement while you shoot
- Review images and adjust movement as needed
Pro Tips:
- Flowing fabrics create beautiful blur patterns
- Spinning or twirling movements work well
- Experiment with different types of movement (walking, dancing, jumping)
- Use colored lighting for more dramatic effects
Common Problems and Solutions:
- Too much blur: Use faster shutter speeds
- Not enough blur: Use slower shutter speeds or faster movement
- Uneven exposure: Use more even lighting
- Subject out of frame: Practice movement patterns
Also Read: New Firmware For Sony A1 A7s Iii
Technique 5: Light Painting Portraits
Light painting is a creative technique where you use light sources to “paint” light onto your subject during a long exposure.
Setup:
- Use a completely dark environment
- Set up camera on tripod
- Gather various light sources (flashlights, LED strips, glow sticks)
- Wear dark clothing to avoid appearing in the image
Camera Settings:
- Shutter Speed: 15-30 seconds or bulb mode
- Aperture: f/8-f/16
- ISO: 100-400
- White Balance: Custom or daylight
- Focus: Manual focus pre-set
- Drive Mode: Bulb mode with remote release
- Lighting: Various light sources
Step-by-Step Process:
- Set up in completely dark room
- Position subject and focus with flashlight
- Set camera to bulb mode
- Open shutter with remote release
- Use light sources to paint around subject
- Close shutter after painting is complete
- Review and adjust technique as needed
Pro Tips:
- Different light sources create different effects
- Move lights quickly to avoid hot spots
- Experiment with colors and patterns
- Practice painting techniques before final shoot
Common Problems and Solutions:
- Hot spots: Move lights more quickly and evenly
- Uneven coverage: Plan painting path in advance
- Subject movement: Use posing chair or have subject hold still
- Light leaks: Ensure room is completely dark
Technique 6: Urban Long Exposure Portraits
This technique combines long exposure with urban environments to create dynamic city portraits.
Setup:
- Choose urban locations with interesting architecture and lights
- Shoot during blue hour for best results
- Use ND filters if shooting in brighter conditions
- Bring portable lighting for subject illumination
Camera Settings:
- Shutter Speed: 5-30 seconds
- Aperture: f/8-f/16
- ISO: 100-400
- White Balance: Auto or custom
- Focus: Manual focus
- Drive Mode: Single shot with remote release
- Filters: ND filter as needed
Step-by-Step Process:
- Scout urban location during blue hour
- Set up tripod and compose shot
- Set camera to manual mode
- Take test shots for ambient exposure
- Add subject lighting if needed
- Take final shots with subject holding still
- Experiment with different compositions
Pro Tips:
- Traffic light trails add dynamic elements
- City buildings provide interesting backgrounds
- Use leading lines to draw attention to subject
- Shoot during blue hour for perfect balance of light
Common Problems and Solutions:
- Too much ambient light: Use stronger ND filters
- Subject too dark: Add fill light or use reflector
- Camera shake: Use heavier tripod or add weight
- Color casts: Set custom white balance
Technique 7: Water Long Exposure Portraits
Water creates beautiful, ethereal effects in long exposure portraits. This technique is perfect for beach, pool, or rain photography.
Setup:
- Choose location with water element (ocean, pool, fountain)
- Use waterproof gear protection if needed
- Bring towels and dry clothes for subject
- Consider using underwater housing for unique angles
Camera Settings:
- Shutter Speed: 1-15 seconds
- Aperture: f/8-f/16
- ISO: 100-400
- White Balance: Auto or custom
- Focus: Manual focus
- Drive Mode: Single shot with remote release
- Protection: Weather-sealed gear or housing
Step-by-Step Process:
- Choose water location and time of day
- Set up tripod safely away from water
- Compose shot and set manual focus
- Test exposure without subject
- Position subject in water
- Take final shots with water movement
- Ensure gear stays dry and safe
Pro Tips:
- Moving water creates silky smooth effects
- Splashes and drops add dynamic elements
- Golden hour lighting enhances water effects
- Safety first—never compromise safety for a shot
Common Problems and Solutions:
- Water spots on lens: Use lens hood and UV filter
- Too much reflection: Use polarizing filter
- Subject uncomfortable: Keep sessions short and warm
- Gear safety: Use weather-sealed equipment
Technique 8: Multiple Exposure Long Exposure Portraits
This advanced technique combines multiple exposures to create complex, layered portraits with long exposure elements.
Setup:
- Use camera with multiple exposure capability
- Plan your composition in advance
- Use consistent lighting throughout exposures
- Consider using post-processing for additional control
Camera Settings:
- Shutter Speed: Varies by exposure
- Aperture: Consistent across exposures
- ISO: Consistent across exposures
- White Balance: Consistent across exposures
- Focus: Manual focus locked
- Drive Mode: Multiple exposure mode
- Special: Camera with multiple exposure feature
Step-by-Step Process:
- Plan your multiple exposure concept
- Set camera to multiple exposure mode
- Take first exposure (usually background)
- Take second exposure with subject
- Review combined result
- Adjust and reshoot if needed
- Consider post-processing refinements
Pro Tips:
- Plan exposures to complement each other
- Use consistent lighting for seamless blending
- Experiment with different exposure combinations
- Shoot in RAW for maximum post-processing flexibility
Common Problems and Solutions:
- Exposures don’t blend: Check camera settings and try again
- Inconsistent lighting: Use same lighting setup for all exposures
- Misalignment: Use tripod and don’t move camera between shots
- Overexposed areas: Reduce exposure time or use smaller aperture
Advanced Long Exposure Portrait Techniques
Now that we’ve covered the fundamental techniques, let me share some advanced methods that will take your long exposure portraits to the next level.
Rear Curtain Sync Mastery
I’ve found that mastering rear curtain sync is one of the most important skills for long exposure portraits. Here’s how to get the most out of it:
Understanding Rear Curtain Sync: Rear curtain sync fires the flash at the end of the exposure, just before the shutter closes. This creates a more natural look where motion trails appear behind your subject rather than in front of them.
When to Use Rear Curtain Sync:
- When your subject is moving through the frame
- When you want natural-looking motion trails
- When shooting with ambient light sources
- When creating light trail effects
Camera Setup for Rear Curtain Sync:
- Go to your camera’s flash control menu
- Select “Rear Curtain Sync” or “Second Curtain Sync”
- Set your flash to manual mode for consistent output
- Test the timing to ensure flash fires at the right moment
Pro Tips for Rear Curtain Sync:
- Use slower shutter speeds (1/2 second or longer) for dramatic effects
- Combine with colored gels for creative color effects
- Experiment with multiple flash units for complex lighting
- Practice timing to get the perfect moment
High-Speed Sync Long Exposures
High-speed sync allows you to use flash at shutter speeds faster than your camera’s normal sync speed. This opens up creative possibilities for long exposure portraits.
Understanding High-Speed Sync: High-speed sync pulses the flash rapidly during the exposure, allowing it to sync with faster shutter speeds. This is useful when you want to balance bright ambient light with flash.
When to Use High-Speed Sync:
- Shooting in bright daylight with flash
- When you want shallow depth of field with flash
- When freezing fast motion with ambient light
- When balancing bright backgrounds with subject
Setup for High-Speed Sync:
- Use compatible flash and camera system
- Enable high-speed sync in flash settings
- Set shutter speed higher than normal sync speed (usually 1/250 sec)
- Adjust flash power to compensate for high-speed sync
Pro Tips for High-Speed Sync:
- High-speed sync reduces flash power, so use flash closer to subject
- Combine with ND filters for even more creative control
- Use multiple flashes for more power
- Experiment with different shutter speeds for varying effects
Bulb Mode Long Exposures
Bulb mode allows you to keep the shutter open for as long as you hold the shutter button down, making it perfect for very long exposures.
Understanding Bulb Mode: Bulb mode is typically accessed by setting your shutter speed to the slowest setting (usually 30 seconds) and then going one step further to “Bulb” or “B”.
When to Use Bulb Mode:
- Exposures longer than 30 seconds
- Light painting sessions
- Astrophotography portraits
- When precise timing control is needed
Setup for Bulb Mode:
- Set camera to manual mode
- Turn shutter speed dial to bulb mode
- Use remote shutter release with lock function
- Use tripod and ensure camera stability
Pro Tips for Bulb Mode:
- Use a timer remote for precise exposure control
- Keep track of exposure times for consistency
- Use lower ISOs to reduce noise in very long exposures
- Consider using intervalometer for timed sequences
Light Modifiers for Long Exposure Portraits
The right light modifiers can make a huge difference in your long exposure portraits. Here are my favorites:
Softboxes: Softboxes create soft, even light that’s perfect for illuminating your subject during long exposures. I prefer medium-sized softboxes (24×36 inches) for most portrait work.
Umbrellas: Umbrellas provide broad, soft light that’s great for filling in shadows. I use shoot-through umbrellas for maximum light spread.
Snoots and Grids: These modifiers focus light into a narrow beam, perfect for highlighting specific areas of your subject or creating dramatic lighting effects.
Beauty Dishes: Beauty dishes provide a unique quality of light that’s both soft and directional. They’re excellent for creating flattering portrait lighting.
Gels and Filters: Colored gels can add creative color effects to your long exposure portraits. I often use CTB (blue) and CTO (orange) gels to balance different light sources.
Creative Long Exposure Portrait Ideas
Now let me share some creative ideas and concepts that will inspire your long exposure portrait sessions.
Concept 1: Time Traveler Portraits
Create portraits that suggest movement through time by combining sharp portraits with blurred environmental elements.
Setup Ideas:
- Use historic locations as backgrounds
- Have subject wear period clothing
- Combine modern and vintage elements
- Use props that suggest time travel
Technical Approach:
- Use shutter speeds of 1-4 seconds
- Keep subject perfectly still
- Allow environmental elements to blur
- Use rear curtain sync with flash
Concept 2: Elemental Portraits
Incorporate natural elements like wind, water, and fire into your long exposure portraits for dramatic effects.
Setup Ideas:
- Use fans for wind effects on hair and clothing
- Incorporate water elements (fountains, rain, splashes)
- Use fire elements safely (candles, sparklers)
- Combine multiple elements for maximum impact
Technical Approach:
- Adjust shutter speed based on element speed
- Use appropriate safety measures
- Experiment with different lighting conditions
- Consider using ND filters for control
Concept 3: Urban Ghost Portraits
Create ethereal, ghost-like portraits in urban environments by using long exposures to blend subjects with their surroundings.
Setup Ideas:
- Choose urban locations with interesting architecture
- Use flowing, translucent clothing
- Experiment with multiple exposures
- Incorporate city lights and reflections
Technical Approach:
- Use longer exposures (5-30 seconds)
- Have subject move slowly during exposure
- Combine with flash for partial freezing
- Use post-processing for enhanced effects
Concept 4: Light Writing Portraits
Combine portrait photography with light writing techniques to create images where light becomes part of the portrait.
Setup Ideas:
- Use dark environments
- Incorporate light writing tools
- Plan light writing in advance
- Combine with traditional portrait lighting
Technical Approach:
- Use bulb mode for maximum control
- Write with lights during exposure
- Keep subject still during light writing
- Experiment with different light sources
Concept 5: Motion Emotion Portraits
Use motion blur to convey emotion and mood in your portraits, creating images that feel alive and dynamic.
Setup Ideas:
- Choose locations that match desired emotion
- Use clothing that enhances movement
- Incorporate props that suggest emotion
- Plan movement patterns in advance
Technical Approach:
- Use shutter speeds that match emotion (faster for energy, slower for calm)
- Experiment with different types of movement
- Use lighting that enhances mood
- Consider using multiple exposures
Post-Processing Long Exposure Portraits
Post-processing is an essential part of creating stunning long exposure portraits. Let me share my workflow and techniques.
Basic Editing Workflow
Step 1: Initial Adjustments
- Adjust exposure and contrast
- Correct white balance
- Set black and white points
- Apply lens corrections
Step 2: Detail Enhancement
- Sharpen subject areas
- Reduce noise in shadow areas
- Apply clarity and texture adjustments
- Enhance eyes and facial features
Step 3: Color Grading
- Adjust hue, saturation, and luminance
- Apply split toning for mood
- Use color grading for creative effects
- Ensure color consistency across images
Step 4: Final Touches
- Crop and straighten if needed
- Apply vignette for focus
- Add any special effects
- Export in appropriate format
Advanced Techniques
Exposure Blending: Combine multiple exposures for perfect balance between subject and background.
Frequency Separation: Separate texture from color for advanced retouching while maintaining natural look.
Orton Effect: Add a dreamy, glowing quality to your long exposure portraits.
Light Painting in Post: Enhance or add light painting effects during post-processing.
HDR Techniques: Use HDR techniques to balance extreme dynamic range in challenging lighting conditions.
Recommended Software
Adobe Lightroom: Excellent for basic editing and batch processing.
Adobe Photoshop: Essential for advanced techniques and detailed retouching.
Capture One: Great alternative to Lightroom with excellent color control.
Luminar Neo: AI-powered editing with creative effects.
ON1 Photo RAW: All-in-one solution with excellent portrait tools.
Common Problems and Solutions
Based on my experience, here are the most common problems photographers encounter with long exposure portraits and how to solve them.
Problem 1: Camera Shake
Symptoms: Entire image is blurry, not just moving elements.
Causes: Unstable tripod, wind, camera movement during exposure.
Solutions:
- Invest in a sturdy, high-quality tripod
- Add weight to tripod center column
- Use remote shutter release
- Avoid touching camera during exposure
- Shoot in calmer conditions
Problem 2: Subject Movement
Symptoms: Subject is blurry while background is sharp.
Causes: Subject movement during exposure, unstable posing.
Solutions:
- Use faster shutter speeds
- Use flash to freeze subject
- Have subject hold very still
- Use posing aids or supports
- Practice holding still with subject
Problem 3: Incorrect Exposure
Symptoms: Images too bright or too dark, loss of detail.
Causes: Incorrect camera settings, changing light conditions.
Solutions:
- Use manual mode for consistent exposure
- Check histogram regularly
- Use exposure compensation
- Shoot in RAW for flexibility
- Bracket exposures for safety
Problem 4: Color Casts
Symptoms: Unnatural color tints in images.
Causes: Mixed lighting sources, incorrect white balance.
Solutions:
- Set custom white balance
- Use consistent light sources
- Shoot in RAW for white balance adjustment
- Use color correction filters
- Calibrate monitor for accurate editing
Problem 5: Noise and Grain
Symptoms: Visible grain, especially in shadow areas.
Causes: High ISO, long exposures, underexposure.
Solutions:
- Use lowest possible ISO
- Ensure proper exposure
- Use noise reduction in post-processing
- Consider using noise reduction software
- Avoid extreme cropping
Pro Tips for Perfect Long Exposure Portraits
Let me share some professional tips that I’ve learned through years of shooting long exposure portraits.
Tip 1: Plan Your Shots
Scout Locations: Visit locations ahead of time to plan compositions and lighting.
Check Weather: Weather conditions can make or break long exposure shoots.
Time Your Shoot: Golden hour and blue hour provide the best lighting for most long exposure work.
Prepare Equipment: Have all gear ready and tested before the shoot.
Tip 2: Master Your Equipment
Know Your Camera: Understand your camera’s long exposure capabilities and limitations.
Test Your Gear: Test all equipment before important shoots.
Backup Equipment: Always have backup gear available.
Maintenance: Keep equipment clean and well-maintained.
Tip 3: Work with Your Subjects
Communicate Clearly: Explain the process to your subjects.
Practice Poses: Have subjects practice holding still.
Provide Feedback: Give clear direction during the shoot.
Keep Comfortable: Ensure subjects are comfortable during longer exposures.
Tip 4: Experiment and Learn
Try New Techniques: Don’t be afraid to experiment with new methods.
Learn from Mistakes: Analyze what went wrong in unsuccessful shots.
Study Others: Look at work of other long exposure photographers.
Keep Learning: Photography is a continuous learning process.
Long Exposure Portrait FAQ
What’s the best shutter speed for long exposure portraits?
The best shutter speed depends on the effect you want to achieve. For subtle motion blur, I recommend starting with 1/4 to 1/2 second. For more dramatic effects, try 1-4 seconds. For very long exposures with lots of movement, use 5-30 seconds or more. The key is to experiment and adjust based on the amount of movement in your scene and the look you’re going for.
Do I need expensive equipment for long exposure portraits?
While having good equipment helps, you don’t need the most expensive gear to get started. A sturdy tripod is the most important investment. You can use any DSLR or mirrorless camera with manual controls. For lighting, even a single speedlight can work well. Start with what you have and upgrade as you develop your skills and specific needs.
How do I keep my subject sharp during long exposures?
Keeping your subject sharp requires a combination of techniques. First, use a flash to freeze your subject at the end of the exposure (rear curtain sync). Second, instruct your subject to hold very still during the exposure. Third, use faster shutter speeds when possible. Finally, consider using posing aids or having your subject lean against something stable for support.
What’s the difference between front curtain and rear curtain sync?
Front curtain sync fires the flash at the beginning of the exposure, while rear curtain sync fires it at the end. For long exposure portraits, I almost always use rear curtain sync because it creates a more natural look with motion trails appearing behind your subject rather than in front of them. Front curtain sync can look unnatural because the motion trails appear in front of a moving subject.
Can I shoot long exposure portraits in bright daylight?
Yes, you can shoot long exposure portraits in bright daylight, but you’ll need to use neutral density (ND) filters to reduce the amount of light entering your camera. ND filters act like sunglasses for your lens, allowing you to use slower shutter speeds even in bright conditions. Start with a 3-stop or 6-stop ND filter and adjust based on the lighting conditions.
How do I avoid noise in long exposure portraits?
To avoid noise in long exposure portraits, use the lowest possible ISO setting (usually 100 or 200). Ensure proper exposure to avoid underexposing, which can increase noise. Use your camera’s long exposure noise reduction feature if available. In post-processing, use noise reduction tools carefully to maintain image quality while reducing noise.
What’s the best aperture for long exposure portraits?
The best aperture depends on your creative goals. For shallow depth of field and background blur, use wider apertures like f/2.8 to f/4. For greater depth of field and environmental context, use smaller apertures like f/8 to f/16. Keep in mind that very small apertures (f/16 and smaller) can cause diffraction, which reduces overall sharpness.
How do I focus in low light conditions?
Focusing in low light can be challenging. I recommend using manual focus and a flashlight to illuminate your subject for focusing. Once focused, switch off autofocus to prevent the camera from hunting. Some cameras have focus peaking or magnification features that can help with manual focusing. You can also use autofocus assist beams on your flash if available.
Can I create long exposure portraits with a smartphone?
While smartphones have limitations, you can create basic long exposure portraits using apps that offer manual controls. Look for apps that allow you to control shutter speed, ISO, and focus. However, for the best results and creative control, I recommend using a dedicated camera with manual controls.
How do I add creative effects to my long exposure portraits?
There are many ways to add creative effects to long exposure portraits. Try using colored gels on your flash, experiment with light painting, incorporate moving elements like fabric or water, or try multiple exposure techniques. Post-processing can also add creative effects like double exposures, color grading, and special filters.
Final Thoughts
Long exposure portraits have completely transformed my photography, and I’m confident they’ll do the same for you. The combination of technical skill and creative expression makes this one of the most rewarding photography techniques you can learn.
Remember, mastering long exposure portraits takes time and practice. Don’t get discouraged if your first attempts aren’t perfect. Every great photographer started somewhere, and each “failed” shot is a learning opportunity.
I encourage you to experiment with different techniques, settings, and creative approaches. The beauty of long exposure portraits lies in their endless creative possibilities. Whether you’re shooting in the studio, outdoors, at night, or in bright daylight, there’s always a new technique to try and a new effect to create.
Don’t forget to bookmark this guide for future reference. As you continue your photography journey, you’ll find yourself coming back to these techniques and discovering new ways to apply them.
Happy shooting, and I can’t wait to see the amazing long exposure portraits you create! 📸✨