Pressing the shutter button directly on your camera introduces subtle vibrations that can blur your images, especially during long exposures or high-magnification macro work. A wireless remote shutter trigger solves this problem by letting you fire your camera from a distance without ever touching it. In this guide, I will walk you through everything you need to know about setting up and using a wireless remote shutter trigger, from choosing the right type to troubleshooting common issues.
Whether you shoot astrophotography, self-portraits, wildlife, or simply want sharper product photos, understanding how to properly use a wireless remote shutter release will improve your results immediately. I have tested dozens of remotes over the years, and the setup process is simpler than most photographers realize.
What Is a Wireless Remote Shutter Trigger?
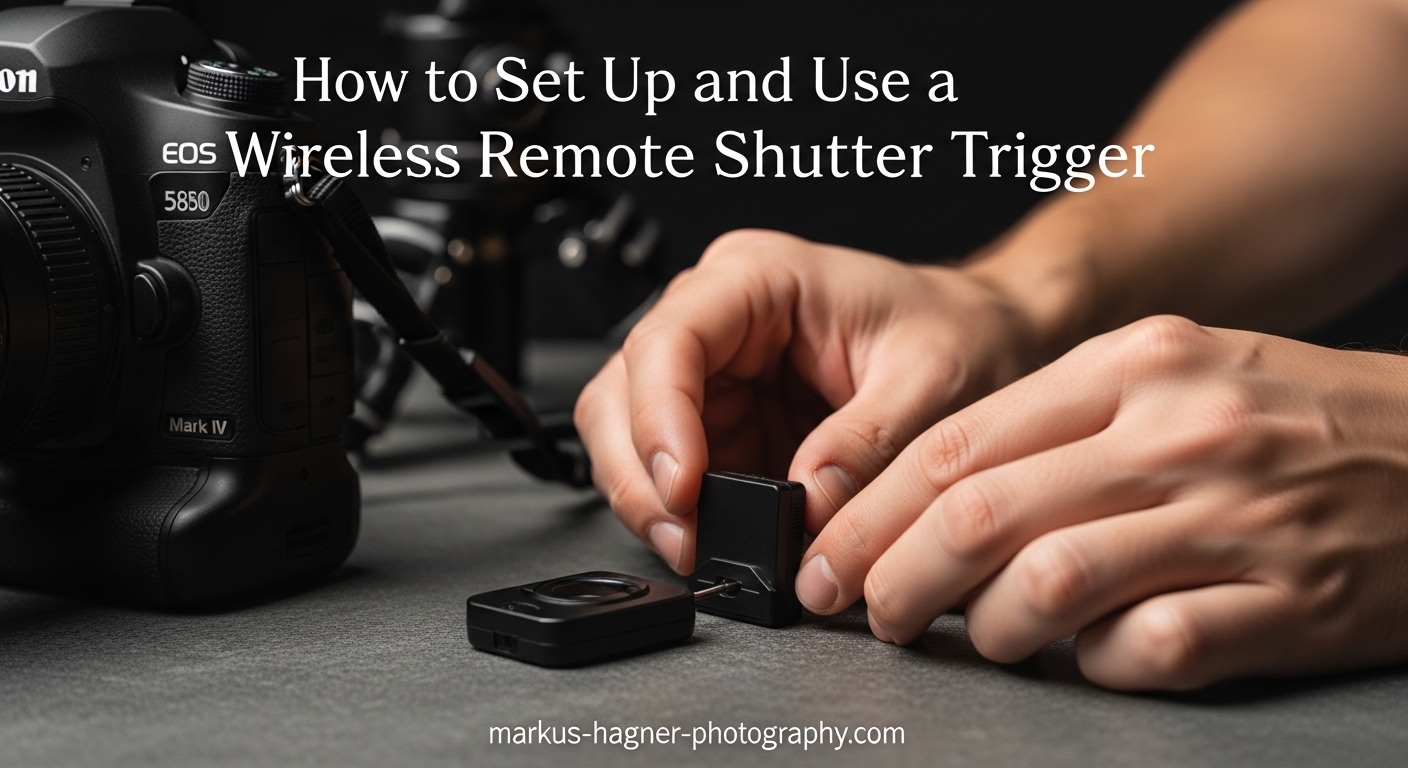
A wireless remote shutter trigger is a device that allows you to fire your camera’s shutter without physically pressing the button on the camera body. It consists of a transmitter (the handheld remote) and either a receiver that attaches to your camera or a direct wireless connection through infrared or Bluetooth. The primary purpose is eliminating camera shake caused by your finger pressing the shutter button.
When you press the button on the remote, it sends a signal to your camera to trigger the shutter. This happens wirelessly, meaning you can stand several feet or even hundreds of feet away from your camera depending on the technology used. Photographers use wireless remotes for long exposures where any vibration ruins the shot, self-portraits, wildlife photography where approaching the camera would scare subjects, and studio work where hands-free operation improves efficiency.
The concept is straightforward, but the implementation varies significantly between different types of remotes. Understanding these differences will help you choose and set up the right remote for your specific camera and shooting style.
Types of Wireless Remote Shutter Triggers
Not all wireless remotes work the same way. There are three main technologies used today, each with distinct advantages and limitations. Knowing which type you have (or plan to buy) is essential for proper setup.
Infrared (IR) Remote Controls
Infrared remotes work like television remotes. They emit an infrared light beam that your camera’s sensor detects. Most Canon, Nikon, Sony, and Fujifilm cameras have built-in infrared receivers, so no additional receiver hardware is needed. You simply point the remote at the camera and press the button.
The main limitation is line-of-sight. You must point the remote directly at the camera’s IR receiver, typically located on the front or back of the body. The range is usually limited to 15-25 feet, and bright sunlight can interfere with the signal. However, IR remotes are inexpensive, small, and require no setup beyond enabling remote mode in your camera menu.
Radio Frequency (RF) Remote Controls
Radio frequency remotes use radio waves to communicate between the transmitter and a receiver attached to your camera. The receiver typically slides into your hotshoe or connects via a cable to the camera’s remote port. RF remotes work through walls and obstacles, offering ranges of 100 feet or more.
These are the most reliable option for serious photography work. You do not need line-of-sight, the range is excellent, and interference is rare. The tradeoff is that you must attach a receiver to your camera and ensure both the transmitter and receiver use the same channel. Many RF remotes also include intervalometer functions for time-lapse photography.
Bluetooth Remote Controls
Bluetooth remotes pair directly with your camera or smartphone. Modern mirrorless cameras from Sony, Canon, and Fujifilm often include Bluetooth connectivity, allowing you to use compatible remotes without a separate receiver. For smartphones, Bluetooth remotes are the standard for selfie sticks and content creation.
Bluetooth offers decent range (typically 30-50 feet) and simple pairing. The main consideration is battery life, as Bluetooth connections do consume power on both ends. Setup involves pairing the devices through your camera’s wireless menu or your phone’s Bluetooth settings.
Which Type Should You Choose?
For casual use with a compatible camera, infrared remotes offer the simplest experience at the lowest cost. For professional work, wildlife photography, or situations where reliability matters most, radio frequency remotes are worth the investment. Bluetooth remotes are ideal for smartphone photography and cameras with built-in Bluetooth support.
How to Set Up a Wireless Remote Shutter Trigger In 2026?
The setup process depends on which type of remote you are using. I will cover each type separately, plus brand-specific considerations for major camera manufacturers.
Setting Up an Infrared Remote
Infrared remotes require the least hardware setup but some menu configuration. Here is the step-by-step process:
Step 1: Locate your camera’s infrared receiver. Check your camera manual for the exact location. Most cameras have the receiver on the front near the grip or on the back near the viewfinder. Some models have receivers on both sides.
Step 2: Enable remote control mode in your camera menu. Navigate to the shooting menu and look for options labeled “Remote Control,” “Wireless Remote,” or “IR Remote.” Select “Enable” or “On.” Some cameras require you to set the drive mode to remote or self-timer.
Step 3: Point the remote at the IR receiver and press the shutter button. The camera should fire immediately. If nothing happens, check that you are pointing directly at the receiver and that there are no obstructions. Bright sunlight can sometimes interfere, so try shading the receiver if shooting outdoors.
Step 4: Test the range by stepping back from the camera. Most IR remotes work reliably within 15-20 feet. Beyond that, the signal becomes inconsistent.
Setting Up a Radio Frequency Remote
RF remotes require physical connection to your camera but offer greater reliability. Follow these steps:
Step 1: Attach the receiver to your camera. If your receiver has a hotshoe foot, slide it into the camera’s hotshoe and tighten the lock wheel. If your receiver connects via cable, plug it into your camera’s remote port (usually located on the side of the body under a rubber cover).
Step 2: Set the channel on both the transmitter and receiver. Most RF remotes have dip switches or a channel selector. Ensure both units are set to the same channel number. This prevents interference from other photographers using similar remotes.
Step 3: Power on both the transmitter and receiver. Check that both units have fresh batteries. Some receivers draw power from the camera battery, while others use their own power source.
Step 4: Test the connection by pressing the shutter button on the transmitter. The camera should fire immediately. If it does not respond, verify the cable connection (if applicable) and confirm the channels match.
Step 5: Test the range by walking away from the camera while pressing the shutter. Quality RF remotes work at 100 feet or more. Note the maximum reliable range for your specific remote.
Setting Up a Bluetooth Remote
Bluetooth remotes require pairing, similar to pairing headphones or speakers. Here is how to do it:
Step 1: Enable Bluetooth on your camera or smartphone. For cameras, navigate to the wireless or connectivity menu and turn on Bluetooth. For smartphones, open Settings and enable Bluetooth.
Step 2: Put your remote in pairing mode. This usually involves holding down the shutter button for several seconds until an LED flashes. Check your remote’s instructions for the specific procedure.
Step 3: Search for devices. On your camera, select “Pairing” or “Add Device” from the Bluetooth menu. On smartphones, look for the remote in the list of available devices. The remote may appear as “AB Shutter,” “Camera Remote,” or a similar name.
Step 4: Select the remote to complete pairing. Some remotes require a passcode (often 0000 or 1234), though most pair automatically.
Step 5: Test the connection by pressing the shutter button. The camera or smartphone should capture an image. If it does not work, ensure the camera app is open (for smartphones) or the camera is in shooting mode.
Brand-Specific Setup Tips
Different camera brands handle remote setup slightly differently. Here are tips for the major manufacturers:
Canon: Most Canon DSLRs and mirrorless cameras support the RC-6 infrared remote. Enable “Remote Control” in the shooting menu. For Bluetooth remotes on newer EOS R bodies, go to the wireless menu, enable Bluetooth, and select “Smartphone” or “Remote” pairing. Some Canon cameras require you to set the drive mode to the remote icon before the remote will work.
Nikon: Nikon cameras work with the ML-L3 infrared remote. Look for “Remote control mode” or “Remote shutter release” in the custom settings menu. Set the release mode dial to the remote setting if your camera has one. For Bluetooth remotes on Z-series cameras, use the Connect to Smart Device menu option.
Sony: Sony Alpha cameras support the RMT-DSLR2 infrared remote. Enable “Remote Ctrl” in the setup menu. For Bluetooth remotes, use the “Bluetooth Settings” under the network menu. Sony cameras with the Imaging Edge Mobile app can also use your smartphone as a remote.
Fujifilm: Fujifilm cameras work with the RR-90 infrared remote. Enable “Remote Release” in the setup menu. For Bluetooth remotes on X-series and GFX cameras, use the “Bluetooth Settings” in the network menu. The Fujifilm Camera Remote app also provides wireless shutter control.
When and Why to Use a Wireless Remote Shutter Trigger?
Understanding when a remote shutter improves your photography helps you decide when to use it versus when pressing the button directly is fine. Here are the most common scenarios.
Long Exposure Photography
Long exposures are the number one use case for wireless remotes. When your shutter stays open for several seconds or even minutes, any vibration during the exposure ruins the image. The simple act of pressing the shutter button creates enough movement to blur details, even on a sturdy tripod.
A remote shutter eliminates this completely. You trigger the exposure without touching the camera, resulting in perfectly sharp long exposures. This is essential for astrophotography, light trail photography, smooth water effects, and any exposure longer than one second.
For exposures longer than 30 seconds (bulb mode), a remote with a lock function is invaluable. Press once to open the shutter and again to close it, rather than holding the button down for minutes.
Self-Portraits and Group Photos
Wireless remotes transform self-portrait photography. Instead of racing against a 10-second timer, you can compose your shot, get into position, and fire the shutter when you are ready. This gives you time to adjust your pose, expression, and position without the stress of a countdown.
For group photos, a remote lets you join the group rather than running back and forth. Set up the camera on a tripod, frame the shot, and trigger it from within the group. Some photographers prefer this over timer modes because you capture candid moments rather than posed countdown expressions.
Wildlife and Nature Photography
Wildlife photographers use wireless remotes to trigger cameras from a distance. This allows you to set up near a bird feeder, animal trail, or nest site and trigger the camera from a hidden location. The animal never associates the camera with your presence, resulting in more natural behavior.
Radio frequency remotes are ideal for this application because they work at long range without line-of-sight. You can hide behind brush or in a blind 100 feet away and still trigger the camera reliably.
Macro Photography
Macro photography magnifies any camera movement dramatically. At 1:1 magnification or higher, even the slight vibration from pressing the shutter button shows up as blur. A remote shutter is practically essential for sharp macro work.
Many macro photographers combine remote shutters with mirror lock-up (on DSLRs) or electronic front curtain shutters (on mirrorless cameras) to eliminate every possible source of vibration. The difference in sharpness is immediately visible in final images.
Studio and Product Photography
In studio environments, wireless remotes improve workflow efficiency. When your camera is on a stand or in an awkward position, firing remotely saves time and physical effort. Product photographers appreciate being able to trigger shots while adjusting lighting or props without walking back to the camera.
Some studio photographers prefer wired connections for absolute reliability, but wireless remotes offer freedom of movement that wired solutions cannot match.
Troubleshooting Common Issues
Even with proper setup, wireless remotes sometimes fail to work as expected. Here are solutions to the most common problems.
Remote not responding: First, check that remote mode is enabled in your camera menu. Many cameras disable remote functionality by default. Verify that batteries in both the transmitter and receiver are fresh. For infrared remotes, ensure you are pointing directly at the receiver and are within range. For RF remotes, confirm that transmitter and receiver channels match.
Weak or intermittent signal: Radio interference can affect RF remotes. Try changing to a different channel. Obstacles between transmitter and receiver reduce range, so maintain a clear path when possible. For infrared remotes, bright sunlight overwhelms the receiver, so shade it or move closer.
Compatibility issues: Not all remotes work with all cameras. Verify that your remote is designed for your specific camera model or port type. Some cameras require specific remote protocols. Check manufacturer compatibility lists before purchasing.
Hotshoe occupied by flash: If your hotshoe is taken by a flash trigger, use a receiver that connects via cable to the remote port instead of sliding into the hotshoe. Some receivers include a pass-through hotshoe that lets you stack devices.
Battery drain: Bluetooth remotes and receivers consume battery even when idle. Turn them off between shoots. Keep spare batteries in your bag, as remote batteries often fail at the worst moments.
Frequently Asked Questions
How to connect wireless remote shutter?
To connect a wireless remote shutter, first determine your remote type. For infrared remotes, enable remote mode in your camera menu and point the remote at the IR receiver. For RF remotes, attach the receiver to your camera’s hotshoe or remote port, set matching channels on both units, and power them on. For Bluetooth remotes, enable Bluetooth on your camera or phone, put the remote in pairing mode, and select it from available devices.
How to use a remote trigger in photography?
Use a remote trigger for any situation where touching the camera causes problems. This includes long exposures (eliminating shake), self-portraits (triggering from your position), wildlife photography (shooting from a distance), macro work (preventing vibration blur), and studio photography (hands-free operation). Set up your camera on a tripod, compose your shot, enable remote mode, and press the remote button to fire the shutter.
How to pair shutter remote control?
Pairing a shutter remote depends on the connection type. For Bluetooth remotes, enable Bluetooth on your camera or smartphone, put the remote in pairing mode (usually by holding the shutter button for several seconds), then select the remote from your device’s Bluetooth menu. The remote typically appears as ‘AB Shutter,’ ‘Camera Remote,’ or a similar name. Some remotes require a passcode like 0000 or 1234.
What is a wireless shutter remote?
A wireless shutter remote is a device that triggers your camera’s shutter without physical contact. It consists of a handheld transmitter and either a receiver that attaches to your camera or a direct wireless connection through infrared or Bluetooth. The primary purpose is eliminating camera shake from pressing the shutter button, which improves sharpness for long exposures, macro photography, and other vibration-sensitive work.
Conclusion
Learning how to set up and use a wireless remote shutter trigger opens up creative possibilities while improving technical image quality. The setup process is straightforward once you understand which type of remote you have and how it communicates with your camera. Infrared remotes offer simplicity, radio frequency remotes provide reliability and range, and Bluetooth remotes integrate seamlessly with modern cameras and smartphones.
The sharpness improvement from eliminating camera shake alone makes a remote worth having. Add in the benefits for self-portraits, wildlife photography, and hands-free studio work, and a wireless remote becomes one of the most useful accessories in your camera bag. Whether you are capturing star trails, photographing shy wildlife, or simply want sharper product photos, a wireless remote shutter trigger is a tool that delivers immediate, visible results.