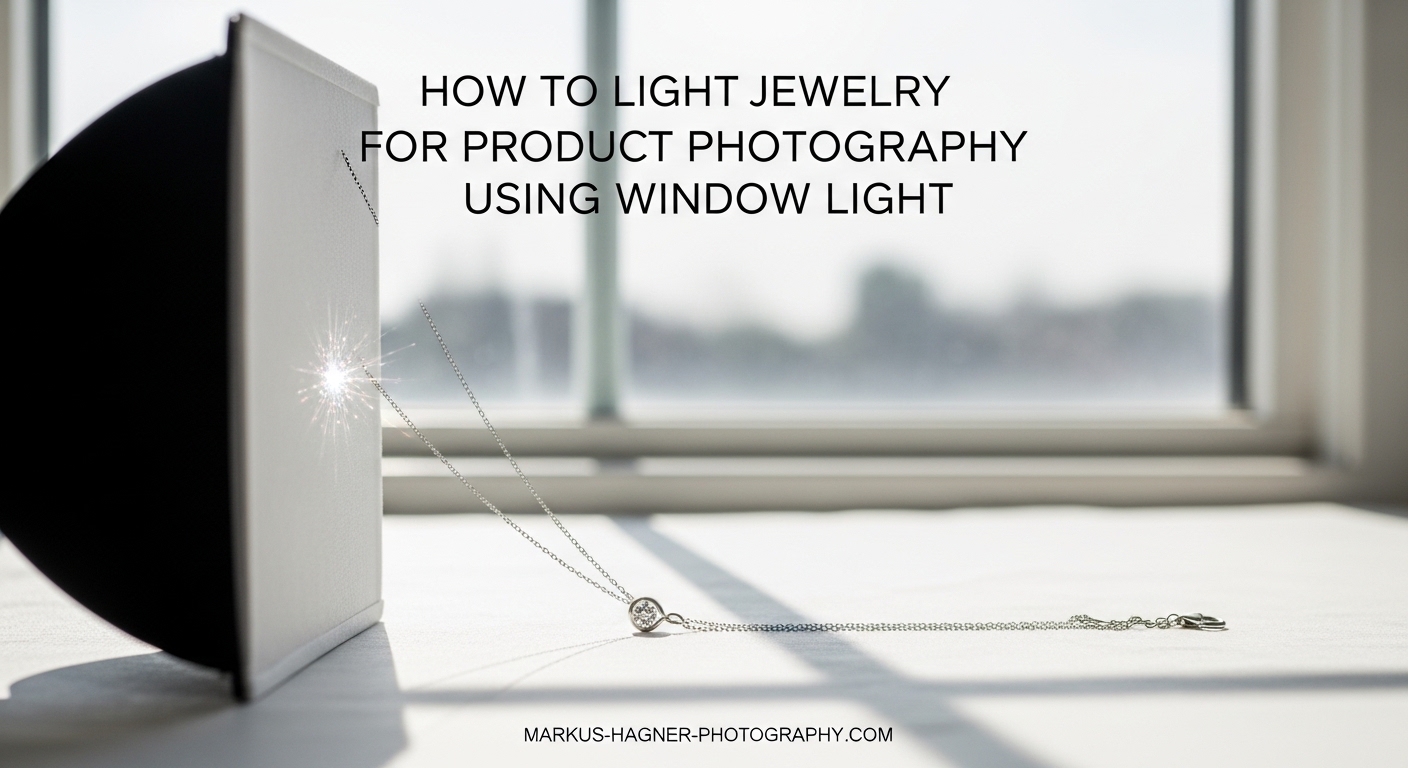
Learning how to light jewelry for product photography using window light transformed my small business photography. When I first started selling handmade jewelry online, my photos looked amateur and inconsistent. After years of experimentation, I discovered that window light jewelry photography produces professional results without expensive equipment.
Natural light jewelry photography works because soft, indirect illumination enhances sparkle without harsh glare. The key is understanding how to harness indirect natural light from windows while controlling reflections and shadows. In this guide, I’ll share the exact techniques I’ve used to capture stunning jewelry photos with just window light and basic equipment.
Why Window Light Works for Jewelry Photography?
Window light creates the ideal conditions for jewelry photography window light because it provides soft, diffused illumination that enhances metallic surfaces and gemstone brilliance. Unlike direct sunlight that creates harsh shadows and blown-out highlights, window light bathes jewelry in gentle, even lighting.
I’ve tested both natural light and artificial studio lighting extensively. Window light consistently produces more authentic color rendering, especially for gold and silver pieces. The natural color temperature preserves the true metal tones that artificial lights often distort with yellow or blue casts.
Another advantage is cost effectiveness. Professional jewelry lighting setups can cost thousands of dollars. Window light is free and available to anyone with access to a window. This makes it perfect for Etsy sellers, small business owners, and photographers just starting with jewelry product photography.
Soft diffused light from windows also reduces post-processing work. When I used artificial lights, I spent hours correcting color casts and fixing harsh reflection issues. Window light requires minimal editing because the natural illumination already looks professional right out of camera.
How to Light Jewelry for Product Photography Using Window Light?
The foundation of successful window light photography is positioning your jewelry near a window that receives indirect natural light. Direct sunlight creates problems with specular highlights and harsh shadows that distract from your jewelry’s beauty.
Start by finding a window with consistent light throughout the day. North-facing windows provide the most reliable indirect light because they never receive direct sun. If you only have east or west-facing windows, you can still achieve excellent results by shooting during the right times and using proper diffusion.
Clear a table or surface near your window and position your jewelry setup so the light comes from the side at approximately a 45-degree angle. This side lighting creates dimension and reveals the texture and details that make jewelry photography compelling.
Window Direction and Quality
North-facing windows are ideal for jewelry photography window light because they provide consistent, soft illumination throughout the entire day. The light never becomes direct or harsh, which means you can shoot from morning until evening with similar results.
South-facing windows present more challenges because they receive direct sunlight at different times. If you only have south-facing windows available, you’ll need to diffuse the light more heavily. Sheer curtains, white bed sheets, or dedicated diffusion material can soften harsh sunbeams into usable jewelry lighting.
East-facing windows work well in the afternoon when the direct sun has moved past. Morning light from east windows can be too direct and intense. West-facing windows are the opposite—morning sessions work best before direct sun hits the window.
Window Size Considerations
Larger windows provide more even lighting across your jewelry setup. A big window creates a broader light source that wraps around jewelry pieces, revealing details while maintaining soft shadows. I’ve found that windows at least three feet wide produce the best results for most jewelry photography.
Small windows can still work effectively with proper positioning. The key is moving your jewelry closer to the light source and using white reflector boards to fill in shadow areas. When I had only a small bathroom window available, I positioned my jewelry within 12 inches of the glass and surrounded it with white foam boards to bounce light back onto the piece.
Time of Day Matters
Overcast days are actually ideal for jewelry photography window light because clouds act as giant diffusers, creating perfectly soft illumination. I schedule my most important jewelry shoots for cloudy days whenever possible.
Sunny days require more careful light management. Avoid shooting when direct sunbeams hit your jewelry setup. Instead, wait for the sun to move past your window or use heavier diffusion materials. The “golden hour” shortly after sunrise and before sunset provides beautiful warm light that can enhance gold jewelry tones.
Essential Equipment for Window Light Jewelry Photography
While window light itself is free, a few basic tools dramatically improve your results. You don’t need expensive gear—simple household items often work perfectly for controlling and shaping window light.
Reflectors
White reflector boards are the most important tool for window light jewelry photography. I use white foam board reflectors on almost every shoot because they bounce soft fill light into shadow areas, revealing hidden details and reducing contrast.
Foam board reflectors are inexpensive and available at any office supply store. I recommend buying at least two 20×30 inch boards. White poster board works in a pinch but is less rigid and harder to position precisely.
Silver reflectors add more punch and can boost brightness when working with smaller windows. However, silver reflectors can create harsher reflections that may not suit all jewelry types. I prefer white reflectors for most jewelry because they produce softer, more natural-looking fill light.
Diffusion Materials
Diffusion material softens harsh window light and creates the even illumination that makes jewelry sparkle without glare. Sheer curtains are the simplest option—most homes already have them. A single thin white curtain between the window and your jewelry can transform direct sun into perfect jewelry lighting.
Tracing paper or vellum works as a budget DIY diffuser. I’ve clipped tracing paper over window openings using spring clamps for quick diffusion setups. Professional diffusion panels like those from Westcott or Lastolite provide more control but aren’t strictly necessary.
A white bed sheet makes an excellent large-scale diffuser. Drape it over the window frame when you need to soften intense sunlight. The fabric should be thin enough to transmit light while thick enough to scatter direct rays.
Backgrounds
Your background choice significantly impacts how window light interacts with your jewelry. White backgrounds reflect light back onto jewelry pieces, filling shadows and creating bright, airy images. Black backgrounds absorb light and create dramatic contrast that emphasizes sparkle.
I recommend starting with white poster board or foam board as your background. Position it so it curves gently from horizontal to vertical, creating a seamless sweep that eliminates horizon lines. This classic product photography setup works beautifully with window light.
Neutral gray backgrounds offer versatility and work well for most jewelry types. Gray provides middle-ground contrast that isn’t as bright as white or as dramatic as black. You can create a DIY gray background using gray construction paper or matte-finish gray cardstock.
Light Tent Option
A light tent jewelry setup provides maximum control over window light while maintaining simplicity. Light tents are translucent boxes that surround your jewelry, diffusing light from all sides. They’re especially helpful for highly reflective pieces like polished silver or crystals.
Position your light tent near a window with the open side facing the light source. The tent material diffuses the window light evenly around your jewelry, minimizing reflections and controlling contrast. Tents work particularly well for beginners because they forgive positioning mistakes.
Basic Window Light Setup Step-by-Step
Follow these exact steps to create a professional window light jewelry photography setup. I’ve refined this process through hundreds of jewelry shoots, and it produces consistent results every time.
Step 1: Choose Your Window
Select a window that provides indirect natural light for at least a few hours during your shooting time. North-facing windows are ideal but any direction works with proper diffusion. Test different windows in your space to find which provides the most consistent, soft illumination.
Step 2: Clear Your Workspace
Remove all objects from the table or surface where you’ll photograph. Colored items nearby can reflect onto your jewelry and create unwanted color casts. I use a white tablecloth or white poster board to create a neutral shooting surface.
Step 3: Position Your Background
Set up your background material so it creates a smooth sweep behind your jewelry shooting area. If using poster board or foam board, tape it to the wall behind your table and let it curve gently onto the shooting surface. This eliminates distracting horizon lines in your photos.
Step 4: Place Your Jewelry
Position your jewelry piece on the background, approximately 2-3 feet from the window. This distance provides enough room for proper lighting angles while keeping your subject close enough to the light source. Rotate the piece to find the most flattering angle relative to the window.
Step 5: Add Diffusion
If the window light appears harsh or creates bright spots on your jewelry, add diffusion material. A sheer curtain or tracing paper clipped to the window frame works well. The goal is soft, even illumination without distinct shadows.
Step 6: Position Reflectors
Place a white foam board reflector on the side opposite the window to bounce light back into shadow areas. Start with the reflector at approximately 45 degrees to your jewelry and adjust the angle until shadows are filled without creating competing highlights. You may need a second reflector above or below to fill additional shadows.
Step 7: Test and Adjust
Take test shots and evaluate the lighting. Look for harsh shadows that need fill, bright reflections that need diffusion, and overall exposure balance. Small adjustments to reflector positions make significant differences in the final image quality.
Controlling Reflections and Glare
Reflections and glare present the biggest challenges in jewelry photography window light. Metallic surfaces and gemstones reflect their surroundings, including the camera, photographer, and room. Learning to control these reflections separates amateur from professional jewelry photos.
Understanding Specular Highlights
Specular highlights are the bright, mirror-like reflections that appear on shiny jewelry surfaces. Some specular highlights are desirable—they create sparkle and dimension. Too many become distracting and overwhelm the jewelry’s details.
The goal is managing, not eliminating, specular highlights. Professional jewelry photos typically show controlled highlights that enhance the piece’s form and finish. I aim for 2-3 distinct highlights on metal surfaces that reveal the light source shape without overwhelming the image.
Window light naturally creates larger, softer specular highlights than small artificial lights. This is one reason window light jewelry photography looks more professional—the highlights are gentle and flattering rather than harsh and distracting.
Eliminating Unwanted Reflections
The most problematic reflections show the camera lens, photographer, or room in the jewelry’s reflective surfaces. These reflections look amateur and distract from the piece itself. Several techniques eliminate unwanted reflections.
Position your camera at a 45-degree angle to the jewelry rather than straight on. This angle prevents the lens from reflecting directly in metal surfaces. Use a longer lens or zoom from farther away—this increases the working distance and makes reflections less likely.
Create a shooting tent using white poster board or fabric. Cut a small hole for your lens and shoot through this opening. The white surroundings reflect in the jewelry as clean, neutral highlights rather than distinct camera or room shapes.
Wear dark, neutral clothing when photographing jewelry. Bright colors and patterns can reflect in metal surfaces and gemstone facets. Black or dark gray clothing minimizes unwanted reflections of the photographer.
Using Black Cards for Contrast
Black foam board or black cards placed strategically create dark reflections that define metal edges and add sophistication to jewelry photos. This technique, called “negative fill,” adds contrast and prevents metals from looking flat and featureless.
Position black cards opposite your main light source to create dark reflections that define form. I often use a black card on the shadow side when photographing silver jewelry—the dark reflections make the white metal pop and add dimensionality.
Diffusion for Glare Control
Heavily diffused window light minimizes glare on gemstones and polished metals. If you see bright, distracting hot spots on your jewelry, add additional diffusion material between the window and your setup.
Multiple layers of diffusion create progressively softer light. Start with a single sheer curtain, then add tracing paper or additional fabric as needed. The goal is even illumination without distinct bright spots that overpower the jewelry’s details.
Positioning Jewelry for Best Results
How you position your jewelry relative to the window light dramatically affects the final image. Different jewelry types require different approaches for optimal results.
Ring Photography
Rings photograph best standing upright rather than lying flat. Use ring holders or museum wax to position rings vertically. This angle shows off the band profile and allows light to interact interestingly with the setting.
Position rings so the window light strikes from a 45-degree angle relative to the ring’s face. This lighting creates highlights on metal edges while revealing stone details. Rotate the ring to find the angle that maximizes sparkle and minimizes distracting reflections.
For rings with side details or gallery work, slightly tilt the ring backward to showcase these elements. The three-quarter view reveals more design elements than a straight-on shot while maintaining the ring’s recognizability.
Necklace Photography
Necklaces present unique challenges because of their length and multiple components. Lay necklaces out in natural curves that suggest how they drape when worn. Avoid straight lines that look stiff and artificial.
Pendant necklaces photograph well with the pendant as the focal point and the chain arranged in graceful curves behind it. Position the pendant to catch the window light at an angle that reveals stone brilliance without creating hot spots.
Statement necklaces with multiple elements may need rearrangement to look their best. Space elements evenly and ensure the window light reaches all important components. I sometimes use small pieces of museum wax to position pendant elements exactly where I want them.
Earring Photography
Stud earrings look great photographed in pairs or singly. When shooting pairs, position them close together without touching—this shows consistency while allowing each earring to be clearly seen. Angled earring cards that display studs at a slight angle often photograph better than flat cards.
Dangle earrings and drops should hang naturally to show their true form. Use earring stands or prop cards at an angle to the window light. This allows the earrings to swing slightly and catch highlights that reveal their movement and dimension.
For ear jackets and convertible earrings, photograph all configurations so customers see the versatility. Window light works beautifully for these shots because it’s consistent enough that multiple photos will match seamlessly.
Gemstone Photography
Gemstones require careful positioning to maximize their light return and fire. Faceted stones sparkle most when the light source is large and soft—exactly what window light provides naturally.
Rotate gemstone jewelry slowly while watching through your camera. You’ll see positions where the stone suddenly lights up with internal brilliance. This is the “sweet spot” where the facet geometry catches the window light optimally.
Diamonds and other highly refractive stones often photograph best with slightly brighter window light. Colored gemstones like sapphires and emeralds may prefer softer, more diffused light that reveals color saturation without washing out subtle hues.
Camera Settings for Window Light Jewelry Photography
Proper camera settings maximize the quality of your window light jewelry photos. While natural light provides beautiful illumination, your camera needs the right settings to capture it effectively.
Aperture Selection
Aperture controls depth of field—the amount of your jewelry that appears sharp from front to back. For most jewelry photography, I use apertures between f/8 and f/16 to ensure the entire piece is in focus.
Wide apertures like f/2.8 create very shallow depth of field that can leave portions of your jewelry blurry. This artistic effect works for some types of photography but usually fails for jewelry where customers want to see all details clearly.
Smaller apertures like f/22 provide maximum depth of field but can introduce diffraction softness. I’ve found that f/11 to f/16 offers the best balance of sharpness and depth of field for most jewelry pieces.
ISO Settings
Keep your ISO as low as possible to maintain image quality. I typically use ISO 100 or ISO 200 for window light jewelry photography. These settings provide the cleanest files with minimal digital noise.
If you’re shooting in dim window light conditions, you may be tempted to increase ISO. Resist this urge—high ISO creates noise that’s especially visible in metal surfaces and shadow areas. Instead, use a tripod and longer shutter speeds to maintain low ISO.
Modern cameras handle higher ISO better than older models, but I still recommend staying below ISO 400 whenever possible for professional jewelry photography results.
Shutter Speed Considerations
Shutter speed depends on your lighting conditions and whether you’re using a tripod. With a tripod, you can use slower shutter speeds like 1/30 or even 1/15 second without blur concerns.
If shooting handheld, maintain shutter speeds faster than 1/125 second to prevent camera shake. Window light photography often requires slower speeds, so a tripod becomes essential equipment for professional results.
Your shutter speed should also be fast enough to freeze any movement in the scene. This matters less for stationary jewelry but becomes important if you’re photographing pieces that might sway slightly, like dangling earrings.
White Balance for Window Light
Proper white balance ensures accurate color representation in your jewelry photos. Window light color temperature varies throughout the day—cool in midday, warm during golden hour, and very blue on overcast days.
I recommend shooting in RAW format and adjusting white balance in post-processing. RAW files contain complete color data that allows precise white balance correction without quality loss.
If you must shoot JPEG, use the daylight or cloudy white balance preset rather than auto white balance. These presets provide more consistent results than AWB, which can shift unpredictably between shots.
For accurate metal colors, include a gray card in one test shot. This allows you to set perfect white balance in post by sampling from the neutral gray. Gold and silver tones are particularly sensitive to white balance errors, so this step matters for professional results.
Smartphone Jewelry Photography with Window Light
You don’t need a professional camera to capture stunning jewelry photos with window light. Modern smartphones can produce excellent results when used correctly. I’ve taken many sale-worthy jewelry photos using just my iPhone and natural light.
Smartphone Camera Settings
Use your smartphone’s manual camera mode if available. This allows control over ISO, shutter speed, and focus—critical elements for jewelry photography. If manual mode isn’t available, use the portrait or macro mode which typically handles close-up subjects better than standard photo mode.
Turn off HDR mode for jewelry photography. HDR can create unnatural tonal mapping in metal surfaces and gemstone facets. Standard capture preserves more accurate detail in reflective jewelry surfaces.
Enable grid lines in your camera settings. The rule-of-thirds grid helps with composition and ensures your jewelry is positioned correctly within the frame. Proper composition makes window light jewelry photos look more professional and engaging.
Stabilization Techniques
Smartphone jewelry photography requires steady hands or support. Even slight movement can blur close-up shots. Use a small tripod or prop your phone against books to stabilize it.
If you must shoot handheld, tuck your elbows into your body and hold your breath while pressing the shutter. This technique reduces camera shake significantly. Some smartphones offer burst mode—shooting multiple frames in rapid succession increases your chances of getting one perfectly sharp shot.
The smartphone timer function is your friend for window light jewelry photography. Set a 3-second delay, then tap the shutter and let go completely. This eliminates the vibration caused by touching the screen and results in sharper images.
Smartphone Focus Tips
Tap your smartphone screen to set focus precisely on your jewelry. Most phones allow you to tap to focus and then slide up or down to adjust exposure. For jewelry photography, tap on the most important element—often the center stone or main metal work.
Lock focus and exposure once you’ve found the ideal settings. This prevents the phone from readjusting between shots. On iPhones, a long press on the screen locks AE/AF (auto exposure/auto focus).
Clean your smartphone lens before shooting. Jewelry photography reveals every flaw, including smudges and dust on your camera lens. A quick wipe with a microfiber cloth makes a noticeable difference in image sharpness and clarity.
DIY Diffusers and Reflectors
You don’t need to buy expensive equipment for window light jewelry photography. Household items can serve as effective light modifiers, making this technique accessible to anyone on any budget.
DIY Reflector Options
White foam board from office supply stores costs just a few dollars and works as well as professional reflectors. I buy 20×30 inch boards and keep several on hand for different lighting configurations. Foam board is rigid enough to position precisely yet light enough to move around easily.
Aluminum foil creates a silver reflector with more punch than white. Crumple the foil slightly before smoothing it out—this texture softens the reflected light. Tape foil to cardboard for stiffness, and you have an effective DIY silver reflector.
White poster board offers larger surface area than foam board but flops around more. Tape poster board to cardboard backing or use spring clamps to hold it in position. The larger size is helpful when photographing bigger jewelry pieces or multiple items at once.
Mirrors provide the strongest possible reflection but can be tricky to control. Use small makeup mirrors or mirror tiles strategically for adding bright highlights to specific areas. I sometimes use mirrors to add sparkle to gemstone facets that need extra punch.
DIY Diffuser Materials
Sheer curtains work perfectly as window diffusers. If you don’t have sheer curtains, a white bed sheet draped over the window opening provides effective diffusion. Layer multiple sheets for heavier diffusion on bright, sunny days.
Tracing paper or vellum creates excellent diffusion for small windows. Clip it to the window frame using spring clips or tape. The paper diffuses harsh sun while transmitting plenty of light for jewelry photography.
Parchment paper from your kitchen works similarly to tracing paper. While slightly more expensive, parchment paper is more durable and can be reused multiple times. The translucent quality provides beautiful soft light for jewelry.
White umbrellas can serve as diffusers when positioned between the window and your jewelry. While intended for rain, plain white umbrellas scatter light effectively. This hack works particularly well for larger setups requiring substantial diffusion.
Background Alternatives
White printer paper works for small jewelry pieces. Several sheets taped together create a larger sweep for bigger items. The matte surface minimizes reflections while providing a clean, neutral background.
Fabric scraps from a sewing store offer interesting texture and color options. Velvet creates luxurious backgrounds that work beautifully for high-end jewelry. Linen and cotton provide casual, natural looks suitable for bohemian or artisanal pieces.
Contact paper applied to cardboard creates custom background surfaces. Marble-pattern contact paper mimics expensive stone backgrounds. Wood-grain patterns add warmth and organic feel. Both options cost under $10 and look professional in photos.
Seasonal and Time-of-Day Considerations
Window light quality changes throughout the day and year. Understanding these patterns helps you plan jewelry photography sessions for optimal results.
Seasonal Light Variations
Summer provides the brightest, most consistent window light but often requires heavy diffusion. The high sun angle creates intense illumination that can overwhelm jewelry if not properly softened. I use double layers of diffusion during summer months.
Winter light is softer and lower in angle, often requiring less diffusion. The tradeoff is shorter days and fewer hours of usable light. Plan winter jewelry shoots for midday when light is brightest and most consistent.
Fall and spring provide ideal conditions for jewelry photography window light. The sun angle creates moderate intensity that often requires minimal diffusion. These seasons are my favorite for jewelry photography because the light is naturally balanced and forgiving.
Daily Light Patterns
Midday light (10am to 2pm) is brightest and most consistent. This window provides the longest shooting time and most predictable results. If you only have limited time for jewelry photography, schedule sessions during midday hours.
Morning light tends to be cooler in color temperature before warming as the sun rises. This gradual change can cause white balance shifts during long shoots. Take test shots periodically and adjust white balance as needed throughout the session.
Afternoon light becomes progressively warmer as it approaches golden hour. This warm glow can enhance gold jewelry tones but may require white balance adjustment for accurate color representation. The low angle also creates longer shadows that need careful fill management.
Weather Impact
Overcast days provide the easiest, most forgiving window light for jewelry photography. Clouds act as giant diffusers, creating perfectly soft illumination. I schedule important jewelry shoots for cloudy days whenever possible.
Clear sunny days require careful management but can produce stunning results. The challenge is preventing direct sun from hitting your setup. Heavy diffusion and strategic positioning make sunny day jewelry photography possible and sometimes spectacular.
Partly cloudy conditions create rapidly changing light as clouds pass the sun. Watch your exposure carefully during these conditions and be prepared to adjust settings quickly between shots. The variability makes partly cloudy days more challenging but also offers opportunities for different looks within a single session.
Troubleshooting Common Window Light Issues
Even with careful planning, problems arise during window light jewelry photography. I’ve encountered every issue below and developed reliable solutions through extensive trial and error.
Harsh Shadows Problem
Symptom: Deep, dark shadows on the side opposite your window that hide jewelry details.
Solution: Add white reflector boards on the shadow side to bounce light back into dark areas. Position the reflector at a 45-degree angle and adjust until shadows soften. Use multiple reflectors if needed—one on the side and another from above or below.
For persistent shadow problems, move your jewelry closer to the window. The closer your subject is to the light source, the softer the shadows become. Distance is one of the most effective tools for shadow control in window light photography.
Bright Spots and Hot Spots
Symptom: Overly bright reflections on metal surfaces that blow out detail and distract from the jewelry.
Solution: Add diffusion material between the window and your setup. Start with a single layer and add more as needed until bright spots soften. Multiple layers of sheer curtains work well for progressive diffusion control.
Reposition your jewelry slightly relative to the window. Small angle changes dramatically affect reflections. Rotate the piece a few degrees at a time while watching through your camera until bright spots move to less problematic positions or disappear entirely.
Yellow Color Cast
Symptom: Jewelry photos look unnaturally warm, with yellow or orange tones especially in metal surfaces.
Solution: Adjust white balance to cooler settings. If shooting RAW, correct in post-processing by adjusting the temperature slider toward blue. For JPEG shooters, use the cloudy or daylight preset instead of auto white balance.
Yellow color cast often results from mixed lighting sources. Turn off all indoor lights and close curtains on windows with different color temperatures. Use only one window as your light source to ensure consistent color throughout the photo.
Motion Blur and Camera Shake
Symptom: Jewelry looks soft or blurry even though it appeared sharp on your camera screen.
Solution: Use a tripod or other stable support. If a tripod isn’t available, prop your camera on books or use a bag of rice as a makeshift support. Enable your camera’s self-timer or use a remote trigger to eliminate vibration from pressing the shutter button.
Increase your ISO slightly if necessary to achieve faster shutter speeds. While low ISO is ideal, a sharp photo at ISO 400 beats a blurry photo at ISO 100. Modern cameras handle moderately high ISO quite well, so don’t hesitate to increase ISO slightly if needed for sharpness.
Inconsistent Lighting Across Series
Symptom: Photos in a series look different from each other due to changing light conditions.
Solution: Work efficiently during your brightest, most consistent lighting hours. Midday provides the longest window of stable light. Avoid shooting during periods when light changes rapidly, such as sunrise and sunset.
For critical consistency, take a reference shot of your setup before beginning. If light changes during the session, you can refer to this reference to adjust your position or settings to match the original look. This technique is especially important for catalog photography where all images must match.
Dark Photos
Symptom: Images appear underexposed even with proper camera settings for the available light.
Solution: Move your jewelry closer to the window. Every foot closer dramatically increases light intensity. If proximity isn’t possible, add more white reflector boards to bounce available light back onto your subject.
Check that your window isn’t blocked by trees or buildings outside. Sometimes what appears to be adequate window light is actually being obstructed. If possible, temporarily remove obstructions or choose a different window for your photography session.
Frequently Asked Questions
How to light jewelry for photography?
The best approach for jewelry photography lighting is using soft, diffused natural light from a window. Position your jewelry 2-3 feet from a north-facing window or any window receiving indirect sunlight. Add white foam board reflectors to fill shadows and create even illumination. Avoid direct sunlight which creates harsh highlights and deep shadows. The combination of indirect window light and white reflectors produces professional results without expensive equipment.
What is the best light for jewelry photography?
Indirect natural light from a north-facing window is the best light source for jewelry photography. This soft, diffused illumination enhances sparkle without harsh glare and accurately renders metal colors. Window light provides the large, soft light source that jewelry requires while remaining accessible and free. Professional studio lighting can replicate window light but requires significant investment in softboxes, diffusers, and continuous lights. For most photographers, window light produces superior results with minimal equipment.
What is the 3 lighting rule?
The 3-point lighting rule refers to using three light sources for professional photography: key light, fill light, and backlight. In jewelry photography with window light, the window serves as your key light. A white reflector provides fill light to soften shadows. A backlight or rim light separates your jewelry from the background. This three-light setup creates dimension while maintaining soft, flattering illumination. Window light naturally follows this principle with the sun as key light and strategically placed reflectors for fill and separation.
What is the 20-60-20 rule in photography?
The 20-60-20 rule applies to outdoor photography lighting: avoid shooting within 20 degrees of the horizon when the sun is at low angles, shoot during the middle 60 degrees when the sun is higher and more consistent, and avoid shooting again during the final 20 degrees. For window light jewelry photography, this translates to avoiding times when direct sun enters your window. Instead, shoot during midday hours when indirect light provides consistent, soft illumination for your jewelry photos.
How do you reduce glare in jewelry photography?
Reduce glare by using soft, diffused window light instead of direct sun. Add sheer curtains or tracing paper between the window and your jewelry setup. Position jewelry at an angle to the window rather than facing it directly. Use white reflectors to fill shadows without creating competing highlights. Black foam boards placed strategically can reduce unwanted bright spots. For highly reflective pieces, a light tent or diffusion tent surrounds the jewelry with soft light from all directions, minimizing glare while maintaining sparkle.
What camera settings are best for jewelry photography?
Optimal camera settings for jewelry photography with window light include aperture f/11 to f/16 for adequate depth of field, ISO 100-200 for clean files, and shutter speed adjusted based on available light. Use a tripod to allow slower shutter speeds without blur. Set white balance to daylight or cloudy preset when shooting JPEG, or shoot RAW and adjust in post. Use manual focus for precise control, especially with shallow depth of field at close focusing distances. These settings capture maximum detail while maintaining image quality.
Can you photograph jewelry with just window light?
Yes, window light alone is sufficient for professional jewelry photography. In fact, many professional jewelry photographers prefer natural window light for its softness and color accuracy. The key is using indirect light rather than direct sun, and adding white reflectors to control shadows. While artificial lights provide consistency, they require significant investment and expertise to produce results as natural-looking as window light. With proper positioning and a few simple modifiers like reflectors and diffusers, window light produces stunning jewelry photos.
What time of day is best for jewelry photography?
Midday hours from 10am to 2pm provide the most consistent window light for jewelry photography. During these hours, indirect light remains relatively steady in intensity and quality, allowing longer shooting sessions without constant adjustments. Overcast days extend this window further because clouds maintain soft light throughout the day. Avoid early morning and late afternoon when low sun angles create rapidly changing conditions and potential direct sun issues. For most reliable results, schedule jewelry photography sessions during midday.
How do you position jewelry for window light photos?
Position jewelry 2-3 feet from the window on a stable surface. The piece should be at approximately a 45-degree angle to the window for optimal dimension and highlight placement. Rotate the jewelry while viewing through your camera to find the angle that maximizes sparkle and minimizes distracting reflections. For rings and earrings, display them upright rather than flat to show their three-dimensional form. Necklaces should drape naturally to suggest how they look when worn. Small adjustments to position dramatically affect how window light interacts with your jewelry.
What reflector is best for jewelry photography?
White foam board reflectors are ideal for jewelry photography because they provide soft, neutral fill light. Foam board is inexpensive, rigid enough to position precisely, and available in sizes perfect for small-scale jewelry work. White reflectors produce natural-looking fill without the harshness sometimes created by silver reflectors. For most jewelry photography window light setups, two 20×30 inch white foam boards provide sufficient control. One fills shadows from the side opposite the window, while the second can add fill from above or below as needed.
Conclusion
Learning how to light jewelry for product photography using window light has been one of the most valuable skills in my photography journey. The techniques I’ve shared have helped me capture professional jewelry photos without investing thousands of dollars in studio equipment.
Window light jewelry photography works because it harnesses the soft, diffused natural light that makes jewelry sparkle authentically. By understanding how to choose the right window, position reflectors effectively, and control reflections, you can achieve results that rival professional studio lighting. The beauty of window light is its accessibility—anyone with a window and basic materials can create stunning jewelry photos.
Start practicing these techniques with simple pieces and gradually work up to more challenging jewelry types. Pay attention to how window light changes throughout the day and season, and adapt your setup accordingly. With patience and experimentation, you’ll develop an intuitive sense for how to position jewelry for optimal window light illumination.
Whether you’re an Etsy seller looking to improve product photos, a jewelry maker documenting your creations, or a photographer building your skills, window light provides a professional foundation that grows with your expertise. The principles outlined in this guide will serve you well as you continue your journey in jewelry photography window light techniques.