Recording video with poor audio is one of the fastest ways to make viewers click away. I learned this the hard way when my first few YouTube videos had muffled, distant sound that made even great visuals feel amateurish. The built-in microphone on your camera simply cannot deliver the audio quality your content deserves. Whether you are filming interviews, vlogs, or documentary footage, learning how to record clean audio with an external microphone on your camera transforms your video production quality immediately.
In this guide, I will walk you through everything you need to know about connecting and using external microphones with your camera. You will learn which microphone type suits your recording situation, how to set up your camera for optimal audio capture, and the specific techniques that professional videographers use to get broadcast-quality sound. By the end, you will have a complete understanding of the entire process from microphone selection to troubleshooting common issues.
Understanding Camera Audio Inputs and Connections
Before you can record clean audio with an external microphone on your camera, you need to understand what connection options your camera offers. Most consumer and prosumer cameras feature a 3.5mm microphone input, which is the small round jack similar to headphone ports on phones and computers. This connection type is standard on DSLR and mirrorless cameras from Canon, Sony, Nikon, and Fujifilm. Some cameras also include a 3.5mm headphone output for monitoring audio while recording.
Professional video cameras and cinema cameras often include XLR inputs, which are the three-pin locking connectors used in broadcast and studio environments. XLR connections provide better signal quality and are more secure than 3.5mm jacks. If your camera lacks XLR inputs but you want to use professional XLR microphones, you can add an external preamp or audio interface that connects to your camera’s 3.5mm input.
Newer cameras are increasingly featuring USB-C ports that can accept digital audio from compatible USB microphones. This is particularly common on newer Sony and Canon models. However, compatibility varies significantly between camera models, so always check your camera’s manual before purchasing a USB microphone for direct camera connection.
TRS vs TRRS Cables: Why This Matters
One of the most common sources of frustration when connecting external microphones to cameras is the difference between TRS and TRRS cables. TRS stands for Tip-Ring-Sleeve and has three conductive sections separated by two insulating bands. TRRS adds a fourth conductor (Tip-Ring-Ring-Sleeve) with three insulating bands. Cameras use TRS inputs for microphones, while smartphones and some consumer devices use TRRS.
If you plug a TRRS microphone (like one designed for a smartphone) into a camera’s TRS input, it typically will not work. The wiring configuration differs between the two standards, causing the microphone signal to route incorrectly. I have seen countless forum posts from frustrated users who could not figure out why their microphone produced no sound. The solution is often as simple as using the correct TRS cable or adding a TRRS-to-TRS adapter.
Plug-in Power and Phantom Power Explained
Some microphones require power to operate, and understanding how your camera provides this power is essential. Plug-in power is a low-voltage power supply (typically 2-3 volts) that cameras send through the 3.5mm microphone jack to power small condenser microphones. Most shotgun and lavalier microphones designed for camera use rely on plug-in power.
Phantom power is a higher voltage (48 volts) used by professional XLR condenser microphones. Consumer cameras never provide phantom power through their 3.5mm jacks. If you want to use a professional condenser microphone that requires phantom power, you need an external preamp or field recorder between the microphone and your camera. Dynamic microphones do not require any external power and work directly with camera inputs.
Types of External Microphones for Camera Recording
Choosing the right microphone type is crucial when you want to record clean audio with an external microphone on your camera. Each microphone design excels in specific recording situations, and using the wrong type can result in poor audio quality regardless of your camera settings. Let me break down the main categories and when to use each one.
Shotgun Microphones: Directional Audio Capture
Shotgun microphones are the most popular choice for on-camera audio recording. These highly directional microphones pick up sound primarily from the direction they are pointing while rejecting sound from the sides and rear. This directional quality, called a supercardioid or hypercardioid polar pattern, makes shotgun mics ideal for focusing on your subject while minimizing background noise.
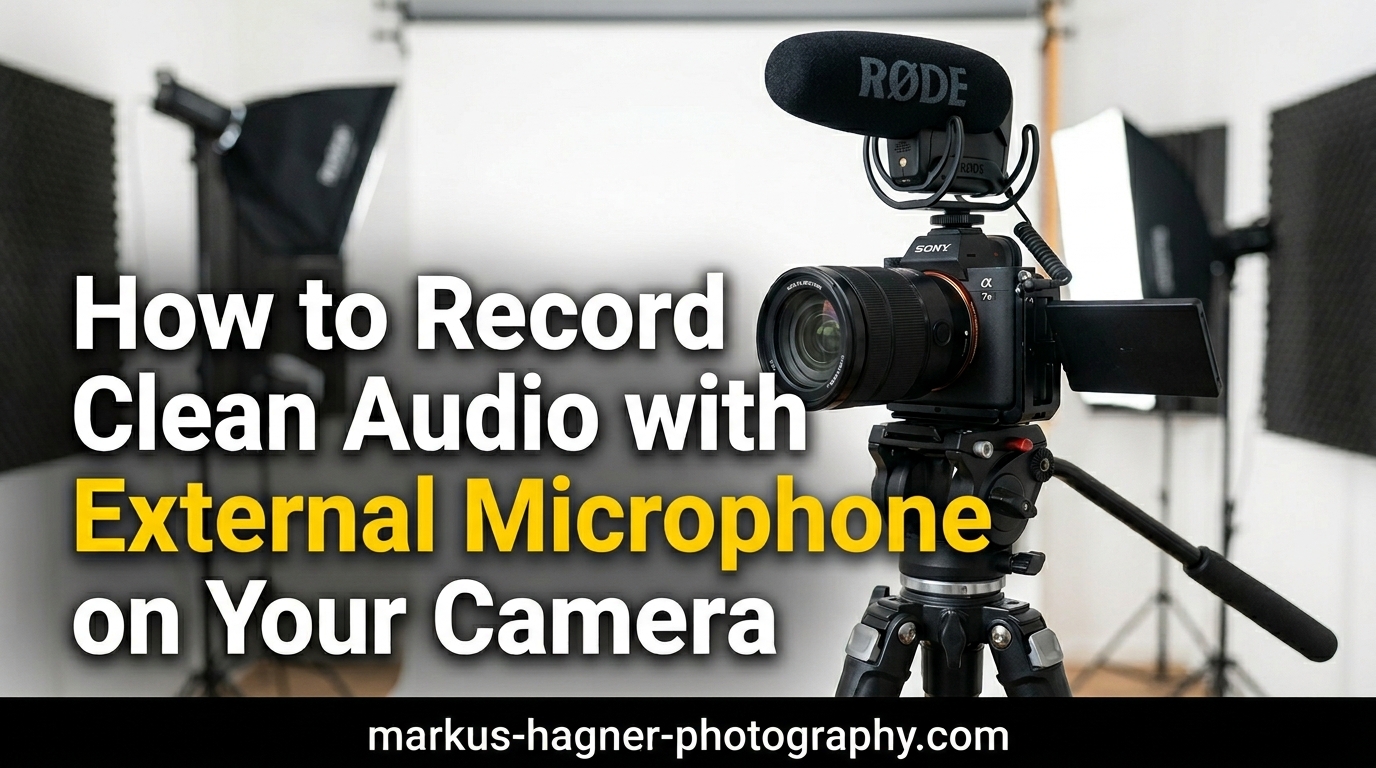
I use shotgun microphones for most of my run-and-gun videography work. They mount directly to your camera’s hot shoe and connect via a short 3.5mm cable. The close positioning to the camera means they capture audio from whatever the lens is pointed at. For interviews, vlogs, and documentary work where the camera is close to the subject, a quality shotgun microphone delivers excellent results.
Shotgun microphones range from budget options under $50 to professional models costing several hundred dollars. The main differences are in build quality, noise floor (how much hiss the microphone itself introduces), and directionality. Rode, Sennheiser, and Audio-Technica produce reliable shotgun microphones that work well with camera setups.
Lavalier Microphones: Close-Mic Clarity
Lavalier microphones, also called lapel mics or clip-on mics, are tiny microphones that attach directly to your subject’s clothing near their mouth. Because they position so close to the sound source, lavalier microphones capture incredibly clean audio with minimal background noise. The short distance between mouth and microphone means you get strong signal levels without needing high gain settings that could introduce noise.
For interviews, presentations, and any situation where your subject remains relatively stationary, lavalier microphones are often the best choice. Wired lavaliers connect directly to your camera via a long cable, while wireless systems transmit the audio signal to a receiver mounted on your camera. Wireless systems provide more freedom of movement but cost significantly more and can suffer from interference.
The main drawback of lavalier microphones is visibility. If you are filming a scene where the microphone would be distracting, you need to hide it under clothing, which can introduce rustling noises. Professional sound recordists use specialized techniques and accessories to minimize clothing noise when hiding lavaliers.
Handheld Microphones: Reporter Style Recording
Handheld microphones are the classic reporter-style microphones you see in news broadcasts and field interviews. These are typically dynamic microphones with a cardioid polar pattern, meaning they pick up sound from the front while rejecting sound from the rear. The interviewer holds the microphone and positions it near whoever is speaking.
Handheld microphones work well for man-on-the-street interviews and situations where multiple people take turns speaking. They are rugged, reliable, and do not require any power source. However, they require someone to hold and position the microphone, which limits their usefulness for solo shooters or scenarios where a visible microphone would be inappropriate.
Wireless Microphone Systems
Wireless microphone systems combine a transmitter (which the subject wears with a lavalier or handheld microphone) and a receiver (which mounts on your camera). The audio transmits wirelessly from subject to camera, allowing complete freedom of movement. This is essential for documentary work, event videography, and any situation where running cables would be impractical.
Modern wireless systems operate on various frequency bands and use digital transmission to minimize interference. Entry-level wireless systems work well for short distances indoors, while professional systems can maintain clean audio over hundreds of feet outdoors. The trade-off for wireless convenience is higher cost, potential for interference, and the need to manage batteries in both transmitter and receiver.
Understanding Polar Patterns
A microphone’s polar pattern describes its sensitivity to sound from different directions. Understanding polar patterns helps you choose the right microphone for your recording situation and position it correctly for optimal audio capture.
Cardioid microphones pick up sound primarily from the front, with sensitivity decreasing toward the sides and maximum rejection at the rear. This pattern works well for most single-subject recording situations. Supercardioid and hypercardioid patterns are more directional than cardioid, with narrower pickup angles but small areas of sensitivity at the rear. Shotgun microphones typically use these patterns.
Omnidirectional microphones pick up sound equally from all directions. While this might seem undesirable for video work, omnidirectional lavalier microphones are actually quite common because they are less sensitive to head movements and positioning errors. The close proximity to the mouth still provides good rejection of distant background sounds. Bidirectional microphones pick up sound from front and rear while rejecting sound from the sides, which is useful for two-person interviews with a single microphone.
Condenser vs Dynamic Microphones
The terms condenser and dynamic refer to how a microphone converts sound waves into electrical signals. Each type has distinct characteristics that affect their suitability for camera recording.
Condenser microphones use a thin, electrically charged diaphragm that responds to sound pressure waves. They are highly sensitive and capture detailed, natural sound across a wide frequency range. Most shotgun microphones, lavalier microphones, and studio microphones are condensers. The downside is that they require power (either plug-in power, phantom power, or internal batteries) and can be more fragile than dynamic microphones.
Dynamic microphones use electromagnetic induction, with a diaphragm attached to a coil moving within a magnetic field. They are rugged, reliable, and require no external power. Dynamic microphones handle high sound pressure levels well, making them ideal for loud environments. However, they are less sensitive than condensers and may require more gain, which can introduce noise when used with camera preamps.
How to Connect an External Microphone to Your Camera
Connecting an external microphone to your camera involves several steps, and skipping any of them can result in no audio or poor-quality recordings. Follow this process carefully to ensure your microphone works correctly every time.
Step 1: Check Your Cable Compatibility
Before connecting anything, verify that your microphone cable matches your camera’s input type. Most cameras with 3.5mm microphone inputs require TRS cables. If your microphone came with a TRRS cable (common with microphones designed for smartphones), you need either a TRS replacement cable or a TRRS-to-TRS adapter. Look at the connector: TRS has two black insulating rings separating three metal sections, while TRRS has three rings separating four sections.
For XLR microphones, you need an XLR-to-3.5mm adapter cable or an external preamp with XLR inputs and a 3.5mm output. Professional setups often use a dedicated field recorder or preamp between the microphone and camera to provide phantom power and better preamp quality.
Step 2: Power Off Your Camera Before Connecting
While many cameras handle hot-plugging microphones without issues, I recommend powering off your camera before connecting or disconnecting any external audio equipment. This prevents potential damage from static electricity and ensures the camera properly detects the external microphone when powered on. It only takes a few seconds and eliminates a potential source of problems.
Step 3: Connect the Microphone Cable
Insert the microphone cable firmly into your camera’s microphone input. The jack is usually labeled with a microphone icon or the word “MIC.” Do not force the connector; it should slide in smoothly with mild resistance. If you encounter significant resistance, check that you are using the correct jack (microphone input, not headphone output) and that the connector is properly aligned.
For on-camera shotgun microphones, mount the microphone in your camera’s hot shoe and connect the short 3.5mm cable from the microphone to the camera’s mic input. Route the cable neatly to avoid snagging on anything during use.
Step 4: Power On and Check Microphone Power
Power on your camera and check whether your microphone requires external power. Active microphones (most condensers) need power from either the camera’s plug-in power, internal batteries, or phantom power from an external preamp. If your microphone has an internal battery, insert a fresh battery and switch the microphone on.
Some cameras allow you to enable or disable plug-in power in the audio menu. Check your camera’s manual for this setting if your microphone is not working. When in doubt, enable plug-in power for any active microphone.
Step 5: Verify the Connection in Your Camera Menu
Navigate to your camera’s audio settings menu and verify that the external microphone is detected. Many cameras show an icon indicating whether the internal or external microphone is active. Some cameras automatically switch to external microphone input when a cable is inserted, while others require you to select the external input manually in the menu.
Step 6: Perform a Test Recording
Never assume your audio is working correctly without testing. Record a short test clip while speaking or making sounds at the expected distance from your microphone. Play back the recording with headphones to verify audio quality, level, and clarity. This simple step has saved me from numerous recordings that would otherwise have been ruined by unnoticed audio problems.
Camera Audio Settings for Clean Recording
Getting clean audio with an external microphone on your camera requires proper configuration of your camera’s audio settings. Most cameras default to automatic audio settings that prioritize convenience over quality. Taking manual control of your audio settings gives you consistently better results.
Disable Automatic Gain Control (AGC)
Automatic Gain Control, or AGC, is a feature that automatically adjusts audio levels based on the input signal. While this sounds helpful, AGC often causes more problems than it solves. When things get quiet, AGC boosts the gain, amplifying background noise and hiss. When loud sounds occur, AGC reduces gain, causing audio levels to pump up and down in an unnatural way.
Most cameras have an option to disable AGC and switch to manual audio level control. Look for this setting in your camera’s audio menu, often labeled as “Auto Level” or “AGC.” Turn it off and take manual control of your audio levels. The consistent, stable audio levels you get from manual control are worth the small amount of extra effort.
Some cameras without manual audio control can still have AGC disabled through workarounds. Certain external microphones include AGC disable features that trick the camera into maintaining constant levels. If your camera lacks manual audio control, consider using an external preamp or field recorder that provides manual gain adjustment.
Manual Audio Level Settings
Setting proper audio levels manually gives you control over your recording quality. The goal is to capture audio that is loud enough to be clear without distorting. Audio levels are measured in decibels (dB), with 0 dB representing the maximum level before digital clipping occurs.
Aim to keep your average audio levels around -12 dB to -6 dB on your camera’s level meters. This provides adequate headroom for unexpected loud sounds while maintaining a strong signal. Peaks can briefly reach -3 dB, but anything approaching 0 dB will cause distortion that cannot be fixed in post-production.
Most cameras display audio levels as a meter with green, yellow, and red sections. Green indicates safe levels, yellow warns of approaching the limit, and red indicates clipping or distortion. Keep your levels primarily in the green with occasional peaks into the yellow. Never let levels reach the red section during normal recording.
Using Audio Limiters
Some cameras include audio limiters that prevent sudden loud sounds from causing distortion. A limiter automatically reduces gain when audio approaches the clipping point. This can be useful for unpredictable situations where loud sounds might occur unexpectedly.
However, limiters are not a substitute for proper gain staging. Heavy limiting can cause audible pumping effects as the gain rapidly reduces and recovers. Use limiters as a safety net, not as your primary level control method. Set your gain so that normal audio stays well below the limiting threshold.
Camera-Specific Audio Settings
Different camera brands organize their audio settings differently. Here are some specific considerations for common camera systems:
Canon cameras typically place audio settings in the main menu under a camera or sound icon. Look for “Sound Recording” or “Audio Recording” settings. Canon DSLRs and mirrorless cameras usually offer manual level control with a 64-step level adjustment. Some Canon cameras require you to enable “Manual Audio” before you can adjust levels.
Sony cameras often have audio settings in the Setup menu or a dedicated Audio menu on newer models. Sony provides real-time audio level displays during recording and typically offers more granular level control than Canon. Some Sony cameras also include wind noise reduction filters that can be enabled or disabled.
Nikon cameras place audio settings in the Movie Shooting Menu. Look for “Microphone Sensitivity” to adjust levels manually. Nikon typically offers fewer audio adjustment options than Canon or Sony, but the essential manual level control is available on most recent models.
Fujifilm cameras have audio settings in the Shooting Setting menu under “Movie Setting.” Fujifilm offers manual level control on most X-series cameras, with level adjustment in dB increments. Some Fujifilm cameras have experienced issues with external microphone detection, so always test your setup before important recordings.
Recording Techniques for Clean Audio
Even with the right microphone and proper camera settings, your recording technique significantly impacts audio quality. These practical tips will help you capture the cleanest possible audio with your external microphone setup.
Monitor Your Audio with Headphones
Recording without headphone monitoring is like shooting video without looking at your screen. You simply cannot know what your audio sounds like during recording without listening in real-time. Connect headphones to your camera’s headphone output and monitor audio throughout your recording session.
Closed-back headphones work best for monitoring because they block external sound, allowing you to focus on the recorded audio. Listen for unwanted background noise, distortion, hum, or any sounds that should not be present. If you hear problems, stop recording and address the issue before continuing.
I cannot count the number of times headphone monitoring has saved my recordings. From unexpected background conversations to cable interference, headphones reveal problems you would never notice otherwise. Make headphone monitoring a non-negotiable part of your recording workflow.
Optimal Microphone Placement
Microphone placement is one of the most important factors in audio quality. As a general rule, closer is better. The inverse square law in audio states that sound intensity decreases with the square of the distance. Doubling the distance between your microphone and sound source reduces the audio level by 6 dB, which significantly impacts quality.
For shotgun microphones mounted on your camera, this means getting physically closer to your subject. The camera-to-subject distance determines the microphone-to-subject distance for on-camera microphones. If you need wider framing but want better audio, consider using an off-camera microphone positioned closer to the subject.
Lavalier microphones should be positioned on the chest, about 6-8 inches below the chin. Clip the microphone to clothing where it will not rub against fabric or jewelry. Position the microphone head upward toward the mouth for optimal sound capture.
The 3:1 Rule for Multiple Microphones
When using multiple microphones, the 3:1 rule helps prevent phase cancellation problems that cause thin, hollow sound. The rule states that the distance between microphones should be at least three times the distance from each microphone to its sound source.
For example, if you position a microphone 1 foot from your subject, the next microphone should be at least 3 feet away from the first microphone. This prevents the same sound from reaching multiple microphones at slightly different times, which causes phase issues when mixed together.
If you cannot follow the 3:1 rule due to space constraints, use only one microphone or position microphones so their polar patterns minimize overlap. Supercardioid and hypercardioid patterns help in these situations by focusing pickup on specific areas.
Wind Noise Reduction
Wind noise can completely ruin outdoor recordings. Even light breezes create low-frequency rumble and buffeting sounds that overwhelm your desired audio. Wind protection is essential for any outdoor recording situation.
Most shotgun microphones include a foam windscreen that provides basic protection for indoor use and very light outdoor breezes. For outdoor recording, you need a more substantial windscreen, often called a “deadcat” or “wind muff.” These furry covers significantly reduce wind noise while allowing sound to pass through to the microphone.
For extreme wind conditions, consider a full blimp-style windscreen that completely encloses the microphone in a basket with a fur cover. These are standard equipment for professional location recording and can handle winds up to 30 mph or more.
Recording Environment Considerations
Your recording environment has a major impact on audio quality. Hard, reflective surfaces like walls, floors, and ceilings cause sound reflections that can make audio sound hollow or echoey. Soft materials like carpet, curtains, and furniture absorb sound and reduce reflections.
When possible, record in rooms with soft furnishings or add temporary sound absorption. Closing curtains, placing rugs on hard floors, and positioning subjects away from bare walls all improve audio quality. Even hanging a blanket behind the camera can help reduce reflections.
Avoid recording near noise sources like air conditioning vents, refrigerators, computer fans, and traffic. These sounds may seem quiet during recording but become noticeable and distracting in the final video. Turn off what you can and position your microphone to minimize pickup of unavoidable noise sources.
Pre-Recording Audio Checklist
Before every recording session, run through this checklist to ensure clean audio capture:
1. Connect your external microphone securely and verify the cable type matches your camera input.
2. Check that your microphone has fresh batteries or is receiving power from your camera.
3. Verify in your camera menu that the external microphone is selected as the audio input.
4. Disable automatic gain control and switch to manual audio levels.
5. Set audio levels so normal speech peaks around -12 dB to -6 dB.
6. Connect headphones and verify you can monitor audio during recording.
7. Record a test clip and play it back to confirm audio quality and levels.
8. Check for wind if recording outdoors and attach appropriate wind protection.
9. Scan the environment for noise sources and adjust positioning as needed.
10. Confirm you have adequate storage space for your recording session.
Troubleshooting Common Audio Issues
Even with careful preparation, audio problems can occur. Here are the most common issues and how to resolve them.
External Microphone Not Working: No Sound
If your external microphone produces no sound, start by checking the cable connection. Ensure the cable is fully inserted into both the microphone and camera. Try removing and reconnecting the cable with the camera powered off. If the problem persists, test with a different cable to rule out a faulty connection.
Verify that you are using the correct cable type. TRRS cables designed for smartphones will not work with camera TRS inputs without an adapter. Check the connector visually: TRS has two black rings, TRRS has three.
Check whether your microphone requires power. Condenser microphones need either plug-in power from the camera, phantom power from an external preamp, or internal batteries. If your microphone has a battery compartment, insert a fresh battery and verify the power switch is on.
Navigate to your camera’s audio menu and confirm that external microphone input is selected. Some cameras require manual selection of the external input even when a cable is connected. Look for a menu option labeled “External Mic,” “Mic Input,” or similar.
Distorted or Clipping Audio
Audio distortion usually results from recording levels set too high. If your audio levels reach 0 dB during recording, digital clipping occurs, creating harsh, unpleasant distortion that cannot be removed in post-production. Lower your gain settings until peaks stay below -6 dB.
If distortion occurs even with low gain settings, the problem might be at the microphone itself. Some microphones have built-in gain pads or sensitivity switches. Check your microphone for any level controls and reduce its output level if available.
For very loud sound sources, you may need an inline attenuator (also called a pad) between the microphone and camera. These reduce the signal level before it reaches your camera, preventing distortion from hot microphone signals.
Low Audio Levels
Low audio levels requiring significant boost in post-production result in increased noise and reduced quality. First, verify that automatic gain control is disabled. AGC sometimes sets levels too conservatively, resulting in quiet recordings.
Increase your manual gain settings until audio peaks reach -12 dB to -6 dB. If maximum gain still produces low levels, your microphone may not be receiving adequate power or may have compatibility issues with your camera’s preamp.
Consider using an external preamp between your microphone and camera. External preamps typically provide cleaner gain than camera preamps, allowing higher levels without introducing hiss. This is especially helpful with dynamic microphones that produce lower output levels than condensers.
Intermittent Connection Issues
If your audio cuts in and out during recording, you likely have a loose or damaged connection. Inspect your cable for damage, particularly near the connectors where bending stress occurs. Try a different cable to isolate whether the problem is cable-related.
Check the microphone input jack on your camera for debris or damage. Compressed air can clean dust from the jack, but visible damage requires professional repair. Avoid putting stress on cables during recording by using strain relief or cable management.
For wireless systems, interference and dropout issues often result from frequency conflicts or range limitations. Change to a different frequency channel and maintain line-of-sight between transmitter and receiver. Keep the receiver as close as practical to the transmitter.
Background Noise and Hiss
All audio recordings contain some level of noise, but excessive hiss indicates a problem with gain structure or equipment quality. Camera preamps are often the weakest link in the audio chain, introducing noise when high gain is required.
Reduce hiss by positioning your microphone closer to the sound source, allowing lower gain settings. An external preamp or field recorder with better preamps than your camera can significantly reduce noise floor. Record at 24-bit depth when available, as this provides more dynamic range and lower noise than 16-bit recording.
Frequently Asked Questions
How to record audio with an external mic?
To record audio with an external mic, first connect your microphone to your camera’s 3.5mm input using a compatible TRS cable. Disable automatic gain control in your camera menu and switch to manual audio levels. Set levels so peaks reach -12 dB to -6 dB, connect headphones to monitor audio, and always record a test clip before your main session to verify everything works correctly.
How to record clean audio?
Recording clean audio requires getting your microphone close to the sound source, using manual gain control instead of automatic settings, monitoring with headphones throughout recording, and choosing an appropriate recording environment with minimal background noise and reflective surfaces. Wind protection is essential for outdoor recording.
How to use an external mic on a camera?
Using an external mic on a camera involves connecting the microphone to your camera’s mic input, verifying the connection in your camera menu, disabling automatic gain control, setting proper manual levels, and monitoring audio with headphones. Always test your setup with a short recording before important sessions.
What is the 3 to 1 rule in micing?
The 3 to 1 rule states that when using multiple microphones, the distance between microphones should be at least three times the distance from each microphone to its sound source. For example, if a microphone is 1 foot from your subject, the next microphone should be at least 3 feet away from the first microphone. This prevents phase cancellation problems that cause thin, hollow sound when audio from multiple microphones is mixed together.
Conclusion
Recording clean audio with an external microphone on your camera transforms your video production quality from amateur to professional. The process involves understanding your camera’s audio inputs, selecting the right microphone type for your recording situation, connecting equipment properly, configuring camera audio settings for manual control, and using proper recording techniques. Each step matters, and skipping any of them can result in poor audio that undermines otherwise excellent video.
The most important takeaways are these: always use an external microphone instead of your camera’s built-in mic, disable automatic gain control and set levels manually, monitor your audio with headphones during recording, and test your setup before every important session. With these fundamentals in place, you will capture clean, clear audio that matches the quality of your visuals.
Start practicing these techniques with whatever equipment you have available. Even an inexpensive external microphone properly connected and configured will dramatically improve your audio over built-in camera microphones. As you gain experience, you can upgrade your equipment and refine your technique, but the core principles remain the same. Clean audio is within reach for any videographer willing to invest the time to learn and apply these methods.