Getting cinematic drone footage is not just about having an expensive drone. It is about understanding and using the right camera settings. I have spent years filming with drones, and the difference between amateur-looking footage and professional aerial video comes down to how you configure your camera settings. In this guide on drone camera settings for cinematic aerial video, I will walk you through every setting you need to master for smooth, film-quality footage.
When I first started flying drones, my footage looked jerky and amateurish. The problem was not my flying skills. It was my settings. Once I understood the relationship between shutter speed, frame rate, and motion blur, everything changed. Now I want to share what I learned so you can skip the frustrating trial-and-error phase.
What Makes Drone Footage Cinematic?
Cinematic drone footage has a distinctive, film-like quality that sets it apart from typical home videos. The key characteristics are smooth motion blur, rich colors, and balanced exposure. When your footage looks cinematic, it flows naturally from one frame to the next without the stuttery, robotic feel that plagues poorly configured cameras.
The secret lies in controlling motion blur. Movies shot on film have a natural blur between frames that our brains interpret as smooth, continuous motion. Recreating this effect with your drone requires specific settings working together. The relationship between your frame rate and shutter speed is the foundation of cinematic video, and understanding this connection will transform your aerial footage.
Professional aerial videographers also prioritize dynamic range. This means capturing detail in both bright skies and darker ground areas simultaneously. By using the right picture profiles and exposure techniques, you preserve maximum information for color grading in post-production.
Frame Rate Selection: 24fps vs 30fps vs 60fps
Your frame rate is one of the most important drone camera settings for cinematic aerial video because it directly affects how motion appears in your footage. Each frame rate serves a different purpose, and choosing the right one depends on your creative goals and final output platform.
24fps (frames per second) delivers the classic film look that most people associate with cinema. This frame rate creates the most natural motion blur and gives footage a dreamy, movie-like quality. I use 24fps for most of my aerial cinematography work because it produces the most aesthetically pleasing results for standard video projects.
30fps offers a slightly smoother, more realistic look that works well for documentary-style content and corporate videos. This frame rate is standard for television broadcasts in North America. If your footage will primarily appear on YouTube or social media platforms, 30fps provides a good balance between cinematic feel and smooth motion.
60fps and higher frame rates are essential for slow-motion footage. When you record at 60fps and play back at 30fps or 24fps, you get smooth slow-motion that can add dramatic impact to your aerial sequences. I recommend 60fps or 120fps for action shots, water scenes, or any moment where slowing down time enhances the visual impact.
Here is a quick reference for frame rate selection:
- 24fps: Best for cinematic, film-like footage
- 30fps: Good for standard video and online content
- 60fps: Ideal for slow-motion (50% speed)
- 120fps: Extreme slow-motion (25% speed at 30fps playback)
Match your frame rate to your intended delivery platform. If you are creating content for Instagram Reels or TikTok, 30fps or 60fps works well. For film festivals or high-end commercial work, stick with 24fps.
The 180-Degree Shutter Rule Explained
The 180-degree shutter rule is perhaps the most critical concept for achieving cinematic drone footage. This rule states that your shutter speed should be approximately double your frame rate. For 24fps footage, use 1/48 second (rounded to 1/50 on most cameras). For 30fps, use 1/60 second. For 60fps, use 1/120 second.
Why does this matter? The 180-degree shutter angle creates natural motion blur that mimics how our eyes perceive movement. When your shutter speed is too fast, each frame becomes too sharp, creating the stuttery, choppy look that screams amateur video. When your shutter speed follows the 180-degree rule, objects in motion blur slightly between frames, producing smooth, natural-looking footage.
I learned this lesson the hard way. My early drone videos looked like slide shows because I was shooting at 1/500 or 1/1000 second in bright daylight. The footage was technically sharp but visually jarring. Once I started using ND filters to maintain proper shutter speeds, the improvement was immediate and dramatic.
Here is the challenge: achieving the 180-degree shutter speed in bright conditions often requires reducing the light entering your lens. Since most drone cameras have fixed apertures, you cannot simply stop down the lens. This is where ND filters become essential accessories for serious aerial videographers.
Quick reference for the 180-degree rule:
- 24fps = 1/50 second shutter speed
- 30fps = 1/60 second shutter speed
- 60fps = 1/120 second shutter speed
- 120fps = 1/240 second shutter speed
Picture Profiles: D-Log, D-Cinelike, and Flat Profiles
Picture profiles control how your drone camera processes and records color information. For cinematic footage, flat or log profiles are essential because they preserve maximum dynamic range and give you the most flexibility in post-production. DJI drones offer options like D-Log and D-Cinelike, while other manufacturers have their own variations.
D-Log is DJI’s logarithmic color profile that captures the widest dynamic range possible. The footage looks flat and desaturated straight out of camera, but this is intentional. By compressing the highlights and lifting the shadows, D-Log preserves detail that would otherwise be lost. You must color grade D-Log footage in post-production to achieve the final look.
D-Cinelike is a flatter version of DJI’s standard color profile that requires less aggressive color grading than D-Log. It offers more dynamic range than the normal profile while still producing usable footage without heavy post-processing. I recommend D-Cinelike for pilots who want improved image quality without committing to extensive color grading workflows.
When should you use these profiles? If you plan to color grade your footage, shoot in D-Log for maximum flexibility. If you want better-looking footage with minimal editing, choose D-Cinelike. If you need to deliver footage immediately without any post-processing, the normal profile produces pleasing results straight from the camera.
The trade-off with log profiles is workflow complexity. You cannot simply upload log footage and expect it to look good. Color grading becomes a required step in your production process. However, the creative control and image quality improvements make this extra effort worthwhile for serious aerial videographers.
White Balance Settings for Aerial Video
White balance is often overlooked but critically important for consistent, professional-looking footage. Auto white balance might seem convenient, but it causes problems in aerial videography. As your drone moves through different lighting conditions, auto white balance shifts colors mid-shot, creating jarring color transitions that ruin continuity.
Instead, lock your white balance to a fixed value. For most daylight aerial shooting, 5600K provides natural-looking colors. This standard daylight setting works well for golden hour, midday sun, and overcast conditions. If you want warmer tones during golden hour, try 6000K to 6500K. For cooler, blue tones, 4800K to 5200K achieves that effect.
The key is consistency. Once you set your white balance, keep it the same throughout your entire shoot. This ensures all your clips match when you edit them together. Nothing screams amateur like color temperature jumping between shots in a single sequence.
Recommended white balance settings by condition:
- Sunny daylight: 5600K
- Golden hour (warm): 6000K-6500K
- Overcast: 5200K-5500K
- Shade: 6000K-7000K
- Sunset/sunrise: 5800K-6200K
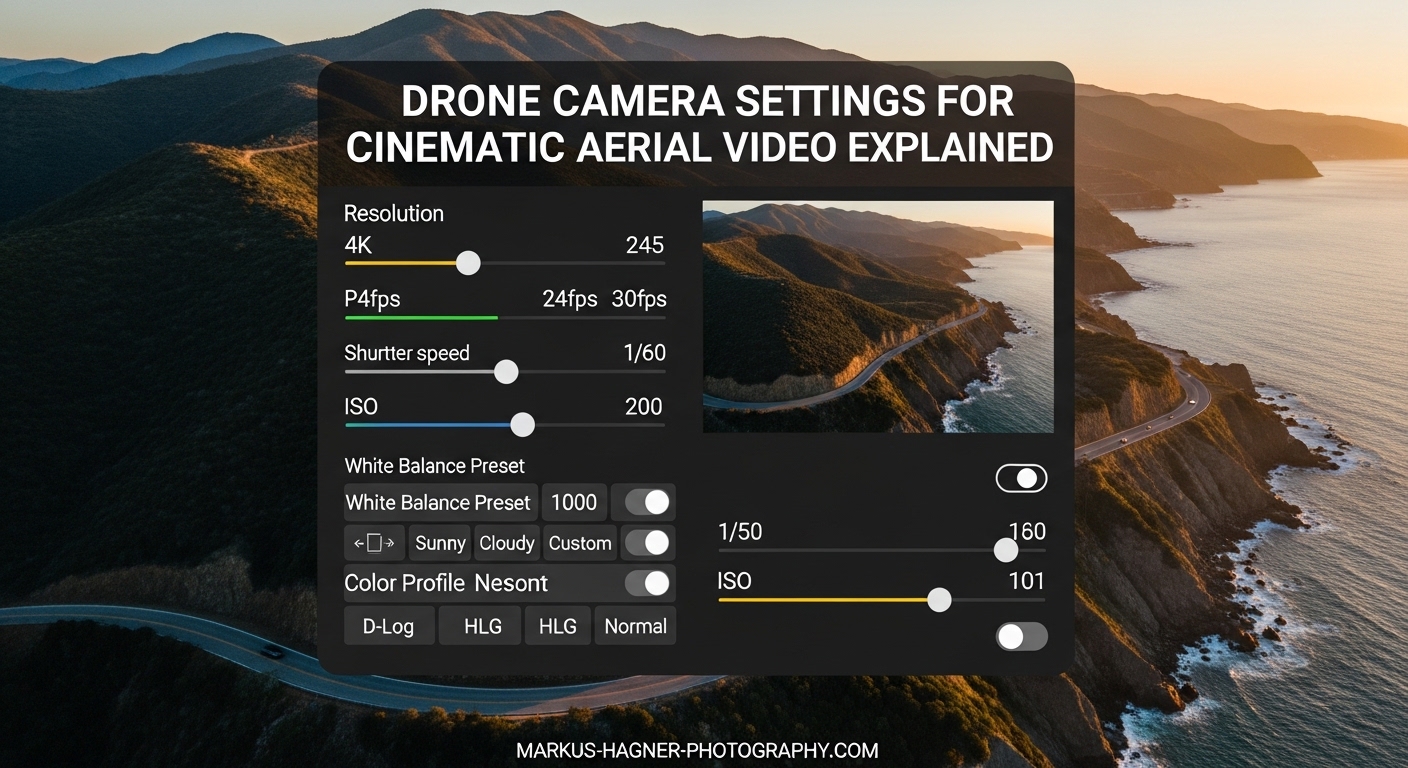
ISO and Exposure Control
ISO controls your camera’s sensitivity to light, and for cinematic drone footage, the rule is simple: keep it as low as possible. Higher ISO values introduce noise and grain that degrade image quality. Most drone cameras perform best at their base ISO, typically 100 or 200 depending on the model.
In bright conditions, this is not a problem. You can maintain base ISO while using ND filters to achieve proper exposure. In low light situations, you may need to increase ISO, but always do so reluctantly. I rarely exceed ISO 400 on most consumer drones because the noise becomes unacceptable.
Monitoring your exposure is essential for avoiding blown-out highlights. Unlike shadows, overexposed highlights cannot be recovered in post-production. Enable your drone’s histogram display if available, and watch for data piling up on the right side. Enable zebra patterns or overexposure warnings to identify problem areas in real-time.
The ideal exposure places your histogram data toward the right side without clipping. This technique, called exposing to the right (ETTR), maximizes the signal-to-noise ratio while preserving highlight detail. Be careful not to overdo it, as clipped highlights are unrecoverable.
Exposure tips for aerial video:
- Always use manual exposure mode
- Keep ISO at base value (100-200)
- Monitor histogram and zebras
- Prioritize highlight preservation
- Use ND filters rather than high shutter speeds
ND Filters: When and How to Use Them
Neutral density filters are essentially sunglasses for your drone camera. They reduce the amount of light reaching the sensor without affecting color, allowing you to maintain proper shutter speeds in bright conditions. For aerial videographers serious about cinematic footage, ND filters are not optional accessories. They are essential tools.
Remember the 180-degree shutter rule? In bright sunlight, achieving 1/50 or 1/60 second shutter speed is often impossible without ND filters. Your camera would be massively overexposed. ND filters solve this problem by reducing incoming light to manageable levels.
Selecting the right ND filter strength depends on lighting conditions. ND filters are rated by how many stops of light they block. An ND8 filter reduces light by 3 stops, an ND16 by 4 stops, and an ND32 by 5 stops. Most aerial videographers carry a set ranging from ND8 to ND64 to handle various conditions.
Here is my guide for ND filter selection:
- ND8: Overcast or late afternoon
- ND16: Bright daylight with some clouds
- ND32: Full sun, middle of day
- ND64: Extremely bright conditions or snow/sand
Variable ND filters offer adjustable strength in a single filter, but they can introduce artifacts and are generally not recommended for aerial work. Fixed-strength filters produce cleaner results. I recommend purchasing a quality filter set from reputable brands rather than cheap alternatives that can introduce color casts or softness.
Polarizer filters are another option that combines ND filtering with polarization effects. These can reduce glare from water and foliage while also darkening blue skies. However, the polarization effect varies with camera angle relative to the sun, which can create inconsistent results as your drone moves.
Gimbal Settings and Camera Movement
Even with perfect camera settings, jerky camera movements will ruin your cinematic footage. Your gimbal settings control how smoothly the camera pans and tilts, and adjusting these parameters is essential for professional results. Most pilots leave gimbal settings at default, which is often too responsive for cinematic work.
Reduce your gimbal pitch speed and yaw speed for smoother movements. On DJI drones, you can find these settings in the remote controller configuration. I typically set my gimbal pitch speed to around 15-20 for slow, controlled tilts. Higher speeds work for quick adjustments but create jarring movements during cinematic shots.
Cinematic mode, available on many DJI drones, automatically slows gimbal and drone movements for smoother footage. This mode is helpful for beginners, but experienced pilots often prefer manual control. Either way, practice smooth, gradual stick inputs rather than sudden movements.
Camera movement techniques also matter. The most cinematic drone shots use slow, deliberate motions. Avoid the temptation to zip around quickly. Instead, focus on smooth orbits, gentle reveals, and steady tracking shots. The combination of proper settings and smooth flying creates footage that looks truly professional.
Drone Camera Settings for Cinematic Aerial Video: Common Mistakes to Avoid
After reviewing countless drone videos from pilots at all skill levels, I see the same mistakes repeated. Avoiding these common errors will immediately improve your aerial footage quality.
Using auto exposure is the most frequent mistake. Auto exposure constantly adjusts brightness as your drone moves, creating distracting exposure shifts mid-shot. Always shoot in manual mode to maintain consistent exposure throughout each clip.
Ignoring the 180-degree shutter rule produces that stuttery, amateur look. If your footage looks like a series of sharp still images rather than smooth video, your shutter speed is probably too fast. Add ND filters to achieve proper shutter speeds in bright conditions.
Forgetting to lock white balance creates color consistency problems. Auto white balance shifts colors as lighting changes during flight, resulting in mismatched footage that is difficult to correct in post-production.
Overexposing highlights destroys detail that cannot be recovered. Bright skies are particularly challenging. Always monitor your histogram and zebras to catch overexposure before it ruins your footage.
Skipping color grading when shooting in log profiles leaves footage looking flat and lifeless. If you are not prepared to color grade, shoot in a standard profile instead of D-Log or similar flat profiles.
Frequently Asked Questions
What are the best drone settings for cinematic video?
The best settings for cinematic drone video are: 24fps frame rate, 1/50 second shutter speed (following the 180-degree rule), base ISO (100-200), locked white balance at 5600K for daylight, and D-Log or flat picture profile for maximum dynamic range. Always use manual exposure mode and ND filters to maintain proper shutter speed in bright conditions.
How to make drone video more cinematic?
To make drone video more cinematic, follow the 180-degree shutter rule by matching your shutter speed to double your frame rate. Use ND filters in daylight to achieve this. Shoot in flat or log profiles for better dynamic range. Enable cinematic mode or reduce gimbal sensitivity for smoother movements. Plan your shots and fly slowly with deliberate, smooth motions.
What camera settings are needed for cinematic video?
Cinematic video requires: frame rate of 24fps for film-like motion or 30fps for standard video, shutter speed double your frame rate (1/50 for 24fps), lowest possible ISO (100-200), fixed white balance, flat or log picture profile, and manual exposure control. These settings work together to create natural motion blur and preserve maximum image quality for post-production.
What makes drone footage cinematic?
Cinematic drone footage is characterized by natural motion blur created by following the 180-degree shutter rule, smooth camera movements achieved through proper gimbal settings and flying technique, rich dynamic range from flat or log picture profiles, consistent exposure and white balance throughout sequences, and professional color grading in post-production. The combination of these technical elements creates the film-like quality that distinguishes professional aerial cinematography.
Conclusion
Mastering drone camera settings for cinematic aerial video transforms your footage from amateur home video to professional aerial cinematography. The key principles are straightforward: follow the 180-degree shutter rule, use manual exposure with locked white balance, shoot in flat profiles for maximum dynamic range, and employ ND filters to achieve proper shutter speeds in bright conditions.
These settings work together as a system. Frame rate determines your shutter speed, which then dictates your ND filter needs. Picture profile choice affects your post-production workflow. White balance ensures color consistency across all your clips. Understanding how each setting impacts the others is what separates casual drone pilots from serious aerial videographers.
Start with these fundamentals, practice consistently, and you will see immediate improvements in your footage quality. The difference between jerky, amateur footage and smooth, cinematic aerial video is entirely within your control through proper camera settings.