I’m absolutely thrilled to share my passion for spiral light painting photography with you! When I first discovered this magical technique, I was blown away by how I could create these mesmerizing spirals of light that seemed to dance right out of my camera. After countless nights experimenting in my backyard and studio, I’ve perfected the art of creating stunning spiral light paintings, and I’m here to show you exactly how you can do it too.
What is Spiral Light Painting Photography?
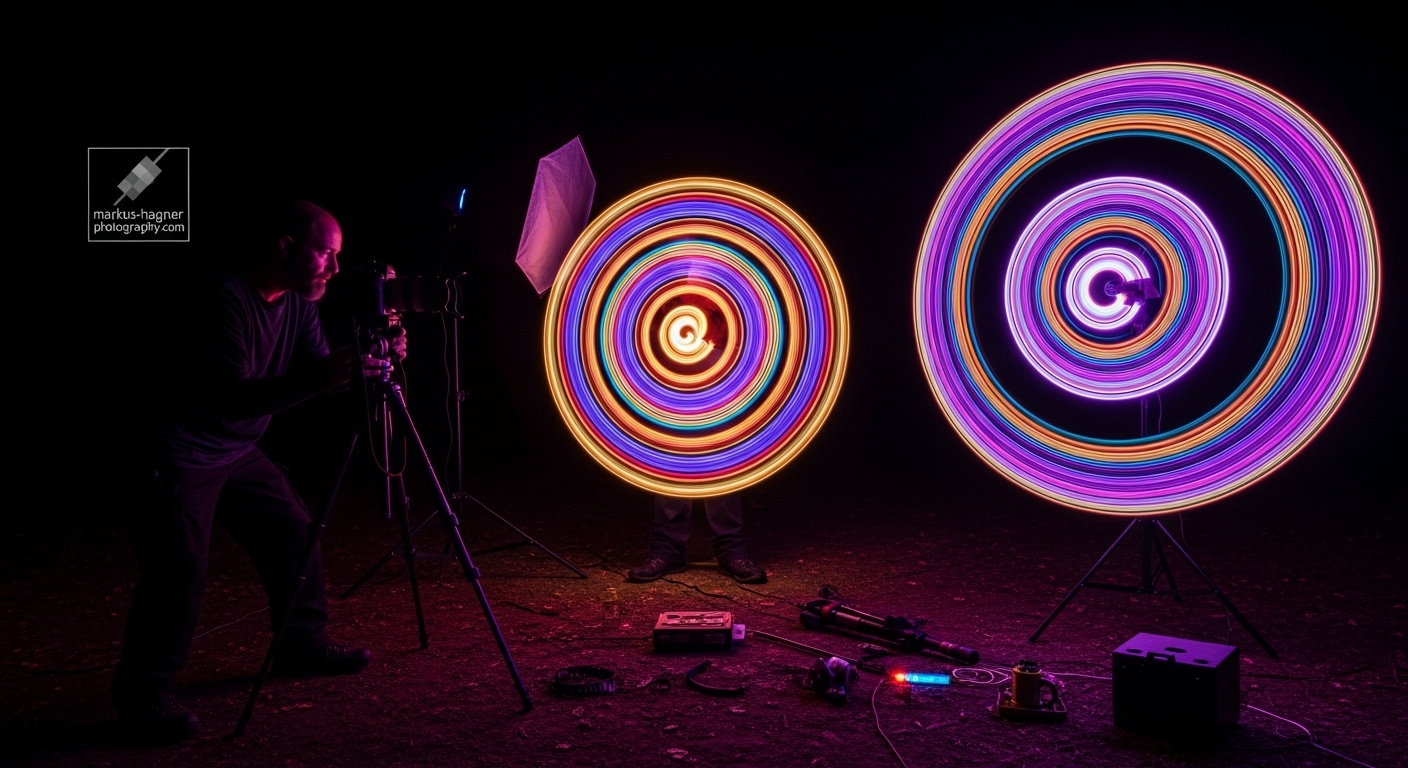
Spiral light painting is a fascinating photography technique where you use long exposure photography to capture the movement of light sources in spiral patterns. I discovered this technique quite by accident one night while playing with a flashlight and my camera’s bulb mode. The results were so captivating that I’ve been hooked ever since!
What makes spiral light painting so special is that every single image is unique. No two spirals will ever be exactly the same, which makes each photograph a true piece of art. I love how this technique combines technical photography skills with creative expression – it’s like painting with light itself!
Essential Equipment for Spiral Light Painting
Before we dive into the techniques, let me share what you’ll need to get started. Don’t worry – you probably already have most of this equipment!
Camera Requirements
I recommend using a camera that has manual mode capabilities. While I personally shoot with a Sony a7R III for my professional work, I’ve created amazing spiral light paintings with everything from entry-level DSLRs to even some smartphone cameras that have manual controls. The key is having control over shutter speed, aperture, and ISO.
Tripod: Your Best Friend
I can’t stress this enough – a sturdy tripod is absolutely essential for light painting photography. When I first started, I tried balancing my camera on various surfaces, and let me tell you, the results were disappointing at best. A good tripod keeps your camera perfectly still during those long exposures, which can last anywhere from 8 to 30 seconds or even longer.
Light Sources: The Magic Wands
This is where the real fun begins! I’ve experimented with countless light sources over the years, and here are my favorites:
LED Flashlights: These are my go-to for beginners. They’re bright, consistent, and easy to control. I especially like LED flashlights with adjustable brightness settings.
Light Painting Brushes: These specialized tools are fantastic for creating consistent spirals. I particularly recommend the collapsible light sword from Light Painting Brushes – it’s what I use for most of my professional spiral work.
RGB LED Lights: These are game-changers! Being able to change colors on the fly has opened up so many creative possibilities for my spiral designs.
Smartphone Flashlights: Don’t have fancy equipment? No problem! I’ve created some of my most popular spiral images using just my iPhone’s flashlight. It’s all about technique, not expensive gear.
Color Gels and Filters: These are inexpensive accessories that can transform your plain white light into any color imaginable. I keep a set of basic color gels in my camera bag at all times.
Optional but Helpful Equipment
- Remote shutter release or intervalometer to prevent camera shake
- Dark clothing to stay invisible in your shots
- Extra batteries (long exposures drain batteries quickly!)
- Lens hood to prevent unwanted light from entering your lens
Perfect Camera Settings for Spiral Light Painting
Getting your camera settings right is crucial for successful spiral light painting. I’ll share the exact settings I use, but remember – these are starting points. The beauty of digital photography is that you can experiment and adjust until you get the perfect results!
Shutter Speed: The Foundation
For spiral light painting, you’ll need long exposures. I typically start with shutter speeds between 8-30 seconds. Here’s my general approach:
- Beginners: Start with 8-15 seconds
- Intermediate: Try 15-25 seconds
- Advanced: Experiment with 30 seconds to several minutes
I discovered that the longer the exposure, the more complex and detailed your spirals can be. However, longer exposures also mean more room for error, so master the shorter exposures first!
Aperture: Controlling Light and Sharpness
Aperture affects both how much light enters your camera and the sharpness of your spirals. Here’s what I recommend:
- f/8 to f/16: This is my sweet spot for spiral light painting
- f/8: Great for brighter environments or when you want more light
- f/16: Perfect for darker settings or when you want sharper spiral edges
I usually start at f/11 and adjust from there based on how bright my light source is and how dark the environment is.
ISO: Keeping Noise at Bay
ISO controls your camera’s sensitivity to light, but higher ISOs also introduce more noise (that grainy look). For light painting, I almost always keep my ISO low:
- ISO 100-200: My go-to range for clean, noise-free images
- ISO 400: Maximum I’ll go in very dark situations
I learned this lesson the hard way early in my light painting journey. I was so excited about a particular spiral that I cranked up the ISO to 1600, and while I could see the image better on my camera screen, the final result was disappointingly grainy. Keep it low for professional-quality results!
Focus: The Make-or-Break Setting
Getting proper focus in the dark can be tricky, but I’ve developed a foolproof method:
- Set your lens to manual focus
- Use a flashlight to illuminate your starting point
- Focus on that point
- Lock your focus (use tape if necessary!)
- Turn off the flashlight and don’t touch the focus ring again
I can’t tell you how many potentially amazing spiral shots I’ve ruined by accidentally bumping my focus ring. Learn from my mistakes – lock that focus down tight!
Step-by-Step Guide to Creating Your First Spiral
Now for the fun part! Let me walk you through exactly how to create your first spiral light painting. I remember my first attempt like it was yesterday – it was messy, uneven, and I was completely hooked!
Step 1: Set Up Your Shot
Find a dark environment. This could be your living room at night, a backyard, or even a dark studio. The darker, the better! Set up your tripod and compose your shot. I like to include some interesting foreground elements – a tree, a building, or even just the ground can add context to your spirals.
Step 2: Dial in Your Settings
Set your camera to manual mode and input the settings we discussed:
- Shutter speed: Start with 15 seconds
- Aperture: f/11
- ISO: 100
- Manual focus (locked on your starting point)
Step 3: Position Yourself
This is where technique really matters. Stand to the side of your camera, not directly in front of it. You want to be able to move freely without blocking the camera’s view. I always wear dark clothing to minimize my visibility in the final image.
Step 4: The Spiral Technique
Here’s the magic! When you’re ready:
- Trigger the shutter (use a remote or timer to avoid shake)
- Wait a second for the camera to settle
- Turn on your light and immediately start creating your spiral
The basic spiral motion is simple but takes practice:
- Hold your light source at arm’s length
- Spin it in a circle while keeping your arm extended
- Simultaneously rotate your body in a circle
- Maintain consistent speed throughout the motion
I discovered that the key to perfect spirals is keeping the light at the same distance from your body throughout the entire motion. When I first started, my spirals looked more like chaotic scribbles because I was moving my arm in and out. Consistency is everything!
Step 5: Complete the Exposure
Once your shutter time is almost up, turn off your light source and quickly move out of the frame. This ensures you don’t appear as a ghostly figure in your final image.
Step 6: Review and Adjust
Take a look at your image! Don’t be discouraged if it’s not perfect – my first dozen attempts were far from it. Use this first shot to adjust your settings and technique for the next one.
Also Read: Fujifilm Xt3 Vs Sony A7Iii
Advanced Spiral Techniques
Once you’ve mastered the basic spiral, you’ll want to take your skills to the next level. These are the techniques that separate amateur spiral light painters from the pros!
Multi-Color Spirals
I absolutely love creating spirals with multiple colors. Here’s how I do it:
- Use RGB LED lights that can change colors mid-exposure
- Or use color gels that you can quickly swap during the exposure
- Change colors at specific points in your spiral rotation
My favorite technique is creating a rainbow spiral by changing colors every quarter rotation. It takes practice, but the results are absolutely stunning!
Double and Triple Spirals
This advanced technique creates overlapping spirals that add incredible depth to your images:
- Create your first spiral as normal
- Without moving your feet, create a second spiral at a different height
- Vary the size of each spiral for more visual interest
I discovered this technique when I accidentally moved my arm to a different position during an exposure. The happy accident led to one of my most popular spiral images!
Spiral Orbs
Combining spiral techniques with orb creation opens up even more creative possibilities:
- Start with a tight spiral in the center
- Gradually expand your rotation to create an orb effect
- End with a large spiral that encompasses the entire orb
This technique takes practice, but I’ve found it creates some of the most mesmerizing light painting images imaginable.
Speed Variations
Playing with the speed of your spiral motion can create dramatically different effects:
- Slow, deliberate movements create clean, defined spirals
- Fast, energetic movements create more chaotic, organic spirals
- Variable speeds within the same exposure add dynamic interest
I often start slow and gradually increase my speed as the exposure progresses. This creates spirals that appear to be accelerating or exploding outward!
Creative Composition Ideas
Great technique is only half the battle. Composition is what transforms a technically good spiral into a truly captivating image. Here are my favorite composition approaches:
Environmental Integration
Instead of creating spirals in empty space, I love incorporating them into interesting environments:
- Wrap spirals around trees or other objects
- Create spirals that appear to emerge from buildings or structures
- Use natural features like rock formations as part of your composition
One of my most successful images features a spiral that appears to be emerging from an old abandoned car. The contrast between the industrial subject and the ethereal light spiral creates a powerful visual statement.
Multiple Light Sources
Using multiple light sources simultaneously can create incredibly complex and beautiful images:
- Have a friend help with a second light source
- Use stationary lights to illuminate the environment while you create spirals
- Combine different colored lights for rainbow effects
I once worked with another photographer where we created intersecting spirals using different colored lights. The resulting image looked like two galaxies colliding in space!
Portrait Integration
Combining spiral light painting with portraits creates magical, otherworldly images:
- Position your subject in the frame
- Use a separate light to briefly illuminate them
- Create spirals around them during the long exposure
This technique requires careful timing, but I’ve created some of my most memorable images using this approach. The key is keeping your subject perfectly still during the exposure.
Also Read: Fujifilm Xt5 Vs Xt4
Troubleshooting Common Problems
Even experienced light painters run into issues. Let me share solutions to the most common problems I’ve encountered (and solved!) over the years.
Problem: Spirals Look Messy or Chaotic
Solution: This is usually caused by inconsistent movement. I found that practicing my spiral motion with the light off helped me develop muscle memory. Try to maintain a constant speed and distance from your body throughout the entire motion.
Problem: Light Source Appears in the Image
Solution: You’re probably lingering too long in one spot or moving too slowly. I discovered that keeping the light moving constantly and at a consistent speed prevents hot spots. Also, make sure you’re not wearing reflective clothing!
Problem: Spirals Are Too Dim
Solution: This could be several things:
- Increase your light source brightness
- Slow down your movement to allow more light in each area
- Increase your ISO (but be careful of noise)
- Open your aperture (lower f-number)
I struggled with this early on until I realized that sometimes the simplest solution is just using a brighter light source!
Problem: Camera Shake or Blur
Solution: This is almost always caused by touching the camera during the exposure. I always use a remote shutter release or the camera’s built-in timer. Also, make sure your tripod is on stable ground and not being bumped by your movements.
Problem: Inconsistent Spiral Shapes
Solution: Practice, practice, practice! I found that recording myself practicing the spiral motion helped me identify where I was going wrong. The key is consistency in your arm extension and rotation speed.
Pro Tips for Stunning Spiral Light Paintings
After years of experimentation, I’ve discovered these professional secrets that take spiral light painting to the next level:
Tip 1: The “Rule of Thirds” for Spirals
Just like in traditional photography, composition matters. I always try to position my spirals according to the rule of thirds. Place the center of your spiral at one of the intersection points rather than dead center for more dynamic compositions.
Tip 2: Layer Multiple Exposures
Some of my most complex spiral images are actually multiple exposures combined in post-processing. I’ll create several different spirals in the same location and then blend them later. This gives me incredible control over the final composition.
Tip 3: Use Wind to Your Advantage
On breezy nights, I’ve discovered that I can create organic, flowing spirals by letting the wind affect my light movement. This creates natural-looking spirals that seem to be dancing in the air.
Tip 4: Experiment with Different Light Modifiers
I love experimenting with different light modifiers:
- Diffusers create softer, more ethereal spirals
- Snoots create tighter, more defined spirals
- Colored gels add mood and atmosphere
Each modifier creates a completely different effect, so I always bring a variety to my light painting sessions.
Tip 5: Shoot in RAW Format
I always shoot in RAW format for my light painting. This gives me much more flexibility in post-processing to adjust exposure, color balance, and bring out details in the spirals that might be lost in JPEG files.
Post-Processing Your Spiral Images
While getting it right in camera is always the goal, post-processing can elevate your spiral light paintings from good to absolutely stunning. Here’s my workflow:
Basic Adjustments
I start with basic adjustments in Lightroom or Adobe Camera Raw:
- Exposure: Fine-tune the overall brightness
- Contrast: Add punch to make spirals pop
- Whites and Blacks: Set the tonal range
- Clarity: Add mid-tone contrast for definition
- Vibrance: Enhance colors without oversaturating
Color Grading
This is where the magic happens! I love to:
- Adjust individual color channels to make certain spiral colors pop
- Add split toning for creative color effects
- Use color grading tools to create mood and atmosphere
Local Adjustments
I use local adjustments to:
- Brighten specific spiral areas that need more emphasis
- Darken the background to make spirals stand out
- Add vignettes to draw attention to the spiral center
Advanced Techniques
For my professional work, I sometimes:
- Combine multiple exposures for complex compositions
- Remove unwanted elements that appeared in the frame
- Add subtle glow effects to enhance the light painting feel
Safety Considerations
Light painting is generally safe, but I’ve learned a few important safety considerations over the years:
Personal Safety
- Be aware of your surroundings when shooting in the dark
- Watch for tripping hazards like cables, rocks, or uneven ground
- Let someone know where you’ll be if shooting alone
- Bring a flashlight for navigating between shots
Equipment Safety
- Secure your tripod on stable ground
- Protect your gear from weather if shooting outdoors
- Keep spare batteries warm in cold weather (they drain faster)
- Use lens caps when not shooting to protect from dust and moisture
Environmental Respect
- Leave no trace when shooting in natural areas
- Be respectful of private property
- Avoid disturbing wildlife with your lights
- Follow local regulations regarding photography in public spaces
FAQ: Your Spiral Light Painting Questions Answered
How long does it take to get good at spiral light painting?
I get this question a lot! Honestly, you can create decent spirals on your first try, but mastering the technique takes practice. I’d say it took me about a month of regular practice before I was consistently creating spirals I was proud of. The key is patience and not getting discouraged by early attempts.
What’s the best time of day for spiral light painting?
I prefer shooting during the “blue hour” – that time just after sunset when there’s still some ambient light in the sky. This creates beautiful contrast between your bright spirals and the darkening sky. However, complete darkness works great too, especially for more abstract spiral images.
Can I create spiral light paintings with my smartphone?
Absolutely! While dedicated cameras give you more control, many modern smartphones have manual modes that work surprisingly well for light painting. I’ve created some beautiful spirals using just my iPhone’s manual camera app. The key is finding a way to keep your phone perfectly still during the long exposure.
Why do my spirals always look uneven?
This is one of the most common issues beginners face. Uneven spirals are usually caused by inconsistent movement speed or varying the distance of your light from your body. I found that practicing with the light off helped me develop the muscle memory needed for consistent spirals.
How do I prevent myself from appearing in the photos?
The secret is moving quickly and wearing dark, non-reflective clothing. I always wear black from head to toe when light painting. Also, make sure you’re not standing between your light source and the camera, and keep moving throughout the exposure.
What’s the difference between spirals and orbs in light painting?
Great question! Spirals are typically created by rotating your body while moving your light in a circular motion. Orbs are usually created by spinning a light source on a string or around a fixed point. I often combine both techniques in my work for more complex images.
Can I create spiral light paintings indoors?
Definitely! Some of my favorite spiral images were created indoors. Just make sure the room is as dark as possible, and be mindful of reflective surfaces that might catch unwanted light. I’ve created amazing spirals in everything from living rooms to garages to empty studios.
Final Thoughts: Your Spiral Light Painting Journey
I hope this comprehensive guide has inspired you to dive into the magical world of spiral light painting photography. When I first started, I never imagined that this simple technique would become such a passion of mine, or that it would open up so many creative possibilities.
Remember, the most important thing is to have fun and experiment. Some of my best spiral images came from happy accidents and unexpected discoveries. Don’t be afraid to try new things, break the rules, and develop your own unique style.
I’d love to see what you create! Feel free to share your spiral light painting images and experiences in the comments below. And don’t forget to bookmark this guide for reference as you continue your light painting journey.
Ready to create some magic? Grab your camera, find a dark space, and let’s paint with light!