Nothing ruins a 360 photo faster than a visible stitch line cutting through your subject. You have spent time setting up the perfect shot, only to find ghosting, misalignment, or an ugly seam splitting your image in half. The good news? Most stitching errors in 360-degree photography are completely preventable once you understand what causes them.
I have worked with 360 cameras for years, and I can tell you that nearly every stitching problem traces back to a handful of technique errors. This guide covers the eight most common stitching errors, why they happen, and exactly how to fix them. You will also learn a complete prevention workflow that covers setup, shooting, and quality control so you can capture seamless 360 images every time.
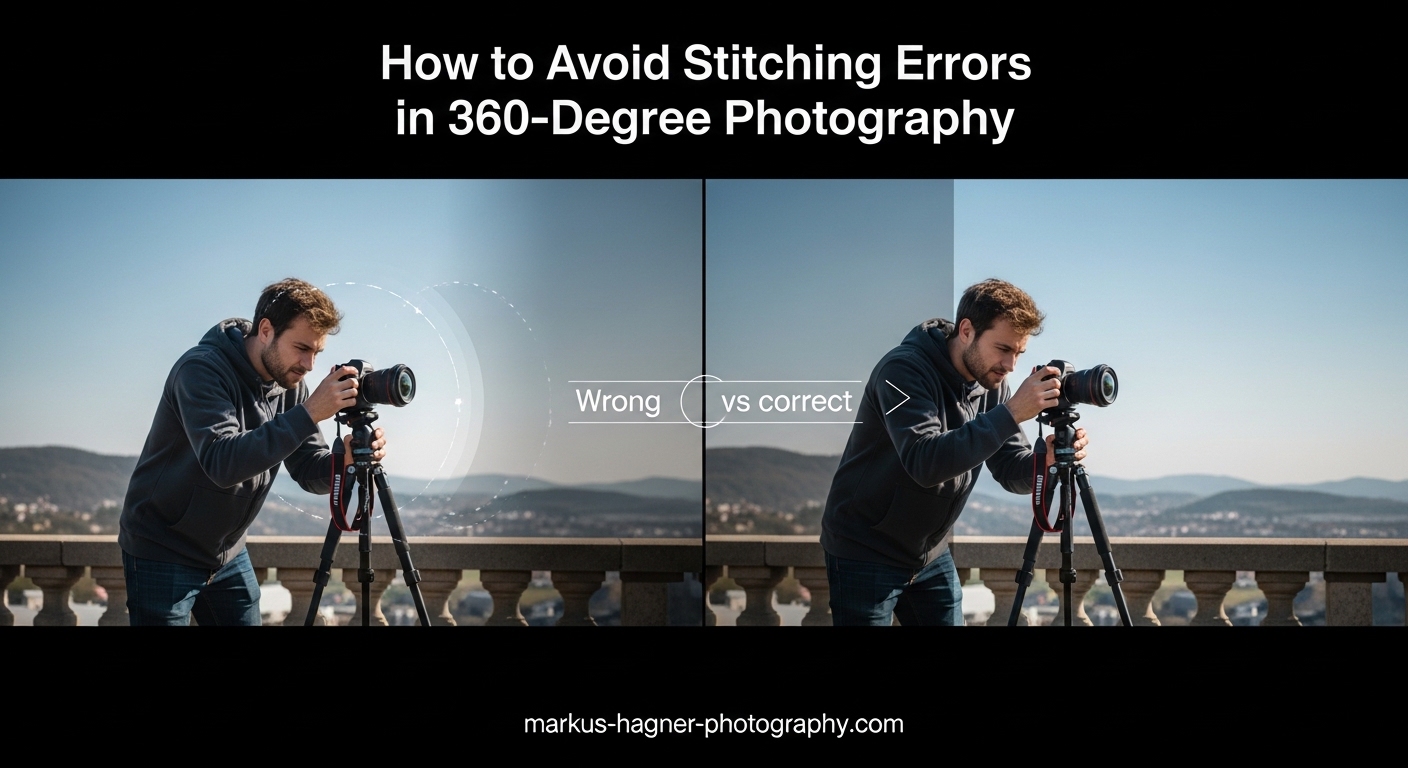
Understanding Stitching Errors in 360 Photography
360 cameras capture a full spherical view using two or more lenses. Each lens records a portion of the scene, and the camera’s stitching algorithm identifies matching features in the overlapping areas to blend them into a single seamless image. When this process fails, you see visible seams, ghosting, or misalignment at the points where the images should connect.
Several factors can break this stitching process. Parallax error occurs when the camera moves slightly between lens captures, causing objects at different distances to shift relative to each other. The nodal point, which is the optical center of the lens, must stay perfectly still for clean stitching. Any rotation around a different point introduces parallax that the algorithm cannot correct.
Common stitching problems include ghosting, where objects appear duplicated or semi-transparent at the stitch line, visible seams that look like a cut through the image, misalignment where edges do not line up, and black lines or banding caused by accessories interfering with the lens field of view. Understanding these terms helps you diagnose problems quickly and apply the right fix.
The stitching algorithm relies on feature matching to find corresponding points between the two lens views. When your scene lacks distinctive features, such as a blank wall or clear sky, the algorithm struggles to find enough reference points. This is why stitching often fails in featureless environments even when your technique is perfect. Adding texture or distinctive elements to your scene can sometimes help the software do its job.
8 Common Stitching Errors and How to Fix Them
1. Visible Stitch Lines
This is the most obvious and frustrating error. You see a clear line where the two halves of your 360 image meet, often cutting right through your main subject. The primary cause is having objects or people too close to the camera. When subjects are within three feet of the lenses, the parallax between the two lens views becomes too large for the stitching algorithm to blend smoothly.
The fix: Always maintain a minimum distance of three to six feet between your camera and any important subjects. The further away your subject, the cleaner the stitch. For the absolute best results, keep key subjects at least eight feet from the camera. This gives the algorithm plenty of overlap to work with and minimizes the parallax effect that causes visible seams.
2. Ghosting and Duplication
Ghosting shows up as semi-transparent duplicates of moving objects near the stitch line. You might see a person appearing twice or a car looking like it has been copied and pasted partially across the seam. This happens when something moves during the brief moment between when each lens captures its image. Even small movements can create noticeable ghosting artifacts.
The fix: Position yourself and any moving subjects facing directly toward one lens rather than standing between the two lenses. This keeps motion away from the critical stitch area. For action shots, consider using a camera with faster synchronization between lenses, or simply avoid having fast-moving subjects near the camera. If you must capture motion, try to time your shot when subjects are furthest from the stitch line.
3. Parallax Error
Parallax error creates a subtle but noticeable misalignment where objects at different distances do not line up correctly at the stitch line. This often looks like a slight jump or offset when you pan across the seam. The cause is almost always camera movement or rotation that is not centered on the nodal point of the lens system.
The fix: Use a sturdy tripod and ensure your camera is perfectly level before shooting. Avoid handheld shots when possible, especially for static scenes where you have time to set up properly. If you must shoot handheld, keep your movements slow and steady, rotating around the camera’s center rather than swinging it around you. A quality tripod with a level indicator is one of the best investments for clean 360 photography.
4. Misalignment from Third-Party Accessories
Using third-party mounts, lens guards, or filters can introduce unexpected stitching problems. The camera’s stitching algorithm is calibrated for specific lens parameters, and even small changes to the lens geometry can throw off the calculations. I have seen photographers struggle for hours with mysterious stitching issues that disappeared once they switched back to official accessories.
The fix: Stick with manufacturer-approved accessories whenever possible. If you need third-party gear, test it thoroughly before relying on it for important shoots. Some cameras have calibration options in their apps that can compensate for certain accessories, so check your settings if you notice consistent misalignment. The small savings from cheaper accessories are not worth the headache of unreliable stitching.
5. Black Lines and Banding
Dark lines or horizontal banding across your 360 image usually indicate something is physically blocking part of the lens field of view. This commonly happens with incompatible lens guards, improperly mounted ND filters, or mounting brackets that extend into the frame. The stitching software cannot blend what it cannot see, so these obstructions create permanent artifacts in your final image.
The fix: Remove all accessories and shoot a test image to confirm the camera itself stitches correctly. Then add accessories one at a time, testing after each addition to identify which one causes problems. Use only lens guards and filters specifically designed for your camera model. Many manufacturers offer thin-profile accessories that minimize interference with the lens field of view.
6. Exposure Mismatch Between Lenses
When one half of your 360 image looks brighter than the other, you have an exposure mismatch. This happens because each lens meters the scene independently, and if lighting conditions vary across your environment, the camera may choose different exposure settings for each lens. The result is a jarring transition at the stitch line that makes the image look unnatural.
The fix: Lock your exposure and white balance before taking the shot. Most 360 camera apps have an exposure lock feature, often activated by tapping and holding on the preview screen. Set your exposure for the most important part of your scene, lock it, and then reposition the camera. This ensures both lenses use identical settings, creating a consistent exposure across the entire spherical image.
7. Interval Shooting and Time-Lapse Problems
Many photographers notice that images shot in interval or time-lapse mode have worse stitching than single shots. This happens because the camera processes images differently in continuous shooting mode, sometimes reducing the computational power dedicated to each individual stitch. The result is less accurate feature matching and more visible errors in each frame.
The fix: For critical shots where stitching quality matters most, use single-shot mode rather than interval shooting. If you need time-lapse footage, shoot at longer intervals to give the camera more processing time between frames. Some newer cameras have improved their interval shooting stitching through firmware updates, so check for updates if you are experiencing this issue regularly.
8. Underwater Stitching Problems
Shooting underwater introduces unique stitching challenges. Water refracts light differently than air, and standard dive cases can distort the lens geometry enough to cause significant stitching errors. The dome or flat port of the case changes how light reaches each lens, often resulting in a curved or wavy stitch line that ruins the immersive underwater experience.
The fix: Use an invisible dive case specifically designed for 360 cameras. These cases have a special dome shape that maintains the proper lens geometry underwater. Standard waterproof cases that work fine for traditional cameras will almost always cause stitching problems with 360 cameras. If underwater 360 photography is important to you, investing in the right case is essential for professional results.
Prevention Techniques: Before, During, and After Shooting
The best way to deal with stitching errors is to prevent them entirely. Here is a complete workflow covering everything you should do before, during, and after your shoot to ensure clean stitches every time.
Before Shooting: Setup Checklist
Start every 360 shoot with these preparation steps. Lock your exposure and white balance settings to ensure consistency across both lenses. Check that your lenses are completely clean, as even small smudges can affect feature matching and reduce stitch quality. Verify that any accessories you plan to use are officially compatible with your camera model. Finally, plan your subject positioning to keep important elements at least three feet from the camera, ideally further for the best results.
Take a moment to assess your environment for potential stitching challenges. Look for moving subjects like people, cars, or foliage that might cause ghosting. Identify areas with strong lighting variations that could create exposure mismatches. Plan your camera position to minimize these issues before you even press the shutter button.
During Shooting: Best Practices
Once you start shooting, keep your camera stable on a tripod whenever possible. If you must move the camera, do so slowly and smoothly. Avoid rapid rotations that can introduce motion blur or synchronization issues between lenses. Position yourself facing directly toward one lens rather than standing between the lenses, which puts your body in the optimal location to minimize visibility at the stitch line.
Watch for moving subjects like people walking or cars passing, and time your shots to avoid having motion near the critical seam area. If someone walks through your frame, wait until they clear the stitch line before capturing. This patience in the moment saves hours of frustration trying to fix ghosted subjects in post-processing.
After Shooting: Quality Control
Do not wait until you get home to check your images. Review your shots in the camera app immediately after capturing them. Zoom in on the stitch line area and look for any visible errors like ghosting, misalignment, or exposure mismatches. If you spot problems, reshoot right away while you are still on location. It takes thirty seconds to verify a shot but can save you hours of frustration later trying to fix problems in post-processing.
Develop a quick quality control routine for every shoot. Pan around the entire image to check all angles, not just the primary stitch line. Look up at the zenith and down at the nadir, as these areas sometimes show stitching issues that are easy to miss. Making this review a habit ensures you catch problems while you still have the opportunity to reshoot.
How to Fix Stitching Errors in Post-Processing
Sometimes despite your best efforts, you still end up with stitching errors. Here is how to decide whether to fix or reshoot, and what tools can help when correction is possible.
First, assess whether the error is fixable. Minor exposure mismatches can usually be corrected with basic editing tools. Small misalignments might be improved with manual adjustment in stitching software. But severe ghosting, major parallax errors, or completely failed stitches often require reshooting. If the error is in a critical part of your image, like cutting through a person’s face or a key architectural feature, reshooting is almost always the better choice.
For minor corrections, start with your camera manufacturer’s app. Most 360 cameras offer different stitching modes that can improve results. Try switching between auto, horizon lock, and other available modes to see if one produces a cleaner stitch. Some apps also offer manual adjustment tools that let you fine-tune the stitch line position or adjust the blending area.
For more advanced correction, consider third-party stitching software like Ptgui. This professional stitching software gives you manual control over control points and blending parameters, allowing you to fix errors that the automatic algorithms miss. You can also bring your 360 image into Photoshop or Lightroom and use cloning, healing, or content-aware tools to manually retouch visible seams. This works best for small errors in textured areas where the retouching will not be obvious.
Remember that post-processing fixes have limits. The best 360 images start with proper technique in the field. Use these correction tools as a safety net for minor issues, not as a replacement for good shooting habits.
Frequently Asked Questions
How do I fix stitching on Insta360 cameras?
To fix stitching on Insta360 cameras, first ensure you are using official accessories and the latest firmware. In the Insta360 app, try different stitching modes like Auto or Horizon Lock. For underwater shooting, use the Invisible Dive Case. Keep subjects at least 3 feet from the camera, and lock exposure before shooting. If errors persist, use the app’s manual stitch adjustment feature or reshoot with proper technique.
What causes stitching errors in 360 photos?
Stitching errors are caused by subjects too close to the camera, camera movement during capture, exposure differences between lenses, incompatible accessories blocking the lens field of view, moving objects near the stitch line, and parallax from improper camera rotation. Using third-party accessories, shooting in interval mode, or shooting underwater without proper equipment can also cause stitching problems.
How far should subjects be from a 360 camera?
Keep all important subjects at least 3 to 6 feet away from your 360 camera for clean stitching. For best results, maintain 8 feet or more when possible. Objects closer than 3 feet will almost always show stitching artifacts like ghosting or visible seams because the parallax between lenses becomes too large for the algorithm to blend smoothly.
Can stitching errors be fixed in post-processing?
Minor stitching errors can be fixed in post-processing using manufacturer apps with different stitching modes, third-party software like Ptgui for manual control, or retouching tools in Photoshop and Lightroom. However, severe errors like major ghosting or parallax usually require reshooting. Always check your shots on location so you can reshoot if needed rather than relying on post-processing fixes.
Why does my 360 camera have visible seams?
Visible seams occur when subjects are too close to the camera, exposure settings differ between lenses, you are using incompatible accessories, or the camera moved during capture. The stitching algorithm needs consistent image data from both lenses to blend them seamlessly. Lock exposure and white balance, use official accessories, keep subjects distant, and stabilize your camera to eliminate visible seams.
Conclusion
The key to avoiding stitching errors in 360-degree photography comes down to three fundamentals: maintain proper subject distance, lock your exposure settings, and use compatible accessories. Keep subjects at least three to six feet from the camera, always lock exposure and white balance before shooting, and stick with manufacturer-approved gear. Follow the before, during, and after workflow outlined above, and you will eliminate the vast majority of stitching problems before they happen.
Remember that even professional 360 photographers occasionally encounter stitching errors. The difference is knowing how to prevent most issues and having a clear plan for fixing the ones that slip through. With these techniques in your toolkit, you can confidently capture seamless 360 images that deliver the immersive experience your viewers expect.