Ever looked at a 360 photo on your computer and wondered why it appears stretched and distorted like a bizarre world map? That flattened, warped image staring back at you is using something called equirectangular projection—and understanding it completely changed how I approach 360 photography. Equirectangular projection is the standard format for storing 360-degree spherical images as flat 2D files, using a 2:1 aspect ratio where the width is exactly double the height. In this guide, I’ll break down exactly what equirectangular projection is, how 360 cameras capture these images, and why this seemingly technical concept matters for anyone creating immersive content.
When I first started shooting 360 photos, I was confused why my images looked so strange when opened in regular photo viewers. The tops and bottoms appeared stretched beyond recognition, while the middle looked somewhat normal. It turns out this distortion isn’t a flaw—it’s the mathematical key that makes 360 photography work across all platforms, from VR headsets to Google Street View.
By the end of this article, you’ll understand how equirectangular projection maps spherical environments onto flat rectangles, why the 2:1 aspect ratio is non-negotiable, and how viewers transform these distorted flat images back into immersive spherical experiences. I’ll also share practical tips from my experience working with 360 cameras and the common pitfalls that trip up most beginners.
What Is Equirectangular Projection
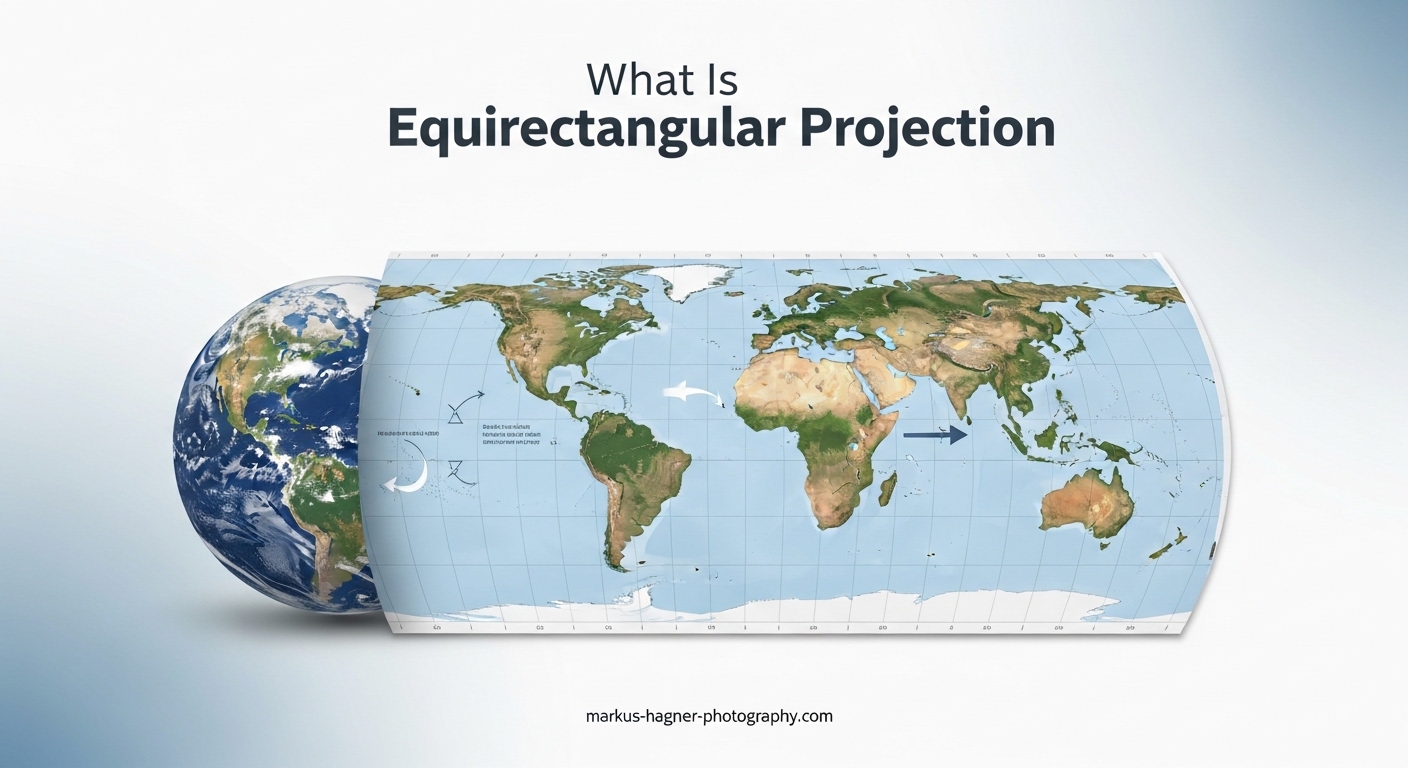
Equirectangular projection is a method of mapping a complete 360-degree spherical view onto a flat 2D rectangular image. Think of it like peeling an orange and pressing the skin flat onto a table—the curved surface gets stretched and distorted, but every point on the original sphere corresponds to a specific location on the flat rectangle. This projection format has been used in cartography for centuries to create world maps, and it works the same way for 360 photography.
The key characteristic of equirectangular projection is its simple coordinate system. Each pixel in the flat image corresponds to a specific latitude and longitude on an imaginary sphere. The horizontal position (X coordinate) represents longitude, ranging from -180 degrees to +180 degrees. The vertical position (Y coordinate) represents latitude, ranging from -90 degrees at the bottom to +90 degrees at the top. This direct mapping makes equirectangular projection easy to work with mathematically, which is why it became the standard format for 360-degree content.
When you view an equirectangular image in a standard photo viewer, it looks extremely distorted because you’re seeing a sphere flattened onto a plane. Objects near the top and bottom of the image (the poles of the sphere) appear stretched horizontally, while objects near the center (the equator) look relatively normal. This distortion isn’t an error—it’s the expected result of spherical projection, and it corrects itself when the image is viewed through proper 360-degree viewing software.
The name “equirectangular” comes from the mathematical properties of the projection. “Equi” means equal, referring to how the projection spaces latitude and longitude lines equally across the image. This creates a rectangular grid where each degree of latitude takes up the same vertical space, and each degree of longitude takes up the same horizontal space. It’s essentially the simplest possible way to map spherical coordinates to a flat surface.
The 2:1 Aspect Ratio Explained
Every proper equirectangular image has a 2:1 aspect ratio, meaning the width is exactly double the height. This isn’t arbitrary—it’s a mathematical necessity based on how latitude and longitude work. Longitude spans 360 degrees around the sphere (from -180 to +180), while latitude spans 180 degrees from pole to pole (from -90 to +90). Since equirectangular projection maps these coordinates directly to pixel positions, the resulting image must have a 2:1 ratio to maintain accurate proportions.
You can validate any equirectangular image by simply dividing the width by the height. A 6000×3000 pixel image? That’s 2:1. An 8192×4096 panorama? Also 2:1. If you encounter an image that doesn’t match this ratio, it either isn’t a true equirectangular projection or has been cropped incorrectly, which will cause problems when viewed in 360-degree applications.
Common resolutions for equirectangular images include 4096×2048 (4K), 6000×3000 (6K), 8192×4096 (8K), and 12288×6144 (12K). Higher resolutions provide more detail when viewers zoom into specific areas of the 360-degree scene. For VR applications, I recommend at least 8K resolution to ensure sharp visuals when viewed through headsets that place the display close to your eyes.
One important note: the total pixel count doesn’t determine whether an image is equirectangular—only the aspect ratio matters. A 4000×2000 image and an 8000×4000 image are both valid equirectangular projections, just at different quality levels. The format is defined by the coordinate mapping system, not the resolution.
How 360 Cameras Actually Work
Understanding how 360 cameras capture images explains why equirectangular projection became the standard output format. These cameras don’t capture a single wide-angle shot—they capture multiple images simultaneously and stitch them together into a seamless sphere.
Dual Lens Capture System
Most consumer 360 cameras use two fisheye lenses mounted back-to-back, each capturing a hemisphere of approximately 180+ degrees. These ultra-wide-angle lenses create heavily distorted circular images that contain everything the lens can see in front of it. The two lenses point in opposite directions, so together they capture the entire spherical environment around the camera.
The fisheye lenses are essential because no single lens can capture 360 degrees in one shot. The extreme curvature of fisheye optics bends light from wide angles into the sensor, but this creates significant barrel distortion in the raw captured images. Each lens produces a circular image with severe distortion near the edges, which must be corrected during processing.
Professional 360 camera rigs sometimes use more than two lenses—six or even eight cameras arranged in a cube pattern can capture higher quality with less individual lens distortion. However, the principle remains the same: multiple overlapping images are captured simultaneously and combined into a single spherical representation.
The Stitching Process
After capture, specialized software takes the two (or more) fisheye images and stitches them together into a single equirectangular file. This stitching process identifies overlapping regions between the lens captures and blends them seamlessly. The software also corrects the fisheye distortion, unwarping each circular image and mapping the pixels to their correct spherical positions.
Modern 360 cameras handle this stitching automatically, either in-camera or through companion mobile apps. The camera knows the exact specifications of its lenses—the field of view, distortion characteristics, and optimal overlap zone—and uses this information to create accurate stitches. Higher-end cameras allow manual adjustment of stitch lines for tricky scenes with objects close to the camera.
The final output of the stitching process is an equirectangular image. The software maps every pixel from the fisheye captures to its corresponding latitude and longitude on the virtual sphere, then outputs the result as a standard rectangular image file. This equirectangular format can be shared, uploaded, and viewed on any platform that supports 360-degree content.
Common Stitching Issues
From my experience, stitching errors are the most frustrating aspect of 360 photography. The most obvious problem is visible seams where the images from different lenses meet. These appear as discontinuities where objects don’t align properly, often visible as jagged lines or ghosting effects. Objects close to the camera are particularly prone to stitching errors because small misalignments become more obvious at close range.
Parallax errors occur when the two lenses capture slightly different perspectives of nearby objects. Since the lenses are physically separated by a few centimeters, objects very close to the camera appear in different relative positions in each lens’s view. Software attempts to correct this, but complex scenes with nearby objects often show artifacts.
Moving subjects cause another common issue. If someone walks through the overlap zone while the camera is capturing, they might appear partially in both lens views, creating ghosting or partial figures in the final stitch. Some cameras use temporal synchronization to minimize this, but fast-moving subjects can still cause problems.
Why Equirectangular Images Look Distorted
The distortion you see in flat equirectangular images is completely normal and mathematically predictable. Understanding why it happens helps you work with these images more effectively and explains why proper viewing software is essential.
The distortion occurs because equirectangular projection stretches spherical geometry onto a flat plane. Near the equator of the sphere (the middle of the image), each degree of longitude represents a relatively large distance. But near the poles (the top and bottom of the image), the same degree of longitude represents a much smaller distance—converging to zero at the exact pole. Yet equirectangular projection assigns the same pixel width to each degree of longitude everywhere in the image.
This means pixels near the poles represent much less actual content than pixels near the equator. A single pixel at the very top of an equirectangular image represents the entire 360-degree ring around the north pole of the sphere, compressed into a tiny point. This is why the top and bottom of equirectangular images look so stretched—those areas are massively oversampled compared to the equatorial regions.
When you view the image through a proper 360-degree viewer, the software knows exactly how to interpret this distortion. It takes each pixel’s position, converts it to latitude and longitude, and projects it onto the correct position on a virtual sphere surrounding the viewer. The stretching that looked like a flaw becomes the key that allows seamless spherical viewing.
This also explains why equirectangular projection is somewhat inefficient for storage. The polar regions contain many more pixels than necessary to represent their actual content. Alternative formats like cube maps store spherical content more efficiently, but equirectangular remains popular because of its simplicity and universal compatibility.
Equirectangular vs Other Projection Types
While equirectangular is the most common format for 360-degree content, it’s not the only option. Understanding the alternatives helps you choose the right format for specific applications and explains some of the trade-offs involved.
Cube map projection divides the spherical view into six separate square images, one for each face of an imaginary cube surrounding the viewer. This format stores polar regions more efficiently since each face has uniform pixel density. Many game engines and VR applications convert equirectangular images to cube maps internally for faster rendering. The downside is that cube maps require more complex software to display and aren’t as universally supported.
Mercator projection is another cylindrical projection similar to equirectangular, but it stretches latitude non-uniformly to preserve angles and shapes at the expense of area. You’ve seen this projection used for world maps where Greenland appears larger than Africa despite being much smaller in reality. Mercator isn’t commonly used for 360 photography because the angular distortions complicate the coordinate mathematics.
Here’s a comparison of the main projection types used in 360 content:
| Projection Type | Aspect Ratio | Pros | Cons | Best For |
|---|---|---|---|---|
| Equirectangular | 2:1 | Universal compatibility, simple math, single file | Inefficient polar storage, visible stretching | General use, sharing, VR platforms |
| Cube Map | Variable (6 squares) | Efficient storage, uniform quality, fast GPU rendering | Six files, complex software, seam management | Game engines, real-time rendering |
| Equiangular Cubemap | Variable | Better polar efficiency than equirectangular, single file option | Less universal support, newer format | YouTube 360, some VR platforms |
For most photographers and content creators, equirectangular projection remains the practical choice because virtually every 360 platform, viewer, and editing tool supports it. You can always convert to other formats when needed for specific applications.
How Viewers Convert Flat to Immersive 360
The magic of 360 photography happens when viewing software takes that distorted flat image and transforms it into an immersive spherical experience. Understanding this process demystifies why equirectangular works the way it does.
When you open an equirectangular image in a 360 viewer—whether it’s Facebook, YouTube, a VR headset, or dedicated panorama software—the viewer creates a virtual sphere around your viewing position. For each pixel on your screen, it calculates which direction you’re looking based on your current view angle and field of view settings.
The viewer then converts this viewing direction into latitude and longitude coordinates and looks up the corresponding pixel in the equirectangular image. The math is straightforward: horizontal screen position maps to longitude, vertical position maps to latitude. The viewer samples the equirectangular image at this coordinate and displays the color on your screen.
Here’s the basic coordinate conversion formula that viewers use. To convert from equirectangular UV coordinates (0-1 range) to spherical direction:
Longitude = (U * 360) – 180 degrees
Latitude = (V * 180) – 90 degrees
Then the spherical coordinates convert to a 3D direction vector:
X = cos(latitude) * sin(longitude)
Y = sin(latitude)
Z = cos(latitude) * cos(longitude)
This direction vector tells the viewer which way to “look” into the spherical environment for each pixel on your screen. As you pan and tilt your view, the viewer recalculates these lookups in real-time, sampling different regions of the equirectangular image to show you different parts of the sphere.
VR headsets work the same way but render the image twice—once for each eye—with slight offsets to create stereoscopic depth. Some advanced 360 formats include separate left and right eye equirectangular images for true 3D VR experiences.
Practical Applications of Equirectangular Projection
Equirectangular projection has become essential across many industries beyond casual photography. Understanding these applications helps you see why mastering this format matters for professional work.
Real estate virtual tours represent one of the largest commercial uses of equirectangular imagery. Agents photograph properties with 360 cameras, creating equirectangular images that potential buyers can explore remotely. Platforms like Matterport and Kuula host these tours, allowing viewers to virtually walk through homes. The standardized equirectangular format means agents can shoot with any 360 camera and upload to any platform.
Google Street View is built entirely on equirectangular photography. The familiar street-level imagery you explore in Google Maps comes from cameras mounted on cars, bikes, and backpacks, all capturing equirectangular panoramas. Google’s infrastructure expects this format, so any Street View-compatible camera outputs equirectangular images.
VR and AR applications rely heavily on equirectangular projection for environmental backgrounds and skyboxes. When you put on a VR headset and look around a virtual environment, you’re often viewing equirectangular imagery mapped onto a sphere surrounding your virtual position. Game engines like Unity and Unreal can import equirectangular skybox images directly.
Architectural visualization uses equirectangular renders to show clients proposed spaces. Architects can render their 3D models as 360 panoramas and share them with clients who can explore the designs using any web browser. This has largely replaced static rendered images for client presentations.
Educational institutions use equirectangular imagery for virtual field trips and immersive learning experiences. Students can explore historical sites, museums, and natural environments without leaving the classroom. The format’s universal compatibility means content works across devices from smartphones to dedicated VR headsets.
Training simulations in industries like healthcare, manufacturing, and emergency response use 360 video and imagery to create realistic scenarios. Trainees can practice recognizing hazards and making decisions in safe virtual environments that accurately represent real-world conditions.
Viewing and Editing Equirectangular Images
Working with equirectangular images requires specialized software that understands the spherical nature of the content. Here’s what I’ve learned about the available tools.
For viewing equirectangular images, you have many options. Most social platforms (Facebook, YouTube, Flickr) automatically detect equirectangular metadata and display images in 360-degree viewers. Dedicated panorama viewers like Pannellum and Marzipano offer more control and can be embedded on websites. VR media players like Skybox VR and Pigasus provide the most immersive viewing experience through headsets.
Editing equirectangular images requires software that can either work with the spherical projection directly or temporarily convert it to a viewable format. Adobe Photoshop has added 360-degree editing capabilities in recent versions, allowing you to apply adjustments while previewing in spherical mode. This prevents accidental edits that would create seams or visible artifacts.
For stitching multiple images into equirectangular panoramas, PTGui remains the industry standard with powerful control over the stitching process. Hugin offers similar functionality as free, open-source software. Both programs handle the complex mathematics of converting overlapping images into seamless equirectangular output.
Here are some best practices I follow when editing equirectangular images:
Always work on a copy of the original file—360 images contain metadata that can be lost during editing. Never crop an equirectangular image, as this breaks the 2:1 aspect ratio requirement. Avoid adding text or graphics that span the top or bottom edges, as these will appear severely distorted. When retouching, remember that pixels near the poles represent different amounts of actual content than pixels near the equator.
Common Mistakes and Troubleshooting
After working extensively with 360 photography, I’ve identified the most common issues that cause problems. Here’s how to avoid or fix them.
Aspect ratio errors occur when images are accidentally cropped or resized incorrectly. Always verify that your final output has exactly a 2:1 ratio before uploading to 360 platforms. An image that’s even slightly off will either fail to display correctly or show obvious distortion artifacts.
Missing or incorrect metadata prevents platforms from recognizing images as 360 content. Equirectangular images should include XMP metadata specifying the projection type and field of view. If your image opens as a flat photo instead of a 360 view, the metadata is probably missing or corrupted. Most 360 cameras embed this automatically, but it can be stripped during editing.
Stitching seams become visible when the overlap zone between lenses isn’t blended properly. This often happens with subjects close to the camera or in scenes with complex geometry. Some cameras allow manual stitch adjustment, and post-processing software can sometimes correct visible seams, but prevention through proper capture technique works best.
Nadir and zenith holes appear when the camera’s blind spots (directly above and below) aren’t covered by either lens. Many 360 cameras leave small holes at these positions that become visible when looking straight up or down. Some photographers capture additional images with the camera pointing up and down to fill these gaps during stitching.
Platform compatibility issues arise when specific platforms expect certain metadata, resolution limits, or file formats. Google Street View, for example, has specific requirements for GPS data and image dimensions. Always check the platform’s guidelines before uploading your equirectangular content.
FAQ
What is equirectangular projection effect 360 camera?
Equirectangular projection is the standard format 360 cameras use to store spherical panoramic images as flat 2D files. When you capture a 360 photo, the camera maps the complete spherical environment around you onto a rectangular image with a 2:1 aspect ratio (width exactly double the height). This format looks stretched and distorted when viewed normally but becomes immersive when displayed through 360-degree viewing software that wraps the flat image back onto a sphere.
What is equirectangular projection used for?
Equirectangular projection is used for virtual tours in real estate and hospitality, Google Street View imagery, VR and AR applications, architectural visualization, 360 product photography, immersive educational content, training simulations, and any application requiring complete spherical environment capture. Its universal compatibility makes it the standard format for sharing and distributing 360-degree content across all major platforms and viewing devices.
What are the disadvantages of 360 cameras?
360 cameras have several disadvantages: complex post-production workflow requiring specialized software, visible stitching errors where lens images meet, lower effective resolution when viewing specific areas, poor low-light performance due to small sensors, no zoom capability for distant subjects, the photographer often visible in shots unless using invisible stick techniques, very large file sizes requiring substantial storage, and limited creative control compared to traditional photography.
Can a 360 camera see everything?
A 360 camera captures nearly everything around it but has limitations. Most dual-lens 360 cameras have small blind spots directly above and below the camera (at the nadir and zenith) where neither lens can see. Additionally, while the camera captures the full 360-degree horizontal field of view, it cannot zoom in on distant subjects, so far-away objects lack detail. The photographer is typically visible in the shot unless using special techniques like timer delays or invisible selfie sticks.
Conclusion
Understanding equirectangular projection transforms 360 photography from mysterious technology into something you can confidently control. You now know that equirectangular projection maps spherical environments onto flat 2D images using latitude and longitude coordinates, always produces images with a 2:1 aspect ratio, and appears distorted when flat but corrects itself when viewed through proper 360-degree software.
The format’s universal compatibility makes it the practical choice for sharing 360 content across platforms from VR headsets to social media. Whether you’re creating real estate virtual tours, architectural visualizations, or simply capturing immersive travel memories, equirectangular projection is the foundation that makes it all work.
I encourage you to experiment with your own 360 photography now that you understand what’s happening behind the scenes. Pay attention to the 2:1 aspect ratio, watch for stitching errors with nearby subjects, and always use proper 360 viewing software to see your images as they were meant to be experienced. The more you work with equirectangular images, the more intuitive the format becomes.