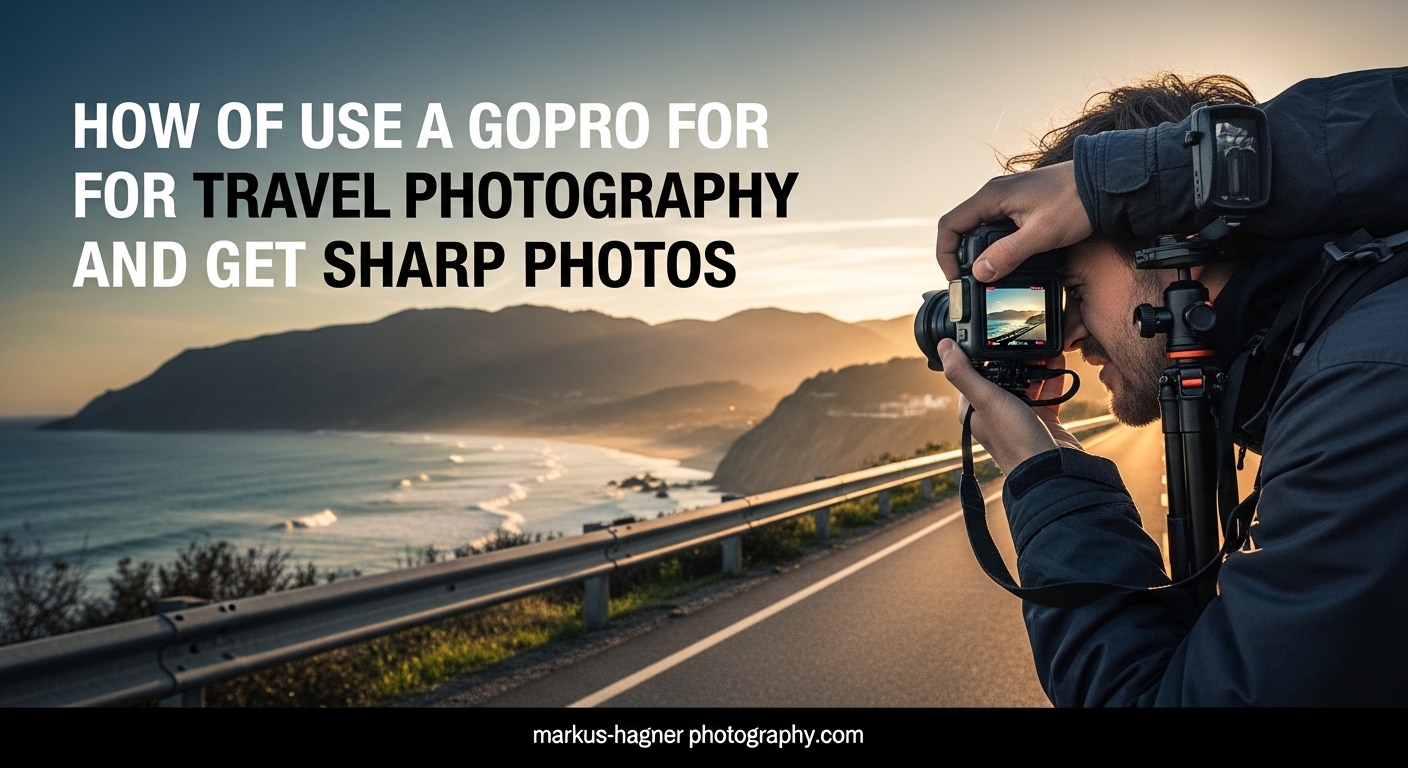
Travel photography demands a camera that can handle anything you throw at it. Rain, sand, water, and the occasional drop onto rocky terrain. That is where the GoPro shines. This guide shows you exactly how to use a GoPro for travel photography and get sharp photos that look professional, not like grainy action camera snapshots.
I have spent years shooting with GoPro cameras alongside my primary DSLR and mirrorless setups. What I learned surprised me. The GoPro has become one of my favorite travel companions for specific situations. But getting sharp photos requires understanding its unique characteristics and limitations.
The truth is that GoPro cameras have a fixed-focus lens with a small sensor. This combination creates both advantages and challenges. Most blurry GoPro photos happen because photographers misunderstand how the focus system works. By the end of this guide, you will know exactly which settings to use, when to use each shooting mode, and the critical distance rule that determines whether your photos turn out sharp or soft.
Understanding GoPro for Travel Photography
Before diving into settings, let us be honest about what a GoPro can and cannot do. This is not a DSLR replacement. The small sensor and fixed wide-angle lens create inherent limitations for still photography. However, for adventure travel, water activities, and situations where you would not risk a regular camera, the GoPro excels.
Why Choose a GoPro for Travel
The GoPro offers advantages no other camera can match for travel photography. It is waterproof to 33 feet without a housing on current models. It survives drops that would destroy other cameras. The compact size means you actually bring it places where larger cameras stay in the hotel room.
Travel photographers on Reddit consistently praise the GoPro for specific use cases. Surf and beach photography where you cannot take a regular camera. Underwater shots while snorkeling or diving. POV perspectives from activities like skiing, mountain biking, or zip-lining. Selfie shots in front of landmarks where the wide angle captures both you and the background.
The hyperfocal distance of the wide-angle lens means landscapes from 12 inches to infinity stay reasonably sharp. This infinite depth of field becomes an advantage for scenic travel photography where you want everything in focus.
GoPro Strengths and Limitations
Let me be direct about what the GoPro does well and where it struggles based on real-world use and community feedback.
GoPro Strengths:
- Waterproof and rugged for any conditions
- Ultra-wide perspective perfect for landscapes and architecture
- Hands-free shooting with voice control and mounts
- Excellent for action shots and fast-moving subjects
- Compact enough to carry everywhere
- Hyperfocal distance keeps everything sharp from 12 inches onward
GoPro Limitations:
- Small sensor produces noise in low light
- No optical zoom capabilities
- Fixed focus requires minimum 12-inch distance for sharp photos
- Wide-angle distortion in portraits and people photos
- Photos look good on camera but reveal quality issues on large screens
- Not suitable for large prints or gallery display
One experienced photographer on the GoPro forums put it perfectly. GoPro photos are good enough for social media but not nice gallery work. Manage your expectations accordingly.
When to Use GoPro vs Another Camera
The GoPro works best as a secondary camera for most travel photographers. Use it for situations where your primary camera cannot go or would be at risk. Bring both if you want professional-quality photos alongside adventure shots.
Choose the GoPro when shooting in or around water, during active sports, in rainy or dusty conditions, for unique POV angles, or when traveling ultralight. Switch to your main camera for low-light situations, portraits, detail shots, and any photos you want to print large.
Essential Camera Settings for Sharp Photos
The right settings make the difference between soft, disappointing images and sharp, professional-looking travel photos. Here is exactly what you need to configure.
Protune Settings Explained
Protune unlocks manual controls that are essential for getting sharp photos. Turn it on immediately. Without Protune, the GoPro makes all exposure decisions automatically, which often results in higher ISO settings and softer images.
To enable Protune, swipe down on the back screen, tap the Protune icon, and toggle it on. This reveals the advanced settings menu where you control every aspect of exposure.
Key Protune Settings for Sharp Photos:
- Color: Choose Flat for maximum editing flexibility or GoPro Color for ready-to-share results
- ISO Min: Set to 100 for best quality in good light
- ISO Max: Limit to 1600 to prevent excessive noise
- Sharpness: Set to Medium for balanced results without over-sharpening artifacts
- EV Comp: Adjust minus one-third to minus two-thirds for bright scenes to preserve highlights
ISO and Sharpness Settings
ISO control is your primary tool for managing image quality. The small GoPro sensor produces noticeable noise at ISO settings above 800. Keep ISO as low as possible for the sharpest results.
In bright daylight, lock ISO at 100-200. During golden hour, you might need ISO 400-800. Only push to ISO 1600 or higher when absolutely necessary, understanding that image quality will suffer.
The sharpness setting affects how much in-camera processing gets applied to edges. High sharpness creates artificial-looking halos around subjects and exaggerates noise. Low sharpness can leave images looking soft. Medium provides the best balance for most situations.
Field of View Options
GoPro cameras offer multiple field of view options that dramatically change how your photos look. Understanding when to use each helps you capture better travel photos.
Wide: The default setting captures the maximum angle of view. Use for landscapes, architecture, and situations where you want to include as much of the scene as possible. Creates the most fisheye distortion at edges.
Linear: Digitally corrects the fisheye distortion for more natural-looking photos. Perfect for people photos, city scenes, and any situation where distortion looks unnatural. You lose some of the ultra-wide perspective.
Narrow: Provides the most zoomed-in view with minimal distortion. Useful when you want a tighter composition or need to avoid including unwanted elements at the edges of the frame.
For most travel photography, I recommend shooting in Wide for landscapes and Linear for anything involving people or architecture.
RAW vs JPEG for Travel
Shooting in RAW format gives you significantly more control over the final image. The GoPro captures DNG files that you can process in Lightroom, Photoshop, or other RAW editors. This matters because GoPro images typically need adjustment to look their best.
RAW files capture more dynamic range and allow you to recover details in shadows and highlights. You can adjust white balance after shooting without quality loss. The 12-bit color depth provides smoother gradations.
The trade-off is file size and workflow. RAW files take up 4-5 times more space than JPEGs. You must process every photo before sharing. For a week-long trip, this means carrying more memory cards and spending time editing after your travels.
My recommendation: Shoot RAW for important shots and switch to JPEG for casual snapshots. Enable RAW+JPEG if your model supports it for maximum flexibility.
The Critical 12-Inch Focus Rule
This is the single most important thing to understand about getting sharp GoPro photos. The GoPro has a fixed-focus lens with a minimum sharp focus distance of approximately 12 inches, or 30 centimeters.
Anything closer than 12 inches will appear soft or blurry. This is not a defect. It is simply how the lens optics work. I cannot count how many forum posts I have seen from frustrated users wondering why their close-up shots look terrible.
Community members on Reddit consistently report this same finding. One user noted that for the image to be sharp on their Hero 11 Black, the lens needs to be at least 12 inches from the subject. This rule applies to all GoPro models.
When composing shots, maintain at least 12 inches between the camera and your closest subject. For selfies, extend your arm fully. For food or detail shots, step back and crop later if needed. This one rule alone will dramatically improve your photo sharpness.
Shooting Modes and Techniques for Travel
The GoPro offers several shooting modes designed for different situations. Choosing the right mode for each scenario helps you capture the best possible travel photos.
Single Photo Mode
Basic single photo mode works well for static scenes and posed shots. The camera captures one image each time you press the shutter. Simple and straightforward for most travel photography situations.
Use single photo mode when photographing landscapes, architecture, posed portraits, and any situation where you have time to compose carefully. This mode conserves battery and storage space compared to continuous shooting options.
Burst Mode for Action Shots
Burst mode captures multiple photos in rapid succession, perfect for action and fast-moving subjects. The GoPro can shoot 30 frames per second at lower resolutions or slower burst rates at full resolution.
Travel situations where burst mode shines include capturing friends jumping on the beach, wildlife in motion, street performers, sports activities, and any moment where timing is critical.
Set burst mode to capture 10-30 frames, then select the best shot afterward. Enable RAW capture in burst mode if your camera supports it for maximum quality.
Time-Lapse for Landscapes
Time-lapse mode automatically captures photos at set intervals, perfect for creating sequences or capturing gradual changes in light. The resulting images work as individual photos or can be combined into videos.
For travel photography, use time-lapse during sunrise and sunset, at busy tourist locations, for cloud movement over landscapes, and anywhere you want to capture the passage of time.
Set intervals based on subject speed. Clouds and slow movement: 5-10 seconds. People and traffic: 1-2 seconds. Fast action: 0.5 seconds.
Night Lapse for Low Light
Night Lapse mode extends exposure times for low-light photography while maintaining the interval shooting of time-lapse. This mode produces some of the most dramatic GoPro travel photos when used correctly.
One professional tip from experienced photographers: use Night Lapse mode even during daylight for continuous RAW shooting. The longer exposures and RAW capture produce higher quality than standard photo mode.
For actual night photography, set exposure to auto or manually adjust shutter speed based on available light. Keep the camera perfectly still using a tripod or mount. Expect some noise in dark areas due to sensor limitations.
Super Photo and HDR
Super Photo mode applies in-camera processing to improve dynamic range and local contrast. The camera analyzes the scene and applies HDR-like effects automatically. This can produce better results in high-contrast situations but may also create unnatural-looking images.
Forum users report mixed results with Super Photo. Some find it overprocesses images, creating artificial looks. Others appreciate the convenience for quick sharing without editing.
My recommendation: Try Super Photo for quick snapshots but shoot RAW for important photos. You can always apply HDR effects during editing with more control over the final result.
Essential Accessories for Travel Photography
The right accessories transform your GoPro from a simple point-and-shoot into a versatile travel photography tool. Here are the items that actually make a difference based on real-world use.
Must-Have Mounts and Stabilizers
The 3-Way mount tops my list of essential accessories. It functions as a camera grip, extension arm, and tripod in one compact package. Perfect for selfies, stable handheld shots, and setting up time-lapses without carrying separate gear.
A simple hand grip or Handler provides buoyancy for water activities while giving you stable handheld control. Essential for beach, pool, and water sports photography.
For adventure photography, the Bite Mount lets you capture hands-free POV shots by holding the camera in your mouth. Popular with skiers, bikers, and action sports enthusiasts.
Battery Management for Travel Days
GoPro batteries drain quickly, especially when shooting in cold conditions or using power-intensive features. Forum users consistently rank battery life as a major frustration during travel.
Carry at least two spare batteries for a full day of shooting. The Enduro batteries in newer models offer better cold-weather performance and faster charging than standard batteries.
Conserve power by lowering screen brightness, disabling voice control when not needed, and using QuickCapture to start recording without turning on the screen. Carry a USB power bank for charging between locations.
ND Filters for Creative Effects
Neutral density filters reduce light entering the lens, allowing longer exposures even in bright conditions. This enables creative effects like smooth water in waterfalls and rivers, motion blur in moving subjects, and cinematic looks in bright daylight.
PetaPixel’s landscape photography guide specifically recommends ND filters for long exposure water shots with GoPro. The fixed aperture means you cannot stop down for longer exposures without them.
Pack ND filters if you plan landscape photography with creative motion blur effects. Start with a 6-stop ND filter for typical daylight conditions.
Underwater Photography Gear
While GoPro cameras are waterproof, adding a Protective Housing extends depth capability to 196 feet and provides additional protection against impacts. Essential for diving and water sports.
Anti-fog inserts prevent lens fogging when moving between temperature extremes. Insert them into the housing before underwater sessions to maintain clear photos.
For split shots showing half above and half below water, use a dome port attachment. This places the lens at the waterline for dramatic 50/50 images.
Packing and Protection Solutions
A dedicated GoPro case keeps your camera and accessories organized and protected during travel. Look for cases with custom foam inserts that hold the camera, batteries, mounts, and memory cards securely.
The Sleeve plus Lanyard provides quick access while protecting the camera body from scratches. Wear it around your neck for ready access during active travel days.
Composition and Shooting Techniques
Technical settings only take you so far. Strong composition transforms ordinary snapshots into compelling travel photographs. Here are techniques specific to GoPro’s unique characteristics.
Working with Wide-Angle Perspective
The ultra-wide GoPro lens creates dramatic perspectives that other cameras cannot capture. Use this to your advantage by getting close to foreground subjects while including expansive backgrounds.
For landscape photography, position interesting foreground elements near the camera. Rocks, flowers, or architectural details add depth when captured close with the wide lens. The 12-inch minimum focus distance still applies, so maintain that separation while getting as close as possible.
Minimizing Fisheye Distortion
The wide-angle lens creates barrel distortion that curves straight lines near the edges of the frame. This looks natural in some situations but distracting in others.
Switch to Linear field of view when photographing buildings, people, or any scene where distortion appears unnatural. The digital correction removes most fisheye effect at the cost of some field of view.
Alternatively, compose shots with subjects centered where distortion is minimal. Keep people away from frame edges where stretching becomes obvious.
Best Practices for People and Portraits
GoPro portraits require different technique than traditional portrait photography. The wide angle can make people look distorted if positioned incorrectly.
Position people in the center third of the frame where distortion is minimal. Keep them at least arm’s length from the camera. Use Linear mode for more flattering results. Embrace the environmental portrait style where the wide angle captures both the person and their surroundings.
POV and Creative Angles
The GoPro excels at perspectives impossible with traditional cameras. Mount it on your chest for hiking shots, on your helmet for biking, or hold it at arm’s length for dynamic selfies with context.
Low-angle shots look particularly dramatic with the wide lens. Place the camera near the ground pointing upward for heroic perspectives. The compact size and rugged build mean you can position it places you would never place a regular camera.
Quick Editing Workflow for Travel Photos
GoPro photos benefit from post-processing to reach their full potential. Even well-exposed images typically need adjustment for optimal results.
GoPro Quik App Basics
The free GoPro Quik app provides basic editing tools right on your phone. Import photos via Wi-Fi, apply presets, adjust exposure and color, then share directly to social media. Convenient for quick edits while traveling.
Quik works well for JPEG images but offers limited RAW processing. For serious editing, transfer files to a computer with proper RAW editing software.
RAW Processing in Lightroom
Adobe Lightroom provides the tools needed to maximize GoPro RAW files. Start by adjusting exposure and recovering highlights. The small sensor often requires noise reduction, especially in shadows.
Apply lens profile corrections to remove remaining distortion. Adjust clarity and texture carefully to enhance detail without exaggerating noise. The Flat color profile preserves maximum dynamic range for recovery.
Quick Fixes for Common Issues
Blurry photos usually stem from subjects too close to the camera. Unfortunately, you cannot fix this in editing. Prevention through proper shooting technique is the only solution.
Noisy images benefit from luminance noise reduction in Lightroom. Apply enough to smooth noise without destroying detail. Excessive noise reduction creates plastic-looking images.
Color casts from mixed lighting or underwater conditions respond well to white balance adjustment in RAW processing. Shoot with white balance locked for consistent results across a series.
Frequently Asked Questions
Is GoPro good for travel photography?
Yes, GoPro is excellent for specific travel photography situations including underwater shots, action sports, rainy or dusty conditions, and unique POV angles. However, it works best as a secondary camera alongside your primary DSLR or mirrorless setup. The small sensor limits low-light performance and the fixed wide-angle lens creates distortion in portraits. For landscapes, adventure shots, and any situation where you would not risk a regular camera, the GoPro excels.
Why are my GoPro photos blurry?
GoPro photos appear blurry for several common reasons. The most frequent cause is subjects closer than 12 inches from the camera, since GoPro has a fixed-focus lens with a 12-inch minimum sharp focus distance. Other causes include camera movement during capture, high ISO settings creating noise that looks like blur, dirty or foggy lens, and wrong settings for the lighting conditions. Maintain at least 12 inches from your subject and use appropriate ISO settings for the light available.
What are the best GoPro settings for travel photos?
For optimal travel photo quality, enable Protune with these settings: ISO Min 100, ISO Max 1600, Sharpness Medium, and shoot in RAW format for editing flexibility. Use Wide field of view for landscapes and Linear for people and architecture. Set EV Compensation to minus one-third for bright outdoor scenes. In low light, accept higher ISO or use Night Lapse mode with longer exposures. Always maintain at least 12 inches between the camera and your subject for sharp focus.
What is the minimum focus distance for GoPro?
The GoPro minimum focus distance is approximately 12 inches, or 30 centimeters. Subjects closer than this distance will appear soft or blurry regardless of settings. This is a physical characteristic of the fixed-focus lens design, not a defect. For sharp photos, always maintain at least 12 inches between the camera lens and your closest subject. This rule applies to all GoPro models including the HERO11, HERO12, and HERO13.
Should I shoot RAW or JPEG with GoPro for travel?
Shoot RAW for important travel photos where you want maximum editing flexibility and quality. RAW files capture more dynamic range, allow white balance adjustment after shooting, and provide 12-bit color depth for smoother gradations. Shoot JPEG for casual snapshots you want to share quickly without editing. RAW files require 4-5 times more storage space and need processing before sharing. Consider enabling RAW plus JPEG mode if your camera supports it for maximum flexibility while traveling.
Conclusion
Learning how to use a GoPro for travel photography and get sharp photos requires understanding both its capabilities and limitations. The 12-inch focus rule alone solves most blurry photo problems. Protune settings give you control over image quality. The right shooting mode matches your subject to the camera’s strengths.
Treat the GoPro as a specialized tool for adventure and situations where other cameras cannot go. Master its settings, respect its limitations, and you will capture travel photos that stand out from typical smartphone snapshots.