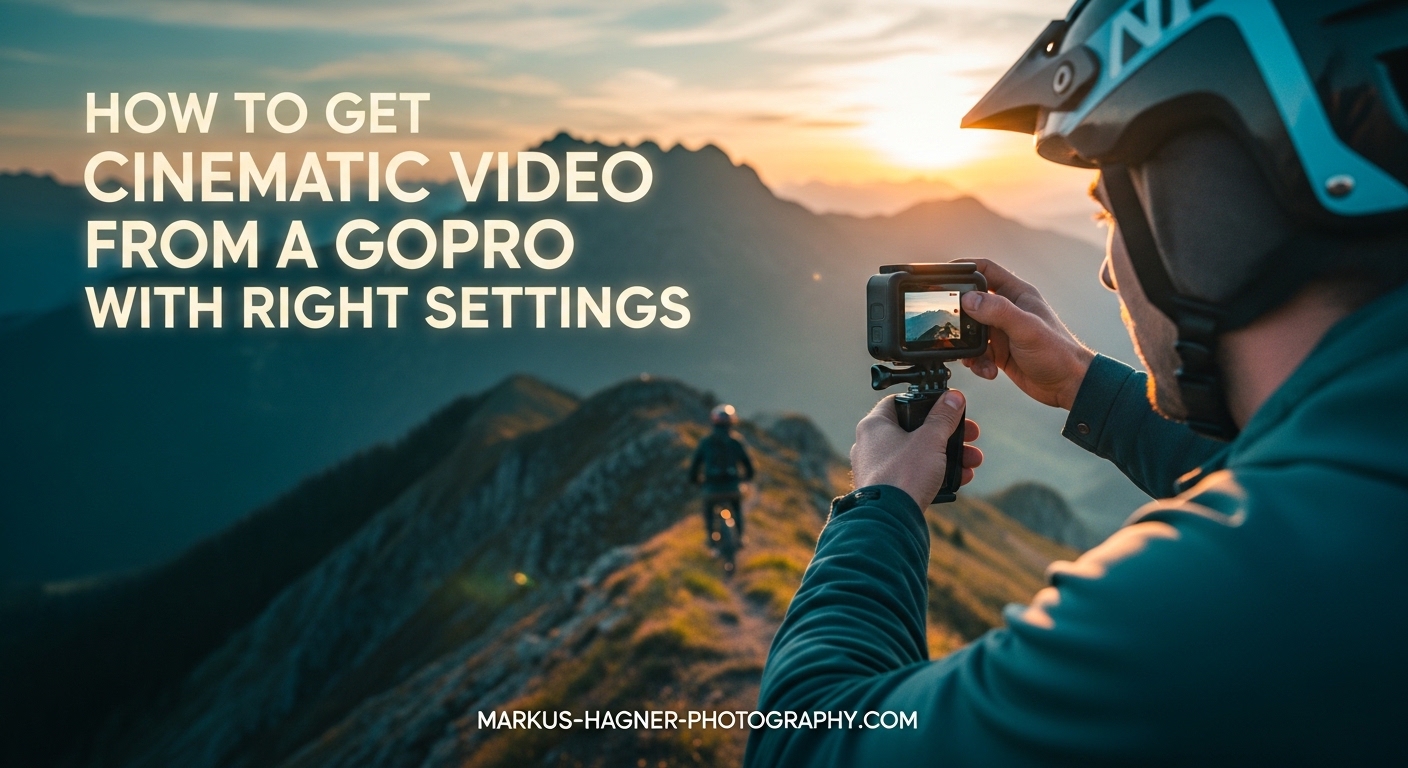
Your GoPro is capable of far more than just action shots and vacation clips. With the right GoPro cinematic video settings, you can capture footage that rivals professional cinema cameras. The secret lies in understanding a few key settings that transform ordinary action camera video into film-like content.
I’ve spent years testing GoPro settings across different models and shooting conditions. What I’ve learned is that cinematic footage isn’t about having the newest camera. It’s about making intentional choices with frame rates, shutter speed, and color profiles. Let me walk you through exactly how to set up your GoPro for that coveted cinematic look.
What Makes GoPro Video Cinematic?
Cinematic video mimics the visual characteristics of traditional film. This includes natural motion blur, carefully controlled exposure, and colors that feel rich rather than oversaturated. When viewers describe footage as “cinematic,” they’re usually noticing how smooth the motion feels and how the colors have depth and dimension.
Does GoPro have cinematic mode? No, there’s no single button or mode that creates cinematic footage automatically. Instead, achieving that film-like quality requires combining several specific settings within Protune. Think of it as building a recipe rather than pressing a preset. The good news is that once you understand these settings, you can apply them consistently across any shooting situation.
The key elements that create cinematic footage include shooting at 24 frames per second for film-like motion, using a proper shutter speed that creates natural motion blur, and capturing in a flat color profile that gives you flexibility during editing. Each of these works together to separate amateur-looking video from professional results.
How to Enable Protune on Your GoPro
Protune is the gateway to cinematic footage on any GoPro. What is the GoPro Protune setting? It’s a collection of manual controls that unlock professional-level customization for your video recordings. Without Protune enabled, your GoPro makes automatic decisions about exposure, color, and sharpness that typically produce “video-like” rather than cinematic results.
Here’s how to enable Protune on your GoPro:
Step 1: Swipe down from the top of your GoPro screen to access the settings menu.
Step 2: Tap on “Protune” or navigate to Video Settings, then find the Protune toggle.
Step 3: Switch Protune to “On” to reveal all manual control options.
Once Protune is active, you’ll see new options appear including frame rate, shutter speed, ISO, white balance, and color profile. These are the tools that will transform your footage. I recommend spending time with each setting to understand how it affects your image. Many filmmakers I know leave Protune permanently enabled because the control it provides is essential for consistent results.
Should I use Protune on GoPro? Absolutely, if you want cinematic footage. The only time to avoid it is when you need grab-and-go shooting with zero post-production work. But for any project where quality matters, Protune is non-negotiable.
Frame Rate Selection: 24fps vs 30fps vs 60fps
Frame rate is one of the most impactful decisions for cinematic footage. What is the best frame rate for cinematic shots? The answer depends on your creative intent, but 24fps is the traditional cinema standard.
24fps creates that classic film look that audiences associate with movies and high-end productions. This frame rate produces natural motion blur that feels smooth and organic. When you watch a Hollywood film, you’re almost certainly watching 24 frames per second. For pure cinematic appeal, this is your starting point.
30fps produces smoother motion that works well for broadcast television and web content. The movement feels slightly more “real” and less dreamy than 24fps. Many vloggers and content creators prefer 30fps because it feels contemporary while still looking professional.
60fps opens up slow-motion possibilities in post-production. When you record at 60fps and slow footage down to 24fps or 30fps during editing, you get buttery smooth slow motion. This is perfect for action sequences, sports, or any moment you want to emphasize through speed manipulation.
Should I record in 24, 30 or 60 fps? For cinematic narrative content, choose 24fps. For versatile web content, 30fps works well. For action or when you want slow-motion options, shoot at 60fps and slow it down in post.
The relationship between frame rate and shutter speed matters enormously. Each frame rate requires a specific shutter speed to achieve proper motion blur. This is where the 180-degree rule comes into play.
Shutter Speed and the 180-Degree Rule
Can a GoPro adjust the shutter speed? Yes, and this control is essential for cinematic footage. The 180-degree shutter rule is a fundamental principle that cinematographers have followed for decades. Understanding it will immediately improve your footage quality.
The rule states that your shutter speed should be approximately twice your frame rate. This creates natural-looking motion blur that our eyes perceive as smooth and cinematic. Here’s how it works in practice:
For 24fps: Set shutter speed to 1/48 or 1/50 second
For 30fps: Set shutter speed to 1/60 second
For 60fps: Set shutter speed to 1/120 second
When you follow this rule, moving objects in your frame will have natural motion blur at their edges. This is what separates cinematic footage from the hyper-sharp, “video-like” appearance that faster shutter speeds produce. Sports broadcasts often use fast shutter speeds for clarity, but narrative cinema uses slower speeds for that dreamy quality.
Here’s the challenge: in bright sunlight, a slow shutter speed like 1/50 will overexpose your image even at the lowest ISO. This is where ND filters become essential. ND (neutral density) filters act like sunglasses for your camera, darkening the image without affecting color. With an ND filter, you can maintain proper shutter speed for cinematic motion blur even in bright conditions.
I carry ND filters in various strengths for different lighting situations. For bright outdoor shooting with 24fps, I typically need an ND16 or ND32 filter to achieve proper exposure at 1/50 shutter speed. Without one, I’d be forced to use faster shutter speeds that kill the cinematic feel.
What shutter speed for 24fps GoPro? Stick to 1/50 whenever possible. If conditions force you faster, know that you’re sacrificing some cinematic quality. If you’re shooting 60fps for slow motion, use 1/120 as your target.
Resolution and Aspect Ratio Settings
Your resolution choice affects both image quality and cropping flexibility. Modern GoPros offer multiple resolution options, and each has distinct advantages for cinematic work.
4K (3840 x 2160) provides maximum detail and gives you room to crop in post without losing quality. This is my default choice for any project where I might need to reframe shots during editing. The file sizes are larger, but the flexibility is worth it.
2.7K (2704 x 1520) offers a good balance between quality and manageable file sizes. For most web content and social media, 2.7K provides excellent quality while saving storage space. Many creators find this resolution hits the sweet spot for everyday shooting.
1080p (1920 x 1080) is sufficient for most delivery platforms but offers less flexibility for cropping and stabilization. I only use 1080p when storage is extremely limited or when I know I won’t need to reframe.
Aspect ratio also matters for cinematic presentation. The standard 16:9 widescreen ratio is what most viewers expect for cinematic content. However, shooting in 4:3 or 8:7 (available on newer GoPro models) gives you more vertical space to work with. You can crop to 16:9 in post while having flexibility to adjust your framing up or down.
Field of view affects how your footage feels cinematically. The Wide setting captures more scene but introduces distortion at the edges. Linear view corrects this distortion for a more natural perspective. For cinematic work, I often prefer Linear because it produces cleaner, more professional-looking footage without the fisheye effect.
White Balance, ISO, and Exposure Settings
These three settings work together to control how bright and colorful your footage appears. Getting them right in-camera saves hours of correction later.
White Balance determines how your camera interprets colors under different lighting conditions. Auto white balance works fine for casual shooting, but for cinematic results, I recommend locking to a specific temperature. This ensures consistent color across all your clips, which is essential when editing.
For daylight shooting, set white balance to 5500K or 5600K. For indoor tungsten lighting, try 3200K. For cloudy or shaded conditions, 6500K often works well. Many GoPros also offer a “Native” white balance option that preserves maximum color information for grading. This is ideal when you plan extensive color work in post-production.
ISO controls your camera’s sensitivity to light. Lower ISO values produce cleaner images with less noise. Higher ISO values brighten the image but introduce grain. For cinematic footage, keep ISO as low as possible, ideally between 100 and 400.
What ISO for GoPro cinematic video? Start at ISO 100 and only increase when absolutely necessary. If you’re shooting in low conditions, you might need to push to ISO 800 or 1600, but expect some noise in the image. The newer GoPro models handle higher ISOs better, but clean footage always starts with the lowest ISO your lighting allows.
Exposure Compensation lets you fine-tune brightness beyond what auto-exposure chooses. If your footage consistently looks too bright or dark, use exposure compensation to adjust. For cinematic work, I often underexpose slightly by -0.5 to -1.0 stops. This preserves highlight detail that would otherwise be clipped, and I can brighten shadows in post-production.
Set your ISO limit in Protune to prevent the camera from automatically pushing ISO too high. I typically set my maximum at 1600 for daylight and 3200 for low-light situations. This prevents ugly noise from creeping into footage when lighting changes unexpectedly.
Color Profile: Flat vs GoPro Color
Your color profile choice significantly impacts post-production flexibility. GoPro offers two main color options: GoPro Color and Flat (also called Log on some models).
GoPro Color produces ready-to-use footage with punchy colors and contrast. This is great when you want to share clips immediately without editing. However, it locks you into a specific look and limits how much you can adjust the image later.
Flat color profile captures more dynamic range and preserves detail in both shadows and highlights. The footage looks washed out and low-contrast straight from the camera. This is intentional. That flat appearance contains more color information that you can manipulate during color grading.
For cinematic work, I strongly recommend shooting in Flat. The extra dynamic range gives you room to create rich, film-like colors during editing. You can always add contrast and saturation later, but you cannot recover detail that was never captured.
Think of Flat profile as shooting RAW photos instead of JPEGs. You’re prioritizing flexibility over immediate appeal. When you color grade Flat footage properly, the results can look genuinely cinematic with rich skin tones and controlled contrast.
Scenario-Based Settings Presets
Different shooting situations call for different approaches. Here are my recommended starting points for common scenarios:
Sunny Outdoor Cinematic:
4K at 24fps, shutter speed 1/50, ISO 100-200, white balance 5500K locked, Flat color profile, Linear field of view. Use ND16 or ND32 filter to achieve proper exposure.
Low Light Cinematic:
4K at 24fps, shutter speed 1/50 (or Auto if too dark), ISO 400-1600, white balance set to match your light source, Flat color profile. Accept some noise rather than using faster shutter speeds.
Action and Sports:
4K at 60fps, shutter speed 1/120, ISO 100-400, white balance locked to conditions, Flat or GoPro Color depending on post-production plans. The 60fps gives you slow-motion options in editing.
Indoor Video:
4K at 30fps, shutter speed 1/60, ISO 400-800, custom white balance matched to indoor lighting, Flat color profile. Watch for mixed lighting situations that create color casts.
FPV Drone Cinematic:
4K at 60fps (slow down to 24fps in post), shutter speed 1/120, ISO 100-400, Flat color profile. The extra frames give you smooth slow motion for those dramatic fly-through shots.
Post-Production Color Grading Basics
Cinematic footage isn’t finished when you stop recording. Color grading is where you shape the final look and feel of your video. This step transforms flat, washed-out footage into rich, cinematic imagery.
Start by adjusting contrast to add depth to your image. Flat footage needs contrast added back in, but be subtle. Too much contrast looks harsh. Next, adjust saturation to taste. Cinematic footage often has slightly muted, controlled colors rather than oversaturated vibrance.
Color wheels let you adjust shadows, midtones, and highlights independently. This is where you create specific looks. Many editors use LUTs (Look-Up Tables) as starting points for cinematic grades. A LUT applies a preset color transformation that you can then tweak to match your vision.
The goal is consistency across all your clips. Viewers should feel like they’re watching one cohesive piece, not a collection of differently colored shots. Match your colors shot to shot, and your footage will feel more professional and cinematic.
Frequently Asked Questions
Does GoPro have cinematic mode?
No, GoPro does not have a specific cinematic mode. Cinematic footage requires combining several manual settings within Protune, including 24fps frame rate, proper shutter speed following the 180-degree rule, flat color profile, and careful exposure control.
What video settings are best for cinematic look?
For cinematic GoPro footage, use these settings: Enable Protune, set frame rate to 24fps, shutter speed to 1/50, choose Flat color profile, lock white balance to match conditions, keep ISO between 100-400, and use Linear field of view. Add an ND filter in bright light to maintain proper shutter speed.
What is the best frame rate for cinematic shots?
24fps is the cinema standard for cinematic footage. This frame rate produces natural motion blur that audiences associate with film. 30fps works for broadcast-style content, while 60fps is best when you plan to create slow motion in post-production.
Should I record in 24, 30 or 60 fps?
Choose 24fps for narrative cinematic content and film-like motion. Use 30fps for web content and vlogs where you want smooth but contemporary feel. Record at 60fps when you want slow-motion options in editing, such as for action sports or dramatic reveals.
Can a GoPro adjust the shutter speed?
Yes, GoPro cameras allow manual shutter speed adjustment when Protune is enabled. For cinematic footage, set shutter speed to approximately twice your frame rate: 1/50 for 24fps, 1/60 for 30fps, and 1/120 for 60fps. This follows the 180-degree shutter rule for natural motion blur.
Conclusion
Getting cinematic video from your GoPro requires intentional settings choices, not magic. Start with 24fps, enable Protune, use flat color profile, and follow the 180-degree shutter rule. Practice these GoPro cinematic video settings across different shooting scenarios, and you’ll develop an intuition for what works in each situation. The camera captures the footage, but your settings choices make it cinematic.