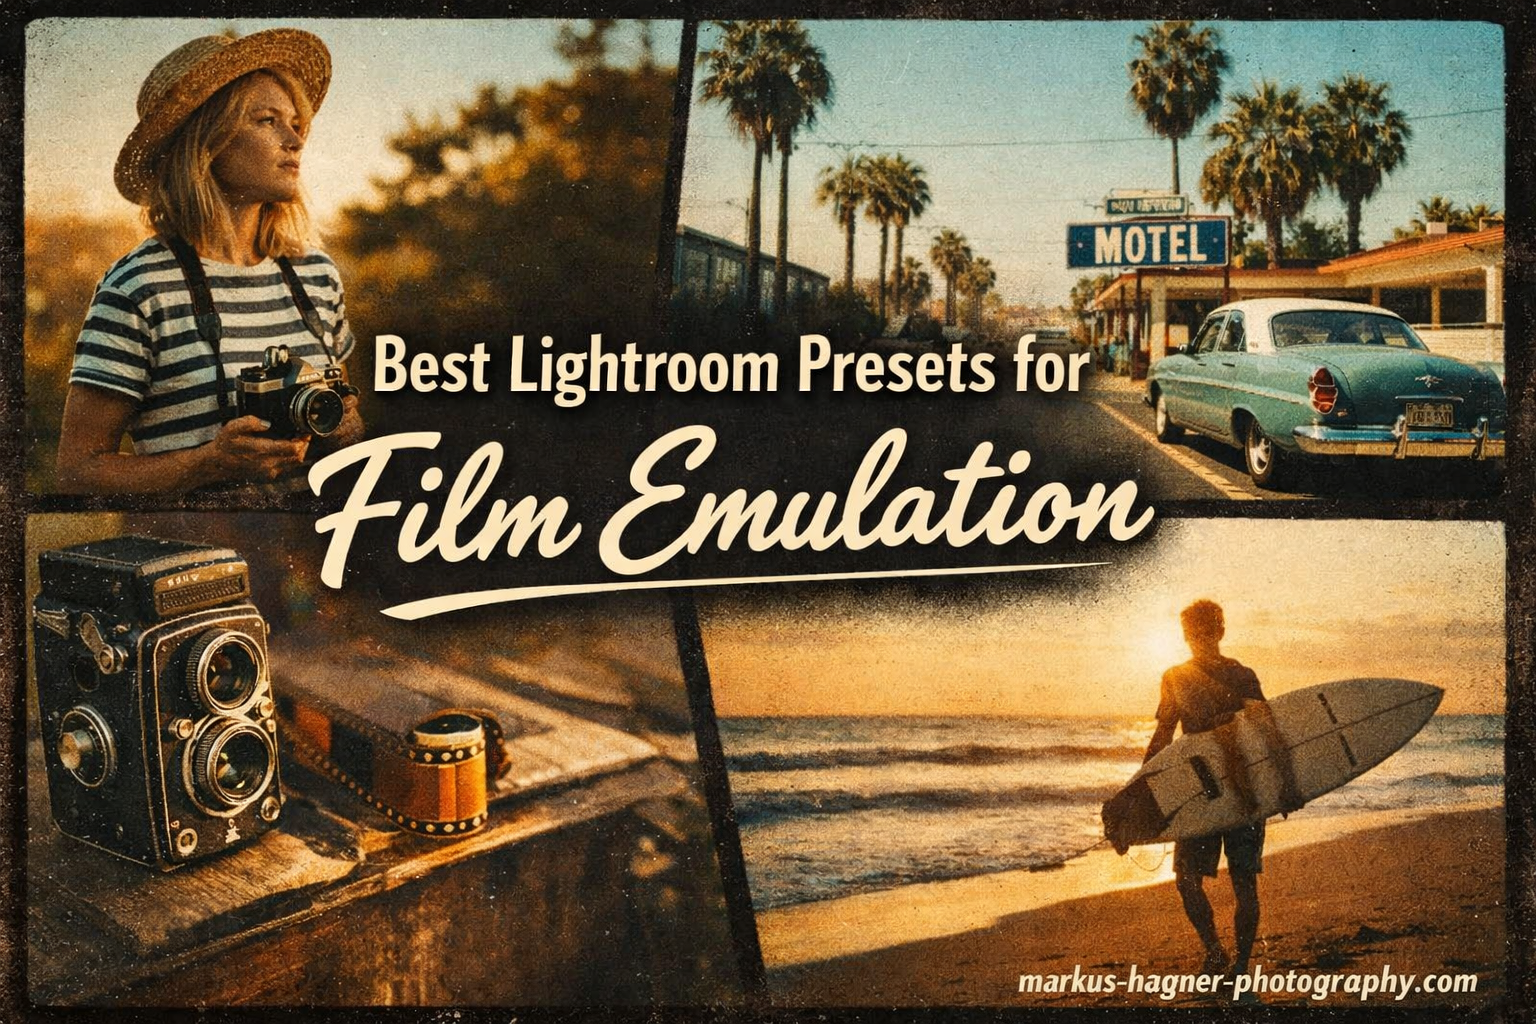
Film photography has made an incredible comeback in recent years, but not everyone wants to deal with the cost and hassle of shooting actual film. That’s where the best Lightroom presets for film emulation come in. These powerful editing tools let you transform your digital photos into images that look like they were shot on classic film stocks like Kodak Portra, Fuji 400H, or Ilford black and white.
After testing dozens of preset packs and resources over the past year, our team has identified the top options that deliver authentic film looks without breaking the bank. Whether you’re a portrait photographer seeking warm skin tones, a street photographer chasing that cinematic vibe, or a landscape artist wanting rich color rendition, this guide covers everything you need to know about achieving the analog film aesthetic in 2026.
The appeal of film emulation goes beyond just nostalgia. Film stocks developed over decades have characteristic color responses that many photographers find more pleasing than clinical digital output. The subtle color shifts, organic grain structure, and unique tonal rolloff of film create images with emotional depth that purely digital processing sometimes lacks.
In this comprehensive guide, we’ll explore five standout products that help you achieve that coveted analog film aesthetic in your digital workflow. From complete workshop packages to specialized preset packs, each option offers something unique for photographers at different skill levels and budgets. We’ll also cover the technical differences between presets and profiles, share tips for choosing the right film stock for your style, and answer the most common questions about film emulation.
Top 3 Picks for Film Emulation Presets
Cinematic Street Photography with Preset Pack
- Cinematic techniques
- Preset pack included
- Bonus eBook
- Practical tips

Adobe Lightroom Complete Workshop
- Complete workflow
- Presets included
- Image processing
- Organization techniques

Digital Photography Made Easy
- Film photography basics
- B&W film development
- Analog techniques
- Beginner-friendly
Best Lightroom Presets for Film Emulation in 2026
| Product | Specifications | Action |
|---|---|---|
|
Cinematic Street Photography with Preset Pack
|
|
Check Latest Price |
|
Adobe Lightroom Complete Workshop
|
|
Check Latest Price |
 Unleash the Power of Lightroom Presets
|
|
Check Latest Price |
|
Digital Photography Made Easy
|
|
Check Latest Price |
 Film & Digital Zone System Photography
|
|
Check Latest Price |
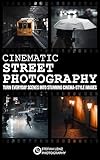
1. Cinematic Street Photography with Preset Pack – Best for Street Photographers
Cinematic Street Photography: Turn Everyday Scenes into Stunning Cinema-Style Images – incl. Preset Pack & BONUS eBook
Pros
- Well written with useful tips
- Beautiful photography style
- Practical tips you can apply immediately
- Inspires creativity
- Good value for the price
Cons
- Some found it overpriced
- Bonus materials require QR code access
- Not for advanced photographers
I picked up this guide a few months ago when I wanted to add more cinematic flair to my street photography. What immediately stood out was how Stefan Lenz breaks down complex composition and lighting concepts into digestible, actionable steps. The included preset pack was a nice surprise that actually delivers on its promise of creating that cinema-style look without looking overprocessed.
The bonus eBook adds extra value, though I did find the QR code access system a bit clunky at first. Once I got everything downloaded, I had immediate access to both the main content and the supplementary materials. For under ten dollars, the amount of practical knowledge packed into this package impressed me significantly.
What I appreciate most is that Lenz doesn’t just hand you presets and send you on your way. He explains the reasoning behind certain editing decisions, which helped me understand how to customize the look for different lighting conditions and subjects. This educational approach means you’re not just copying a style but learning how to adapt it to your unique vision.
The preset pack itself focuses on cinematic color grading rather than trying to replicate specific film stocks. This makes it more versatile for different types of street photography, from golden hour urban scenes to moody nighttime shots. I found the presets particularly effective for creating a cohesive look across an entire photo series.
One thing worth mentioning is that this package works best when you approach it as a learning resource rather than just a preset collection. The real value comes from understanding why certain adjustments work and how to apply those principles to your own editing style.
Who Should Buy This
This package works best for intermediate photographers who want to develop a signature cinematic style without spending hours learning complex color grading. If you shoot street photography, travel, or urban environments, the techniques here translate directly to your work. The preset pack gives you a solid starting point that you can tweak to match your personal vision.
Beginners will also find value here, though some concepts might require a bit of foundational knowledge. The practical tips can be applied immediately, which means you can start seeing improvements in your work right away. The writing style is accessible without being condescending.
Travel photographers who want their images to have a consistent, polished look across different locations and lighting conditions will appreciate the systematic approach. The presets handle varied situations well, from bright daylight to overcast skies.
Who Should Skip This
Advanced photographers who already have a solid grasp of color grading and composition might find the content too basic. If you’re looking for deep technical discussions about film stock characteristics or advanced color science, this won’t satisfy that need. The preset pack is good but not revolutionary for those who already own professional-grade presets.
Photographers specifically seeking authentic film stock emulation like Portra 400 or Fuji 400H might want to look at dedicated film emulation products instead. This package focuses more on cinematic style than accurate film replication.
2. Adobe Lightroom Complete Workshop – Best for Comprehensive Learning
Pros
- Comprehensive coverage
- Excellent workflow instruction
- Great for experts and novices
- Easy to follow tutorials
- Includes valuable presets
- Dramatically reduces editing time
Cons
- Currently unavailable
- Physical DVD format
- Some installation difficulties
When our team first explored this workshop from SLR Lounge, we were struck by how thoroughly it covers every aspect of Lightroom. The presets included here aren’t just throwaway additions either. They’re genuinely useful tools that many photographers have used to cut their editing time from hours to minutes, according to numerous reviews.
The workflow instruction alone makes this package stand out from other Lightroom resources. Rather than just showing you what each slider does, the workshop teaches you how to think about editing as a systematic process. This approach helped me develop a consistent style that I could apply across entire photo shoots with confidence and efficiency.
The DVD format might seem dated in an era of streaming content, but the depth of material justifies it. You can re-watch sections multiple times and pick up new details with each viewing. The tutorials progress logically from basic concepts to advanced techniques, making it accessible for photographers at various skill levels.
What sets this workshop apart is its focus on developing a repeatable, efficient workflow. Many photographers waste hours trying different approaches to each image. This program teaches you a systematic method that produces consistent results while dramatically reducing the time spent per photo.
The included presets serve as practical examples of the techniques being taught. Rather than mysterious black boxes that magically transform your images, these presets demonstrate the principles discussed in the tutorials. Understanding how they work empowers you to create your own variations.
Who Should Buy This
Photographers who want a complete Lightroom education will benefit most from this workshop. If you’re struggling with organization, spending too much time on each edit, or feeling overwhelmed by all the options in Lightroom, this systematic approach will transform your workflow. The included presets serve as excellent starting points for developing your own style.
Portrait and wedding photographers particularly appreciate the efficiency gains. When you’re editing hundreds of images from a single event, having a solid workflow and quality presets makes a massive difference in both speed and consistency. The time savings alone justify the investment.
Beginners who want to start their Lightroom journey with proper habits will avoid developing bad editing practices. The structured curriculum ensures you learn the right way from the beginning rather than cobbling together techniques from random YouTube videos.
Who Should Skip This
The main drawback is availability. Since this product is currently unavailable, you’ll need to wait for restocking or find alternative sources. If you only use computers without optical drives, the DVD format could be problematic unless you have an external drive readily available.
Those seeking the latest Lightroom features might find some content slightly outdated. While the core principles remain relevant, interface changes and new tools added in recent updates won’t be covered. Photographers who prefer streaming content over physical media might find the format inconvenient.
3. Unleash the Power of Lightroom Presets – Best for Preset Organization
Pros
- Logical preset organization
- Empowers understanding of presets
- Well organized and easy to follow
- Comprehensive coverage
- Teaches custom preset creation
- Helps novices understand Develop Module
Cons
- Some users found it not useful
- May be too basic for advanced users
- Older publication may not cover latest features
Klaus Herrmann takes a different approach with this guide compared to most preset resources. Instead of just giving you presets to use, he teaches you how to think about preset organization and development. This philosophy resonated with me because it transforms you from a passive preset consumer into an active preset creator.
The logical organization system Herrmann presents helps you build preset collections that actually make sense for your workflow. No more scrolling through endless lists trying to find the right look or remembering cryptic preset names. His framework for understanding how presets interact with Lightroom’s various features gave me insights I hadn’t considered before reading this book.
What surprised me was how much this book helped me understand the Develop Module itself. By explaining the mechanics behind presets, Herrmann essentially provides a masterclass in Lightroom editing fundamentals. Even if you never create your own presets, the knowledge translates directly to better manual editing decisions.
The book addresses a common frustration many photographers face: accumulating dozens or hundreds of presets but never being able to find the right one quickly. Herrmann’s organizational system brings order to the chaos, making your preset library a useful tool rather than a source of frustration.
Learning to create your own presets also means you can develop looks specifically tailored to your shooting style, camera system, and typical subjects. Generic presets often require significant tweaking to work well with specific setups. Custom presets built from your own edits fit perfectly from the start.
Who Should Buy This
Photographers who feel overwhelmed by disorganized preset collections will find immediate value here. If you’ve accumulated dozens of presets but struggle to find the right one quickly, this organizational framework will save you time and frustration. Those interested in creating their own presets rather than always buying them will appreciate the systematic approach to preset development.
Novice to intermediate users benefit most from the Develop Module education. Understanding how adjustments interact with each other helps you make better editing decisions even when you’re not using presets at all. The foundational knowledge serves you well beyond just preset management.
Photographers who shoot in consistent conditions and want to develop signature looks for their work will find the custom preset creation guidance particularly valuable. Building presets from your best edits ensures consistency across your portfolio.
Who Should Skip This
Advanced users who already have well-organized preset systems and deep Lightroom knowledge might find the content too foundational. The 2015 publication date means some newer Lightroom features aren’t covered, though the core principles remain applicable. If you’re strictly looking for preset packs to download and use immediately without any educational component, this book-focused approach might not match your needs.
Photographers who prefer video tutorials over written content should consider alternative resources. The book format works well for reference but doesn’t offer the visual demonstration that video provides.
4. Digital Photography Made Easy – Best Budget Option
Pros
- Good description of film developing
- Affordable price point
- Covers fundamentals
Cons
- Not much useful information according to reviewers
- Some concepts incorrect
- May confuse readers
- Poor writing quality
- Very short content
At just a few dollars, this budget-friendly option covers the basics of film photography and development. While it’s not specifically about Lightroom presets, it provides foundational knowledge about how film works, which can inform your approach to film emulation editing in general.
The black and white film development section offers some useful insights into the analog process that many digital photographers never experience firsthand. Understanding how film actually responds to light and chemistry gives you context for what you’re trying to emulate digitally. For absolute beginners curious about the connection between film and digital workflows, this serves as a starting point.
However, I should note that reviews are notably mixed on this title. Some readers found valuable information about the film developing process, while others felt the content was too sparse and occasionally inaccurate in its explanations. The low price point reflects the brevity of the material and its limited scope.
The book attempts to bridge the gap between analog and digital photography but does so superficially. Readers expecting comprehensive coverage of either topic will likely be disappointed. What it does offer is a quick, inexpensive introduction to concepts that more thorough resources cover in greater detail.
For photographers on an extremely tight budget who just want to understand basic film concepts, this might serve as a first step before investing in more comprehensive resources. Just manage your expectations regarding depth and accuracy.
Who Should Buy This
Complete beginners with minimal photography knowledge who want to understand the basics of film photography without a significant investment might find this useful as a starting point. If you’re curious about how film development works and want a quick, affordable overview, this covers some fundamentals at a very low cost.
Those on a tight budget who just want to dip their toes into understanding analog photography concepts will appreciate the low barrier to entry. The minimal investment means little risk if the content doesn’t meet your needs.
Who Should Skip This
Anyone with existing photography knowledge or those specifically seeking quality Lightroom preset instruction should look elsewhere. The content is brief, and some reviewers noted inaccuracies that could confuse beginners. If you’re serious about film emulation, the other options in this guide offer substantially more value despite their higher costs.
Photographers wanting accurate, comprehensive information about film photography or Lightroom should invest in more authoritative resources. The savings here come at the cost of depth and reliability.
5. Film & Digital Techniques for Zone System Photography – Best for Black and White Enthusiasts
Pros
- Concise Zone System insights
- Complete step-by-step B&W guide
- Great for understanding zone placement
- Excellent film photography reference
- Amazing B&W examples
- Tonal range explained with clarity
Cons
- 95% about film not digital
- Limited digital discussion
- Dry technical writing
- Outdated for modern digital work
Glenn Rand’s exploration of the Zone System bridges classic film photography technique with digital application. For photographers serious about black and white work, understanding the Zone System fundamentally transforms how you think about tonal range and exposure in any medium.
The book excels at explaining zone placement, expansion, and compaction with clarity. These concepts, originally developed by Ansel Adams for film photography, translate to digital editing in powerful ways. When you understand how to visualize and control tonal zones, your black and white conversions gain depth and dimension that purely intuitive editing rarely achieves.
What impressed our team most were the black and white photography examples throughout the book. They demonstrate the practical application of Zone System principles in ways that make abstract concepts concrete and applicable. The step-by-step approach to black and white image creation provides a repeatable workflow you can apply to any photograph.
The Zone System teaches you to pre-visualize your final image before pressing the shutter. This skill improves not just your editing but your shooting as well. Understanding how different exposures will translate to specific tonal values helps you make better decisions in the field.
While the book leans heavily toward film application, the underlying principles of tonal control apply equally to digital workflows. Photographers willing to translate the concepts will find valuable knowledge regardless of their medium.
Who Should Buy This
Black and white photography enthusiasts who want to master tonal control will find tremendous value here. If you shoot portraits, landscapes, or street photography in black and white, understanding the Zone System elevates your work significantly beyond basic desaturation. Film photographers doing darkroom work will especially appreciate the comprehensive coverage of traditional techniques.
Those seeking to understand the historical and technical foundations of exposure control will find this reference invaluable. The clarity of explanation regarding tonal range fundamentals is unmatched in most modern photography guides. Serious students of photography as a craft rather than just a hobby will appreciate the depth.
Fine art photographers who want their black and white work to have the depth and dimension of classic masters will find the Zone System approach essential for achieving those results consistently.
Who Should Skip This
Photographers focused primarily on color work or those expecting equal coverage of digital and film techniques should temper expectations significantly. The majority of content addresses film photography, with digital applications added almost as an afterthought. The technical writing style may feel dry to casual readers seeking more accessible, modern instruction.
Those looking for quick tips or preset collections won’t find what they’re seeking here. This is a foundational text requiring study and practice rather than a quick reference for immediate results.
How to Choose the Right Film Emulation Presets
Selecting the right film emulation resources depends on your current skill level, photography style, and specific creative goals. Here’s what to consider before making your choice to ensure you get the most value from your investment.
Understand Presets vs Profiles
Before investing in any preset pack, understand the crucial difference between presets and profiles. Presets apply standard Lightroom adjustments like exposure, contrast, saturation, and color shifts. They work within the existing color interpretation of your RAW file. Profiles, on the other hand, use ICC or DNG technology to fundamentally change how your RAW file is interpreted from the start.
Profile-based emulation tends to produce more authentic film looks because it works at a deeper level of color science. The changes happen before standard adjustments, giving you a more accurate starting point for film characteristics. However, presets offer more flexibility for fine-tuning individual images.
Some photographers prefer a combination approach, starting with a profile for the base look and adding preset adjustments for finishing touches. This layered approach gives you both authenticity and flexibility. Many professional preset creators now offer both profiles and presets in their packages.
Consider Your Photography Style
Different film stocks suit different subjects and shooting styles. Understanding these characteristics helps you choose presets that enhance rather than fight against your typical subjects. Kodak Portra excels for portraits and weddings with its beautiful skin tone rendition and soft color palette. The warm undertones flatter most skin types.
Fuji Velvia delivers saturated colors perfect for landscapes and nature photography. The enhanced greens and blues make foliage and skies pop with intensity. Fuji 400H offers a softer, pastel-leaning palette that many wedding and lifestyle photographers prefer for its romantic quality.
Kodak Tri-X remains the go-to for classic black and white street photography. Its distinctive grain structure and tonal response create that timeless documentary look. Kodachrome, though no longer manufactured, lives on through emulation for its rich, warm colors and distinctive red rendering.
Think about what you shoot most often and choose presets that match those needs. A wedding photographer needs different tools than a landscape or street photographer. Matching your presets to your subjects saves editing time and produces more cohesive results.
Free vs Paid Presets
Free presets exist in abundance, but they often produce inconsistent results or heavy-handed effects that look unnatural and obviously processed. The creators of free presets typically haven’t invested the research and testing required for accurate film emulation. Paid presets from reputable creators typically offer better color science, more subtle adjustments, and ongoing support.
That said, many premium preset companies offer free demo versions of their products. Take advantage of these trials before committing to larger purchases. RNI Films, for example, offers demo versions that let you test their quality and see how the presets work with your specific camera and shooting style.
The investment in quality presets pays off over time through consistent results and saved editing hours. A preset pack that works well reduces the need for extensive manual adjustments on every image. Consider presets an investment in your workflow efficiency as much as your creative output.
Mobile vs Desktop Compatibility
If you edit on both mobile and desktop, verify that your chosen presets work across platforms before purchasing. Some preset packs include both XMP files for desktop Lightroom and DNG files for mobile use. Others are designed specifically for one platform and won’t transfer effectively.
Mobile presets often require a different approach since the Lightroom mobile app has fewer adjustment options than the desktop version. Some advanced adjustments available on desktop simply don’t exist in the mobile app. Make sure any mobile-compatible presets you choose account for these limitations and still produce quality results.
Consider your editing workflow when choosing. If you do most serious work on desktop but occasionally edit on mobile, prioritize desktop-quality presets with mobile versions as a bonus. If mobile editing is your primary workflow, seek presets specifically designed for mobile constraints.
Look for Educational Value
The best preset purchases include more than just the presets themselves. Look for products that teach you how and when to use them effectively rather than just providing files to install. Understanding the reasoning behind certain adjustments helps you customize looks for different images rather than applying a one-size-fits-all approach.
Products like the Cinematic Street Photography guide or the Lightroom Complete Workshop provide this educational component alongside practical tools. The knowledge gained from these resources extends beyond the specific presets included, improving your overall editing skills.
Quality creators often provide tutorials, example images, and guidance on when to use each preset. This context helps you get better results faster and understand why certain presets work better for specific situations.
Check Camera Compatibility
Not all presets work equally well with all camera systems. Different manufacturers process RAW files differently, creating distinct starting points for color and tone. A preset designed for Canon files might not produce the same results with Sony or Fujifilm files.
Profile-based presets sometimes offer camera-specific versions to account for these differences. Check whether the presets you’re considering support your camera brand. Some creators offer samples specifically for different camera systems.
If you shoot with multiple camera brands, look for presets that work well across systems or offer camera-specific versions. Consistency across your work matters regardless of which camera you used for a particular shoot.
Evaluate Support and Updates
Software evolves, and so should your presets. Quality preset creators update their products when Lightroom adds new features or changes functionality. Check whether your chosen presets come with update guarantees and how long the creator has supported their products.
Active community support also adds value. Some preset creators maintain Facebook groups or forums where users share tips and get help. This community aspect can significantly enhance your experience and help you get more from your purchase.
Money-back guarantees indicate confidence in the product quality. Creators who stand behind their work with satisfaction guarantees typically produce better products worth protecting with such policies.
Frequently Asked Questions
What are the best Lightroom presets for replicating analog film?
The best Lightroom presets for film emulation come from specialized creators like RNI Films, Mastin Labs, and Archetype Process. These companies develop presets and profiles based on actual film stock characteristics using scientific analysis. For beginners, the Cinematic Street Photography pack offers an accessible entry point with practical presets and educational content at an affordable price.
Which Lightroom presets are actually worth it?
Presets worth investing in typically come from established creators with transparent before/after examples, free demo options, and active community support. Look for presets that offer profile-based emulation for accuracy, work across different camera brands, and include educational resources. Mastin Labs and RNI Films consistently receive positive feedback from professional photographers for their authentic results and ongoing support.
How do I make my photos look like film in Lightroom?
To achieve a film look in Lightroom, start by reducing digital sharpness, adding subtle grain, and adjusting the tone curve to create softer contrast with lifted shadows. Focus on skin tone adjustments for portraits, and consider using profile-based presets for more authentic emulation. The key is subtlety and restraint. Heavy adjustments often look artificial rather than authentically analog, so make changes gradually.
What film emulation presets work best for portraits?
For portraits, look for presets that emulate Kodak Portra 400, Fuji 400H, or Kodak Ektar. These film stocks are known for flattering skin tones and soft color rendition that enhances rather than fights against natural skin colors. Mastin Labs Portra Original and RNI Films Portra emulation are popular choices among portrait and wedding photographers for their authentic skin tone handling and consistent results.
Are there any free film emulation presets for Lightroom?
Yes, free film emulation presets exist, though quality varies significantly from excellent to unusable. RNI Films offers free demo versions of their presets that provide a good starting point for testing before purchase. Some photographers create and share free presets on platforms like Reddit and photography forums. However, free presets often lack the color accuracy, consistency, and support of paid options from established developers.
Conclusion
Finding the best Lightroom presets for film emulation doesn’t have to be overwhelming when you understand what to look for. The five products we’ve covered each serve different needs and budgets, from comprehensive workshop packages to specialized guides for specific photography styles. For street photographers wanting cinematic results with educational support, the Cinematic Street Photography pack delivers excellent value at an accessible price point. Those seeking comprehensive Lightroom education will appreciate the Complete Workshop approach that builds lasting skills. And for black and white enthusiasts, the Zone System guide offers foundational knowledge that transforms how you think about tonal control.
Remember that presets are starting points, not final destinations. The most successful photographers use presets as foundations they customize for their unique vision and shooting conditions. Whether you’re emulating Kodak Portra for warm portraits or Tri-X for classic street work, understanding the underlying principles helps you achieve more authentic and personal results. The products in this guide offer both practical tools and the education needed to use them effectively.
Start with one of these recommended options based on your specific needs, experiment with the techniques, and develop your own signature film-inspired look in 2026. The investment in quality resources pays dividends through consistent results, saved editing time, and improved creative satisfaction with your final images.