I’ve spent countless hours experimenting with photo backdrops, and let me tell you – the right background can transform an ordinary photo into something extraordinary. Whether you’re a professional photographer or just love taking pictures, creating your own DIY backdrops opens up a world of creative possibilities without breaking the bank.
In this comprehensive guide, I’ll share 23 creative DIY photo backdrop ideas that I’ve personally tested and perfected over the years. These ideas range from super simple to more complex projects, but they all deliver stunning results that will make your photos stand out.
Why DIY Photo Backdrops Matter
Before we dive into the ideas, let me explain why I’m so passionate about DIY backdrops. When I first started photography, I thought I needed expensive professional backdrops to get great shots. Boy, was I wrong! I discovered that homemade backdrops not only save money but also add a unique personal touch that store-bought options just can’t match.
DIY backdrops allow you to:
- Express your creativity and personal style
- Save hundreds of dollars on professional equipment
- Create custom backgrounds tailored to your specific needs
- Experiment with different textures and materials
- Impress clients with unique, one-of-a-kind settings
23 Creative DIY Photo Backdrop Ideas
1. Geometric Cardboard Backdrop
I absolutely love this one because it’s so versatile and looks incredibly professional. All you need is cardboard, acrylic paint, and some creativity.
What you’ll need:
- Large cardboard sheets
- Acrylic paints in your chosen colors
- Scissors or craft knife
- Glue or tape
How to create it: Cut various geometric shapes (triangles, circles, hexagons) from the cardboard. Paint them in colors that complement your subject’s outfit. Arrange and attach them to a plain wall or large foam board. I discovered that mixing different sizes creates more visual interest, and adding some 3D elements by stacking shapes gives it extra depth.
Pro tip: Use a color palette that matches your subject’s clothing for a cohesive look. I once created a gold and white geometric backdrop for a senior portrait session, and the results were stunning!
2. Fairy Lights Magic Backdrop
This is my go-to for creating dreamy, romantic photos. There’s something magical about fairy lights that instantly elevates any photoshoot.
What you’ll need:
- Multiple strings of fairy lights
- Command hooks or removable adhesive
- Extension cord (if needed)
- Dark background fabric or wall
How to create it: Hang the fairy lights in a curtain pattern against a dark background. I like to create multiple layers for more depth. For extra sparkle, try using warm white and cool white lights together. The key is to space them evenly and ensure they’re secure.
Pro tip: Shoot during twilight or in a dimly lit room to make the lights really pop. I’ve used this backdrop for everything from engagement photos to product photography, and it never fails to impress.
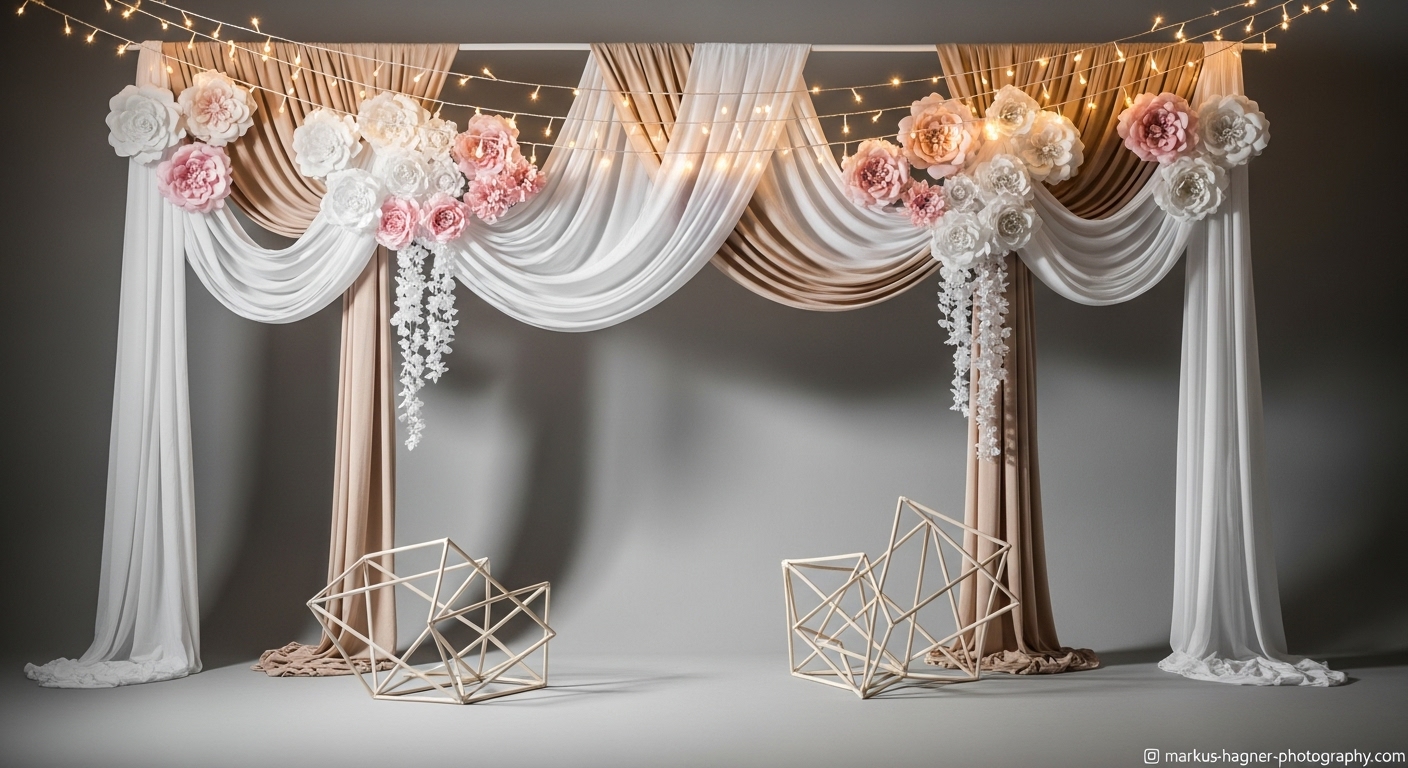
3. Tissue Paper Flower Wall
Don’t let the simplicity fool you – tissue paper flowers create a stunning backdrop that looks like it cost a fortune.
What you’ll need:
- Tissue paper in various colors
- Scissors
- Floral wire or pipe cleaners
- Hot glue gun
- Large foam board or wall space
How to create it: Cut tissue paper into squares, stack 6-8 sheets together, and fold accordion-style. Trim the ends into rounded or pointed shapes, then secure the center with wire. Gently pull each layer apart to create a full flower. Repeat until you have enough flowers to cover your desired area.
Pro tip: Mix different sizes and shades of the same color for a more organic look. I created an ombre effect for a birthday party once, and it was the talk of the event!
4. Coffee Filter Backdrop
This might sound strange, but trust me – coffee filters make an amazing backdrop material! They’re inexpensive, readily available, and create beautiful texture.
What you’ll need:
- White coffee filters (lots of them!)
- Food coloring or watercolors
- Water
- String or fishing line
- Needle
How to create it: Dye the coffee filters using food coloring mixed with water. Let them dry completely, then fluff them up. Thread them onto strings using a needle, spacing them about 1-2 inches apart. Hang multiple strings close together to create a full backdrop.
Pro tip: Create an ombre effect by using different concentrations of dye. I once made a blue ombre coffee filter backdrop for a baby shower, and it looked like clouds!
5. Ribbon and Lace Curtain
For a romantic, ethereal look, nothing beats a ribbon and lace backdrop. It’s perfect for weddings, engagement sessions, or any feminine-themed photoshoot.
What you’ll need:
- Various ribbons in complementary colors
- Lace trim or fabric
- Dowel rod or curtain rod
- Scissors
How to create it: Cut ribbons and lace to your desired length (I recommend at least 6 feet). Tie or attach them to the dowel rod, alternating colors and textures. Hang the rod and arrange the ribbons so they fall naturally.
Pro tip: Mix different widths and textures of ribbon for more visual interest. I discovered that adding some sheer ribbon creates beautiful light effects when backlit.
6. Wooden Pallet Backdrop
If you’re going for a rustic, farmhouse look, wooden pallets are your best friend. They’re often free and create instant character.
What you’ll need:
- Wooden pallets (2-3 depending on size)
- Sandpaper
- Wood stain or paint (optional)
- Screws or nails
- Saw (if cutting needed)
How to create it: Disassemble the pallets and sand the wood pieces. Arrange them in your desired pattern and secure them together. You can leave them natural for a weathered look or stain/paint them to match your theme.
Pro tip: Leave some gaps between boards for interesting light patterns. I created a pallet backdrop for a family reunion, and everyone wanted their photo taken in front of it!
7. Paper Chain Backdrop
Remember making paper chains as a kid? Well, they make fantastic photo backdrops too! This is perfect for colorful, playful photoshoots.
What you’ll need:
- Colored construction paper or cardstock
- Scissors
- Stapler or glue
- Measuring tape
How to create it: Cut paper into strips (about 1-2 inches wide and 6-8 inches long). Create chains by forming loops and securing each one. Make multiple chains and hang them vertically, spacing them evenly.
Pro tip: Use a color scheme that matches your event or subject. I once created rainbow paper chains for a pride event, and it was absolutely stunning!
8. Book Page Backdrop
For a literary, vintage vibe, book pages create a sophisticated and unique backdrop. This is perfect for author photos, library events, or academic portraits.
What you’ll need:
- Old books (thrift stores are great sources)
- Mod Podge or glue
- Foam board or plywood
- Scissors
How to create it: Carefully remove pages from books. Arrange them on your backing material, overlapping slightly. Glue them down, smoothing out any bubbles. You can leave them as-is or lightly tea-stain them for an aged look.
Pro tip: Mix different types of book pages for texture variation. I created this for a local author’s book launch, and it was perfect for the theme!
9. Balloon Wall Backdrop
Balloons aren’t just for parties anymore – they make incredible photo backdrops! The key is using them strategically.
What you’ll need:
- Balloons in various sizes and colors
- Balloon pump
- Fishing line or string
- Command hooks
- Needle (optional)
How to create it: Inflate balloons to different sizes for dimension. Create clusters of 3-5 balloons and tie them together. Attach these clusters to your wall using command hooks, arranging them in a pattern or randomly for an organic look.
Pro tip: Use matte balloons to avoid glare in photos. I discovered that adding a few metallic balloons creates beautiful light reflections!
10. Streamer Backdrop
Simple, colorful, and budget-friendly – streamers create a fun, festive backdrop perfect for parties and celebrations.
What you’ll need:
- Crepe paper streamers in various colors
- Scissors
- Tape or command strips
- Measuring tape
How to create it: Cut streamers to your desired length. Attach them to the top of your wall or a dowel rod, spacing them about 1-2 inches apart. For a fuller look, twist or crinkle the streamers slightly.
Pro tip: Create an ombre effect by using different shades of the same color. I once made a rainbow streamer backdrop for a child’s birthday party, and it was a huge hit!
11. Macrame Backdrop
For a bohemian, artisanal look, macrame adds incredible texture and visual interest to your photos.
What you’ll need:
- Macrame cord or thick yarn
- Dowel rod or branch
- Scissors
- Basic macrame knots knowledge
How to create it: Learn basic macrame knots like the square knot and half hitch. Create a panel using these knots, varying the patterns for visual interest. Hang from your dowel rod and adjust as needed.
Pro tip: Don’t worry about perfection – the beauty of macrame is in its organic, handmade quality. I taught myself basic macrame specifically for a maternity shoot, and the results were breathtaking!
12. Citrus Slice Backdrop
This fresh, vibrant backdrop is perfect for summer photoshoots, food photography, or any time you want to add a pop of color.
What you’ll need:
- Citrus fruits (oranges, lemons, limes)
- Sharp knife
- Dehydrator or oven
- Clear fishing line
- Needle
How to create it: Slice citrus fruits thinly (about 1/8 inch thick). Dry them completely using a dehydrator or low-temperature oven. Once dry, thread them onto fishing line using a needle, spacing them evenly. Hang multiple strings to create a curtain effect.
Pro tip: Mix different citrus types for color variety. I created this for a summer product shoot, and the fresh scent was an unexpected bonus!
13. Fabric Scrap Backdrop
Perfect for using up leftover fabric scraps, this colorful backdrop adds texture and personality to any photoshoot.
What you’ll need:
- Various fabric scraps
- Scissors
- Sewing machine or needle and thread
- Dowel rod or curtain rod
How to create it: Cut fabric scraps into strips or squares. Sew or tie them together to create a continuous piece of fabric. Hang from your rod and arrange as desired.
Pro tip: Use fabrics with different textures for more visual interest. I made this for a craft fair photoshoot, and it perfectly captured the creative spirit!
Also Read: Sony 16-35 GM Vs Sigma 14-24
14. Paper Fan Backdrop
Paper fans create a beautiful, dimensional backdrop that’s perfect for parties and celebrations.
What you’ll need:
- Colored paper or cardstock
- Scissors
- Glue or tape
- String or ribbon
How to create it: Fold paper accordion-style, then fold in half and secure the center with glue or string. Fan out the paper to create a circle. Repeat with different sizes and colors, then arrange them on your wall.
Pro tip: Mix different sizes for a more dynamic look. I discovered that using metallic paper adds beautiful light reflections!
15. Crepe Paper Backdrop
Similar to streamers but with more texture, crepe paper creates a soft, dreamy backdrop perfect for romantic photoshoots.
What you’ll need:
- Crepe paper rolls
- Scissors
- Tape or command strips
- Water spray bottle
How to create it: Cut crepe paper into long strips. Lightly spray with water to make it more pliable, then stretch and twist it to create texture. Attach to your wall, overlapping for fullness.
Pro tip: Use different shades of the same color for depth. I once created an all-white crepe paper backdrop for a winter wedding, and it looked like snow!
16. Polaroid Wall Backdrop
For a nostalgic, personal touch, create a backdrop using Polaroid-style photos. This is perfect for milestone celebrations or personal portraits.
What you’ll need:
- Photos printed in Polaroid style
- Washi tape or removable adhesive
- String or fairy lights (optional)
How to create it: Print your photos in a square format with white borders. Arrange them on your wall in a grid pattern or more organic layout. Use washi tape for a playful look.
Pro tip: Mix recent photos with older ones for a timeline effect. I created this for a graduation party, and it was incredibly meaningful!
17. Disco Ball Backdrop
For a fun, retro vibe, nothing beats a disco ball backdrop. It’s perfect for parties, dance photos, or any time you want to add sparkle.
What you’ll need:
- Small disco balls (or one large one)
- Fishing line
- Command hooks
- Spotlight or strong light source
How to create it: Hang disco balls at different heights using fishing line. Position a light source to hit the disco balls, creating reflections all over your space.
Pro tip: Use multiple light sources for more dramatic effects. I discovered this works amazingly well for dance photography!
18. Green Screen Alternative
While not technically a backdrop in the traditional sense, creating a solid colored background allows for digital backdrop replacement in post-processing.
What you’ll need:
- Bright green or blue fabric or paper
- Smooth, even lighting
- Stands or wall space
How to create it: Hang your green or blue material, ensuring it’s smooth and wrinkle-free. Light it evenly to avoid shadows. This gives you maximum flexibility in post-processing.
Pro tip: Use fabric specifically designed for green screens for best results. I’ve used this technique countless times for client work when they want multiple backdrop options from one session.
19. Hanging Plants Backdrop
Bring the outdoors inside with a hanging plants backdrop. Perfect for botanical-themed shoots or adding natural elements to your photos.
What you’ll need:
- Various hanging plants
- Plant hooks or ceiling mounts
- Fishing line or thin chains
- Scissors
How to create it: Install hooks in your ceiling at different heights. Hang plants using fishing line or chains, varying the heights for visual interest. Arrange them to create a green curtain effect.
Pro tip: Use plants with different leaf shapes and sizes for texture variety. I created this for a wellness brand photoshoot, and it was absolutely perfect!
20. Mirror Backdrop
For a modern, sophisticated look, mirrors create incredible depth and light in your photos.
What you’ll need:
- Various sized mirrors
- Strong adhesive or mirror clips
- Level
- Measuring tape
How to create it: Arrange mirrors on your wall in a pattern or random layout. Ensure they’re securely attached. The reflections will create amazing depth and light effects.
Pro tip: Mix different mirror shapes and sizes for more visual interest. I discovered this works especially well for fashion photography!
21. Yarn Art Backdrop
Create a custom piece of yarn art that doubles as a stunning backdrop. Perfect for adding color and texture to your photos.
What you’ll need:
- Yarn in various colors
- Wooden dowel or frame
- Scissors
- Basic weaving knowledge (optional)
How to create it: Create a simple loom using your dowel and frame. Weave yarn in different colors and patterns, or create a more freeform design. The texture will add incredible depth to your photos.
Pro tip: Use different yarn weights for texture variation. I taught myself basic weaving specifically for a newborn photoshoot, and the results were incredible!
22. Chalkboard Backdrop
For a customizable, interactive backdrop, chalkboard allows you to change your background for each photoshoot.
What you’ll need:
- Chalkboard paint or large chalkboard
- Paint rollers or brushes
- Chalk in various colors
- Eraser or cloth
How to create it: Paint your surface with chalkboard paint (or use a pre-made chalkboard). Season it by rubbing chalk all over and erasing. Now you can draw or write whatever you need for each shoot.
Pro tip: Use colored chalk for more creative options. I love using this for holiday photos – I can change the message for each family!
23. Confetti Backdrop
For a celebratory, fun atmosphere, nothing beats a confetti backdrop. Perfect for birthdays, New Year’s, or any festive occasion.
What you’ll need:
- Colored paper or cardstock
- Hole punch or confetti cutter
- Clear contact paper or laminating sheets
- Spray adhesive
How to create it: Create confetti using hole punches or specialty cutters. Arrange confetti on contact paper, then seal with another sheet. Hang these panels to create a confetti curtain.
Pro tip: Use metallic paper for extra sparkle. I created this for a New Year’s Eve party, and it was absolutely magical!
Pro Photography Tips for DIY Backdrops
After years of experimenting with DIY backdrops, I’ve learned some valuable lessons that I want to share with you:
Lighting is Everything
No matter how beautiful your backdrop is, poor lighting can ruin your photos. I always make sure to:
- Use soft, diffused lighting for fabric and paper backdrops
- Add backlighting for translucent materials like tissue paper or coffee filters
- Avoid harsh shadows that can distract from your subject
- Test lighting before your subject arrives
Distance Matters
The distance between your subject and the backdrop affects the final look:
- Closer to backdrop: more intimate, subject becomes part of the scene
- Further from backdrop: more separation, subject stands out more
- I usually position my subject 3-6 feet from the backdrop, depending on the effect I want
Texture Adds Depth
Don’t be afraid to mix textures! I’ve discovered that combining different materials creates more visual interest:
- Smooth fabrics with rough textures
- Shiny elements with matte surfaces
- Soft materials with hard edges
Keep it Simple
Sometimes the most effective backdrops are the simplest. I’ve learned that:
- One or two colors often work better than many
- Negative space can be as powerful as filled space
- The backdrop should complement, not compete with, your subject
Also Read: Sony A6400 Vs A6000
Photography Equipment Recommendations
While you don’t need expensive equipment for great DIY backdrops, having the right tools helps:
Essential Equipment:
- Good lighting (natural light is best, but invest in softboxes if needed)
- Sturdy backdrop stand or wall space
- Clamps and clips for securing materials
- Basic sewing kit for fabric projects
- Hot glue gun for quick assembly
Nice-to-Have Equipment:
- Professional backdrop stand system
- Various backdrop fabrics and papers
- Specialty lighting equipment
- Steamer for removing wrinkles from fabrics
- Storage solutions for backdrop materials
FAQ: DIY Photo Backdrop Ideas
How much does it cost to create a DIY photo backdrop?
The cost varies widely depending on the materials you choose. Simple backdrops like streamers or paper chains can cost under $10, while more complex projects like wooden pallet backdrops might cost $50-100. The beauty of DIY is that you can often use materials you already have at home!
What’s the easiest DIY backdrop for beginners?
I recommend starting with a fabric backdrop or fairy lights. Both are simple to set up, require minimal materials, and give you professional-looking results right away.
How do I make my DIY backdrop look professional?
The key is in the details: ensure your backdrop is smooth and wrinkle-free, use proper lighting, and pay attention to color coordination. Also, make sure your backdrop is large enough to fill your frame without visible edges.
Can I use DIY backdrops for professional photography?
Absolutely! Many professional photographers use DIY backdrops, especially for unique or themed shoots. The personal touch can actually make your work stand out from competitors who use standard backdrops.
How do I store DIY backdrops between uses?
It depends on the material. Fabric backdrops can be folded or rolled, paper backdrops should be rolled to prevent creases, and more delicate backdrops like tissue paper flowers should be stored flat in a protective container.
What’s the most durable DIY backdrop material?
Wood and fabric are generally the most durable options. Wooden backdrops can last for years with proper care, and fabric backdrops can be washed and reused multiple times.
How do I prevent wrinkles in fabric backdrops?
Use a steamer or iron on low heat before your shoot. For storage, roll fabric backdrops instead of folding them. You can also use wrinkle-release spray for quick touch-ups.
Can I create DIY backdrops for outdoor photoshoots?
Yes, but you’ll need to consider wind and weather. Choose sturdy materials that won’t blow away, and secure everything well. Natural elements like trees and flowers can also serve as beautiful outdoor backdrops.
Related Photography Content
If you enjoyed these DIY backdrop ideas, you might also be interested in:
- [10 Essential Photography Lighting Techniques for Beginners]
- [How to Pose Subjects for Portrait Photography]
- [Best Camera Settings for Different Photoshoot Scenarios]
- [DIY Photography Props on a Budget]
Save This Guide for Later
Photography is all about continuous learning and experimentation. I recommend bookmarking this guide so you can reference it whenever you need inspiration for your next photoshoot. I update my photography guides regularly with new tips and techniques, so check back often for fresh ideas!
Remember, the best backdrop is one that reflects your personal style and makes your subjects feel comfortable and confident. Don’t be afraid to experiment and put your own spin on these ideas. After all, photography is an art form, and your unique perspective is what makes your work special.
Happy shooting, and I can’t wait to see the amazing backdrops you create!