I remember standing in a camera store, completely overwhelmed by the wall of lenses in front of me. Numbers like 24-70mm, f/1.8, and IS meant nothing to me. The sales assistant kept asking what kind of photography I wanted to do, but I didn’t even know the options. That was five years ago, and since then, I’ve spent countless hours learning through trial and error, making expensive mistakes, and gradually understanding how different lenses can transform your photography.
Understanding the different types of camera lenses is fundamental to growing as a photographer. Each lens type opens up new creative possibilities and helps you capture specific scenes more effectively. The right lens can make the difference between a mediocre shot and a stunning one.
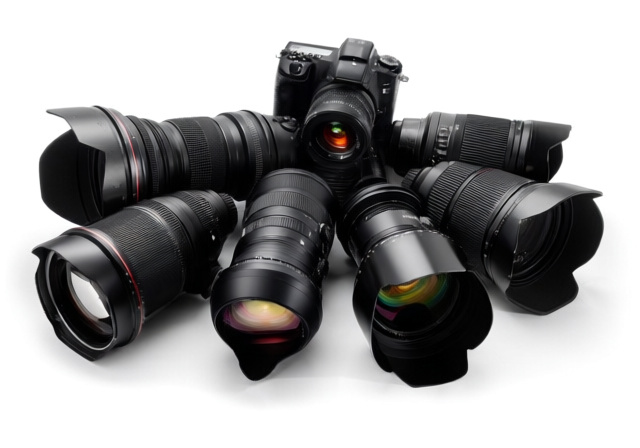
Camera lenses fall into distinct categories based on their focal length and capabilities. From wide-angle lenses that capture sweeping landscapes to macro lenses that reveal tiny details invisible to the naked eye, each type serves a unique purpose in your photographic journey. Understanding these differences will help you make informed decisions and avoid costly mistakes.
In this comprehensive guide, I’ll break down every major lens type, explain when and why you’d use each one, and share the lessons I’ve learned from years of real-world shooting. Whether you’re just starting out or looking to expand your collection, this guide will give you the knowledge to choose the right lens for your photography goals.
The 6 Main Types of Camera Lenses Every Photographer Should Know In 2025
Camera lenses can be categorized into six main types, each with distinct characteristics and applications. Understanding these categories will help you navigate the lens market and make smart choices for your photography needs.
- Wide-Angle Lenses (14-35mm): Capture expansive scenes with a broad field of view. Perfect for landscapes, architecture, and tight indoor spaces where you need to fit more in the frame.
- Standard/Normal Lenses (35-70mm): Mimic human vision, making them incredibly versatile for everyday photography including street, portraits, and general use.
- Telephoto Lenses (70-600mm+): Bring distant subjects closer with significant magnification. Essential for wildlife, sports, and compressed portrait effects.
- Macro Lenses: Provide 1:1 or greater magnification for extreme close-up photography. Ideal for insects, flowers, products, and detail shots.
- Prime Lenses: Fixed focal length lenses with superior optical quality and wider apertures. Favorite among portrait and low-light photographers.
- Zoom Lenses: Variable focal length lenses offering flexibility and convenience. Great for travel, events, and situations where changing lenses isn’t practical.
| Lens Type | Typical Focal Length | Best For | Key Advantage |
|---|---|---|---|
| Wide-Angle | 14-35mm | Landscapes, Architecture | Expansive field of view |
| Standard | 35-70mm | Street, General Use | Natural perspective |
| Telephoto | 70-600mm+ | Wildlife, Sports | Subject compression |
| Macro | 50-200mm | Close-ups, Details | 1:1 magnification |
| Prime | Fixed (24mm, 50mm, 85mm) | Portraits, Low Light | Sharpness & wide aperture |
| Zoom | Variable (24-70mm, 70-200mm) | Travel, Events | Versatility & convenience |
Prime vs Zoom Lenses: The Fundamental Choice
The first decision every photographer faces is choosing between prime and zoom lenses. This choice affects your shooting style, budget, and even how you approach composing your images. I’ve used both extensively, and each has its place in a photographer’s toolkit.
Prime lenses have a fixed focal length, meaning they don’t zoom in or out. You zoom with your feet by moving closer or farther from your subject. Initially, this might seem limiting, but I’ve found it actually improves my composition skills. When I started photography, I bought a 50mm f/1.8 prime lens for $125. That lens taught me more about composition than any zoom lens could have, because I had to actively think about my positioning and framing.
Zoom lenses offer versatility with variable focal lengths in a single lens. My 24-70mm f/2.8 has been a workhorse for wedding photography, allowing me to capture wide shots of the venue and tight portraits without changing lenses. During a 6-hour wedding shoot, I might not have time to switch lenses, and the zoom’s flexibility is invaluable.
⚠️ Important: Prime lenses generally offer better image quality and wider apertures for the price, but zoom lenses provide convenience that can be crucial in certain situations.
Why Choose Prime Lenses?
Prime lenses excel in several key areas. First, image quality is typically superior because lens designers only need to optimize for one focal length. My 85mm f/1.4 prime produces noticeably sharper images at f/1.4 than any zoom lens I’ve used at equivalent apertures.
Low light performance is another significant advantage. The wider maximum apertures (often f/1.4, f/1.8, or even f/1.2) let in 2-4 times more light than typical zoom lenses. I’ve shot entire indoor events with just a 50mm f/1.8 when my f/2.8 zoom lens struggled to gather enough light.
Size and weight considerations matter too. Prime lenses are often smaller and lighter than zoom lenses. During a 10-hour street photography day in Tokyo, my 35mm prime weighed less than half my zoom lens, making a real difference in fatigue.
When Zoom Lenses Make Sense
Zoom lenses shine in situations where flexibility trumps absolute quality. Event photography, travel, and wildlife scenarios often require quick focal length adjustments. I once covered a marathon where subjects went from distant runners to close-up finish line shots within seconds – impossible with a prime lens.
Cost-effectiveness is another factor. While a single high-quality zoom might cost more than one prime, it’s often cheaper than buying multiple primes to cover the same focal range. A 70-200mm zoom replaces at least three prime lenses (85mm, 135mm, 200mm).
Aperture: The opening in your lens that controls how much light enters. Wider apertures (lower f-numbers like f/1.8) allow more light and create shallower depth of field, perfect for low light and background blur.
Ultimately, many photographers end up with both types in their kit. I typically carry a wide zoom (16-35mm), a standard zoom (24-70mm), and a few key primes (35mm f/1.4 and 85mm f/1.8) to cover every situation.
Wide-Angle Lenses: Capturing the Big Picture
Wide-angle lenses, typically those under 35mm, are essential tools for capturing expansive scenes. I remember my first trip to the Grand Canyon with only a 50mm lens – I couldn’t capture the majesty of the landscape no matter how far back I stepped. That experience taught me the importance of having the right tool for the job.
These lenses have a field of view of 63 to 114 degrees or more, allowing you to fit more of the scene into your frame. But they’re not just for getting more in the picture – they create unique perspectives and emphasize relationships between foreground and background elements.
Understanding Focal Length Ranges
Ultra-wide lenses (14-24mm) capture dramatic scenes but require careful handling to avoid distortion. My 16-35mm has become my go-to for real estate photography, where I need to show entire rooms in a single shot. The distortion at 16mm can make close objects appear disproportionately large, which I use creatively to emphasize foreground elements.
Standard wide-angle lenses (24-35mm) offer more natural perspectives while still providing that expansive feel. A 24mm lens on a full-frame camera barely shows distortion but captures significantly more than a 35mm. This range has become my favorite for environmental portraits where I want to include the subject’s surroundings.
⏰ Time Saver: When shooting interiors with wide-angle lenses, keep the camera level to avoid converging vertical lines. Many cameras have built-in level guides – use them!
Creative Applications
Landscape photography is where wide-angle lenses truly shine. I use my 16-35mm for 80% of my landscape work, especially when I want to include dramatic foreground elements. The key is getting close to your foreground subject – a flower, rock, or pattern – while keeping the background context.
Street photography benefits from wide angles too. A 28mm or 35mm prime lets me capture subjects and their environment naturally. I find people are less intimidated by a smaller, wider lens compared to a telephoto that looks like I’m spying on them.
Architectural photography demands wide angles to capture entire buildings. I learned this the hard way when trying to photograph a cathedral with a 50mm lens – I could only capture sections. My 17mm tilt-shift lens solved this problem, though at a significant cost.
Managing Wide-Angle Challenges
Distortion is the biggest challenge with wide-angle lenses. Straight lines near the edges can curve, especially with ultra-wide lenses. I always leave extra space when shooting so I can correct distortion in post-processing without cropping important elements.
Edge softness is another consideration. Cheaper wide-angle lenses often get soft in the corners, especially at wide apertures. I stop down to f/8 or f/11 when corner sharpness matters, like in architectural photography.
Filter compatibility becomes tricky with bulbous front elements on some ultra-wide lenses. My 16-35mm takes standard filters, but many 14-24mm lenses require special filter systems that can cost as much as the lens itself.
Standard/Normal Lenses: The Versatile Workhorses
Standard lenses, typically in the 35-70mm range, are called “normal” because they produce images with a perspective similar to human vision. These underrated workhorses deserve more attention than they get. I’ve seen photographers with thousands in exotic lenses who create stunning images with just a 50mm prime.
The concept of a “normal” lens comes from Oskar Barnack, who created the first Leica camera. He determined that a lens with a focal length equal to the diagonal of the film/sensor produced natural-looking images. For full-frame cameras, that’s about 43mm – close enough to the classic 50mm that it became the standard.
The 50mm Legend
The 50mm lens has achieved legendary status for good reason. Henri Cartier-Bresson, the father of photojournalism, shot almost exclusively with a 50mm lens. I bought my first 50mm f/1.8 for $125, and it remains one of my best photography investments.
What makes the 50mm special? It’s versatile enough for portraits, street photography, events, and even some landscapes. The perspective is natural without being boring. I’ve photographed everything from corporate headshots to travel documentary with this single focal length.
The nifty fifty (50mm f/1.8) is often the first prime lens photographers buy. At around $200, it offers incredible value with an f/1.8 aperture that creates beautiful background blur. I recommend every beginner start with this lens – it forces you to move and compose thoughtfully.
The Growing 35mm Movement
While 50mm has been traditional, 35mm has gained popularity, especially among street photographers. The slightly wider field of view makes it more versatile for environmental storytelling. I’ve found myself reaching for my 35mm more often than my 50mm in recent years.
A 35mm lens captures enough context to tell a story while still isolating subjects effectively. During a documentary project about local craftsmen, my 35mm let me show both the artisans and their workshops in a single frame. The 50mm would have required me to step back too far.
Practical Considerations
Standard lenses are often the sharpest in a manufacturer’s lineup. Lens design is simpler at normal focal lengths, allowing manufacturers to optimize quality without the compromises required in wide or telephoto designs.
They’re also typically the most compact. My 40mm pancake lens weighs less than 4 ounces and makes my camera feel like a point-and-shoot. It’s perfect for travel when I want quality without the bulk.
✅ Pro Tip: If you can only afford one lens besides your kit lens, make it a 35mm or 50mm f/1.8. The low light capability and image quality will transform your photography for minimal investment.
For APS-C crop sensor cameras, consider the crop factor when choosing standard lenses. A 35mm lens becomes equivalent to about 50mm, making 35mm the “standard” choice for crop sensor users. Always factor in your sensor size when lens shopping.
Telephoto Lenses: Bringing Distant Subjects Closer
Telephoto lenses, typically 70mm and longer, are essential tools for isolating subjects and compressing perspectives. I vividly remember trying to photograph a bald eagle with my kit lens – the bird was just a tiny speck. That moment convinced me I needed a telephoto lens for wildlife work.
These lenses magnify distant subjects and create a characteristic compression effect that makes backgrounds appear closer to subjects. This compression is a powerful creative tool that can’t be replicated in post-processing.
Understanding Telephoto Ranges
Short telephotos (70-135mm) are perfect for portraits. My 85mm f/1.8 has become my favorite portrait lens – it provides flattering compression without requiring me to stand too far from subjects. The 85-135mm range is considered ideal for headshots because it renders facial features naturally without distortion.
Medium telephotos (135-300mm) offer more reach for subjects that can’t be approached closely. I use my 70-200mm for event photography, allowing me to capture intimate moments from across a room without intruding. During weddings, this lens lets me photograph ceremonies without blocking anyone’s view.
Super telephotos (300mm+) are specialized tools for wildlife and sports. My 400mm f/5.6 weighs only 2.8 pounds but provides enough reach for bird photography. Professional sports photographers often use 400-600mm lenses, sometimes with teleconverters extending reach beyond 800mm.
The Magic of Compression
Telephoto compression is the phenomenon where distant backgrounds appear larger and closer to foreground subjects. This effect creates beautiful portraits with soft, blurry backgrounds that complement rather than compete with your subject.
I use compression creatively in landscape photography too. A 200mm lens can make distant mountains appear right behind foreground flowers, creating layers that add depth to images. This technique transformed my mountain photography after years of relying solely on wide angles.
Practical Challenges
Telephoto lenses introduce unique technical challenges. Camera shake becomes magnified, often requiring shutter speeds of 1/500s or faster. I learned this rule after countless blurry wildlife shots – now I always use shutter speeds at least equal to my focal length.
Focal Length: The distance from the lens’s optical center to the camera sensor when focused at infinity. Longer focal lengths provide more magnification and narrower fields of view.
Size and weight increase dramatically with telephoto lenses. My 70-200mm f/2.8 weighs 3.2 pounds – not trivial after carrying it for 8 hours. Many photographers opt for slower f/4 versions that weigh 40% less.
Depth of field becomes extremely shallow at telephoto lengths, especially with wide apertures. I once shot an entire session of portraits at f/2.8 with my 200mm lens, only to find eyes were sharp but noses were blurry. Now I stop down to f/4 or f/5.6 for portraits to ensure adequate depth of field.
Image Stabilization Considerations
Image stabilization (IS/VR/VC) is crucial for telephoto lenses. My 70-200mm with IS allows handheld shots at 1/30s – impossible without stabilization. For wildlife, I always budget for a stabilized lens or accept that I’ll need a tripod.
Some manufacturers offer telephoto lenses without stabilization to reduce weight and cost. If you primarily shoot sports with fast shutter speeds or always use a tripod, you might save money with non-stabilized versions.
Macro Lenses: Exploring the World of Close-Up Photography
Macro lenses open up a world of tiny details invisible to the naked eye. I never considered macro photography until I borrowed a friend’s 100mm macro lens and discovered the intricate patterns on a bee’s wings. That experience sparked a fascination with close-up photography that continues today.
True macro lenses provide 1:1 magnification, meaning the subject appears life-sized on the camera sensor. This capability allows you to photograph subjects at actual size, revealing extraordinary details in ordinary objects.
Focal Length Considerations
Macro lenses typically range from 50mm to 200mm. Shorter macros (50-60mm) are more affordable and lighter but require working very close to subjects. My 60mm macro is great for flowers and products, but trying to photograph insects with it usually scares them away.
Standard macros (90-105mm) offer the best balance of magnification and working distance. My 100mm f/2.8 macro lets me fill the frame with a coin while keeping about 12 inches of working distance – perfect for most macro situations without disturbing subjects.
Long macros (150-200mm) provide maximum working distance but at higher cost and weight. Wildlife macro photographers use these to capture skittish subjects like butterflies and dragonflies. The 180mm macro I tested was incredible but heavy enough that I wouldn’t want to carry it far.
Beyond Insects and Flowers
While macro photography is often associated with nature, these lenses excel in many genres. Product photographers use macros for jewelry and electronics details. Food photographers capture textures and steam that make dishes irresistible.
I’ve used my macro lens for architectural details during travel photography – the intricate carvings on ancient buildings tell stories that wide shots miss. Portrait photographers sometimes use macros for eye-catching detail shots in wedding and fashion work.
Technical Considerations
Depth of field becomes extremely shallow in macro photography. At 1:1 magnification and f/2.8, your depth of field might be just millimeters. I learned to stop down to f/8 or f/11 for most macro work, using higher ISO or flash to maintain sharpness.
Focusing is challenging at macro distances. Small movements throw subjects out of focus. I primarily use manual focus for macro work, often with a focusing rail for precise adjustments. Many modern macro lenses have focus limiters that speed up autofocus by preventing hunting through the entire range.
⚠️ Important: Macro photography magnifies camera shake. Use a tripod, remote shutter release, or mirror lock-up mode for sharpest results, especially at magnifications above 1:2.
Lighting becomes critical at macro distances. The lens blocks light from reaching your subject, especially at 1:1 magnification. I use a ring flash or small off-camera flash for most macro work. Even a simple reflector can make the difference between a flat image and one with dimension.
Budget-Friendly Macro Options
Dedicated macro lenses can be expensive, but alternatives exist. Extension tubes are hollow rings that move any lens farther from the sensor, enabling closer focusing. A $100 set of extension tubes turned my 50mm f/1.8 into a capable macro lens.
Close-up filters are another budget option. These magnifying glasses screw onto your lens like regular filters. While not as optically perfect as true macro lenses, quality close-up filters can produce impressive results for minimal investment.
Reversing rings let you mount a standard lens backward on your camera, transforming it into a macro lens. My 50mm f/1.8 reversed becomes a powerful macro tool, though you lose automatic aperture control.
Specialty Lenses: Creative Tools for Unique Perspectives
Beyond the standard lens categories lie specialty optics that create unique effects impossible to achieve otherwise. These lenses won’t be in every photographer’s bag, but when you need their specific capabilities, nothing else will suffice.
Fisheye Lenses: Embracing Distortion
Fisheye lenses create extremely distorted images with 180-degree or wider fields of view. While some photographers correct this distortion, I’ve learned to embrace it creatively. My 8mm fisheye has captured memorable skateboarding shots that pull viewers into the action.
Circular fisheyes capture a full 180-degree circle in the frame, creating distinctive images with black borders. Full-frame fisheyes fill the entire frame with distorted images. Both types have their place, though full-frame versions are more versatile for practical use.
I’ve found fisheyes useful for real estate photography in tight spaces, extreme sports where the distortion adds energy, and creative abstract work. The key is using the distortion purposefully rather than accidentally.
Tilt-Shift Lenses: Controlling Perspective
Tilt-shift lenses are the most complex and expensive specialty lenses. They allow movements that change the plane of focus and correct perspective distortion. Architects and landscape photographers use these lenses to keep vertical lines parallel.
The shift function moves the lens parallel to the sensor, correcting converging vertical lines. I use shift when photographing tall buildings to avoid the leaning effect caused by tilting the camera up.
The tilt function angles the lens relative to the sensor, changing the plane of focus. This allows incredible depth of field control – I once kept both foreground flowers and distant mountains sharp at f/2.8 using tilt.
These lenses require significant practice to master. Manual focus is mandatory, and the learning curve is steep. But for architectural and product photographers, tilt-shift capabilities are essential for professional results.
Other Specialty Options
Soft-focus lenses create dreamy, romantic images with controlled spherical aberration. Portrait photographers sometimes use these for flattering glamour shots or creative effect. While less common today, digital filters can replicate some of these effects.
Variable soft-focus lenses offer adjustable softness, giving more control over the effect. My friend’s 135mm soft-focus lens produces beautiful portraits with a unique glow that post-processing can’t quite replicate.
Super telephoto lenses beyond 600mm serve specialized wildlife and surveillance applications. These massive lenses cost more than many cars and require substantial support systems. Most photographers are better served with 400-600mm lenses and teleconverters.
How to Choose Your First (or Next) Lens A Practical Guide In 2025
Choosing lenses can be overwhelming, especially with the variety of options and price points. After spending thousands on lenses I rarely use, I’ve learned to make more strategic decisions. Here’s my practical approach to building a lens collection thoughtfully.
Start with Your Photography Goals
Before buying any lens, identify what you want to photograph. If you love landscapes, a wide-angle should be your priority. For portraits, invest in an 85mm prime. Wildlife requires telephoto reach. Be honest about what you’ll actually shoot, not what you dream about shooting.
I wasted money on a macro lens I used twice because I thought I “should” do macro photography. Now I only buy gear that solves actual problems in my photography workflow.
Budget-Friendly Starting Points
For beginners on a budget, I recommend a specific progression that balances learning and quality. Start with a 50mm f/1.8 or 35mm f/1.8 depending on your camera’s sensor size. These lenses cost $200 or less but deliver professional-quality images and excellent low light performance.
Your second lens should complement the first. If you started with a 50mm, consider a wide-angle like a 24mm or a telephoto like an 85mm. This approach builds versatility without redundancy.
✅ Pro Tip: Buy used lenses from reputable dealers. I’ve saved 30-50% on lenses in perfect condition. Lenses hold value well, and you can often resell for what you paid if you upgrade later.
Understanding Lens Compatibility (2025)
Camera systems have specific lens mounts that determine compatibility. Canon’s EF and RF mounts, Nikon’s F and Z mounts, and Sony’s E-mount each have their own lens ecosystems. Always verify lens compatibility before purchasing.
Full-frame lenses work on crop sensor cameras, but not vice versa. Crop sensor lenses are designed for smaller sensors and may vignette on full-frame bodies. Consider your future camera upgrade plans when building a lens collection.
Adapters exist to mount lenses from other systems, but performance varies. Manual focus adapters work well, but autofocus adapters can be slow or unreliable. Native lenses almost always perform better.
Building a Progressive Lens Collection
Rather than buying many mediocre lenses, focus on acquiring fewer high-quality pieces that complement each other. My ideal three-lens kit for full-frame cameras would be: a 24-70mm f/2.8 for versatility, an 85mm f/1.8 for portraits, and a 70-200mm f/2.8 for reach.
For APS-C shooters, consider a 16-55mm f/2.8, a 56mm f/1.4 for portraits, and a 55-200mm for telephoto needs. These three cover 90% of photographic situations while maintaining quality.
Prime lens shooters might prefer a 24mm, 50mm, and 85mm set for ultimate quality and low light performance. This minimalist approach forces creativity and produces consistently excellent images.
Quality Over Quantity
One excellent lens outperforms three mediocre ones every time. I’ve seen photographers with $5000 worth of average lenses produce images that don’t match someone with a single $1500 prime lens.
Professional lenses (usually designated with gold or red rings) offer better weather sealing, autofocus, and build quality. While expensive, they last decades and hold their value well. My 15-year-old professional lenses still work flawlessly and produce excellent images.
Frequently Asked Questions
What are the names of the six types of lenses?
The six main types of camera lenses are: wide-angle lenses (14-35mm), standard/normal lenses (35-70mm), telephoto lenses (70-600mm+), macro lenses for close-up photography, prime lenses with fixed focal lengths, and zoom lenses with variable focal lengths. Each type serves specific photography needs from landscapes to portraits to wildlife.
What three lenses should every photographer have?
Every photographer should have: 1) A versatile standard zoom like a 24-70mm for everyday situations, 2) A fast prime lens like a 50mm f/1.8 for low light and portraits, and 3) A telephoto lens like a 70-200mm for distant subjects and compressed portraits. This three-lens kit covers 90% of photographic situations while maintaining quality and versatility.
Is a 35mm or 50mm lens better?
35mm lenses are better for environmental storytelling and street photography where you want to include context. 50mm lenses excel at classic portraits and subjects you want to isolate from backgrounds. 35mm feels more natural for everyday use while 50mm provides slightly more flattering compression for portraits. Choose based on whether you prioritize context (35mm) or subject isolation (50mm).
What is the best all-purpose camera lens?
A 24-70mm f/2.8 zoom lens is the best all-purpose option, covering wide-angle to short telephoto in one lens. It handles landscapes, portraits, events, and travel photography competently. For crop sensor cameras, an 18-55mm or 16-55mm kit lens provides similar versatility at lower cost, though with less low light capability.
Do expensive lenses make a difference?
Yes, expensive lenses offer better sharpness, wider apertures, weather sealing, and autofocus speed. Professional lenses often have better optical quality that’s visible even at web sizes. However, technique matters more than gear – a skilled photographer with a budget lens will outperform an amateur with expensive equipment every time.
Can I use old lenses on new cameras?
Yes, with proper adapters, you can use older lenses on modern cameras. Manual focus adapters work reliably for most lens combinations. Autofocus adapters exist but performance varies by brand and lens combination. Manual focus older lenses often provide excellent image quality at low cost, making them great budget options for learning.
Building Your Lens Collection: Final Thoughts
Understanding lens types is just the beginning of your photography journey. The right lens collection evolves with your skills and interests. I’ve learned that quality matters more than quantity, and that the best lens is the one that helps you capture your vision.
Start small with versatile options, then gradually add specialized lenses as you identify specific needs. A 50mm prime taught me composition fundamentals that expensive zoom lenses couldn’t. Each lens in my bag serves a specific purpose based on how I actually shoot, not how I dream about shooting.
Remember that lenses are long-term investments. Good lenses hold their value and can last decades. My oldest lens is 20 years old and still produces excellent images. Buy quality when possible, maintain your gear properly, and don’t be afraid to buy used equipment from reputable sources.
The most important advice is to shoot with what you have until you understand its limitations. Only then will you know what you truly need next. Every photographer’s journey is different – build your lens collection based on your unique vision and the subjects that inspire you.