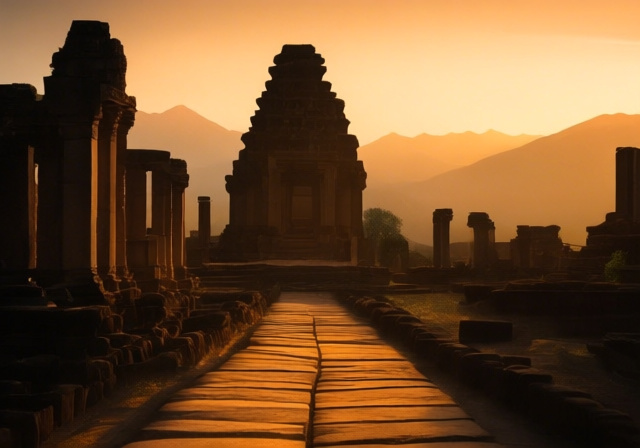
I still remember my first major travel photography disaster in 2025. Standing before the stunning temples of Angkor Wat at sunrise, my expensive DSLR camera set to full auto mode. The results? Dark, blurry photos that looked nothing like the magical scene before me. That morning taught me a crucial lesson: great travel photography isn’t about expensive gear—it’s about knowing the right techniques.
Travel photography is the art of capturing images that tell compelling stories about places, cultures, and experiences while exploring different destinations around the world. It combines technical camera skills with artistic vision, cultural awareness, and perfect timing to create images that preserve memories and inspire others to explore.
After photographing in over 40 countries and making every mistake possible (including dropping a camera in the ocean in Thailand), I’ve learned that transforming your travel photos from snapshots to stunning images comes down to mastering a few key principles. This guide will teach you everything from essential preparation to advanced composition techniques, whether you’re using a professional camera or just your smartphone.
Before You Go: Essential Travel Photography Preparation
The best travel photos often come from thorough preparation before you even leave home. I learned this the hard way when I arrived in Iceland with a dead battery and no backup—missing an incredible aurora display that night.
Research Your Destination Thoroughly
Spend at least 2-3 hours researching your destination’s photogenic spots. Look for iconic landmarks, hidden gems, and local culture. I create a photography shot list for each destination, including must-have shots and alternative angles. Use Google Images, Instagram, and travel blogs to visualize potential compositions before you arrive.
Master Your Equipment Before Traveling
Spend 2 weeks practicing with your camera before any major trip. I made the mistake of buying a new camera the day before a trip to Japan—spent half my vacation fumbling with settings. Learn the exposure triangle (aperture, shutter speed, ISO) until it becomes second nature. Practice changing settings quickly without looking at your camera.
⚠️ Important: Always test new gear extensively before traveling. Read the manual, watch YouTube tutorials, and practice in various lighting conditions.
Create a Photography Packing Checklist
- Camera Body: Clean sensor, check firmware updates
- Lenses: Clean with microfiber cloth, check for dust
- Batteries: Bring 2-3 fully charged, pack in carry-on
- Memory Cards: Bring multiple cards, format before trip
- Tripod: If bringing, ensure it fits in carry-on
- Cleaning Kit: Blower, cloth, sensor swabs
- Weather Protection: Rain sleeve, silica gel packets
Check Legal Requirements
Research photography laws in your destination. Some countries restrict photography of government buildings, military installations, or religious sites. I once nearly got detained for photographing a bridge in Eastern Europe that turned out to be a sensitive military structure.
Mastering Light: Golden Hour and Beyond
Light is the single most important element in photography. After years of chasing light across continents, I can tell you that understanding light will improve your photos more than any new camera or lens.
Golden Hour: The Magic Hour
Golden hour occurs during the first hour after sunrise and last hour before sunset. The light is soft, warm, and creates long, dramatic shadows. This is when I capture 80% of my best landscape shots.
Plan your shoots around golden hour using apps like PhotoPills or The Photographer’s Ephemeris. These apps show exactly when golden hour occurs at your location. I arrive 30 minutes early to scout compositions and set up my gear.
Golden Hour: The period shortly after sunrise or before sunset when the sun is low on the horizon, producing soft, warm, directional light ideal for photography.
Blue Hour: Twilight Photography
Blue hour occurs just before sunrise and after sunset when the sky takes on deep blue tones. It’s perfect for cityscapes and architectural photography. Start shooting 20-30 minutes before sunrise or 20-30 minutes after sunset. The window is short—typically only 20-40 minutes—so be prepared.
Shooting in Harsh Midday Light
Sometimes you can’t avoid shooting in harsh light. Here’s how I make it work:
- Find open shade: Under trees, buildings, or clouds
- Use backlighting: Position subjects with sun behind them
- Look for reflections: Water or glass can soften harsh light
- Convert to black and white: High contrast works well in monochrome
Indoor and Low Light Techniques
When shooting indoors or in low light:
- Use the widest aperture (lowest f-number) your lens allows
- Increase ISO gradually (start with 800, go up as needed)
- Look for natural light sources like windows
- Use a tripod or stabilize against surfaces
- Consider using a fast prime lens (f/1.8 or wider)
Composition Rules That Transform Your Travel Photos (2025)
Good composition separates snapshots from art. These principles took my photography from amateur to professional level, and they’ll work for you too.
Rule of Thirds: The Foundation
Imagine your frame divided into nine equal segments by two horizontal and two vertical lines. Place key elements along these lines or at their intersections. This creates more tension and interest than centering subjects.
Most cameras have a grid overlay you can enable. I keep this grid on constantly—it’s helped me compose better shots intuitively over time. The human eye naturally goes to these intersection points, making your photos more engaging.
Rule of Thirds: A composition principle that divides the frame into a 3×3 grid, placing important elements along the lines or at their intersections rather than in the center.
Leading Lines: Guide the Viewer’s Eye
Leading lines are natural lines in your scene that draw the viewer’s eye through the image. Roads, paths, rivers, fences, even shadows can serve as leading lines. I look for lines that start from the corner of the frame and lead toward the main subject.
Curved lines create a sense of journey, while straight lines create drama and strength. Experiment with both—each tells a different story.
Framing: Natural Frames Within Frames
Look for natural frames like doorways, windows, arches, or tree branches. Frames add depth and context to your images. In Venice, I used gondolas as frames for canal views. In Morocco, I used ornate doorways to frame market scenes.
Frames don’t have to be complete—an L-shape or V-shape can frame effectively. The key is creating layers that draw attention to your main subject.
Perspective and Point of View
Change your perspective to create unique images:
- Get low: Kneel or even lie down for dramatic foregrounds
- Climb high: Find vantage points for overview shots
- Shoot straight up or down: Create abstract compositions
- Move closer: Fill the frame with details
I once spent an entire afternoon photographing a single temple in Myanmar, shooting from every possible angle. The best shot came from lying on my back looking up at the ceiling—no one else had that perspective.
Foreground Interest: Create Depth
Include interesting foreground elements to create a sense of depth. Flowers, rocks, patterns, or textures can serve as foreground interest. The classic landscape composition uses foreground, middle ground, and background elements.
Use a small aperture (f/8-f/16) to keep everything in focus from front to back. This technique, combined with a wide-angle lens, creates images that pull viewers into the scene.
Travel Photography Equipment: Pack Smart, Travel Light
After hauling 15 pounds of camera gear through Southeast Asia for a month, I learned a valuable lesson: less is more. The best camera is the one you’ll actually carry.
| Equipment Type | Minimalist Setup | Standard Setup | Professional Setup |
|---|---|---|---|
| Camera | Smartphone/Compact | Mirrorless/DSLR | Full-frame Mirrorless |
| Lenses | Phone lens kit | 2-3 lenses | 4-5 specialized lenses |
| Tripod | Mini tripod | Travel tripod | Carbon fiber tripod |
| Weight | Under 2 lbs | 5-7 lbs | 10+ lbs |
Camera Choices for Travel
Smartphones: Modern phones take incredible photos. iPhone 13 Pro and newer, Google Pixel series, and Samsung Galaxy phones produce stunning images. Benefits: lightweight, always with you, easy editing. Limitations: limited zoom, less control in low light.
Compact Cameras: Sony RX100 series, Canon G7X. Great balance of quality and portability. I carry one as backup even when traveling with my main camera.
Mirrorless Cameras: The sweet spot for serious travel photography. Sony A6000 series, Canon EOS R, Fujifilm X series. DSLR quality in a smaller package. Most models weigh 1-2 pounds with lens.
DSLR Cameras: Still viable but heavier. Nikon D3500, Canon Rebel series. Great value, but consider the weight—most travel photographers are switching to mirrorless.
Lens Selection Strategy
One Lens Approach: A 24-70mm or 18-55mm kit lens covers most situations. I traveled through India with just one prime lens for a month—forced creativity and saved my back.
Two Lens Kit: Wide angle (16-35mm) for landscapes, standard zoom (24-70mm) for general use. This covers 90% of travel scenarios.
Three Lens Kit: Add a telephoto (70-200mm or 70-300mm) for wildlife and distant subjects. Only if you’re serious about wildlife or sports photography.
✅ Pro Tip: Prime lenses (fixed focal length) are lighter and often sharper than zooms. A 35mm or 50mm f/1.8 lens is versatile and perfect for travel.
Essential Accessories Under $100
- Extra batteries: $20-30 each, always bring 2-3
- Memory cards: 64GB+ cards, bring multiple smaller cards rather than one large
- Polarizing filter: $40-60, reduces glare and enhances colors
- Cleaning kit: $15, includes blower, cloth, lens pen
- Camera bag: $50-80, comfortable and weather-resistant
What NOT to Bring
- Full-size tripod (unless you’re a serious landscape photographer)
- Multiple camera bodies
- Heavy flash units
- Lots of specialized filters
- Laptop for editing (tablet or phone works for most)
Cultural Photography: Respect and Relationship Building
Photographing people and cultures requires sensitivity and respect. I’ve learned that the best cultural photographs come from genuine connections, not sneak attacks with a telephoto lens.
Ask Permission First
Always ask before photographing people, especially in portraits. Learn a few phrases in the local language:
- “May I take your photo?”
- “Beautiful photo, yes?”
- “Thank you” after shooting
In many cultures, a simple smile and gesture toward your camera is enough. Some people may ask for money—decide beforehand if you’re comfortable with this. I sometimes offer to email or print photos as compensation.
Build Relationships
Spend time in communities before photographing. I once spent three days in a village in Peru, playing with kids and helping with daily chores. By day three, people were asking me to take their photos, and the resulting images were incredibly authentic.
Understand Local Customs
Research photography customs before you go:
- Some cultures believe photos steal the soul
- Religious sites often restrict photography
- Government buildings may be off-limits
- Some indigenous communities charge photography fees
When in doubt, ask a local guide or tourism office. Breaking cultural photography rules can range from embarrassing to dangerous.
Street Photography Ethics
Street photography exists in a gray area between candid and exploitative. My guidelines:
- If someone notices you, smile and ask permission
- Don’t photograph vulnerable situations (poverty, grief)
- Avoid photographing children without adult consent
- Be prepared to delete photos if requested
Remember, you’re a guest in someone else’s home. The photo isn’t worth damaging a relationship or causing offense.
Paying for Photos
In some tourist areas, people charge for photos. This is their livelihood. Decide your policy beforehand:
- If it’s a performance or service, pay what you’d pay for any entertainment
- Negotiate prices BEFORE shooting
- Carry small bills for photo tips
- Respect someone’s right to say no
Smartphone Travel Photography: Pro Tips with Your Phone
Modern smartphones are incredible travel photography tools. The best camera is the one you have with you, and your phone is always with you. Here’s how to maximize your phone’s potential.
Master Your Phone Camera App
Go beyond the basic auto mode:
- Portrait mode: Creates background blur (bokeh)
- Night mode: Combines multiple shots for low light
- Panorama: For wide landscapes and cityscapes
- Burst mode: Hold shutter for action sequences
- Exposure control: Tap and slide to adjust brightness
Composition Tips for Phone Photography
Phone photography limitations can become creative advantages:
- Use the wide-angle for dramatic perspectives
- Get closer than you think—phones excel at close-up details
- Use leading lines to compensate for limited zoom
- Take advantage of the pocket size—capture shots bigger cameras miss
Essential Phone Photography Accessories
- Tripod mount: $15-20, essential for night shots
- Clip-on lenses: Wide, macro, and fisheye options
- Portable power bank: 10,000mAh minimum
- Selfie stick: Useful for higher angles and group shots
- Waterproof case: For beach and adventure photography
Best Apps for Mobile Travel Photography
- ProCamera/Sensor: Manual controls like a DSLR
- Snapseed: Powerful free editing app
- Lightroom Mobile: Professional editing on phone
- PhotoPills: Plan golden hour and moon positions
- Google Photos: Automatic backup and organization
Phone vs. Camera: When to Use Each
I use my phone when:
- I need to be discreet (street photography)
- Space and weight are concerns
- I want to quickly share on social media
- Shooting in good daylight conditions
I use my dedicated camera when:
- I need maximum image quality
- Shooting in low light or challenging conditions
- I want creative control with depth of field
- Printing large images or selling photos
Travel Photo Editing Workflow: From Good to Great
Editing is where good photos become great. After returning from a 3-week trip with 3,000 photos, I learned the importance of an efficient workflow.
Organization: The Foundation
Don’t wait until you’re home to organize. I sort photos daily while traveling:
- Delete obvious failures immediately (blurry, badly exposed)
- Star or flag potential keepers
- Create folders by location or date
- Backup to cloud service (Google Photos, Dropbox)
When home, I do a second pass—more ruthless this time. If it doesn’t make me feel something, it gets deleted. From 3,000 photos, I might keep 300 and edit only the best 50.
Basic Editing Workflow
Start with these adjustments for every photo:
- Straighten and crop: Fix horizons, improve composition
- Exposure adjustments: Brighten shadows, recover highlights
- White balance: Remove color casts, set mood
- Contrast and clarity: Add punch and definition
- Vibrance/saturation: Enhance colors subtly
- Sharpening: Apply appropriate amount
Mobile Editing Options
For on-the-go editing, I use:
- Snapseed: Free, powerful, intuitive
- Lightroom Mobile: Syncs with desktop version
- VSCO: Great for consistent film looks
- Afterlight: Creative filters and textures
Creating Your Style
Develop a consistent editing style:
- Create presets or recipes for common looks
- Keep edits subtle—avoid overprocessing
- Study photographers you admire
- Edit in batches for consistency
My style tends toward natural colors with slightly enhanced contrast and warmth. Find what works for you and stick with it—consistency builds a recognizable portfolio.
⏰ Time Saver: Create and save presets for your common editing scenarios (golden hour, indoor, street photography, etc.).
Backup Strategy While Traveling
Losing photos is devastating. I use the 3-2-1 backup system:
- 3 copies of every photo
- 2 different types of storage
- 1 copy off-site/cloud
Daily routine:
- Copy memory card to laptop
- Copy to external hard drive
- Upload favorites to cloud
- Format memory card only after verification
Common Travel Photography Mistakes to Avoid In 2025
I’ve made every mistake in this list. Learn from my failures so you don’t have to make them yourself.
Technical Mistakes
- Wrong settings: Shooting in JPEG instead of RAW, using high ISO unnecessarily, wrong white balance
- Focus issues: Missing focus on main subject, using the wrong focus mode
- Exposure problems: Blown highlights, crushed shadows, camera shake
Composition Mistakes
- Centered subjects: Everything dead center lacks interest
- Distracting backgrounds: Poles growing from heads, clutter behind subjects
- Empty foregrounds: Wide shots with nothing to lead into the scene
Cultural Mistakes
- Photographing without permission: Can range from rude to illegal
- Ignoring local customs: Disrespecting sacred sites or cultural norms
- Treating people as props: Objectifying locals for exotic photos
Planning Mistakes
- Not researching locations: Missing shots because you didn’t know they existed
- Packing too much gear: Leaving the camera in the hotel because it’s too heavy
- Not checking equipment: Dead batteries, full memory cards, dirty sensors
How I Learned from Mistakes
In 2025, I missed the perfect shot of Machu Picchu at sunrise because I was fumbling with my tripod. That experience taught me to practice setup until it becomes muscle memory. Now I can set up my gear in the dark without thinking.
Another time, I accidentally deleted a day’s worth of photos from Paris. The lesson? Backup immediately, twice, and never format a card without triple-checking.
Frequently Asked Questions
What is the best time of day for travel photography?
The best time is during golden hour—the first hour after sunrise and last hour before sunset. The light is soft, warm, and creates long shadows that add depth to photos. Blue hour, just before sunrise and after sunset, is excellent for cityscapes. Midday light is harsh and should be avoided when possible.
How do I take good travel photos with my phone?
Use your phone’s camera features like portrait mode for background blur and night mode for low light. Tap to focus and adjust exposure before shooting. Get closer to subjects rather than using digital zoom. Use leading lines and foreground interest to create depth. Edit with apps like Snapseed or Lightroom Mobile to enhance colors and contrast.
What camera equipment should I bring for travel photography?
For most travelers, a mirrorless or DSLR camera with 2-3 lenses covers all situations: a wide-angle (16-35mm) for landscapes, a standard zoom (24-70mm) for general use, and optionally a telephoto (70-200mm) for wildlife. Always bring extra batteries, memory cards, and a cleaning kit. Consider weight—pack only what you’ll actually carry.
How do I photograph people respectfully when traveling?
Always ask permission before taking close-up portraits. Learn a few phrases in the local language. Spend time building relationships before photographing. Respect people’s right to say no. Avoid photographing vulnerable situations. When photographing children, get adult consent. Consider offering to email or print photos as thanks.
Should I shoot in RAW or JPEG for travel photography?
Shoot in RAW if you plan to edit your photos. RAW files contain more data and allow greater flexibility in post-processing. Shoot in JPEG if you prefer simplicity and immediate sharing. Most cameras can shoot in both formats simultaneously. RAW files are larger but worth it for serious photography.
How do I protect my camera gear when traveling?
Use a padded, weather-resistant camera bag. Bring a rain sleeve for sudden downpours. Keep silica gel packets to absorb moisture. Never check camera equipment in airline luggage—always carry on. Get travel insurance for expensive gear. Clean your sensor and lenses before traveling. Backup photos daily to multiple locations.
Final Thoughts: Your Journey as a Travel Photographer
Travel photography is a journey, not a destination. Every trip teaches you something new, every mistake makes you better, and every captured moment preserves a piece of your adventure forever.
Remember that technical perfection isn’t the goal—telling stories is. The photos that move people are rarely the technically perfect ones; they’re the ones that capture emotion, tell a story, or reveal a unique perspective.
Start with the basics in this guide. Master light and composition. Respect cultures and people. Pack light but prepare thoroughly. Most importantly, put yourself in the right place at the right time, and don’t be afraid to experiment.
Your travel photos are more than images—they’re memories, stories, and connections. They’ll become more valuable with time, not just to you but to others who see the world through your eyes.
Now pack your camera, embrace the adventure, and create images that will last a lifetime. The world is waiting to be photographed through your unique perspective.