Ever wonder why your action shots turn into blurry messes or why that waterfall photo looks like a cotton candy dream? I’ve been there – countless times. After 15 years behind the camera, I’ve learned that shutter speed is the single most powerful creative tool that separates snapshots from stunning photographs.
Shutter speed is the length of time your camera’s shutter stays open when taking a photo, determining how long the camera sensor is exposed to light. This fundamental setting controls both image brightness and motion effects, making it essential for proper exposure and creative photography.
When I started photography, I struggled with basic concepts like why my indoor photos were always blurry or how to freeze my daughter’s soccer games. Understanding shutter speed transformed my photography overnight. Suddenly, I could capture sharp action shots, create silky water effects, and finally understand why some of my photos worked while others failed spectacularly.
In this comprehensive guide, I’ll break down everything you need to know about shutter speed – from basic definitions to advanced creative techniques. You’ll learn exactly when to use fast or slow shutter speeds, how to avoid camera shake, and discover creative possibilities that will transform your photography. We’ll cover practical scenarios you’ll actually encounter, with specific settings and real-world examples from my own photography journey.
What is Shutter Speed?
Shutter speed is exactly what it sounds like: It’s the speed at which the shutter of the camera closes. Think of it like a curtain that opens and closes in front of your camera’s sensor. When you press the shutter button, this curtain opens for a specific amount of time, lets light hit the sensor, then closes again.
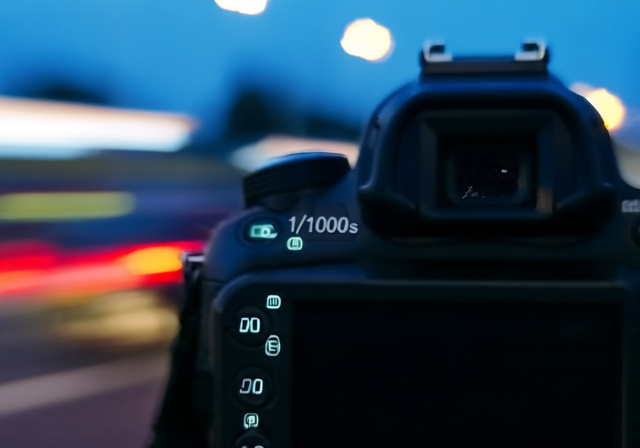
Shutter speeds are measured in fractions of a second for fast speeds (like 1/1000s) and in full seconds for slow speeds (like 2s or 30s). A fast shutter speed (1/1000s) means the shutter opens and closes very quickly – perfect for freezing motion. A slow shutter speed (1/30s or slower) keeps the shutter open longer, allowing more light in but also creating motion blur.
Here’s how shutter speeds work in practice: At 1/1000s, the shutter is open for just one-thousandth of a second – fast enough to freeze a hummingbird’s wings. At 1/60s, it’s open for one-sixtieth of a second – about the minimum for handheld shooting. At 1 second, the shutter stays open a full second – long enough to create light trails from cars or blur waterfalls into that dreamy, misty effect.
Shutter Speed: The duration your camera’s shutter remains open, exposing the sensor to light. Measured in seconds or fractions of seconds (e.g., 1/60s, 1/1000s, 2s).
Understanding shutter speed measurements is crucial for photography success. Faster shutter speeds (higher denominator like 1/2000s) let in less light but freeze motion perfectly. Slower speeds (lower denominator like 1/30s or full seconds) let in more light but require steady hands or a tripod to avoid blur from camera shake.
How Shutter Speed Affects Your Photos?
Shutter speed impacts your photos in two fundamental ways: exposure (brightness) and motion (sharpness or blur). These effects work together to create your final image, and understanding this relationship is key to taking control of your photography.
For exposure, shutter speed determines how much light reaches your sensor. Think of it like filling a bucket with water – a longer shutter speed is like leaving the faucet open longer, collecting more light (water). In dark situations, you need slower shutter speeds to get properly exposed images. In bright sunlight, faster speeds prevent overexposure.
The motion effects are where the real creative magic happens. Fast shutter speeds (1/500s and faster) freeze motion completely. I’ve used 1/4000s to capture water droplets frozen in mid-air and 1/2000s to freeze race cars on the track. These speeds eliminate all motion blur, creating sharp, crisp images of moving subjects.
Slow shutter speeds (1/30s and slower) create intentional motion blur. At 1/15s, a person walking becomes a soft blur. At 1 second, car headlights transform into light trails. At 30 seconds, stars become streaks across the night sky. This blur isn’t always bad – it’s a creative tool that can convey movement, create mood, and transform ordinary scenes into extraordinary images.
| Shutter Speed | Light Effect | Motion Effect | Best For |
|---|---|---|---|
| 1/4000s – 1/1000s | Very low light | Freezes all motion | Sports, wildlife, fast action |
| 1/500s – 1/250s | Low light | Freezes most motion | Children, pets, general action |
| 1/125s – 1/60s | Moderate light | Freezes slow motion | Portraits, street photography |
| 1/30s – 1/15s | More light | Some motion blur | Panning, intentional blur |
| 1s – 30s | Maximum light | Maximum blur | Long exposure, light trails |
Here’s a real example from my own work: Last summer, I was photographing my nephew’s baseball game. At 1/1000s, I froze the ball perfectly as it left the bat – you could see the stitches and spin. Later that evening, I switched to 1/2 second with my camera on a tripod to capture car light trails on a nearby bridge. Same camera, same day, completely different results – all because I understood how shutter speed affects both light and motion.
Camera Settings and Modes for Shutter Control
Modern cameras offer several ways to control shutter speed, and choosing the right mode can make your photography much easier. Each mode has its strengths, and understanding when to use each will accelerate your learning curve significantly.
Shutter Priority mode (S or Tv on your camera dial) is the best starting point for learning shutter speed. In this mode, you set the shutter speed and the camera automatically chooses the aperture for proper exposure. I spent my first year shooting primarily in Shutter Priority – it allowed me to focus on motion control while the camera handled the technical exposure details. When shooting my daughter’s gymnastics meets, I’d set 1/1000s and let the camera worry about the aperture.
Manual mode gives you complete control over both shutter speed and aperture. This is essential for challenging lighting situations or creative effects. I switch to Manual when shooting long exposures at night or when I want specific depth of field combined with a particular shutter speed. The learning curve is steeper, but the creative control is unmatched.
Program mode (P) is like auto-plus – the camera sets both shutter and aperture, but you can shift the combination to favor faster or slower shutter speeds. It’s a good transitional mode when moving from auto to manual controls. Many professional photographers keep Program mode as a backup for unexpected situations.
Quick Summary: Start with Shutter Priority mode to learn motion control. Progress to Manual mode for creative control and challenging situations. Use Program mode as a safety net when you need quick results.
Here’s how to change shutter speed on most cameras: Turn your mode dial to S or Tv, then use the main command dial (usually by your shutter button) to adjust the shutter speed. Look through the viewfinder or at the LCD screen – you’ll see numbers like 60 (meaning 1/60s), 125 (1/125s), or 1000 (1/1000s). For speeds slower than 1 second, you’ll see quotation marks like 2″ (2 seconds) or 30″ (30 seconds).
Modern cameras also offer electronic shutter options with extremely high speeds (up to 1/32000s on some models). These are silent and perfect for wildlife photography or situations where camera noise would be distracting. However, electronic shutters can create weird distortions with very fast movement, so I stick with mechanical shutters for most action photography.
Shutter Speed Selection Guide
Choosing the right shutter speed doesn’t have to be guesswork. Over years of shooting, I’ve developed a systematic approach that works in almost any situation. This guide will help you make confident decisions rather than randomly dialing in settings.
The reciprocal rule is your foundation for handheld photography. This simple rule states that your minimum shutter speed should be 1 over your focal length. Shooting with a 50mm lens? Use at least 1/50s. Using a 200mm telephoto? You need 1/200s or faster. This prevents camera shake from ruining your shots. I learned this rule after wasting countless photos on what I thought was focus problems – turns out, my hands just weren’t steady enough for slow shutter speeds with long lenses.
Image stabilization changes everything. Modern lenses and cameras with IS/VR/IBIS let you break the reciprocal rule by 2-5 stops. With my 24-70mm lens that has 5-stop stabilization, I can shoot at 1/15s handheld and still get sharp images. This opened up low-light photography possibilities I never thought possible without a tripod.
- Assess your subject movement: Is it stationary, slow-moving, or fast action?
- Check your focal length: Apply the reciprocal rule for handheld shooting
- Consider stabilization: Do you have IS/VR/IBIS? Subtract stops accordingly
- Evaluate lighting: Is there enough light for your chosen speed?
- Adjust ISO or aperture: Compensate for exposure changes
- Test and refine: Take a shot, check sharpness, adjust if needed
For action photography, I use the speed-of-subject rule. Your shutter speed should be at least double your subject’s speed across the frame. A person walking might need 1/125s. A running child needs 1/500s. A speeding car requires 1/2000s or faster. This sounds technical, but it quickly becomes intuitive with practice.
Shutter Speed Reference Chart
| Situation | Shutter Speed | Technique | Notes |
|---|---|---|---|
| Sunny day portraits | 1/250s – 1/500s | Handheld | Freezes natural expressions |
| Indoor without flash | 1/60s – 1/125s | Steady hands/IS | Watch for camera shake |
| Sports (daytime) | 1/1000s – 1/2000s | Continuous focus | Freezes action completely |
| Sports (indoor/night) | 1/500s – 1/1000s | High ISO | Increase ISO for faster speeds |
| Children playing | 1/250s – 1/500s | Burst mode | Capture spontaneous moments |
| Pets and animals | 1/250s – 1/1000s | Patience required | Varies by animal speed |
| Waterfalls (smooth) | 1/2s – 2s | Tripod required | Use ND filter in bright light |
| Ocean waves (smooth) | 1s – 4s | Tripod + ND filter | Create misty water effect |
| Car light trails | 10s – 30s | Tripod + dusk | Shoot during blue hour |
| Star trails | 30s+ (multiple) | Tripod + stacking | Need clear dark skies |
| Panning (cars) | 1/30s – 1/60s | Track motion | Keep subject in frame |
| Panning (runners) | 1/15s – 1/30s | Smooth motion | Practice technique first |
| Fireworks | 2s – 8s | Tripod + bulb | Use bulb mode for timing |
| Lightning | Bulb mode | Tripod + patience | Close shutter after strike |
Practical Applications by Photography Genre (2025)
Different types of photography demand different shutter speed approaches. Having shot everything from weddings to wildlife, I’ve learned that each genre has its own shutter speed sweet spots and challenges. Let me share what actually works in the field.
Sports and Action Photography
Sports photography is all about freezing decisive moments. I shot my first major sporting event – a local marathon – with completely wrong settings. My 1/250s shutter speed was too slow for runners, turning their legs into motion-blurred stumps. The next time, I started at 1/1000s and the difference was night and day.
For outdoor sports in good light, I recommend 1/1000s as your minimum starting point. This freezes most human motion cleanly. For faster sports like motorsports or hockey, push to 1/2000s or even 1/4000s if available. Indoor sports are trickier – you’ll often need to bump ISO to 1600 or higher to maintain 1/500s or faster in gym lighting.
Burst mode is your best friend in sports photography. I shoot in continuous high mode, tracking my subject and firing short 3-5 shot bursts. This increases your chances of catching that perfect moment – the ball leaving the bat, the diver entering the water, the receiver making the catch.
Portrait Photography
Portraits seem simple, but shutter speed choices make a huge difference. For static portraits, 1/125s to 1/250s is perfect – fast enough to prevent camera shake and subtle movements, but slow enough to work in most lighting conditions. I shot a corporate headshot session at 1/250s last week and every image was tack sharp.
For children’s portraits, you need faster speeds. Kids move constantly, even when they’re trying to sit still. I use 1/250s as my minimum for toddlers and 1/500s for active kids. During a recent family session, a four-year-old kept blinking during shots. Switching to 1/500s eliminated the blink problem completely.
Candid portraits benefit from understanding your subject’s rhythm. For adults in conversation, 1/125s often works if they’re relatively still. For people walking or gesturing, bump to 1/250s or 1/500s. I captured a great candid of a street performer last month at 1/500s, freezing his dramatic mid-performance gesture perfectly.
Landscape Photography
Landscape photography often uses slower shutter speeds for creative effects, but not always. For sharp landscapes without any movement, 1/125s works fine handheld. But when you want to blur water or clouds, that’s when things get interesting.
Waterfalls are the classic example. At 1/1000s, water droplets freeze in mid-air. At 1s, water becomes a silky smooth flow. At 30s, it looks like mist floating down the rocks. I visited Yosemite last spring and shot the same waterfall at multiple speeds – the 1-second exposure was my favorite, capturing both some texture and that dreamy flow.
Seascapes benefit from even longer exposures. Ocean waves at 1/4s show movement but retain detail. At 10s, waves become a smooth, misty surface. During a coastal shoot in Big Sur, I used a 15-second exposure to turn crashing waves into a surreal, fog-like texture that made the rocky coastline pop.
⚠️ Important: For exposures longer than 1/15s, always use a tripod. Even image stabilization can’t compensate for multi-second exposures. A cheap tripod is better than no tripod – I’ve gotten sharp 30-second exposures with a $60 travel tripod.
Wildlife Photography
Wildlife photography demands fast shutter speeds and quick thinking. Animals move unpredictably, and you need to be ready. I learned this the hard way when I tried to photograph birds at 1/250s – every shot was a blurry mess.
For stationary animals, 1/250s is your minimum. For animals walking or foraging, 1/500s is better. For birds in flight or running animals, 1/1000s to 1/2000s is essential. During a recent safari, I captured a cheetah at full sprint using 1/4000s – every muscle was frozen in perfect detail.
Birds in flight present the ultimate challenge. Small, fast birds need 1/2000s or faster. Larger birds like eagles can be captured at 1/1000s to 1/1250s. I spent weeks practicing with local seagulls before my Alaska trip – by the time I encountered bald eagles, I could consistently capture sharp flight shots at 1/1600s.
Street Photography
Street photography requires a balance between speed and stealth. You need shutter speeds fast enough to capture sharp images but slow enough to work in varying city lighting. I’ve found that 1/250s to 1/500s works for most street situations.
In bright city streets, 1/500s freezes pedestrians and traffic perfectly. For candid moments in cafes or markets, 1/250s usually suffices if you have steady hands. During a recent trip to Tokyo, I shot most street scenes at 1/320s – fast enough for movement but slow enough to work in narrow streets and covered markets.
Panning adds dynamic motion to street photography. Try 1/30s while tracking moving cars, cyclists, or people. The key is to keep your subject in the same position in your frame while moving the camera. I practiced this technique for weeks on busy streets before successfully capturing sharp subjects with beautifully blurred backgrounds.
Creative Shutter Speed Techniques
Once you master the basics, shutter speed becomes your creative superpower. These techniques transformed my photography from simple documentation to artistic expression. Each requires practice, but the results are worth the effort.
Light Trails and Traffic Streaks
Light trails are one of the most satisfying shutter speed effects. Find a location with moving traffic after sunset, mount your camera on a tripod, and use shutter speeds of 10-30 seconds. The passing cars create beautiful ribbons of light against the dark background.
I discovered this technique accidentally during a night shoot in Chicago. My shutter was stuck open for 15 seconds, and when I reviewed the image, the street had transformed into rivers of red and white light. Now it’s one of my favorite techniques for city photography.
For best results, shoot during blue hour (just after sunset) rather than full darkness. The ambient light adds depth and color to your scenes. Use ISO 100-200, f/8-f/11 for sharpness, and experiment with different shutter speeds. Shorter speeds (5-10s) create distinct light trails, while longer speeds (20-30s) create flowing rivers of light.
Silky Water Effects
Waterfalls, rivers, and ocean waves look completely different with long exposures. The trick is to use neutral density (ND) filters in bright conditions to allow slow shutter speeds without overexposure.
For waterfalls, I typically use 1/2s to 2s exposures. This creates that smooth, flowing effect while retaining some water texture. At Yosemite Valley, I shot Bridalveil Fall at 1 second with a 10-stop ND filter – the water transformed into a silky curtain while the surrounding rocks stayed sharp.
Ocean waves require longer exposures. Try 10-20 seconds to completely smooth the water surface. During a trip to the Oregon coast, I used a 20-second exposure to turn crashing waves into a misty, ethereal surface that made the sea stacks appear to float.
Panning for Motion Blur
Panning creates dynamic images with sharp subjects against blurred backgrounds. The technique is simple: use a slow shutter speed (1/15s to 1/60s), track your moving subject smoothly, and continue moving even after you press the shutter.
I spent a whole afternoon practicing panning at a local bike race. My first 50 shots were disasters – either the subject was blurry or the background wasn’t blurred enough. But by shot 75, something clicked. I captured a cyclist perfectly sharp against a beautifully blurred background at 1/30s.
The key is smooth, continuous motion. Start tracking your subject before you press the shutter, and keep moving after the shot. Use continuous autofocus if available, and don’t be afraid to experiment with different shutter speeds for different blur effects.
Intentional Camera Movement (ICM)
ICM is the rebel technique of moving your camera on purpose during exposure. The results are abstract, painterly, and completely unpredictable. It’s photography as improvisation – you never know exactly what you’ll get.
Start with 1/2s to 1s exposures. Move your camera vertically for trees, horizontally for seascapes, or in circles for abstract patterns. During autumn in New England, I created amazing images by moving my camera upward through colorful forests at 1/2s. The trees became streaks of red and gold, like impressionist paintings.
ICM requires letting go of control and embracing happy accidents. I’ve created some of my most creative images using this technique, but I’ve also taken hundreds of unusable photos. The key is to experiment freely and recognize when something magical happens.
Zoom Blur
Zoom blur creates explosive, dynamic images by changing focal length during exposure. Use a zoom lens, set shutter speed around 1/2s to 2s, and smoothly zoom in or out during the exposure.
This technique works great with city lights, flowers, or any subject with strong central elements. I captured downtown Minneapolis at night using a 1-second exposure while zooming from 24mm to 70mm. The buildings became radiating lines of light, like a starburst from the center.
Success requires smooth zooming and a tripod for best results. Practice makes perfect – your first attempts might be jerky or uneven. But once you master the motion, zoom blur creates unique, eye-catching images that stand out from conventional photography.
Painting with Light
Light painting uses long exposures in dark environments while moving light sources through the frame. It’s like drawing with light, and the creative possibilities are endless.
For light painting, you’ll need a tripod, dark location, and light sources (flashlights, LED lights, or even fireworks). Set your camera to bulb mode, use f/8-f/11, ISO 100, and experiment with exposure times from 30 seconds to several minutes.
I spent a magical evening light painting in the desert with friends. We created everything from simple light orbs to complex spirals and words written in light. The 2-minute exposures captured every movement of our flashlights, creating images that looked like digital art rather than photographs.
Essential Equipment for Shutter Speed Control (2025)
While you can practice shutter speed techniques with any camera, certain equipment makes the process easier and expands your creative possibilities. Here’s what I actually use and recommend, based on years of trial and error.
Tripods: The Foundation of Long Exposure
A good tripod is non-negotiable for exposures longer than 1/15s. I’ve learned this lesson repeatedly – trying to balance cameras on rocks, fences, or whatever was available, only to end up with blurry images and near-misses with expensive equipment.
For beginners, I recommend the Manfrotto Compact Action or similar lightweight tripod. It’s not fancy, but it’s stable enough for exposures up to 30 seconds and costs around $100. I used a similar tripod for my first two years of photography and got sharp images despite its basic design.
For serious long exposure work, invest in a carbon fiber tripod. I use a Gitzo Traveler that weighs nothing but supports my camera rock-solid even in wind. The difference in stability is noticeable for exposures longer than 10 seconds, and the weight savings makes it actually enjoyable to carry on hikes.
Neutral Density (ND) Filters
ND filters are sunglasses for your camera – they reduce light entering the lens, allowing slower shutter speeds in bright conditions. They’re essential for daytime long exposures of waterfalls, rivers, or any moving water.
I recommend starting with a 10-stop ND filter. This dark filter lets you use 1-second shutter speeds in bright daylight, perfect for silky water effects. I use a Tiffen 10-stop ND that cost about $70 – not the cheapest, but the optical quality is good enough that I don’t notice image degradation.
Variable ND filters offer convenience by letting you adjust density from 2-10 stops with one filter. They’re great for video work or quickly changing conditions. However, they can cause weird color shifts or cross-patterns at certain settings. I keep both a variable ND and fixed filters in my bag.
Remote Shutter Releases
Remote releases prevent camera shake during long exposures. Even pressing the shutter button can create tiny vibrations that blur 30-second exposures. A simple wired remote costs $20-30 and eliminates this problem completely.
Wireless remotes offer more freedom, especially for self-portraits or when you can’t touch the camera. I use a simple wireless remote that cost $25 – it works reliably up to 15 feet and doesn’t require line of sight.
For the ultimate control, consider an intervalometer. These programmable remotes can take multiple timed exposures automatically – essential for star trails or time-lapse photography. My intervalometer was $40 and has paid for itself many times over in creative possibilities.
Image Stabilization
Image stabilization (IS, VR, or IBIS) lets you use slower shutter speeds handheld. This technology counteracts camera shake, effectively giving you 2-5 extra stops of handheld capability.
When buying lenses, prioritize those with image stabilization. My 70-200mm f/2.8 with IS lets me shoot at 1/60s handheld instead of the 1/200s the reciprocal rule would demand. This is game-changing for indoor sports or event photography.
Camera-body stabilization (IBIS) is even better, working with any lens. My newer camera with 5-stop IBIS can shoot sharp images at 1/8s with a 35mm lens – something I never dreamed possible early in my photography journey.
⏰ Time Saver: Turn off image stabilization when using a tripod. The stabilization system can actually create vibrations when it tries to correct movement that isn’t there. I learned this after getting blurry long exposures despite using a sturdy tripod.
Common Problems and Solutions (2025)
After teaching photography workshops and helping countless beginners, I’ve noticed the same shutter speed problems appear repeatedly. Here are the most common issues and their solutions – many learned through my own frustrating mistakes.
Camera Shake and Blurry Images
This is the number one problem beginners face. Your photos look sharp on the camera screen but turn out blurry on the computer. The cause? Camera shake from shutter speeds that are too slow for handheld shooting.
The solution is the reciprocal rule I mentioned earlier: use at least 1 over your focal length. But here are additional tips I’ve learned the hard way: brace yourself against walls or trees when possible. Tuck your elbows into your body. Exhale slowly before pressing the shutter. Practice good camera-holding technique – left hand supporting the lens, right hand on the camera body.
If you’re still getting blurry photos, don’t be afraid to increase ISO. A slightly grainy photo is better than a blurry one. I’d rather have a sharp photo at ISO 1600 than a blurry one at ISO 100.
Incorrect Exposure with Fast/Slow Shutter Speeds
You set the perfect shutter speed for your subject, but the photos are too bright or too dark. This happens because shutter speed is only one part of the exposure equation.
Remember the exposure triangle: shutter speed, aperture, and ISO work together. When you make shutter speed faster, you’re letting in less light, so you need to compensate with a wider aperture (smaller f-number) or higher ISO. When you make shutter speed slower, you need a smaller aperture (larger f-number) or lower ISO.
I keep this mental checklist: If photos are too dark at my chosen shutter speed, I can either open the aperture (lower f-number) or increase ISO. If photos are too bright, I can close the aperture (higher f-number) or decrease ISO. Practice these adjustments until they become automatic.
Missing Decisive Moments
You’re trying to photograph action, but by the time you press the shutter, the moment has passed. This happens because of shutter lag – the delay between pressing the button and the camera actually taking the picture.
The solution is anticipation. Learn your subject’s patterns and press the shutter just before the peak moment. For a basketball player jumping, press as they’re gathering for the jump, not when they’re at the peak. For a bird taking flight, press as they’re crouching, not as they’re already airborne.
Burst mode helps capture moments you might miss with single shots. I use short 3-5 frame bursts for most action photography. This increases my chances of getting the perfect frame without filling my memory card with too many duplicates.
Long Exposure Noise
Your 30-second night shots look great on camera but have strange digital noise or hot pixels when viewed on a computer. This is long exposure noise, caused by the camera sensor heating up during extended exposures.
Most modern cameras have long exposure noise reduction – a feature that takes a second dark frame and uses it to remove noise from your image. Turn this feature on in your camera menu. It doubles the time for each exposure (a 30-second shot takes another 30 seconds for processing), but the results are worth it.
For the best results, shoot in RAW format. This captures maximum data and gives you more flexibility to remove noise in post-processing. I edit all my long exposures in Lightroom or Capture One, using noise reduction tools that work wonders on difficult files.
Timing Issues with Bulb Mode
You’re trying to use bulb mode for very long exposures, but either you open the shutter too long or not long enough. Bulb mode requires precise timing that’s difficult to judge by feel.
The solution is a timer or stopwatch. For exposures under 30 seconds, I use my phone’s stopwatch. For longer exposures, I use the intervalometer which can be set to exact times. This removes the guesswork and gives consistent results.
Practice with bulb mode in familiar situations before relying on it for important shots. I spent evenings in my backyard practicing with bulb mode before my first star photography trip. By the time I was under dark skies, I could confidently time exposures without checking my watch constantly.
Frequently Asked Questions
Which shutter speed is faster, 1/60 or 1/1000?
1/1000 is faster than 1/60. In shutter speed fractions, larger numbers mean faster speeds. A 1/1000s exposure captures light for just one-thousandth of a second, while 1/60s captures for one-sixtieth of a second – about 16 times longer.
What is the best shutter speed?
There’s no single “best” shutter speed – it depends entirely on your subject and creative goals. For freezing action, use 1/1000s or faster. For handheld portraits, 1/125s to 1/250s works well. For long exposure effects, use 1 second or longer with a tripod.
What is the rule for shutter speed?
The reciprocal rule states your shutter speed should be at least 1 over your focal length for handheld shooting. With a 50mm lens, use 1/50s or faster. With a 200mm lens, use 1/200s or faster. This prevents camera shake from blurring your photos.
What is ISO and shutter speed?
ISO and shutter speed are two parts of the exposure triangle. Shutter speed controls motion and duration of light exposure. ISO controls the sensor’s sensitivity to light. When you make shutter speed faster (less light), you often need to increase ISO (more sensitivity) to maintain proper exposure.
What is the golden rule of shutter speed?
The 180-degree rule for video states your shutter speed should be double your frame rate. For 24fps video, use 1/48s (or 1/50s). For 30fps video, use 1/60s. This creates natural-looking motion blur that matches how our eyes perceive movement.
What is the slowest shutter speed for handheld photography?
With image stabilization, experienced photographers can often shoot at 1/15s or even 1/8s handheld. Without stabilization, most people need at least 1/60s to avoid camera shake. Practice and technique play a big role – steady hands and good camera-holding technique help significantly.
How do I avoid camera shake with slow shutter speeds?
Use a tripod for any exposure slower than 1/15s. If you must shoot handheld, brace yourself against something stable, tuck your elbows in, and use image stabilization if available. Some photographers can manage 1/30s with practice, but 1/60s is safer for most people.
When should I use shutter priority mode?
Use shutter priority (S or Tv) when controlling motion is your priority but you want the camera to handle exposure automatically. It’s perfect for sports, action, wildlife, and any situation where freezing or blurring motion matters more than controlling depth of field.
Final Recommendations
Mastering shutter speed transformed my photography from snapshots to art. It’s the one camera setting that offers the most creative control while being immediately visible in your results. Start with the basics – understanding how shutter speed affects exposure and motion – then gradually explore the creative techniques that excite you most.
Practice deliberately. Don’t just take photos – experiment with specific shutter speeds and analyze the results. Try the same subject at 1/1000s, 1/125s, and 1/15s to see the differences. Keep notes about what works and what doesn’t. I still maintain a photography journal where I record successful settings for different situations.
Remember that perfect is the enemy of good. Your first attempts at panning or long exposures might not be masterpieces, but each attempt teaches you something valuable. Photography is a journey, and understanding shutter speed is one of the most rewarding milestones along that path.
The most important advice? Have fun with it. Shutter speed control gives you the power to freeze time or blur reality, to document reality or create abstraction. Use that power creatively, experiment boldly, and don’t be afraid to make mistakes. Some of my best photographs came from happy accidents when I was just playing with different shutter speeds.
Now grab your camera, set it to shutter priority mode, and go create something amazing. The world looks different through various shutter speeds – go discover how you want to see it.