Have you ever wondered how professional photographers create those stunning portraits where the subject pops while the background melts away into a beautiful blur? That’s selective focus at work—a powerful technique that can transform your ordinary snapshots into compelling, professional-quality images.
Selective focus is a photography technique where you intentionally keep your main subject sharp while blurring the background and/or foreground, creating a shallow depth of field that guides the viewer’s eye exactly where you want it to go.
This technique works by controlling three key factors: your aperture setting, the distance between you and your subject, and the distance between your subject and the background. When you master these elements, you gain complete creative control over what viewers notice first in your photographs.
In this guide, I’ll share everything I’ve learned about selective focus from shooting thousands of portraits, macro images, and creative compositions. You’ll discover how to achieve this effect with any camera—even your smartphone—along with specific settings, creative applications, and solutions to common problems that trip up most beginners.
Understanding Depth of Field: The Key to Selective Focus
Depth of field is the foundation of selective focus. It refers to how much of your image appears sharp from front to back. A shallow depth of field means only a thin slice of your image is in focus, while a deep depth of field keeps everything sharp.
Depth of Field: The zone of acceptable sharpness in your photograph, controlled primarily by your aperture setting but also affected by focal length and distance.
Think of depth of field like your eye’s natural focus. When you concentrate on reading this text, everything in your peripheral vision becomes slightly blurry. Your camera can do the same thing—it’s all about controlling where that sharp zone falls in your frame.
Aperture, measured in f-stops, is your primary tool for controlling depth of field. Lower f-numbers (like f/1.8 or f/2.8) create wider openings in your lens, resulting in shallower depth of field and more background blur. Higher f-numbers (like f/8 or f/11) create smaller openings, giving you deeper depth of field with more of the scene in focus.
But aperture isn’t the whole story. Your focal length and distances matter too. Longer focal lengths naturally compress backgrounds and create more apparent blur, while getting closer to your subject reduces depth of field. These three elements work together, and understanding their relationship is key to mastering selective focus.
| Aperture Setting | Depth of Field | Best For | Expected Results |
|---|---|---|---|
| f/1.4 – f/2.8 | Very Shallow | Portraits, macro details | Subject sharp, background extremely blurred |
| f/4 – f/5.6 | Shallow | Environmental portraits | Subject prominent, background softly blurred |
| f/8 – f/11 | Moderate | Group shots, details | Subject and some background elements sharp |
| f/16 – f/22 | Deep | Landscapes, architecture | Everything in focus from front to back |
How to Achieve Selective Focus 5 Essential Steps
Creating selective focus might seem complicated, but it’s actually a straightforward process once you understand the sequence. I’ve refined these steps through years of trial and error, and they work consistently across different cameras and situations.
- Choose Your Subject and Composition: Start by identifying what you want to emphasize in your image. Is it a person’s eyes, a flower’s center, or a specific detail? Position yourself to get the best angle while considering the background—distracting elements farther away will blur more beautifully.
- Set Your Aperture to Wide Open: Switch to aperture priority mode (A/Av) or manual mode, then select your lens’s widest aperture (lowest f-number). If you’re using a kit lens, this might be f/3.5-5.6, while prime lenses often go down to f/1.8 or lower. Don’t worry if your widest aperture isn’t super wide—just use what you have.
- Adjust Your Distance and Position: Get closer to your subject or move them farther from the background. The greater the distance between subject and background, the more blurred it will become. For portraits, I typically position my subject at least 10 feet from any background elements when using a wide aperture.
- Select Your Focus Point Carefully: Switch to single-point autofocus mode rather than letting your camera choose. For portraits, focus on the nearest eye. For macro shots, focus on the most important detail. If your camera struggles with autofocus in low light or close-up situations, switch to manual focus and use your camera’s focus assist features.
- Test and Refine: Take a test shot and review it at 100% magnification. Check if your focus is precisely where you want it and if the background blur is sufficient. If not, adjust your aperture slightly, change your position, or modify the distance between subject and background. Sometimes a small adjustment makes a huge difference.
For smartphone users, the process is similar but relies on your phone’s portrait mode or manual camera apps. Most modern smartphones use computational photography to simulate selective focus, and while not as precise as dedicated cameras, they can produce impressive results when used correctly.
✅ Pro Tip: When using wide apertures, your depth of field might be razor-thin—sometimes just inches or even fractions of an inch. Small movements forward or backward can throw your subject out of focus. Take multiple shots to ensure at least one is perfectly sharp.
Best Equipment for Selective Focus Photography In 2025
While you can achieve selective focus with any camera, certain equipment makes it easier and more effective. Here’s what I recommend based on my experience shooting everything from professional portraits to casual snapshots.
Lens Recommendations
Prime lenses with wide maximum apertures are ideal for selective focus. A 50mm f/1.8 lens is often called the “nifty fifty” for a reason—it’s affordable, sharp, and perfect for portraits with beautiful background blur. I’ve used everything from budget primes to professional lenses, and here’s what works best:
- 50mm f/1.8: The perfect starting point. Affordable ($150-250), lightweight, and versatile for portraits, details, and general use. The background blur at f/1.8 is gorgeous and professional-looking.
- 85mm f/1.8: The classic portrait lens. Creates more compression and background separation than 50mm, ideal for headshots and environmental portraits. Expect to pay $400-600 for a quality version.
- 35mm f/1.4: Great for environmental portraits where you want more context. Wider angle means you need to be closer to your subject for the same blur effect, but the results are stunning.
- Macro Lens (100mm+): Essential for extreme close-up work with selective focus. These lenses can focus very close while maintaining wide apertures, perfect for flowers, insects, and product photography.
Budget-Friendly Options
You don’t need expensive equipment to create beautiful selective focus. Here are some affordable alternatives I’ve tested extensively:
- Manual Focus Prime Lenses: Vintage 50mm lenses from brands like Pentax, Minolta, or Canon can be found for $50-150 on eBay. With a simple adapter, they work beautifully on modern cameras and often have unique character.
- Extension Tubes: These hollow rings between your camera and lens allow closer focusing for macro-style selective focus. A set costs $20-50 and works with any lens you already own.
- Kit Lens Maximization: Your kit lens can produce decent selective focus at its widest aperture (usually f/3.5-5.6). The key is maximizing subject-to-background distance and minimizing camera-to-subject distance.
Smartphone Accessories
For mobile photography, consider these additions:
- Clip-on Macro Lenses: Moment, Olloclip, and other brands offer quality macro lenses that attach to your phone for close-up selective focus. Expect to pay $70-150 for good quality.
- Manual Camera Apps: Apps like Halide, ProCam X, or Adobe Lightroom Mobile give you manual control over focus and exposure simulation, improving your phone’s selective focus capabilities.
Creative Ways to Use Selective Focus In 2025
Once you’ve mastered the technical aspects, the creative possibilities are endless. I’ve discovered these techniques through years of experimentation, and they can add depth and interest to any photography style.
Portrait Photography Applications
For portraits, selective focus creates professional-looking results by separating your subject from distracting backgrounds. I typically focus on the nearest eye using single-point autofocus, then use aperture f/1.8-2.8 for a dreamy background blur that doesn’t completely eliminate context.
Environmental portraits benefit from slightly deeper depth of field—f/4-5.6—so your subject remains sharp while their surroundings suggest story and context. The key is finding balance between subject isolation and environmental storytelling.
Macro Photography Details
Macro photography is where selective focus truly shines. When shooting flowers, insects, or small objects, your depth of field might be just millimeters thick. I use focus stacking—taking multiple shots at slightly different focus points and combining them later—to get more sharpness where needed while maintaining beautiful blur elsewhere.
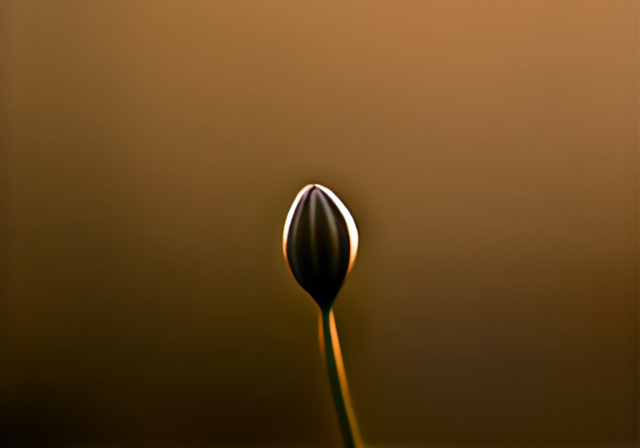
For flower photography, focus on the stamen or most detailed part of the bloom. For insects, focus on the eyes. These small details create powerful images when everything else melts away into soft color and shape.
Landscape and Nature Techniques
While landscapes typically use deep depth of field, selective focus can create moody, artistic results. Try focusing on a foreground element like a flower or rock while using a wide aperture to blur the background landscape. This technique creates depth and draws viewers into your scene.
Forest photography benefits greatly from selective focus—focus on a specific tree or patch of light while letting the rest of the forest fade into impressionistic color and shadow. I’ve created some of my most memorable forest images using this approach.
Storytelling Through Focus
Selective focus is a powerful storytelling tool. By choosing what’s sharp and what’s blurred, you guide viewers’ attention and emotion. Focus on hands to suggest action or craftsmanship. Focus on eyes to create connection. Focus on details to build mystery or curiosity.
I once photographed an elderly craftsman by focusing solely on his weathered hands while his face and workshop blurred into soft shapes. The image told more about his life and work than any conventional portrait could have achieved.
⏰ Time Saver: Pre-set your camera’s back button focus to separate focus from shutter activation. This lets you lock focus on your subject once and recompose freely without refocusing each time.
Common Mistakes and How to Fix Them?
Everyone makes mistakes when learning selective focus. I’ve made them all, and understanding these common issues will save you hours of frustration.
Focus Misses the Target
Your camera’s autofocus might choose the wrong focus point, especially with wide apertures where precision is critical. Fix this by switching to single-point autofocus and manually selecting exactly where you want to focus. For portraits, always focus on the nearest eye—if the eyes aren’t sharp, the entire image feels off.
If autofocus struggles in low light or with close subjects, switch to manual focus. Use your camera’s focus peaking feature (highlighted edges show what’s in focus) or magnify the view to confirm sharpness before shooting.
Not Enough Background Blur
Sometimes your background doesn’t blur as much as you’d like. This usually happens when your subject is too close to the background or your aperture isn’t wide enough. Increase the distance between subject and background, or use a wider aperture if your lens allows it.
Also consider your focal length—longer lenses naturally create more background compression and apparent blur at the same aperture. Switching from 35mm to 85mm can make a dramatic difference in background quality.
Too Much Blur or Wrong Focus Point
With very wide apertures, you might accidentally focus on the wrong part of your subject or have so little depth of field that important details are soft. The solution is to stop down slightly (f/2.8 instead of f/1.8) or be more precise about your focus point selection.
For group portraits, avoid using extremely wide apertures unless everyone is on exactly the same plane. f/4-5.6 usually provides a better balance between subject separation and group sharpness.
Soft Images from Camera Shake
Wide apertures let in more light, which can lead to faster shutter speeds—but not always fast enough to prevent motion blur. If your images are soft overall, increase your ISO to get faster shutter speeds, or use a tripod for stability.
I recommend a minimum shutter speed of 1/125s for portraits with normal lenses, and 1/250s or faster for longer lenses. If you’re shooting handheld, use the reciprocal rule: shutter speed should be at least 1 over your focal length (1/85s for 85mm lens).
Frequently Asked Questions
What aperture is best for selective focus?
The best aperture for selective focus depends on your subject and lens, but f/1.8-2.8 is ideal for most situations. For portraits, f/1.8 creates beautiful background blur. For macro work, you might need f/2.8-4 to get enough depth of field for your subject. Start with your lens’s widest aperture and adjust based on results.
Can I achieve selective focus with a kit lens?
Yes, you can achieve selective focus with a kit lens! While kit lenses typically have maximum apertures of f/3.5-5.6, you can still create background blur by maximizing subject-to-background distance and minimizing camera-to-subject distance. Position your subject far from backgrounds and get as close as possible while maintaining focus.
How close should I be to my subject for selective focus?
The ideal distance depends on your lens and desired effect, but closer is generally better for selective focus. For portraits with a 50mm lens at f/1.8, 4-6 feet is typical. For macro work, you might be just inches away. Remember: the closer you are to your subject, the shallower your depth of field will be at any given aperture.
What’s the difference between bokeh and selective focus?
Selective focus is the technique of choosing what’s sharp in your image, while bokeh refers to the quality of the out-of-focus areas created by selective focus. Bokeh describes how pleasing or creamy the blurred background appears. Good bokeh has smooth, creamy highlights without harsh edges, while poor bokeh shows distracting shapes in the blur.
How do I fix blurry selective focus photos?
Blurry selective focus photos usually result from incorrect focus point or motion blur. Check your focus point selection—use single-point autofocus and place it precisely on your subject’s eyes or most important detail. If everything is soft, increase shutter speed or use a tripod. If only part of your subject is sharp, your depth of field is too shallow—stop down to f/2.8-4.
Can I create selective focus in post-processing?
While genuine selective focus is best created in-camera, you can simulate it in post-processing using software like Photoshop or Lightroom. The Lens Blur filter in Photoshop can create convincing background blur, and portrait mode in Lightroom can automatically detect and blur backgrounds. However, in-camera selective focus always looks more natural and maintains true optical quality.
Final Recommendations
Mastering selective focus takes practice, but it’s one of the most rewarding photography techniques you can learn. Start with the basics—wide aperture, single focus point, proper distances—and gradually build your skills. Don’t get discouraged if your first attempts aren’t perfect; even professional photographers take multiple shots to get the focus just right.
Remember that selective focus isn’t just about technical settings—it’s about creative vision. Use it to tell stories, evoke emotions, and guide viewers through your images. When you combine technical precision with artistic intent, selective focus transforms ordinary snapshots into compelling photographs that capture attention and imagination.