I’ve spent countless hours chasing the perfect forest sunset shot, and let me tell you – it’s been quite the journey! Forest sunset photography combines two of my greatest passions: the serene beauty of woodlands and the magical golden hour light. When I first started, I struggled with harsh contrasts, messy compositions, and exposures that never seemed quite right. But through trial and error (and lots of research), I’ve discovered that capturing stunning forest sunset photos doesn’t have to be complicated. In fact, with the right approach, it can be incredibly easy and rewarding. Whether you’re a beginner looking to improve your landscape photography or an experienced shooter wanting to master forest scenes, I’m going to share everything I’ve learned about creating breathtaking forest sunset images that will make your friends say “Wow!”
Why Forest Sunset Photography is Special
There’s something truly magical about photographing forests during sunset hours. I discovered that the combination of towering trees and golden light creates an atmosphere that’s simply unmatched in any other photography genre. The way sunlight filters through leaves, creating those dreamy light rays, never fails to take my breath away. Plus, forests offer endless opportunities for creative compositions – from intimate macro shots of dew-covered leaves to sweeping wide-angle vistas that capture the grandeur of the woodland.
Essential Gear for Forest Sunset Photography
Camera Body Recommendations
When I’m heading out for a forest sunset shoot, I always reach for my full-frame camera. The dynamic range is crucial for handling the extreme contrasts between bright skies and shadowy forest floors. However, I’ve learned that you don’t need the most expensive gear to get great results. I’ve taken some of my favorite forest sunset shots with entry-level DSLRs and even high-end smartphones!
Lens Selection: My Go-To Choices
After years of experimenting, I’ve found that lens choice can make or break your forest sunset photos. Here’s what works best for me:
Wide-Angle Lenses (16-35mm): Perfect for capturing the grandeur of forest scenes and creating that immersive feeling. I love using my 24mm for sweeping vistas that make viewers feel like they’re standing right there in the woods.
Standard Lenses (35-50mm): These are my workhorses for forest photography. They provide a natural perspective that closely matches what our eyes see, making them ideal for balanced compositions.
Telephoto Lenses (70-200mm): When I want to isolate specific elements or compress perspective, my telephoto lens is invaluable. It’s perfect for capturing those intimate details that get lost in wider shots.
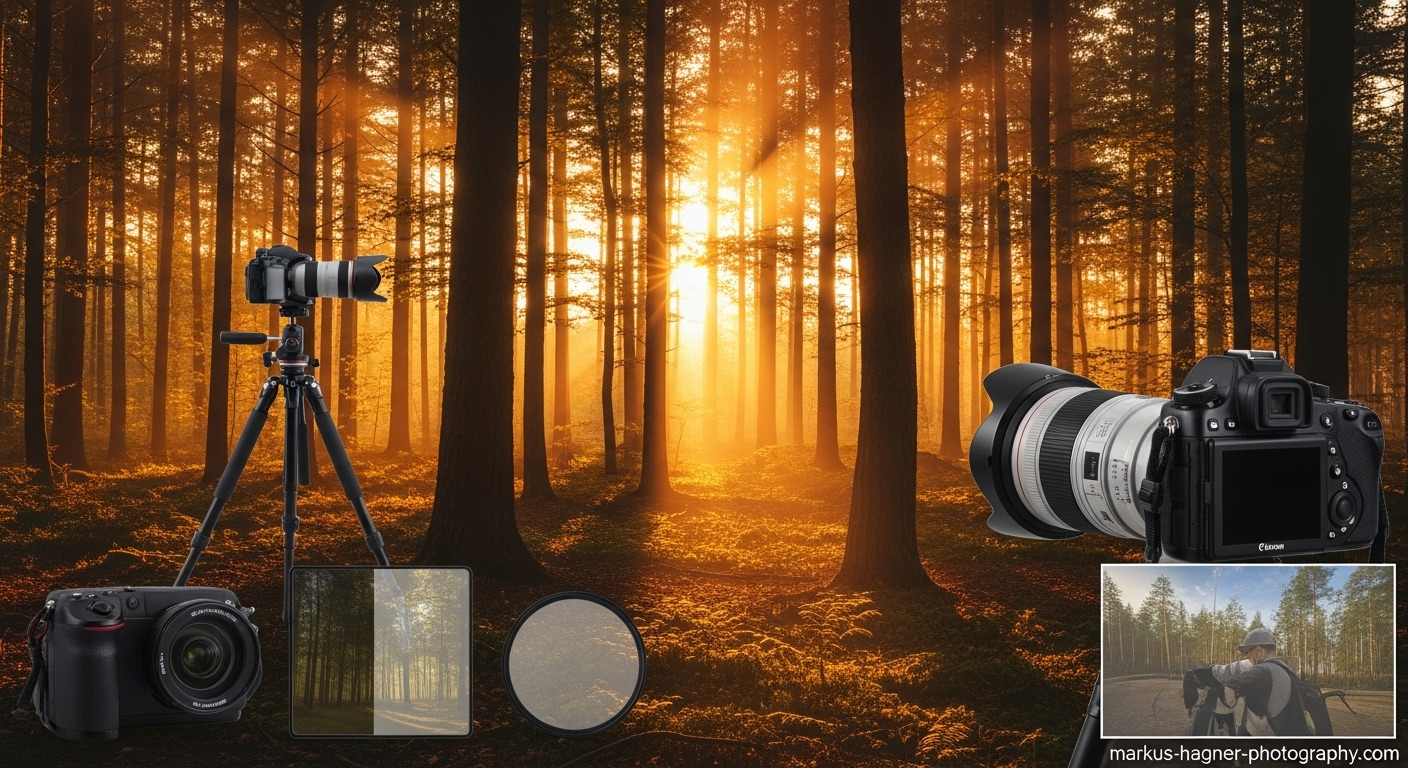
Must-Have Accessories
Tripod: I never go forest shooting without my sturdy tripod. Forests are naturally dark environments, especially during sunset hours, and a tripod is essential for sharp images. I learned this the hard way after too many blurry shots from handholding in low light!
Polarizing Filter: This is my secret weapon for forest sunset photography. It cuts glare on leaves, deepens colors, and helps manage reflections. The difference between a polarized and non-polarized forest shot can be dramatic.
ND Filters: For those silky water effects in forest streams or waterfalls, I always pack my ND filters. They allow me to use longer shutter speeds even in bright conditions.
Remote Shutter Release: Essential for long exposures and keeping your camera perfectly still.
Perfect Camera Settings for Forest Sunsets
Aperture: Finding the Sweet Spot
I’ve experimented extensively with aperture settings, and here’s what works best:
f/8-f/11: This is my go-to range for most forest sunset scenes. It provides excellent sharpness throughout the frame while maintaining good detail in both foreground and background elements.
f/16-f/22: When I need maximum depth of field for scenes with elements very close to the camera and distant background, I’ll stop down to these smaller apertures.
f/2.8-f/4: For intimate detail shots where I want to separate my subject from the background, wider apertures create beautiful bokeh that simplifies busy forest scenes.
Shutter Speed: Capturing the Moment
Shutter speed in forest sunset photography varies dramatically based on what you’re trying to achieve:
1/60s and faster: For handheld shots or when there’s wind and you want to freeze leaf movement.
1/15s-1s: Perfect for creating slight motion blur in water or leaves while keeping most elements sharp.
1s-30s: When I want that silky water effect in forest streams or waterfalls.
30s+: For truly ethereal effects and light painting in deep forest scenes.
ISO: Keeping it Clean
I always start at my camera’s base ISO (usually 100 or 200) to ensure the cleanest possible images. However, I’m not afraid to increase ISO when necessary:
ISO 100-400: Ideal for tripod-based shots in good light.
ISO 400-1600: When I need faster shutter speeds due to wind or moving subjects.
ISO 1600+: Only in emergencies, as noise becomes more noticeable in forest scenes with lots of detail.
White Balance: Capturing the Mood
I’ve found that white balance can dramatically affect the mood of forest sunset photos:
Auto WB: Usually works well, but I often adjust in post-processing.
Daylight (5500K): Preserves the warm golden tones of sunset.
Cloudy (6500K): Enhances warmth and can create beautiful golden hour effects.
Shade (7500K): For maximum warmth when the light is cooler than desired.
Also Read: Nikon 18 300 Vs Tamron 16 300
Mastering Composition in Forest Sunset Photography
Finding Order in Chaos
One of the biggest challenges I faced when starting forest photography was dealing with the inherent chaos of woodland scenes. Here are the techniques I’ve developed to create compelling compositions:
Look for Leading Lines: Forest paths, streams, and fallen logs create natural leading lines that guide viewers through your image. I always scan the scene for these elements before setting up my shot.
Use Framing: Tree trunks and overhanging branches make perfect natural frames. I love positioning myself so that elements in the foreground create a window to the scene beyond.
Shoot Vertical: Forests are tall! I often shoot vertically to emphasize the height of trees and capture more of the canopy.
Get Low: Shooting from ground level creates an immersive perspective that puts viewers right in the scene. I’ve gotten some of my best shots by lying on the forest floor!
Working with Light
Backlighting is Your Friend: I’ve discovered that shooting toward the sun creates beautiful silhouettes and simplifies complex forest scenes. The backlight reduces texture on tree trunks and creates that magical glow we all love.
Side Lighting for Drama: When the sun is low on the horizon, side lighting creates long shadows and adds depth to forest scenes. I look for opportunities where light rakes across the forest floor.
Front Lighting for Clarity: While less dramatic, front lighting ensures even illumination and is great for showcasing colors and details.
The Power of Mist and Fog
Some of my most successful forest sunset shots were taken in misty conditions. Fog adds atmosphere and simplifies busy scenes by separating elements. I’ve learned to check weather forecasts for high humidity conditions, which often lead to morning mist in forests.
Timing: When to Shoot Forest Sunsets
The Golden Hour Magic
I’ve found that the best forest sunset photography happens during specific time windows:
2 Hours Before Sunset: This is when I start scouting and setting up. The light is still bright enough for easy composition, but beginning to take on that warm golden quality.
30 Minutes Before Sunset: The magic really starts here. The light becomes warm and directional, creating those beautiful long shadows and golden highlights.
Sunset: The peak moment for color and drama. I’m always ready to shoot continuously during this period.
30 Minutes After Sunset: Don’t pack up yet! This is often when the most intense colors appear in the sky, and the forest takes on a beautiful blue hour quality.
Seasonal Considerations
Through my experience, I’ve learned that each season offers unique opportunities:
Spring: Fresh green leaves and wildflowers create vibrant scenes. The light tends to be softer and more even.
Summer: Dense foliage creates deep shadows and bright highlights. Early morning or late evening are best to avoid harsh midday light.
Autumn: This is my favorite season for forest sunset photography. The combination of golden leaves and sunset light is simply unbeatable.
Winter: Bare trees create graphic silhouettes, and snow can reflect beautiful sunset colors. The low winter sun stays golden for longer periods.
Advanced Techniques for Stunning Results
Focus Stacking for Maximum Sharpness
I discovered focus stacking when I struggled to get both foreground elements and distant trees sharp in the same shot. This technique involves taking multiple photos at different focus points and combining them in post-processing. It’s revolutionized my forest photography!
HDR for High Contrast Scenes
Forest sunsets often present extreme dynamic range challenges. While I prefer to get it right in camera, HDR techniques can be invaluable when the contrast between bright sky and dark forest is too great for a single exposure.
Long Exposure for Ethereal Effects
Some of my most creative forest sunset images use long exposures to blur moving elements like water or leaves. This technique can transform an ordinary scene into something dreamlike and otherworldly.
Post-Processing Tips
Raw Processing Essentials
I always shoot in RAW format for forest sunset photography. The extra dynamic range and editing flexibility are crucial for handling the challenging lighting conditions. Here’s my basic workflow:
Exposure Adjustment: I carefully balance the exposure to bring out shadow detail while preserving highlight information.
White Balance Tuning: Fine-tuning the white balance to enhance the golden hour feel.
Contrast and Clarity: Subtle adjustments to add depth without making the image look unnatural.
Local Adjustments for Impact
Using adjustment brushes and radial filters, I selectively enhance specific areas of the image:
Light Rays: I often boost exposure and clarity in areas where sunlight filters through the canopy.
Foreground Elements: Slightly brightening foreground elements to create depth.
Sky Enhancement: Carefully adjusting the sky to bring out sunset colors without making them look unnatural.
Common Problems and Solutions
Dealing with Wind
Wind is the enemy of sharp forest photos! Here’s how I handle it:
Wait for Calm Periods: I’ve learned patience is key. Wind often comes in waves, so I wait for lulls to shoot.
Increase Shutter Speed: When wind is persistent, I increase ISO to allow faster shutter speeds.
Embrace Motion: Sometimes, intentional motion blur can add to the atmosphere of a forest scene.
Managing High Contrast
Forest sunsets often have extreme contrast between bright sky and dark forest:
Use Graduated ND Filters: These physical filters help balance exposure between sky and foreground.
Exposure Blending: Taking multiple exposures and combining them in post-processing.
Shoot for Highlights: I often expose for the brightest parts of the scene and recover shadow detail in post-processing.
Also Read: Ilford XP2 vs HP5
Pro Tips from My Experience
Scout Without Your Camera
I’ve found that some of my best shots come from locations I’ve scouted without my camera. Walking through the forest without the pressure to shoot helps me see compositions more clearly.
Use Your Phone for Composition
Before setting up my tripod, I often use my phone to frame potential shots. It’s much easier to visualize compositions and move around quickly.
Clean Your Scene
I’m not afraid to do a bit of “forest gardening” – removing distracting sticks, leaves, or branches from my composition. It’s amazing how much this can improve a shot!
Shoot Vertical and Horizontal
I always shoot both orientations, even when I’m sure one will be better. You’d be surprised how often the “wrong” orientation ends up being the stronger image.
Equipment Recommendations
Budget-Friendly Setup
You don’t need expensive gear to get started! Here’s what I recommend for beginners:
Camera: Any DSLR or mirrorless camera with manual controls Lens: Kit lens (18-55mm) is fine to start Tripod: A sturdy basic tripod Filters: Circular polarizer
Mid-Range Setup
When you’re ready to upgrade: Camera: Full-frame or high-end APS-C camera Lens: 24-70mm f/2.8 Tripod: Carbon fiber for stability and light weight Filters: Polarizer + ND filter kit
Professional Setup
For serious forest sunset photography: Camera: High-resolution full-frame camera Lenses: 16-35mm f/2.8, 24-70mm f/2.8, 70-200mm f/2.8 Tripod: Professional-grade with ball head Filters: Complete filter system with multiple ND grads
FAQ: Forest Sunset Photography
What’s the best time to photograph forests during sunset?
I’ve found that the 30 minutes before and after sunset offer the most magical light. The colors are intense, and the low angle creates beautiful shadows and highlights.
Do I need expensive equipment for forest sunset photography?
Absolutely not! I started with a basic DSLR and kit lens. While good gear helps, it’s more about understanding light and composition than having expensive equipment.
How do I deal with high contrast between sky and forest?
This is a common challenge! I use graduated ND filters, exposure blending, or shoot in RAW to recover shadow detail in post-processing.
What aperture should I use for forest sunset photography?
I typically shoot between f/8 and f/11 for the best balance of sharpness and depth of field. For intimate details, I might open up to f/2.8-f/4.
How do I find good compositions in busy forests?
Look for leading lines, use framing elements, and try to simplify the scene. I often use a telephoto lens to isolate interesting patterns or details.
What weather conditions are best for forest sunset photography?
I love misty or foggy conditions! They add atmosphere and simplify busy scenes. Clear days can work well too, especially when there’s some cloud interest.
Should I use a tripod for forest sunset photography?
Yes! Forests are naturally dark, and a tripod is essential for sharp images, especially during sunset hours when light levels drop.
How do I capture light rays in the forest?
Light rays appear when there’s mist or dust in the air combined with strong directional light. I look for this effect in the early morning or late afternoon.
What post-processing software do you recommend?
I use Lightroom for basic adjustments and Photoshop for more complex edits like exposure blending and focus stacking.
How can I make my forest sunset photos stand out?
Focus on unique compositions, use leading lines effectively, and don’t be afraid to experiment with different perspectives and techniques.
Conclusion
Forest sunset photography has become one of my greatest passions, and I hope this guide helps you discover the joy of capturing these magical moments. Remember, the most important thing is to get out there and practice! Every forest is different, every sunset is unique, and every shoot is an opportunity to learn and grow as a photographer.
I encourage you to start with the basics, master your camera settings, and gradually incorporate more advanced techniques as you become comfortable. Don’t get discouraged if your early attempts don’t turn out perfectly – even the most experienced photographers are constantly learning and improving.
The beauty of forest sunset photography lies in its accessibility. You don’t need to travel to exotic locations or invest in thousands of dollars worth of equipment. Often, the most stunning scenes can be found in local parks and woodlands, just waiting to be discovered.
So grab your camera, head out to the nearest forest, and start capturing those magical sunset moments. I can’t wait to see the beautiful images you create!
Bookmark this page for more photography tips and updates! I regularly add new techniques and insights based on my latest forest sunset photography adventures. Check back often for fresh content that will help you take your photography to the next level.
Last updated: December 2025