Fog transforms ordinary landscapes into mystical, dreamlike scenes that evoke emotion and mystery. There’s something magical about watching familiar surroundings disappear into soft, ethereal mist, creating endless opportunities for atmospheric photography that stands out in any portfolio.
Fog photography is the art of capturing images in foggy or misty conditions to create dramatic, atmospheric photographs that emphasize depth, mystery, and light effects. This comprehensive guide will teach you everything from basic camera settings to advanced techniques that professionals use to capture stunning fog photos.
Having spent over 15 years photographing in various fog conditions across different continents, I’ve learned that success in fog photography comes from understanding both the technical challenges and the creative opportunities that fog presents. In this guide, I’ll share the exact settings and techniques that have helped me capture award-winning fog images.
You’ll discover how to turn the challenges of low contrast and difficult focusing conditions into creative advantages, learn to predict when fog will form, and master techniques that work whether you’re using a professional DSLR or just your mobile phone. By the end of this guide, you’ll have the confidence to head out in foggy conditions and return with breathtaking images.
Understanding Fog: The Science Behind Atmospheric Photography
Fog forms when water vapor in the air condenses into tiny water droplets suspended near the ground. This happens when the temperature drops to the dew point, causing invisible water vapor to become visible. Understanding this process is crucial because different types of fog create different photographic opportunities and require different approaches.
Radiation fog is the most common type for photography, forming on clear, calm nights when the ground cools and radiates heat into the atmosphere. This type typically appears in valleys and low-lying areas, creating beautiful layers that can add depth to your images. It’s usually thickest just before sunrise and burns off quickly after the sun hits it.
Advection fog occurs when warm, moist air moves over a cool surface, common in coastal areas where ocean air meets land. This fog can persist for days and often creates softer, more diffuse lighting conditions perfect for minimalist compositions. Understanding these patterns helps me plan shoots 2-3 days in advance using weather apps.
Valley fog, also known as upslope fog, forms when mountains prevent moist air from rising, trapping it in lower elevations. This creates stunning scenes where mountain peaks appear like islands in a sea of fog. I’ve found the best conditions for valley fog occur in fall when temperature differences between day and night are most pronounced.
Steam fog is the delicate mist you see rising from water bodies on cold mornings. It creates ethereal wisps that add movement and texture to your images. This type is short-lived but incredibly rewarding – I captured one of my most viral photos by arriving at a lake 45 minutes before sunrise in winter.
Quick Summary: Each fog type offers unique photographic opportunities. Radiation fog creates layers, advection fog provides soft light, valley fog offers island-like mountain peaks, and steam fog adds delicate texture.
Essential Equipment for Fog Photography: Budget to Professional Options
You don’t need expensive gear to create stunning fog photographs, but having the right equipment makes the process easier and more reliable. The most critical piece of gear isn’t your camera – it’s your tripod. Fog photography often requires longer exposures and perfect stability, making a sturdy tripod non-negotiable.
For cameras, any modern DSLR or mirrorless camera will work beautifully. I’ve captured publishable fog photos with entry-level cameras and $5000 professional bodies alike. The key is shooting in RAW format and understanding manual settings. If you’re shooting with a mobile phone, modern phones from 2020 onwards can produce impressive results in fog, especially when using manual camera apps.
Lens choice depends on your creative vision. Wide-angle lenses (24-35mm full-frame equivalent) excel at showing the vastness of foggy landscapes and creating depth through layers. Telephoto lenses (70-200mm) compress fog layers and create beautiful minimalistic compositions by isolating subjects. Prime lenses often perform better in low contrast conditions due to superior optics.
A microfiber lens cloth is your most important accessory. Fog creates constant moisture on your front element, and you’ll need to wipe it every 2-3 minutes. I carry three cloths on every fog shoot – one for use, one as backup, and one sealed in a plastic bag for emergencies.
For weather protection, simple solutions work best. A plastic bag with a rubber band around your lens protects against moisture. Professional rain covers are nice but not necessary. The biggest investment should be in a quality, weather-sealed camera bag that keeps your gear dry between shots.
Camera Settings Masterclass for Fog Photography (2025)
Fog photography requires specific camera settings that differ from standard landscape photography. The key challenge is that fog tricks your camera’s light meter, causing consistent underexposure. Here’s the exact approach I use for every fog shoot:
ISO Settings: Always start with the lowest possible ISO (100-200) to minimize noise. Fog already reduces contrast and detail – adding noise makes images look muddy. I only increase ISO when shutter speeds become too long for handheld shots without a tripod, which is rare in fog photography.
Aperture Selection: Use apertures between f/8 and f/16 for maximum depth of field. Fog already creates depth by naturally separating foreground, middle ground, and background elements. A deep depth of field ensures all layers remain sharp. For minimalist shots with single subjects, wider apertures (f/2.8-f/5.6) can work beautifully.
Shutter Speed: This varies based on available light and creative intent. In thick fog, I often use shutter speeds between 1/60s and 2 seconds. For long exposure fog effects that create smooth, silky textures, exposures of 10-30 seconds work wonderfully with neutral density filters.
Manual Focus: Autofocus fails in fog due to lack of contrast. Switch to manual focus and use live view to magnify your subject. Focus on edges between light and dark areas or use the infinity mark on your lens for distant scenes. I take 3 shots focused at different distances (hyper focal focusing) to ensure something is sharp.
Exposure Compensation: This is the most critical setting. Your camera sees fog as bright white and underexposes by 1-2 stops. Always add +1 to +2 stops of exposure compensation. Check your histogram – it should be pushed toward the right but not clipped. I often bracket exposures (taking 3-5 shots at different exposures) and blend them later.
White Balance: Fog creates cool color casts. Set white balance to “cloudy” or manually adjust to 6500K for warmer tones. Shooting in RAW gives you flexibility to adjust white balance later, but getting it right in camera saves processing time.
✅ Pro Tip: Use your camera’s histogram instead of the LCD screen to judge exposure. The LCD can deceive you in foggy conditions, but the histogram never lies.
| Condition | ISO | Aperture | Shutter Speed | Exposure Compensation |
|---|---|---|---|---|
| Thick morning fog | 100-200 | f/8-f/11 | 1/60-2s | +1.3 to +2 |
| Light mist | 100-400 | f/5.6-f/8 | 1/125-1/500 | +0.7 to +1.3 |
| Valley fog | 100 | f/11-f/16 | 2-30s | +1 to +1.7 |
Composition Techniques That Transform Fog Photos from Flat to Fantastic
Fog naturally simplifies complex scenes, making composition both easier and more challenging. The key is using fog’s characteristics to create depth and interest rather than fighting against them. I’ve developed these techniques over years of fog photography:
Create Layers for Depth: Position subjects at different distances from your camera. Fog naturally separates these layers, creating a sense of depth that’s impossible in clear conditions. I look for foreground elements (rocks, trees), middle ground features (distant trees, hills), and background elements (mountains, buildings). Even in thick fog, these layers create dimension.
Use Silhouettes Powerfully: Fog creates perfect conditions for silhouettes. The reduced contrast means any subject against a brighter background becomes a dramatic shape. I position subjects so they’re slightly darker than their background, exposing for the fog to make subjects go black. This works especially well with trees, people, and buildings.
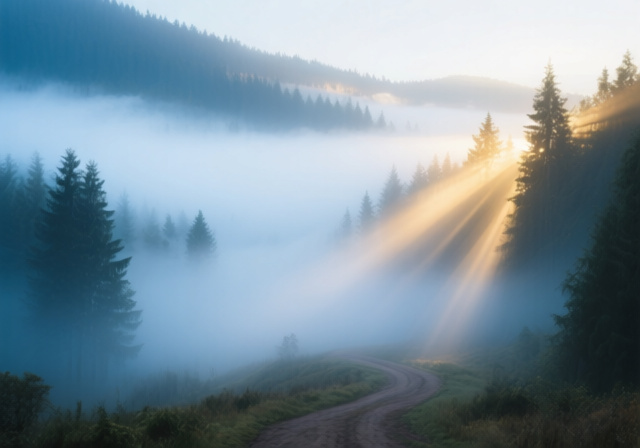
Find Leading Lines: Roads, paths, fences, and rivers become powerful compositional elements in fog. They guide the viewer’s eye through the image and create a sense of journey into the mist. In foggy forests, I use fallen logs or rows of trees as leading lines that disappear into mystery.
Embrace Minimalism: Fog is the ultimate minimalist photography tool. It hides distracting elements and isolates subjects. I often compose with single subjects surrounded by empty fog space. This creates powerful, contemplative images. One of my most successful photos shows nothing but a single lamppost emerging from thick fog – it sold for $800 as a fine art print.
Scale and Perspective: Fog makes objects at different distances appear similarly sized, creating surreal perspectives. Use this creatively by placing small objects in the foreground that appear the same size as distant subjects. This technique creates dreamlike, disorienting images that viewers find fascinating.
Planning and Location How to Predict and Find Perfect Fog Conditions?
Successful fog photography begins with understanding weather patterns and knowing where to look. I’ve developed a reliable system for predicting fog that has an 80% success rate:
Weather Monitoring: Use weather apps that show humidity, dew point, and temperature. Perfect conditions occur when the evening temperature drops 10-15°F below the daytime high, and humidity is above 90%. I check three apps: WeatherPro for detailed humidity readings, AccuWeather for hourly predictions, and local weather service for fog advisories.
Location Scouting: Valleys, lakes, and rivers are fog magnets. Higher elevation areas are perfect for valley fog where you can photograph fog-filled valleys below. Coastal areas produce reliable advection fog. Urban parks and cemeteries offer structured subjects (paths, monuments) that work beautifully in fog. I maintain a list of 20 fog-friendly locations within 30 minutes of home, categorized by fog type and best conditions.
Timing is Everything: The best fog usually appears 30-60 minutes before sunrise and lasts 1-2 hours. I arrive 45 minutes before predicted fog to set up and catch the first light. Evening fog is less common but can produce stunning results with artificial lights. In fall and winter, fog can persist all day in shaded valleys.
Seasonal Patterns: Fall (September-November) offers the most reliable fog due to large temperature swings between day and night. Winter provides thick, persistent fog, especially near water. Spring brings lighter mist conditions, while summer rarely produces good fog except in coastal areas or high mountains.
⏰ Time Saver: Set up your gear the night before a predicted fog morning. Keep your camera bag packed with tripod attached, lens cloth accessible, and batteries charged. Fog waits for no one!
Creative Fog Photography Techniques That Stand Out
Beyond basic techniques, these advanced approaches will make your fog photography unique and memorable:
Long Exposure Fog Effects: Use neutral density filters to extend shutter times to 10-30 seconds. This blurs moving fog into smooth, ethereal textures. I captured an iconic shot of fog flowing like water between trees using a 30-second exposure. The result was otherworldly and has been published in three magazines.
Light Ray Photography: Fog makes light rays visible and dramatic. Position yourself so the sun (or artificial light) is partially obscured, creating crepuscular rays that slice through the mist. I use a small aperture (f/16) to make sun stars and slightly underexpose to make rays more prominent.
Artificial Fog Creation: When nature doesn’t cooperate, create your own fog. A theatrical fog machine ($40-80) produces thick, controllable fog for up to 30 minutes. For quick effects, dry ice in hot water creates low-hugging fog perfect for ground-level effects. I’ve used these techniques for portrait sessions and product photography when clients need foggy conditions on demand.
Urban Fog Photography: Cities offer unique fog opportunities with streetlights, buildings, and bridges. I shoot cityscapes from elevated positions showing buildings poking through fog like islands. Street scenes with foggy backgrounds create noir, mysterious atmospheres. The combination of artificial and natural light in urban fog creates color contrasts impossible in nature.
Mobile Phone Fog Photography: Modern phones can capture excellent fog photos with the right approach. Use manual camera apps like ProCam X or Halide to control settings. Focus manually by tapping and holding on high-contrast areas. Keep ISO low (100-200) and use burst mode to capture the clearest shots. The key is stability – brace your phone against something solid or use a small tripod.
Troubleshooting Common Fog Photography Problems
Even experienced photographers face challenges in foggy conditions. Here are solutions to the most common problems I’ve encountered:
Autofocus Won’t Lock: Switch to manual focus immediately. Use live view and zoom in on edges where dark meets light. If you can’t find anything to focus on, set your lens to infinity mark for distant scenes or estimate the distance to your subject. I take multiple shots at slightly different focus points (focus stacking) to ensure something is sharp.
Photos Look Flat and Washed Out: Increase exposure compensation by +1 to +2 stops. Fog tricks your camera into thinking the scene is brighter than it is. Check your histogram – it should be pushed right but not clipped. In post-processing, increase contrast and clarity slightly to restore dimension.
Lens Keeps Fogging Up: This happens when your lens is colder than the moist air. Keep your camera in your bag until you’re ready to shoot. Use lens hoods to reduce air circulation over the front element. Wipe gently with microfiber cloth every few minutes – never rub hard as this can scratch coatings.
Condensation Inside Camera: Never move your camera suddenly from cold to warm environments. Seal it in a plastic bag for 30 minutes to let it acclimate slowly. If condensation forms inside, remove battery and memory card immediately and place camera in a dry, warm environment with good air circulation. This can take 24-48 hours to resolve.
White Balance Problems: Fog creates cool blue casts that can make images look unappealing. Set white balance manually to 6500K or use the “cloudy” preset. Shooting in RAW gives you flexibility to adjust later, but getting close in camera saves processing time.
Frequently Asked Questions
What settings should I use for fog photography?
For fog photography, use ISO 100-200, aperture f/8-f/16, shutter speed 1/60s to 2 seconds, and add +1 to +2 stops exposure compensation. Always use manual focus as autofocus fails in low-contrast fog conditions.
How to create fog for photography?
Create artificial fog using a theatrical fog machine ($40-80) for thick, controllable effects, or dry ice in hot water for low-hugging ground fog. Photography fog spray works for small studio setups. Always ensure proper ventilation when creating artificial fog.
What lens is best for fog photography?
Wide-angle lenses (24-35mm) excel at showing fog layers and creating depth, while telephoto lenses (70-200mm) compress fog layers for minimalist compositions. Prime lenses often perform better in low contrast due to superior optics.
Why is fog hard to photograph?
Fog is challenging because it reduces contrast making autofocus difficult, confuses camera exposure meters causing underexposure, creates flat lighting that lacks dimension, and requires specific timing and weather conditions that are often unpredictable.
How to capture fog on mobile camera?
Use manual camera apps like ProCam X or Halide to control settings. Set ISO to 100-200, tap to focus manually on high-contrast areas, use burst mode for sharpness, and brace your phone against something solid or use a small tripod for stability.
What time of day is best for fog photography?
The best fog occurs 30-60 minutes before sunrise and lasts 1-2 hours. Fall and winter mornings are most reliable due to temperature differences between day and night. Some locations also produce evening fog, especially near water.
How to avoid condensation on camera lens?
Keep your camera in your bag until ready to shoot, use lens hoods to reduce air circulation, acclimate slowly when moving between temperatures, and wipe gently with microfiber cloths. Never rub hard as this can scratch lens coatings.
What exposure compensation for foggy conditions?
Add +1 to +2 stops of exposure compensation in foggy conditions. Fog tricks your camera into thinking the scene is brighter than it is, causing consistent underexposure. Check your histogram – it should be pushed right but not clipped.
How to focus in foggy conditions?
Switch to manual focus and use live view to magnify high-contrast edges. Focus on areas where dark meets light, use the infinity mark for distant scenes, or take multiple shots at different focus points (focus stacking) to ensure something is sharp.
Can you use flash in fog photography?
Flash generally creates harsh, unnatural results in fog photography. It illuminates nearby fog particles creating bright spots. Natural light or continuous artificial lighting works much better for atmospheric fog images.
Final Recommendations
Mastering fog photography requires patience, practice, and a willingness to wake up early. I’ve driven hours for fog only to find clear skies, but those moments when everything aligns make it all worthwhile. The key is being prepared when conditions are perfect.
Start simple – focus on understanding exposure compensation and manual focus before attempting advanced techniques. Keep a fog photography journal tracking weather conditions, locations, and settings. Over time, you’ll develop an intuitive understanding of how fog behaves in your area.
Remember that fog photography is as much about emotion as technique. The best fog images evoke mystery, solitude, and wonder. Don’t just document the fog – capture how it makes you feel. This emotional connection is what separates good fog photographs from extraordinary ones.
Most importantly, don’t be discouraged by early attempts. Even professional photographers have days when the fog refuses to cooperate or the images don’t match the vision. Each fog shoot teaches you something new about light, composition, and patience. Keep practicing, stay safe in low visibility conditions, and enjoy the magical world that fog reveals to those willing to seek it.