After spending 15 years behind the lens, I’ve learned that camera angles aren’t just technical choices—they’re the secret language of visual storytelling. Changing your camera position by just a few feet can transform an ordinary scene into something extraordinary.
Camera angles in photography refer to the camera’s position relative to your subject, determining how viewers perceive and emotionally connect with your images. This fundamental aspect of composition can make subjects appear powerful, vulnerable, dramatic, or intimate—sometimes all at once.
Mastering camera angles has been the single biggest factor in elevating my photography from amateur snapshots to professional-grade images. In this comprehensive guide, I’ll share 15 essential camera angles that will revolutionize how you see and capture the world through your lens.
5 Essential Camera Angles Every Photographer Must Master (2025)
These foundational angles form the building blocks of visual storytelling. I recommend practicing each one until they become second nature before moving to more creative variations.
Eye-Level Angle: The Natural Connection
The eye-level angle positions your camera at the subject’s eye height, creating a natural, relatable perspective that viewers intuitively understand. This angle mirrors how we see the world in daily life, making it incredibly effective for establishing immediate connection with your audience.
When I photograph portraits at eye level, I notice subjects appear more approachable and genuine. This angle works exceptionally well for documentary photography, street portraits, and environmental portraits where authenticity matters more than dramatic effect.
Eye-Level Angle: Camera positioned at the subject’s eye height, approximately 5-6 feet from ground for adults, creating neutral perspective.
Best uses: Corporate headshots, family portraits, documentary work, product photography, and any situation requiring authentic connection with the subject.
Pro tip: For children and pets, get down to their eye level rather than shooting down from adult height. This small adjustment dramatically improves connection and reduces distortion.
Low Angle: Creating Power and Dominance
Low angle photography involves positioning your camera below the subject and shooting upward. This technique makes subjects appear larger, more powerful, and authoritative by forcing viewers to literally look up to them.
I’ve used low angles to make architecture appear more imposing, athletes look more heroic, and even flowers seem more dominant in their environment. The psychological impact is immediate—low angles convey strength, confidence, and importance.
Technical considerations: Low angles can cause distortion with wide-angle lenses. Use a focal length of 50mm or longer to minimize perspective distortion while maintaining the powerful low-angle effect.
When to use: Architectural photography, sports photography, heroic portraits, automotive photography, and situations requiring dramatic impact.
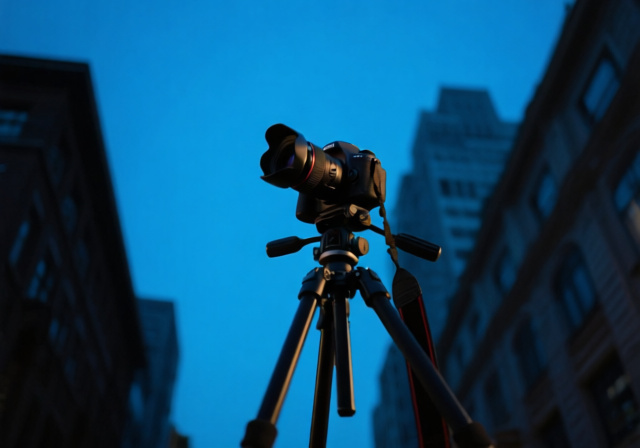
⏰ Time Saver: Use a tripod with reversible center column or a dedicated low-angle tripod for consistent low shots without lying on the ground.
High Angle: The Strategic Overview
High angle shots position the camera above the subject, looking down. This angle can make subjects appear smaller, more vulnerable, or provide context by showing their relationship to the surrounding environment.
In my street photography work, high angles reveal patterns and relationships that aren’t visible from eye level. For portraits, this angle can create a sense of intimacy or vulnerability when used subtly—especially effective for children’s portraits.
Practical applications: Food photography, group portraits, overhead product shots, flat lay photography, and environmental portraits where context matters.
Equipment tip: A monopod with remote trigger allows you to achieve high angles without lifting your camera uncomfortably high. For extreme overhead shots, consider a boom arm or even a small drone.
Bird’s-Eye View: The God Perspective
Bird’s-eye view photography captures subjects from directly above, creating abstract patterns and revealing relationships that are invisible from ground level. This angle transforms ordinary scenes into graphical compositions.
I once spent an entire afternoon shooting a market from a nearby building’s rooftop. The flowing patterns of people, stalls, and activities created a visual symphony that would have been impossible to capture from any other angle.
Best subjects: Landscapes with interesting patterns, traffic flow, architecture, food arrangements, group activities, and any scene with strong geometric elements.
✅ Pro Tip: No drone? No problem. Use bridges, tall buildings, hills, or even a simple step ladder with careful safety precautions to achieve bird’s-eye perspectives.
Dutch Angle: Creating Dynamic Tension
The Dutch angle (or Dutch tilt) involves tilting the camera off its horizontal axis, creating diagonal lines that add energy, tension, or disorientation to images. This technique immediately grabs attention and signals that something unusual is happening.
While studying film noir, I noticed how directors used Dutch angles to create psychological tension. In still photography, this angle works brilliantly for action shots, architectural details, and any subject needing a dramatic boost.
Critical warning: Less is more with Dutch angles. Overuse makes photos look gimmicky rather than dramatic. I recommend using this technique for 10% or less of your work to maintain impact.
When effective: Action photography, architectural abstracts, concert photography, fashion shoots, and artistic compositions where energy and movement are desired.
10 Advanced Camera Angles for Creative Storytelling
Once you’ve mastered the essential angles, these advanced techniques will add creative depth to your visual storytelling toolkit.
Bug’s-Eye View: Extreme Low Perspective
Position your camera as close to the ground as possible, looking upward at your subject. This extreme low angle creates a heroic, larger-than-life perspective that’s especially effective for small subjects.
I captured a stunning mushroom patch this way—the mushrooms appeared as tall as trees, transforming a simple forest floor into an enchanted forest. The key is using an ultra-wide lens and getting within inches of the ground.
Over-the-Shoulder Shot: Context and Connection
Frame your subject over someone’s shoulder, creating both context and a sense of being part of the scene. This angle works wonderfully for conversations, interactions, and storytelling where relationship matters.
Perfect for wedding photography, documentary work, and any situation showing human connection. The shoulder in foreground adds depth and context without distracting from the main subject.
Point-of-View (POV): Seeing Through Their Eyes
Show the world from your subject’s perspective by positioning the camera where their eyes would be. This creates immediate empathy and helps viewers experience the scene as if they were there.
I’ve used POV shots for everything from chef’s hands preparing food to rock climbers scaling cliffs. The key is maintaining the subject’s perspective while keeping essential elements in frame.
Profile Shot: The Classic Portrait
Shoot your subject from the side, capturing their profile against a complementary background. This angle emphasizes facial features, creates elegant silhouettes, and adds a timeless quality to portraits.
Works best with side lighting that defines facial contours. I’ve found this angle particularly flattering for subjects with strong jawlines or interesting profiles.
Three-Quarter Angle: The Versatile Sweet Spot
Position your camera at a 45-degree angle to your subject, combining the best of frontal and profile views. This angle creates depth while maintaining eye contact and showing facial dimension.
This is my go-to angle for most portraits—it’s universally flattering and creates natural-looking results. The three-quarter view reduces distortion while maintaining connection.
Extreme Close-Up: Intimate Details
Move in close—very close—to reveal textures, details, and emotions that aren’t visible from normal distances. This angle creates intimacy and forces viewers to see subjects in a new way.
I captured the intricate details of a butterfly’s wing this way, revealing patterns invisible to the naked eye. Macro lenses or extension tubes are essential for this technique.
Wide Establishing Shot: Setting the Scene
Use a wide-angle lens from a distance to show your subject in its environment. This angle establishes context and tells a broader story about place and relationship.
Essential for travel photography, environmental portraits, and any story where location matters. The key is balancing subject size with environmental context.
Through-Object Framing: Natural Composition
Shoot through objects—doorways, windows, foliage—to create natural frames within your composition. This adds depth and draws attention to your subject while creating layers of interest.
I’ve used everything from tree branches to architectural arches as natural frames. The technique works best when the framing element complements rather than competes with your subject.
Camera Angles by Photography Genre: Practical Applications
Different photography genres benefit from specific angle choices. Here’s my experience-based guidance for applying angles effectively across various specialties.
Portrait Photography: The Flattering Perspectives
After shooting over 500 portrait sessions, I’ve learned that angle choice can make or break a portrait. Eye-level shots create connection, while slight high angles (10-15 degrees above) are universally flattering.
For executive portraits, I use subtle low angles to convey authority without being obvious. For beauty portraits, I often shoot slightly above eye level to create elegant jawlines and minimize double chins.
Avoid: Extreme low angles for close-up portraits (creates double chins) and extreme high angles that make subjects look small or diminished.
Landscape Photography: Expansive Perspectives
Landscape photography rewards those who explore different heights and positions. I’ve captured the same location at different times of day from various angles, and each image tells a completely different story.
Low angles emphasize foreground elements and create depth, while high angles from elevated positions reveal patterns and grandeur. Bird’s-eye views from drones or cliffs can transform familiar landscapes into abstract art.
Pro technique: Scout locations at different times of day to understand how light interacts with various angles. The best landscape often requires returning multiple times.
Street Photography: The Candid Perspectives
Street photography thrives on authentic perspectives. Hip-level shooting creates candid, unposed moments, while eye-level shots establish human connection with subjects.
I’ve learned that shooting from slightly above (holding camera at chest level) reduces confrontation while maintaining natural perspective. This angle has saved me from awkward interactions while preserving authentic street moments.
Ethical consideration: Respect your subjects’ privacy and comfort when choosing angles. Low angles can feel invasive, while eye-level shots feel more respectful and engaging.
Product Photography: The Selling Angles
Product photography requires strategic angle choices that highlight features and create desire. After working with e-commerce clients, I’ve developed a system for angle selection.
Eye-level shots work for most products, but 45-degree angles add dimension and appeal. Bird’s-eye views are perfect for showing layouts and arrangements, especially for food and flat lays.
Client insight: Products sell better when shown from angles customers will actually see them. Realistic perspectives outperform dramatic but impractical views.
The Psychology of Camera Angles: How Perspective Influences Perception
Research in visual psychology reveals that camera angles trigger specific emotional responses in viewers. Understanding these psychological triggers helps you communicate more effectively through your images.
Low angles activate the brain’s threat response system, making viewers feel small and subjects appear dominant. High angles trigger nurturing responses, making subjects appear vulnerable or in need of protection. Dutch angles create cognitive dissonance, forcing viewers to pay closer attention.
I’ve used these principles intentionally—a low angle for a CEO’s portrait to convey leadership, a high angle for pet portraits to create affection, subtle Dutch angles for action shots to add energy without being obvious.
Essential Equipment for Mastering Camera Angles
While creativity matters more than gear, certain equipment makes achieving various angles easier and more consistent. Based on my experience and community recommendations:
| Equipment Type | Budget Option | Professional Choice | Angles Enabled |
|---|---|---|---|
| Tripod | $50 basic with reversible center column | $800+ Really Right Stuff | Low, high, eye-level |
| Remote Trigger | $20 wireless remote | $300 professional trigger system | Overhead, hard-to-reach |
| Monopod | $30 aluminum | $200+ carbon fiber | High angles, stability |
| Angle Finder | $40 right-angle viewer | $150 professional finder | Low angles without discomfort |
⚠️ Important: Start with basic equipment and upgrade as you identify specific needs. Expensive gear won’t fix poor angle choices, but the right equipment makes good angles easier to achieve consistently.
Common Camera Angle Mistakes and How to Fix Them In 2025
After reviewing thousands of student photographs, I’ve identified recurring angle mistakes. Here are the most common issues and their solutions:
Shooting only from eye level: This is the most common limitation I see. Fix: Challenge yourself to take 10 photos of the same subject from different heights and positions. Your photography will improve dramatically.
Overusing dramatic angles: Dutch angles and extreme perspectives lose impact when overused. Fix: Reserve dramatic angles for truly special moments. Let content dictate angle choice, not vice versa.
Ignoring background distractions: Low angles can include unwanted elements. Fix: Always scan the entire frame, especially when changing angles. Sometimes a small adjustment eliminates major distractions.
Forgetting about lens distortion: Wide angles exaggerate perspective, especially from low positions. Fix: Use longer focal lengths (50mm+) for low angles or correct distortion in post-processing.
“The best camera angle is the one that serves your story, not the one that shows off your technical skill.”
– Markus Hagner, Professional Photographer
Frequently Asked Questions
What is the 20 60 20 rule in photography?
The 20 60 20 rule suggests dividing your frame into zones: 20% foreground, 60% middle ground, and 20% background. This creates balanced compositions with depth and interest. It works especially well for landscape and architectural photography where you want to guide the viewer’s eye through different planes of the image.
What is the most attractive camera angle?
For portraits, a slight high angle (10-15 degrees above eye level) is generally most flattering as it defines jawlines and minimizes double chins. For general subjects, eye-level angles create the strongest connection and feel most natural. The ‘best’ angle always depends on your subject and story, not universal rules.
How do you achieve bird’s eye view without a drone?
Use natural elevation like hills, buildings, bridges, or stairs. A monopod extended overhead with a remote trigger can simulate aerial views. For small subjects, simply shooting straight down from a standing position creates effective bird’s-eye perspectives. Even a step ladder can provide enough height for compelling overhead shots.
What angle makes you look thinner in photos?
Shoot from slightly above eye level (45-degree angle down) for the most slimming effect. Ask subjects to angle their body 45 degrees away from camera and turn their head back toward lens. This creates natural shadows and avoids direct frontal lighting that adds width. Proper camera angle combined with positioning creates much more flattering results than digital editing.
Why do low angle shots look dramatic?
Low angles trigger psychological responses associated with looking up to authority figures. They also exaggerate perspective, making subjects appear larger and more dominant. The unusual viewpoint creates visual interest because we don’t typically see the world from this perspective. Our brains are wired to pay attention to unusual viewpoints as potential threats or opportunities.
How many camera angles should I use in one photoshoot?
Variety is key, but quality matters more than quantity. I recommend using 3-5 distinct angles per subject or scene. Start with safe shots (eye-level), then explore creative variations (low, high, Dutch angle). This gives clients options while maintaining a consistent style. Too many angles can create disjointed galleries rather than cohesive stories.
Final Recommendations
Mastering camera angles transformed my photography from technically competent to emotionally compelling. The key is deliberate practice—don’t just vary angles randomly, but make conscious choices about how each perspective serves your story.
Start with the five essential angles until they become intuitive. Then experiment with advanced techniques to develop your unique visual voice. Remember: the best angle is always the one that communicates your vision most effectively, not the most dramatic or technically impressive.
Over my 15-year career, I’ve learned that technical mastery matters, but emotional impact matters more. Camera angles are your most powerful tool for creating that impact. Use them thoughtfully, practice consistently, and don’t be afraid to break the rules once you understand why they exist.
Your next assignment: Choose one subject and photograph it from at least 7 different angles. You’ll be amazed at how each perspective tells a completely different story. That’s the magic of camera angles—they’re not just technical choices, they’re storytelling tools.