I remember when I first got my DSLR camera, staring at the dial with all those mysterious symbols. Aperture, shutter speed, ISO—these terms sounded like a foreign language. After months of trial and error (and countless blurry photos), everything finally clicked when I understood the exposure triangle.
Understanding aperture, shutter speed, and ISO is the key to moving beyond auto mode and taking control of your photography. These three settings work together to determine how light enters your camera and creates your image. Master them, and you’ll transform from someone who just takes pictures to someone who creates photographs with intent and artistry.
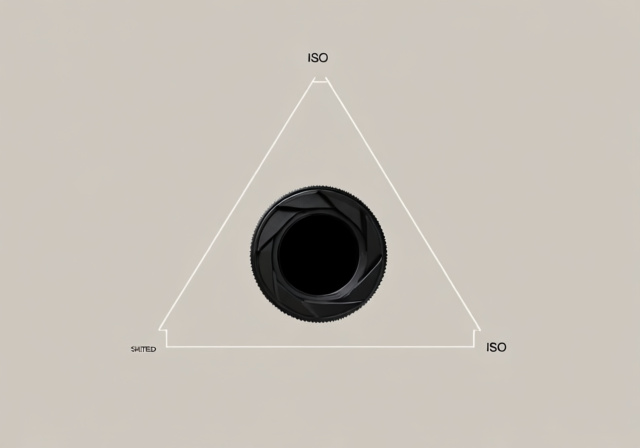
The exposure triangle is simply the relationship between aperture, shutter speed, and ISO where changing one setting requires adjusting others to maintain proper exposure. Think of it like filling a bucket with water: aperture is how wide the faucet is open, shutter speed is how long you leave it running, and ISO is like having a smaller or larger bucket that fills faster or slower.
In this guide, I’ll break down each setting with simple explanations, practical examples, and real-world scenarios. By the end, you’ll have the confidence to shoot in manual mode and create the exact images you envision.
The Exposure Triangle: How These Three Settings Work Together
The exposure triangle isn’t some mysterious photography concept—it’s just balance. At its core, photography is about capturing light, and these three settings control exactly how much light reaches your camera’s sensor. Change one, and you need to adjust at least one other to maintain the same brightness.
Here’s how I think about it: imagine you’re filling a glass with water from a faucet. The aperture is how wide you open the faucet—wider means more water flows through. The shutter speed is how long you leave the faucet running—longer means more water collects. ISO is like having a magic glass that appears fuller or emptier depending on its setting—lower ISO needs more water, higher ISO needs less.
???? Key Insight: Proper exposure is a balance, not a formula. There’s no single “correct” setting—only the combination that creates the image you want.
What makes this triangle so powerful is that each setting doesn’t just affect brightness—it also creates unique creative effects. Aperture controls depth of field (how much is in focus), shutter speed controls motion (freezing or blurring), and ISO affects image quality (digital noise). Understanding these trade-offs is what separates snapshots from art.
The Balancing Act in Practice
When I’m shooting, I always ask myself: what’s most important for this shot? If I want that creamy background blur for a portrait, I start with aperture. If I’m photographing sports, shutter speed takes priority. For low light situations, ISO becomes my primary concern. The key is knowing which setting to prioritize for your vision.
Mastering Aperture: Controlling Light and Depth of Field
Aperture is the opening in your lens that controls how much light enters your camera, measured in f-stops where lower numbers mean wider openings and more light. But here’s what confused me for months: f/1.8 is a BIGGER opening than f/16. The numbers are fractions, so smaller f-numbers mean wider apertures. Think of it like pizza slices—1/8 of a pizza is bigger than 1/16.
The creative magic of aperture lies in its control over depth of field—that beautiful zone of sharpness in your photos. Wide apertures (like f/1.8 or f/2.8) create shallow depth of field, perfect for portraits where you want your subject sharp and background creamy. Narrow apertures (like f/11 or f/16) give you deep depth of field, essential for landscapes where you want everything from foreground to background in focus.
Depth of Field: The zone of acceptable sharpness in your photograph, from front to back. Controlled primarily by your aperture setting.
Understanding F-Stop Numbers
F-stops might seem counterintuitive at first, but there’s a simple pattern. Each full stop (like moving from f/4 to f/5.6) halves the amount of light entering your camera. The standard full stops are: f/1.4, f/2, f/2.8, f/4, f/5.6, f/8, f/11, f/16, f/22. Most cameras also offer third-stop increments between these values for finer control.
When I’m teaching beginners, I suggest starting with these three scenarios: use f/1.8-f/2.8 for portraits with blurred backgrounds, f/8 for general photography, and f/11-f/16 for landscapes. These aren’t rules—they’re starting points for understanding how aperture affects your images.
Practical Aperture Examples
For portraits, I almost always shoot wide open (f/1.4-f/2.8) when using a prime lens. This creates that beautiful background blur called bokeh that makes your subject pop. When photographing groups of people, I stop down to f/4-f/5.6 to ensure everyone’s face is sharp. For landscapes, I typically use f/8-f/11 for maximum sharpness across the frame.
| Aperture Setting | Best For | Depth of Field | Light Gathered |
|---|---|---|---|
| f/1.4 – f/2.8 | Portraits, low light | Shallow | Maximum |
| f/4 – f/5.6 | Groups, street photography | Moderate | Good |
| f/8 – f/11 | General, landscapes | Deep | Moderate |
| f/16 – f/22 | Architecture, macro | Maximum | Minimum |
⏰ Pro Tip: Most lenses are sharpest 2-3 stops down from wide open. If your lens goes to f/1.4, try shooting at f/2.8 or f/4 for optimal sharpness.
Understanding Shutter Speed: Freezing and Blurring Motion
Shutter speed is the length of time your camera’s sensor is exposed to light, measured in fractions of a second where faster speeds freeze motion and slower speeds create blur. This setting controls how movement appears in your photos—both subject movement and camera movement.
Fast shutter speeds (like 1/1000s or faster) freeze action, perfect for sports, wildlife, or any moving subject. Slow shutter speeds (like 1/30s or slower) create motion blur, which can be artistic (like silky waterfalls) or problematic (like camera shake). The key is understanding when to use each for creative effect.
Camera shake is the enemy of sharp photos at slow shutter speeds. As a general rule, I use the reciprocal of my focal length: if I’m shooting at 50mm, I need at least 1/50s shutter speed handheld. With image stabilization, I can sometimes go 2-3 stops slower, but this is a good starting point.
Common Shutter Speed Scenarios
For action photography, I start at 1/1000s as my baseline for freezing motion. Fast-moving sports might require 1/2000s or faster. For portraits, 1/125s to 1/250s prevents any subject movement while keeping everything sharp. Street photography often works well at 1/250s to 1/500s for capturing spontaneous moments.
Slow shutter speeds open up creative possibilities. At 1/15s to 1/30s, you can create intentional motion blur while tracking moving subjects (panning). For light trails and silky water effects, I use 1 second or longer with a tripod. These long exposures reveal a world invisible to the naked eye.
- Freezing Action: Use 1/1000s or faster for sports, wildlife, or any fast-moving subject
- General Photography: 1/125s to 1/250s works for most situations without movement
- Handheld Limit: Stay above 1/60s with standard lenses to avoid camera shake
- Creative Blur: 1/15s to 1/30s for panning or intentional motion effects
- Long Exposure: 1 second or more with tripod for light trails, water effects, or night photography
Understanding Shutter Speed Fractions
Shutter speeds might look confusing at first—1/1000, 1/500, 1/250, 1/125, 1/60, 1/30, 1/15, 1/8, 1/4, 1/2, 1″, 2″, 30″. Each setting is roughly double or half the next—1/125 lets in twice as much light as 1/250. The quotation marks indicate full seconds (1″ means one second, 30″ means thirty seconds).
✅ Quick Reference: 1/1000s+ = freeze fast action, 1/250s = general use, 1/60s = handheld minimum, 1/15s = panning, 1s+ = tripod required
ISO Demystified: Managing Sensor Sensitivity and Noise
ISO is your camera sensor’s sensitivity to light, where lower numbers (100-200) are less sensitive for bright conditions and higher numbers (800+) are more sensitive for dark situations. Think of it like turning up the volume on a quiet sound—higher ISO makes your sensor more responsive to available light.
The trade-off with ISO is digital noise—the grainy texture that appears in photos at high ISO settings. Modern cameras have improved dramatically, with many delivering clean images at ISO 1600, 3200, or even higher. But the principle remains: lower ISO always gives you cleaner images.
I always start at the lowest possible ISO for my lighting conditions. Bright daylight? ISO 100-200. Overcast? ISO 400-800. Indoor lighting? ISO 800-1600. Low light situations? I’ll push to ISO 3200+ if needed, knowing I might need to clean up noise in post-processing.
Understanding ISO Numbers
ISO follows a simple doubling pattern: 100, 200, 400, 800, 1600, 3200, 6400. Each full stop doubles the sensor’s sensitivity (and the amount of noise). Most cameras also offer third-stop increments between these values for precise control.
Auto ISO is a modern camera feature that deserves special attention. Instead of manually setting ISO, you let your camera automatically adjust it to maintain proper exposure while you control aperture and shutter speed. I use Auto ISO frequently—especially in changing lighting conditions—setting a maximum ISO (like 3200 or 6400) that I’m comfortable with.
| ISO Range | Lighting Conditions | Expected Noise | Best Uses |
|---|---|---|---|
| 100-200 | Bright daylight | None | Landscapes, portraits |
| 400-800 | Overcast, shade | Minimal | General photography |
| 1600-3200 | Indoor lighting | Moderate | Events, indoor |
| 6400+ | Low light, night | Significant | Necessary situations only |
Managing Noise at High ISO
Modern cameras have excellent noise reduction, but understanding the trade-offs helps you make better decisions. When I must shoot at high ISO, I slightly underexpose (rather than overexpose) to minimize noise—brightening shadows in post often looks cleaner than reducing noise from overexposed areas.
Putting It All Together: Real-World Photography Scenarios
Understanding each setting individually is one thing; knowing how they work together in real situations is what makes you a photographer. Here are common scenarios and my starting point settings:
Portrait Photography
For portraits, I prioritize aperture first. I typically shoot at f/1.8-f/2.8 to create that beautiful background blur. With a wide aperture, I need faster shutter speeds to avoid camera shake—usually 1/125s or faster. In good light, ISO stays at 100-400. In indoor portraits, I might increase ISO to 800-1600 while keeping my aperture wide and shutter speed at least 1/125s.
Landscape Photography
Landscapes require deep depth of field, so I start at f/8-f/11. With narrower apertures, I need slower shutter speeds or higher ISO. On a tripod, I can use slower shutter speeds without worrying about camera shake, keeping ISO low. Handheld landscapes need faster shutter speeds (1/125s or faster), which might require increasing ISO to 400-800.
Sports and Action Photography
Freezing motion is priority number one, so shutter speed comes first. I start at 1/1000s for general sports, faster for rapid movement. With fast shutter speeds limiting light, I need wide apertures (f/2.8-f/4) and may need to increase ISO to 800-3200 even in good daylight. Indoor sports often require ISO 3200+ and wide apertures just to get enough light at fast shutter speeds.
Low Light and Night Photography
Low light photography always involves trade-offs. With a tripod, I can use slow shutter speeds (1s or longer) and narrow apertures (f/8-f/11) while keeping ISO low. Handheld low light requires the “exposure triangle” in full effect: wide apertures (f/1.4-f/2.8), the fastest shutter speed I can hold steady (1/30s-1/60s), and higher ISO (1600-6400) to compensate.
Camera Modes Explained: From Auto to Manual
Modern cameras offer various shooting modes that automate parts of the exposure triangle. Understanding these modes helps you gradually transition from auto to full manual control.
Aperture Priority (A/Av)
You set the aperture, and the camera chooses the shutter speed automatically. This is my go-to mode for portraits and situations where depth of field control is crucial. I can focus on composition while the camera handles exposure calculations.
Shutter Priority (S/Tv)
You set the shutter speed, and the camera chooses the aperture. Perfect for sports and action photography where freezing motion is priority. The camera ensures proper exposure while you control movement.
Manual Mode (M)
You control all three settings—aperture, shutter speed, and ISO. This offers complete creative control but requires understanding the exposure triangle. I use manual mode for consistent lighting situations, studio work, and when I want exact control over every aspect of the image.
⚠️ Important: Start with aperture or shutter priority mode before jumping to full manual. These semi-automatic modes help you understand the relationships between settings while the camera handles some exposure decisions.
Common Problems and Quick Solutions (2025)
Even experienced photographers run into exposure issues. Here are common problems and their solutions based on my experience:
Blurry Photos
If your photos are blurry, first identify the type of blur. If everything is blurry, it’s likely camera shake—use faster shutter speeds or a tripod. If your subject is blurry but background is sharp, your shutter speed is too slow for the movement—increase shutter speed or pan with your subject.
Photos Too Dark or Too Bright
Consistently dark photos mean you’re underexposing. Try wider apertures (lower f-numbers), slower shutter speeds, or higher ISO. Consistently bright photos mean overexposure—narrower apertures, faster shutter speeds, or lower ISO. Your camera’s light meter and histogram are your best friends here.
High ISO Noise
If you’re seeing too much noise, try these solutions: use wider apertures before increasing ISO, use slower shutter speeds with a tripod, or invest in a faster lens. Modern noise reduction software can also help, but getting the exposure right in camera is always better.
Final Recommendations
Mastering aperture, shutter speed, and ISO is a journey, not a destination. I recommend learning one setting at a time—start with aperture priority mode and focus on understanding depth of field. Then move to shutter priority to master motion control. Finally, transition to manual mode when the exposure triangle makes intuitive sense.
Practice is essential. Take photos in different lighting conditions, experiment with each setting, and review your results with the EXIF data visible. Most importantly, don’t be afraid to make mistakes—every blurry, overexposed, or noisy photo teaches you something about the exposure triangle.
Remember, these settings are tools for creative expression, not rules to follow blindly. The “correct” exposure is the one that creates the image you envision. Trust your eyes, understand the fundamentals, and don’t be afraid to break the rules once you know why they exist.
Frequently Asked Questions
What is the holy trinity of camera settings?
The holy trinity of camera settings refers to aperture, shutter speed, and ISO—the three fundamental settings that control exposure in photography. Together they form the exposure triangle, where changing one requires adjusting others to maintain proper brightness.
Is ISO 200 or 400 better?
Neither is inherently better—ISO 200 produces cleaner images but needs more light, while ISO 400 is more sensitive in darker conditions but may have slightly more noise. Use the lowest ISO possible for your lighting conditions to minimize noise.
What does a 2.8 aperture mean?
An aperture of f/2.8 is a relatively wide opening that allows lots of light to enter your camera. It creates shallow depth of field, making it excellent for portraits and low light photography. Many professional zoom lenses have f/2.8 as their maximum aperture.
What is the 500 or 300 rule in photography?
The 500 rule (or 300 rule for crop sensor cameras) helps avoid star trails in astrophotography. Divide 500 by your focal length to get the maximum shutter speed in seconds. For example, with a 24mm lens, use shutter speeds faster than 21 seconds (500÷24) to keep stars as points of light.
Which setting should I adjust first?
Adjust the setting that most affects your creative vision first. For portraits, start with aperture to control depth of field. For sports, start with shutter speed to freeze motion. For landscapes, start with aperture for sharpness. Let the other settings support your primary creative choice.
When should I use Auto ISO?
Auto ISO is excellent for changing lighting conditions like events or wildlife photography. It lets you focus on aperture and shutter speed while the camera handles ISO. Set a maximum ISO limit you’re comfortable with, and the camera will adjust ISO only as needed to maintain proper exposure.