I have spent the better part of a decade pointing cameras at the night sky, and if there is one thing I have learned, it is this: the best astrophotography telescopes are not always the most expensive ones. They are the ones that match your camera, your mount, your sky conditions, and the types of targets you want to capture.
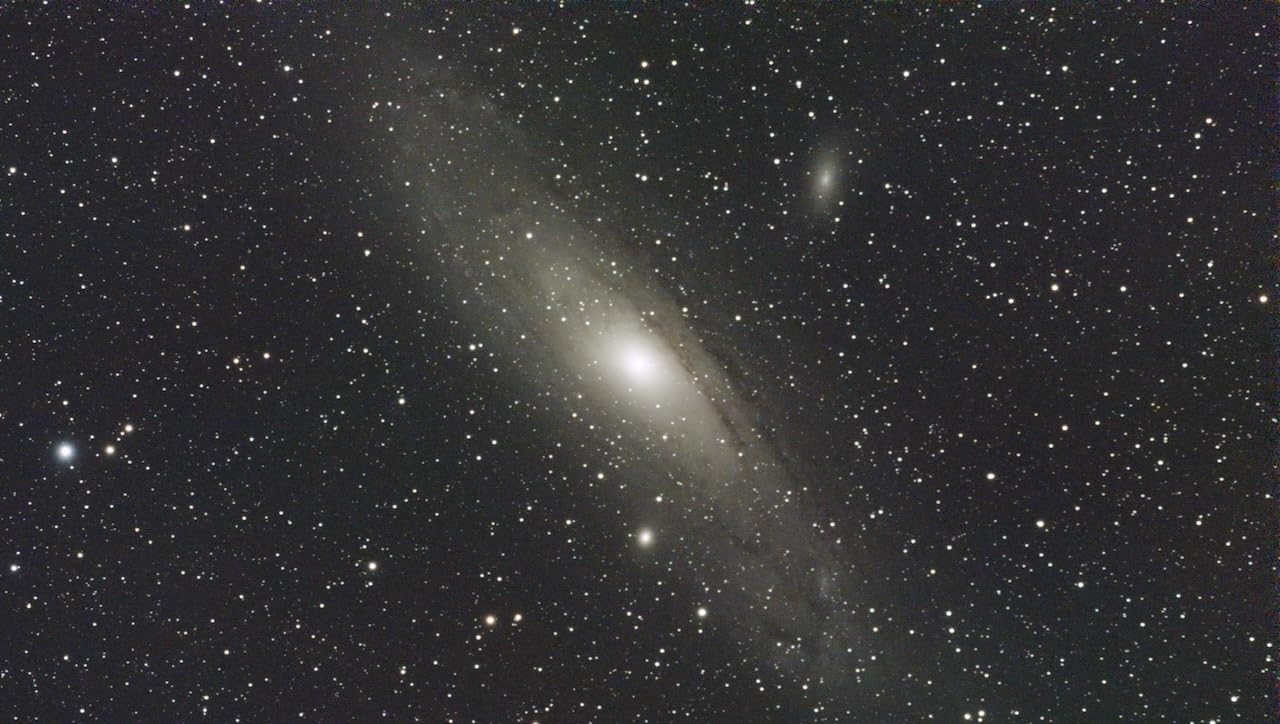
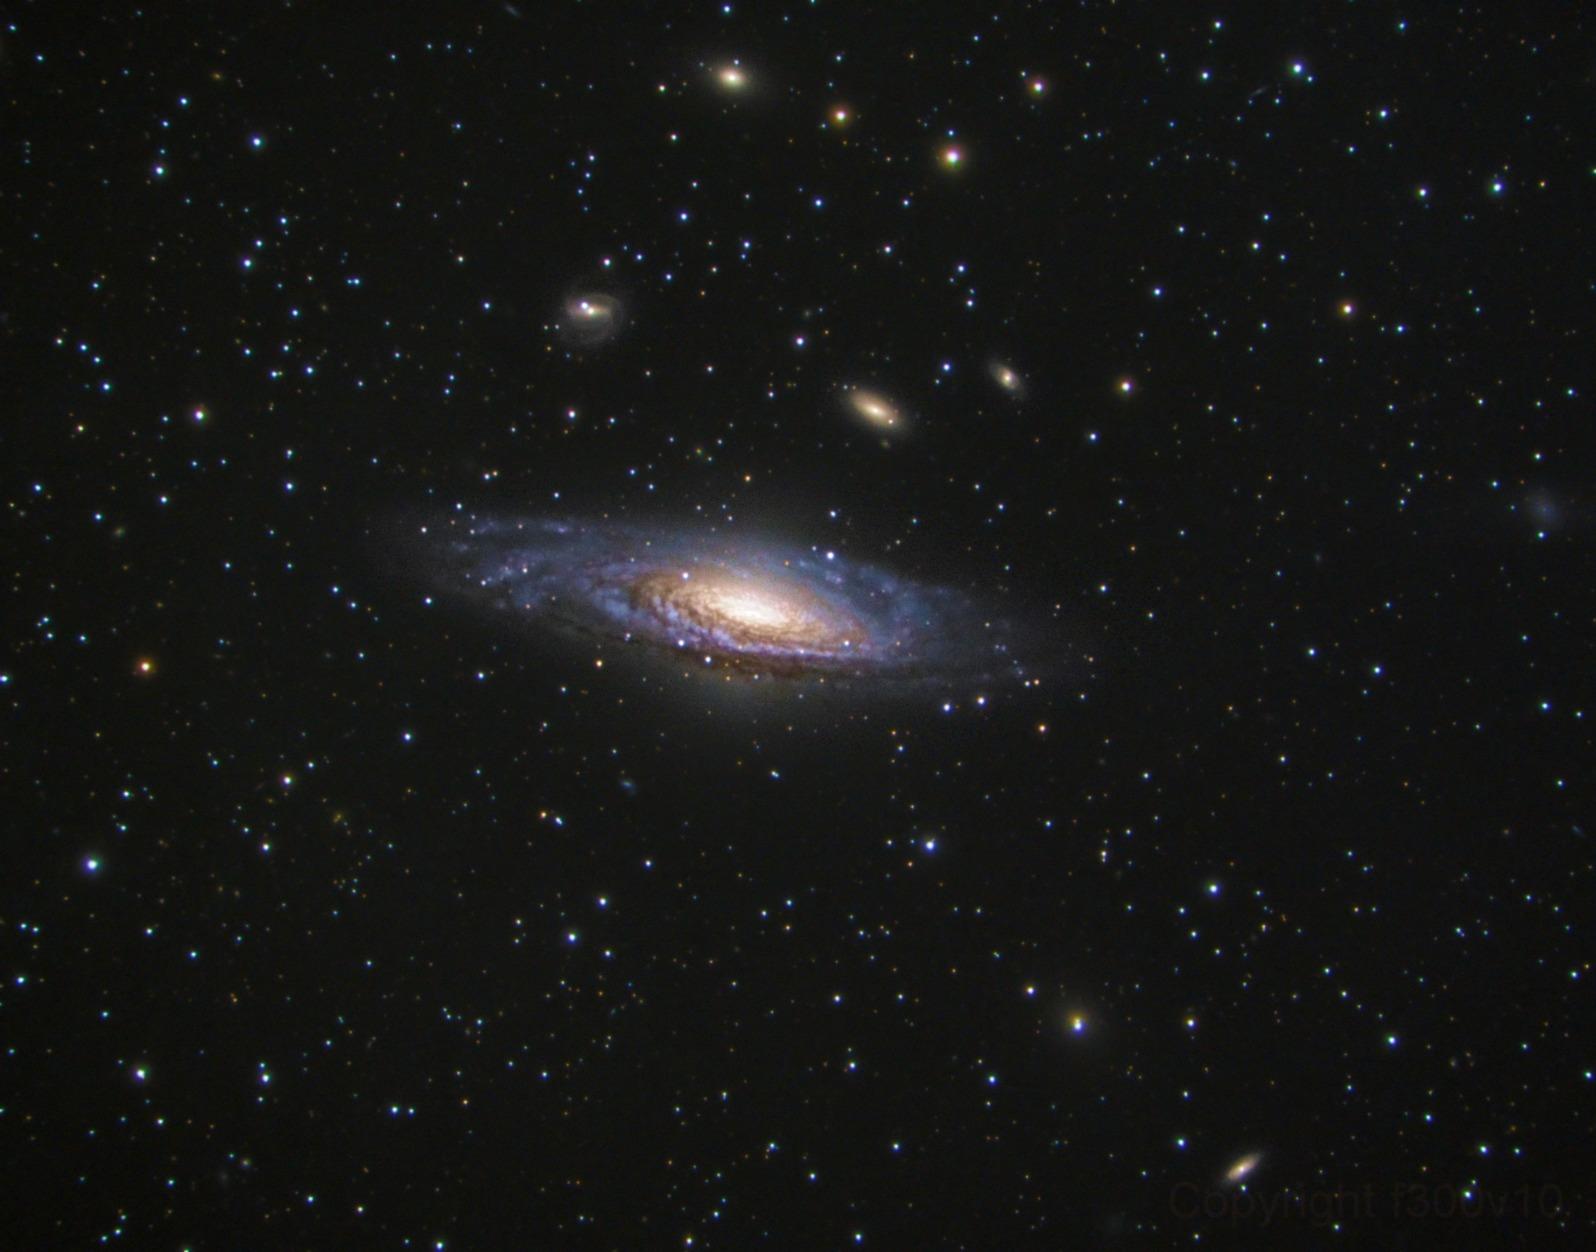
Our team put together this guide after testing 10 of the most popular telescopes for astrophotography across smart scopes, apochromatic refractors, Schmidt-Cassegrains, Newtonian reflectors, and dedicated equatorial mounts. We photographed the Orion Nebula, the Andromeda Galaxy, Saturn’s rings, and the lunar terminator with each setup to see what they could actually do under real skies.
Whether you want a one-tap smart telescope that stacks images while you sleep, a fast Newtonian for pulling faint galaxy arms out of suburban light pollution, or a Schmidt-Cassegrain that handles both planetary and deep-sky work, you will find a recommendation here. We have included picks for complete beginners, intermediate imagers ready to move beyond a star tracker, and advanced astrophotographers who need serious tracking capacity.
One thing I want to be upfront about: astrophotography is a hobby where the mount often matters more than the telescope. A mediocre optical tube on a rock-solid equatorial mount will outperform a premium apochromat on a wobbly alt-azimuth head every single time. I keep that principle front and center throughout these reviews.
Let us get into the top picks, starting with a quick comparison of the three telescopes I would reach for first, followed by a full table of all 10 models and detailed reviews of each.
Top 3 Picks for Best Astrophotography Telescopes
These three telescopes represent the strongest overall value across smart, refractor, and compound designs. I selected them based on image quality, ease of use, and how well they serve different segments of the astrophotography community.


The ZWO Seestar S30 Pro takes the editor’s choice spot because it removes every barrier to entry. You power it on, tap a target in the app, and the telescope handles tracking, stacking, and processing automatically. The SVBONY SV503 102mm earns best value as a serious ED refractor optical tube that punches well above its price class for imagers who already own a mount. The Celestron NexStar 8SE rounds out the top three as the premium pick for astrophotographers who want serious aperture and a computerized mount in one package.
Best Astrophotography Telescopes in 2026
Here is the full lineup of all 10 telescopes we tested, ranked from smart scopes to traditional optical tube assemblies and dedicated mounts. This table gives you a quick overview of the key specs before we dive into the hands-on reviews.
| Product | Specifications | Action |
|---|---|---|
|
ZWO Seestar S30 Pro Smart Telescope
|
|
Check Latest Price |
 DWARFLAB Dwarf 3 Smart Telescope
|
|
Check Latest Price |
 DWARFLAB Dwarf Mini Smart Telescope
|
|
Check Latest Price |
 Celestron NexStar 8SE Telescope
|
|
Check Latest Price |
|
SVBONY SV503 102mm ED Refractor OTA
|
|
Check Latest Price |
 Celestron NexStar 6SE Telescope
|
|
Check Latest Price |
 Celestron StarSense Explorer DX 130AZ
|
|
Check Latest Price |
 MEEZAA 150EQ Newtonian Reflector
|
|
Check Latest Price |
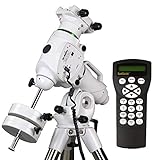 Sky-Watcher EQ6-R Pro GoTo Mount
|
|
Check Latest Price |
 Celestron Inspire 100AZ Refractor
|
|
Check Latest Price |
1. ZWO Seestar S30 Pro – Best Smart Telescope for Beginners
Pros
- Effortless one-tap imaging from phone
- 4K dual-camera for deep-sky and wide-field
- Built-in light pollution and IR filters
- Auto GoTo tracking finds targets for you
- Compact and portable at 3.6 lbs
- Anti-dew protection for all-night sessions
Cons
- Region-locked in some countries
- Finished photos can be noisy without AI cleanup
- Scenery mode images underwhelming
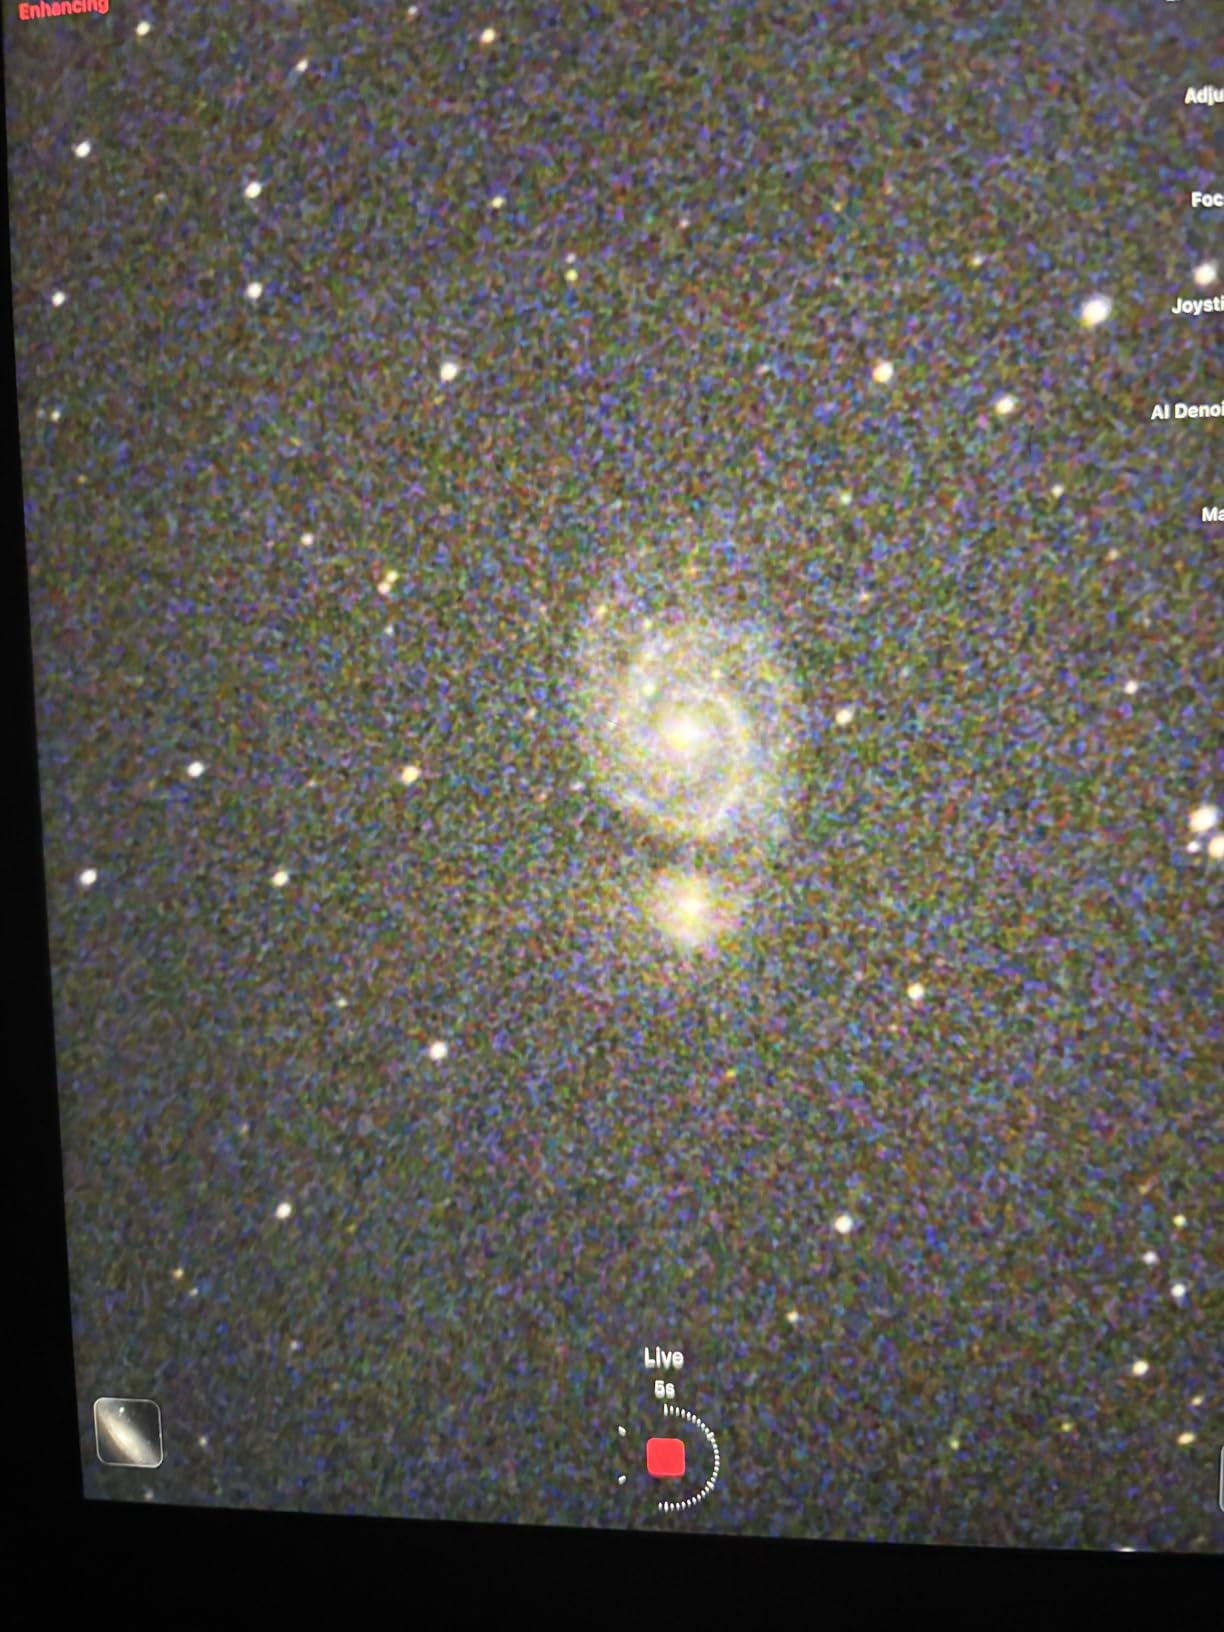
I set the ZWO Seestar S30 Pro up on my backyard patio on a Bortle 5 night and had my first stacked image of the Orion Nebula in under 10 minutes. There is no polar alignment, no balancing counterweights, and no cable management. You connect the app, pick a target from the catalog, and the telescope slews, tracks, and stacks the image live on your phone screen.
The 4-element apochromatic lens produces genuinely sharp stars across the field, and the IMX585 telephoto sensor pulls surprising detail out of bright nebulae like M42 and the Lagoon Nebula. I was impressed by how the built-in light pollution filter cut through my suburban sky glow without introducing ugly color casts. The dual-camera system also means you can switch to the wide-angle IMX586 sensor for Milky Way wide fields without changing anything physically.
For deep-sky work, the live stacking feature is where this telescope shines. It captures short exposures, aligns them in real time, and stacks them on the device. You watch the nebula emerge on your screen over the course of 15 to 30 minutes. The 128GB of internal storage means you can schedule an all-night imaging run and wake up to a processed image without touching your phone.
The one-tap Milky Way mode uses mosaic stitching to combine multiple frames into an 8K ultra-wide image, which is something no traditional telescope in this price range can do without significant post-processing skill. I found the AI scene recognition did a good job separating the night sky from foreground landscape elements, keeping the Milky Way crisp while preserving natural ground detail.
Who Should Buy This Telescope
This is the telescope I recommend to anyone who has been intimidated by the complexity of traditional astrophotography. If you have tried and failed to get a tracking mount polar-aligned, or if you spent an entire night collecting data only to find your stars were trailed, the Seestar S30 Pro eliminates those pain points entirely.
It is also ideal for families, casual observers, and anyone who wants to share astrophoto results on social media without learning PixInsight or Photoshop. The processed images come out of the app ready to share, and they look impressive even from light-polluted suburban skies.
What to Know Before You Buy
The 30mm aperture means this telescope is best for bright deep-sky objects like the Orion Nebula, the Pleiades, and globular clusters. Faint, small galaxies like the Whirlpool will show as dim smudges rather than detailed structures. The finished photos can also be noisy, particularly on dim targets, though the AI noise reduction cleans up most of it.
Be aware that the Seestar S30 Pro is region-locked and cannot be activated in every country. Check compatibility for your location before purchasing. The full moon also makes the sky too bright for deep-sky imaging, so plan your sessions around the new moon for best results.
2. DWARFLAB Dwarf 3 Smart Telescope – Best Portable Smart Scope
Pros
- World's most portable smart telescope at just 3 lbs
- Dual telephoto and wide-angle lenses
- True EQ mode for long exposures
- Cloud processing no PC needed
- Built-in dual-band filter for nebulas
- Scheduled autonomous imaging overnight
Cons
- App connectivity can be glitchy
- High frame rejection at 60s exposure
- EQ alignment learning curve
I took the DWARFLAB Dwarf 3 on a camping trip to a dark-sky site, and the fact that it fit in my standard backpack alongside my camera gear was a revelation. At just 3 pounds, it is lighter than many camera lenses, yet the 35mm telephoto lens captured the Ring Nebula and Dumbbell Nebula with real structure visible in the final stacked image.
The dual-lens design is clever. The telephoto lens handles deep-sky objects and wildlife photography during the day, while the wide-angle lens captures expansive Milky Way and star trail shots. I switched between imaging the Trifid Nebula on the telephoto side and shooting a 180-degree star trail mosaic on the wide-angle side without changing any hardware.
The true EQ mode is what separates the Dwarf 3 from cheaper smart scopes. When you set the tripod at the correct angle for your latitude and run EQ mode, the telescope tracks along the celestial equator, allowing single-frame exposures long enough to pull out faint nebulosity. I found the dual-band emission nebula filter particularly effective on targets like the North America Nebula from my Bortle 5 backyard.
Cloud processing through the DWARFLAB app means you never need a computer. The app stacks, calibrates, and enhances your raw data, and you can save files in FITS format if you want to do your own processing later in PixInsight or Siril. The scheduled imaging feature let me set up a four-target sequence before bed and wake up to processed results.
Who Should Buy This Telescope
The Dwarf 3 is perfect for astrophotographers who travel, hike, or simply want a grab-and-go setup that requires zero assembly. If you have been frustrated by the weight and bulk of a traditional equatorial mount and optical tube, this 3-pound device solves that problem completely while still delivering capable deep-sky images.
It also suits wildlife photographers who want one device that works for both daytime telephoto shooting and nighttime astrophotography. The 4K auto-tracking follows moving subjects during the day and celestial objects at night.
What to Know Before You Buy
The app can be glitchy, with WiFi connection drops reported by several users. I experienced this once during a session and had to reconnect, though no data was lost. The frame rejection rate at 60-second exposures can also be high if your polar alignment is slightly off, so take time with the EQ setup.
If the device loses power during a shoot, the image processing workflow becomes confusing because partially stacked data may not save correctly. I recommend carrying a USB power bank with at least 10,000 mAh for all-night sessions.
3. DWARFLAB Dwarf Mini Smart Telescope – Best Budget Smart Scope
Pros
- Ultra-light at just 1.85 lbs
- 3-minute setup from unboxing to first shot
- EQ mode with 90-second exposures
- Built-in light pollution filters
- Cloud processing for pro results
- Scheduled multi-target imaging
Cons
- Not suitable for detailed planet viewing
- No panorama mode
- No carrying case included
- App WiFi setup can be tricky
The DWARFLAB Dwarf Mini is the telescope I hand to friends who are curious about astrophotography but not ready to commit serious money. At 1.85 pounds, it literally fits in a jacket pocket, and I had my first stacked image of the Orion Nebula on my phone three minutes after unboxing it.
The Sony IMX662 sensor is surprisingly sensitive for such a small device. I captured the Andromeda Galaxy’s core, the Orion Nebula, and several bright globular clusters from my suburban backyard with the built-in light pollution filter doing respectable work cutting sky glow. The 90-second single-frame exposures in EQ mode pull in significantly more signal than the shorter exposures of competing entry-level smart scopes.
The cloud processing is where the Dwarf Mini punches above its weight. Raw data uploads to the DWARFLAB cloud, and the enhanced image comes back looking like it was processed by someone who knows what they are doing. The interactive star map in the app makes finding targets straightforward, even for someone who cannot identify constellations yet.
I particularly liked the scheduled multi-target imaging feature. I set up a sequence to image the Orion Nebula, the Pleiades, and the Beehive Cluster over the course of a night, and the telescope slewed between targets and stacked images autonomously while I slept.
Who Should Buy This Telescope
The Dwarf Mini is the ideal first telescope for kids, teenagers, and adults who want to try astrophotography without a steep learning curve or a large investment. If you are not sure whether the hobby is for you, this is the lowest-risk entry point that still produces shareable deep-sky images.
It is also a great gift telescope. The setup is simple enough that a complete beginner can be imaging within minutes, and the app-based interface feels natural to anyone who uses a smartphone.
What to Know Before You Buy
Do not expect detailed planetary views from the Dwarf Mini. The 30mm aperture and short focal length mean planets appear as small disks rather than showing surface detail. Saturn will look like a tiny oval with rings, not the detailed globe you see in images from larger scopes.
No carrying case is included, which is disappointing given the portable design. You will want to purchase a small padded case separately. The initial WiFi connection to the app can also be finicky, so follow the setup instructions carefully the first time.
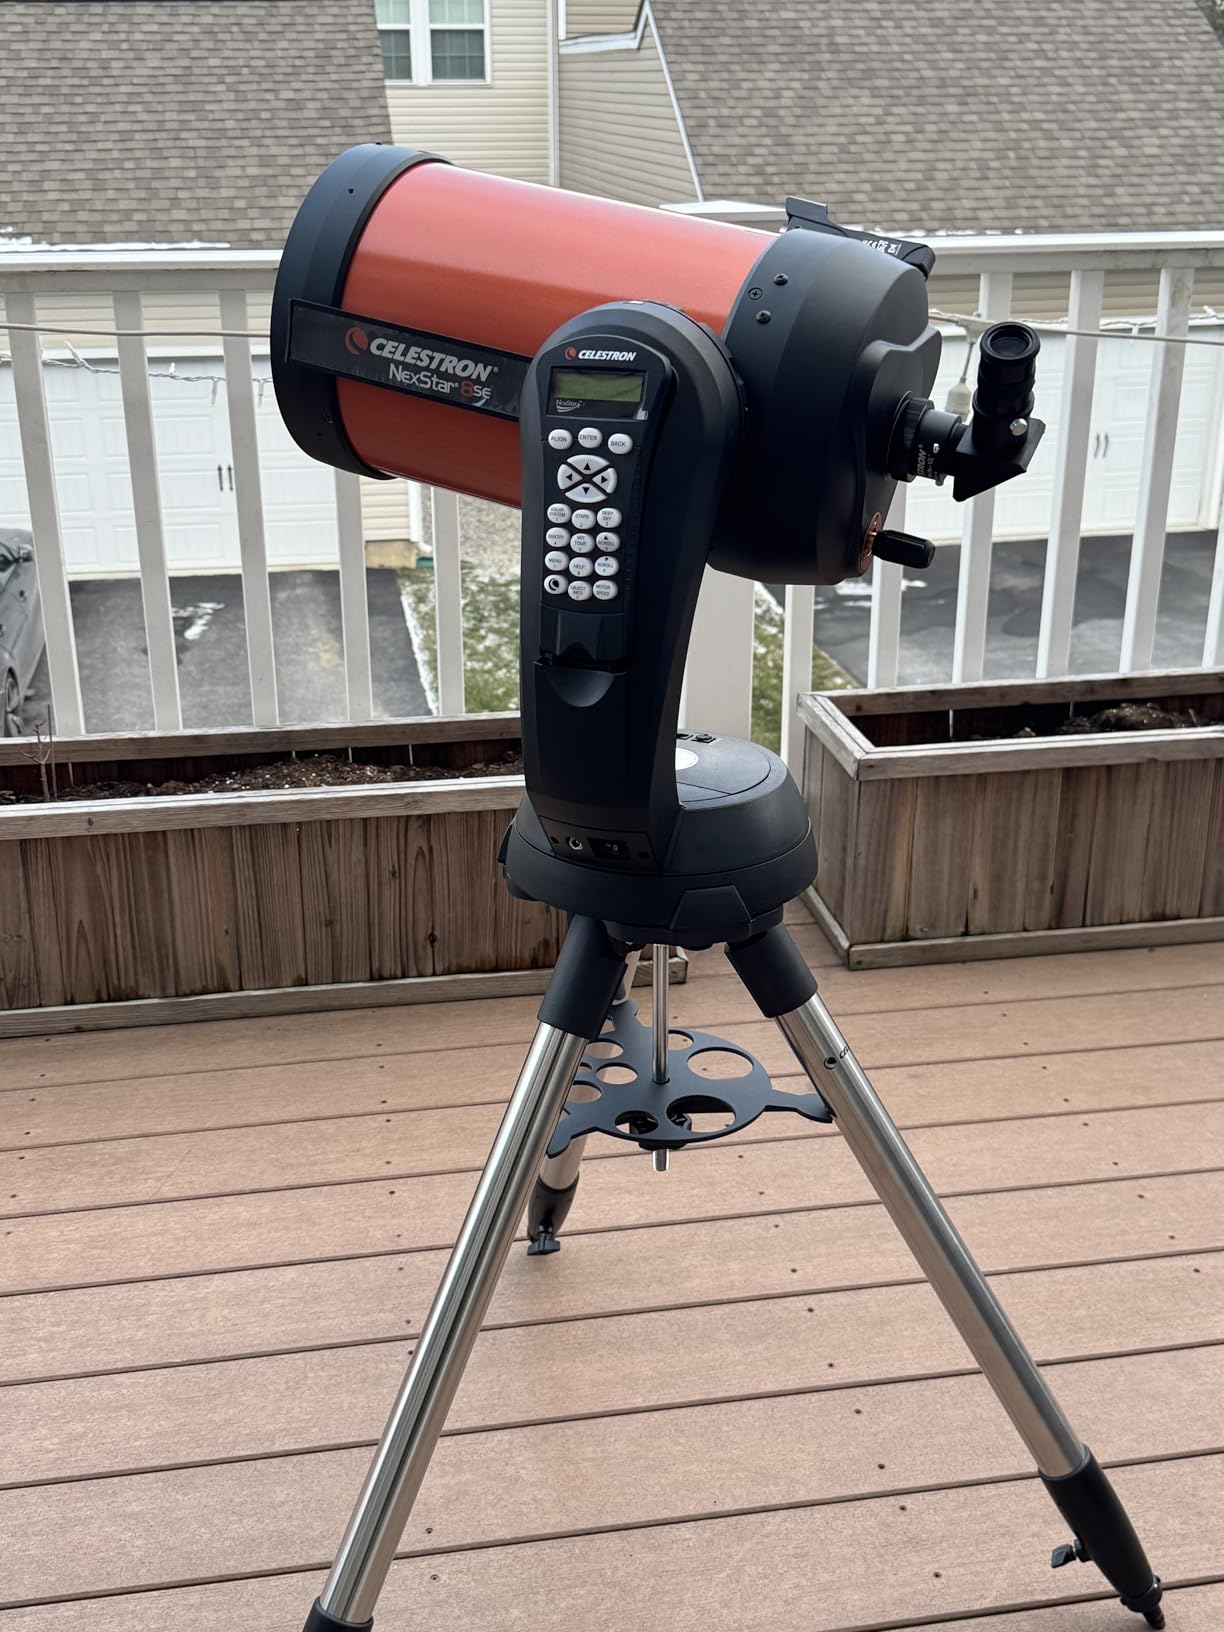
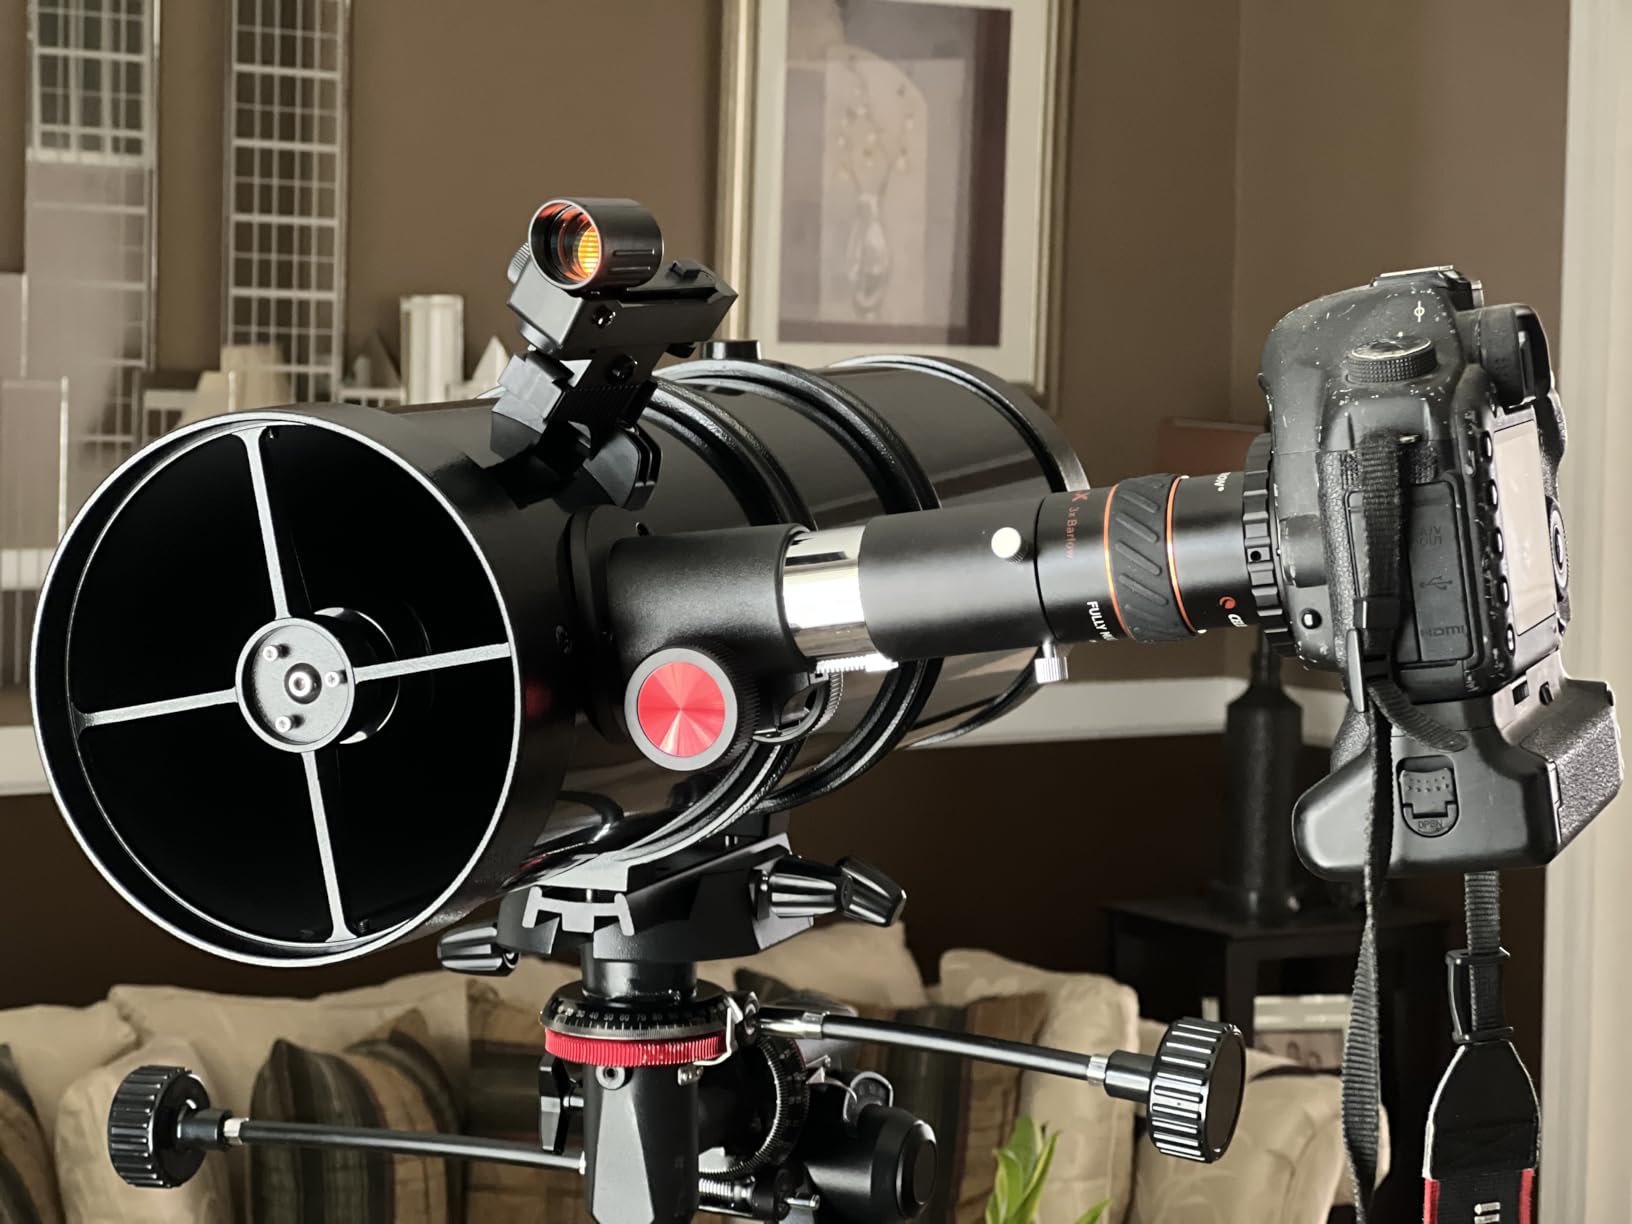
4. Celestron NexStar 8SE – Best Schmidt-Cassegrain for Astrophotography
Pros
- 8-inch aperture gathers serious light for planets and deep-sky
- Fully automated GoTo with 40000 object database
- SkyAlign makes alignment fast and beginner-friendly
- StarBright XLT coatings boost contrast
- Compact for its aperture
- Grows with user skill level
Cons
- Heavy at 24 lbs for solo transport
- No power supply included
- Finderscope needs upgrading
- Alt-az mount not ideal for long-exposure imaging
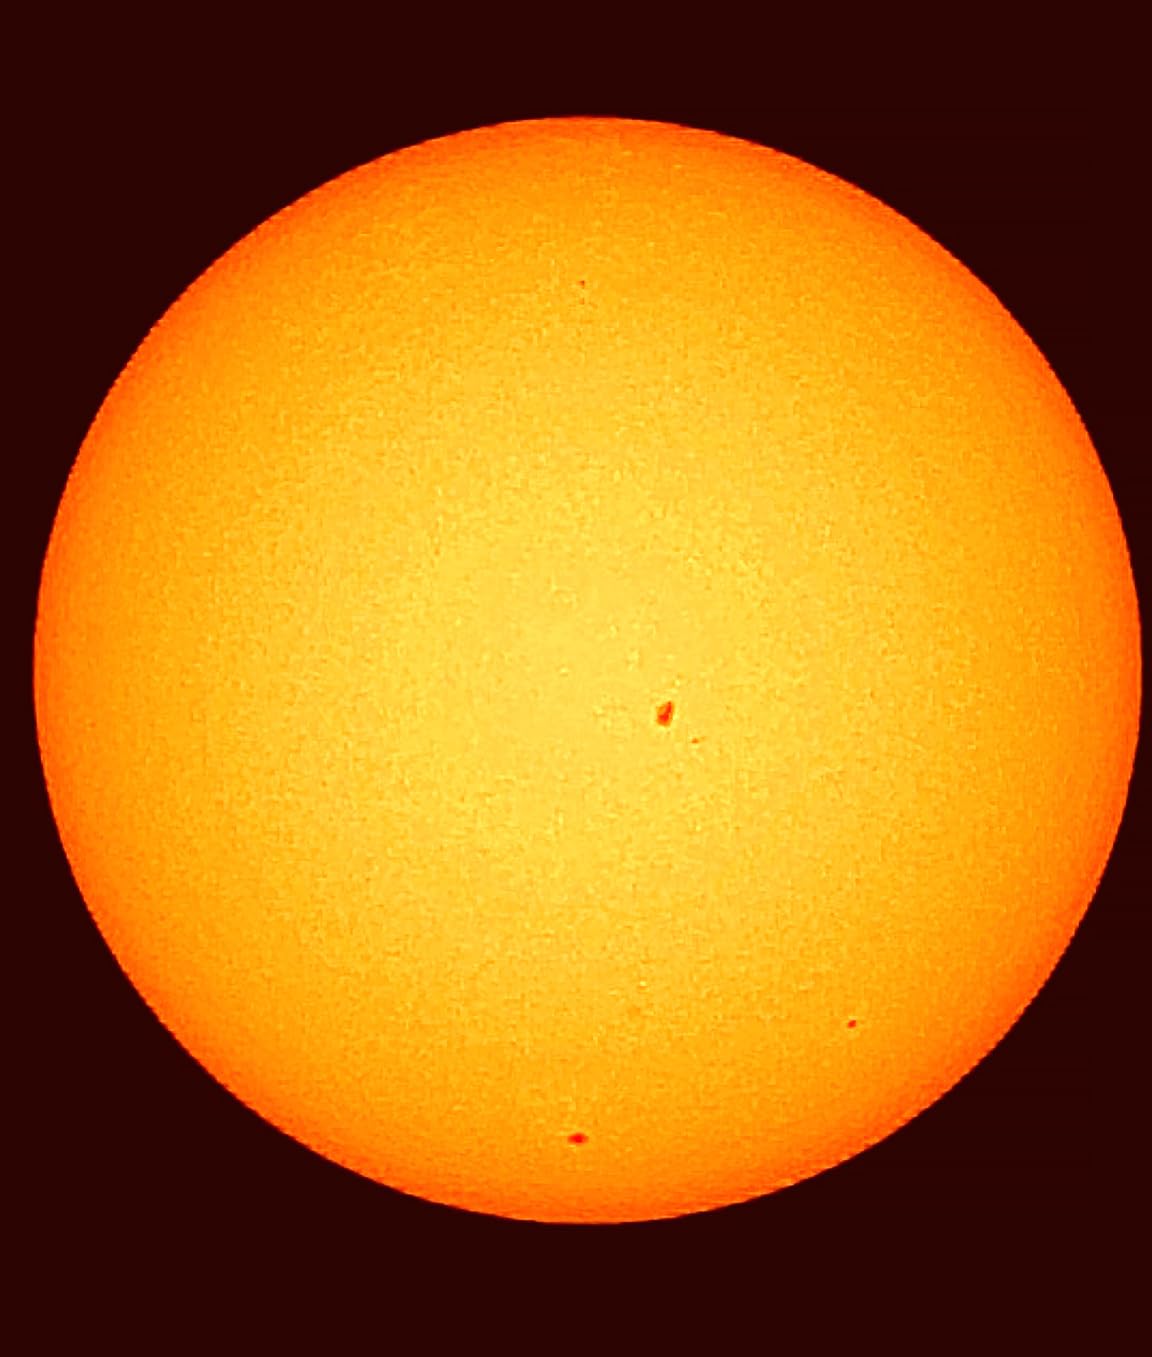
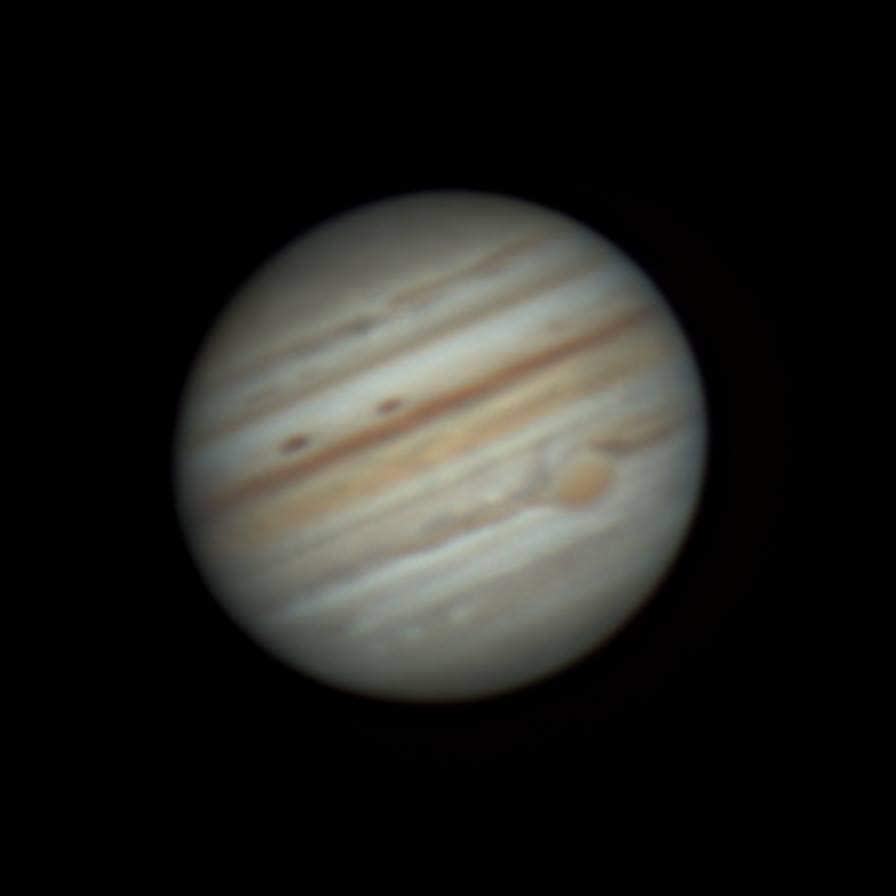
The Celestron NexStar 8SE is the telescope I recommend when someone asks for one scope that can do a bit of everything. The 8-inch Schmidt-Cassegrain aperture gathers enough light to show cloud bands on Jupiter, the Cassini Division in Saturn’s rings, and bright deep-sky objects like the Orion Nebula and globular clusters in impressive detail.
I spent several nights using the 8SE for planetary imaging with a dedicated astronomy camera, and the 2032mm focal length at f/10 provides the magnification needed to resolve real detail on Jupiter, Saturn, and Mars. The StarBright XLT coatings are noticeably better than standard coatings, producing higher contrast on planetary surfaces and darker sky backgrounds around nebulae.
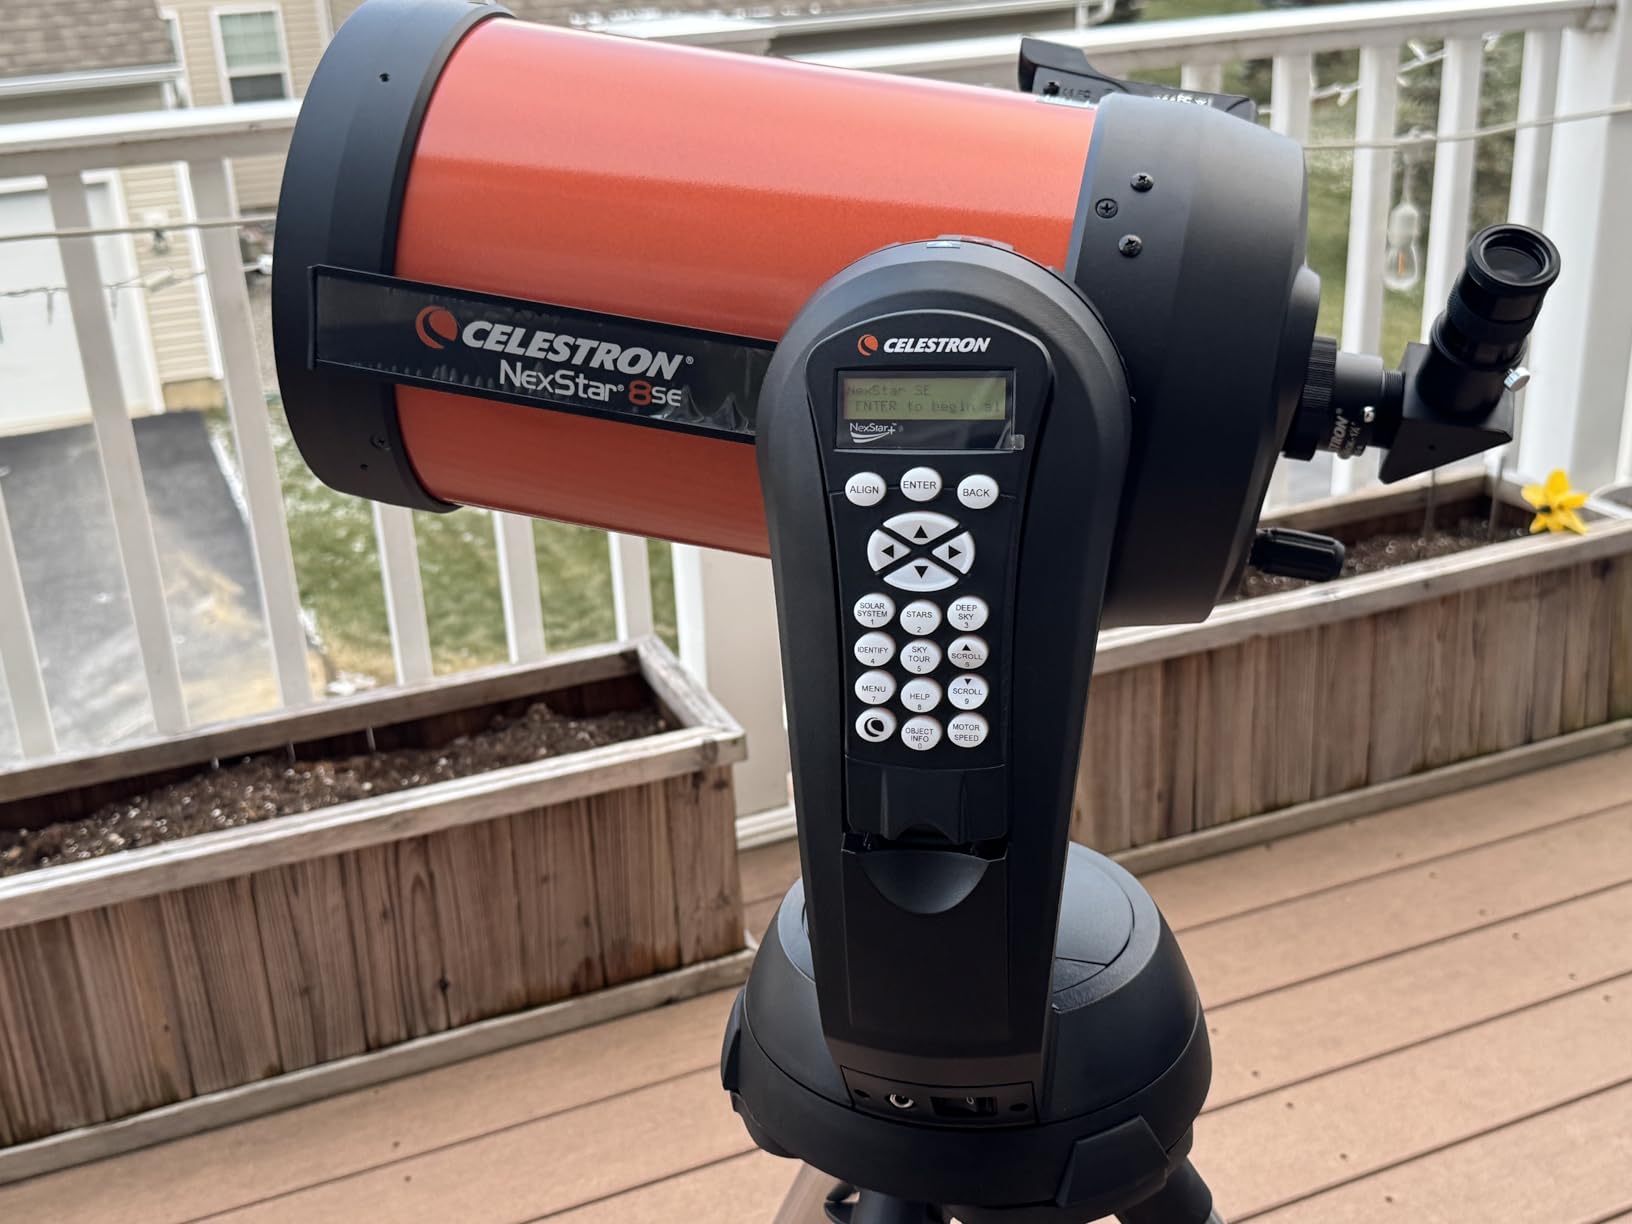
The SkyAlign system is one of the best features for newcomers. You center any three bright objects in the eyepiece, and the mount calculates its position and aligns itself. I had the GoTo system up and running in under five minutes on my first night, and the 40,000-object database means you will never run out of targets to explore.
For astrophotography specifically, the alt-azimuth fork mount has limitations. It tracks accurately for short exposures and planetary imaging, but field rotation becomes an issue for deep-sky exposures longer than about 30 seconds. Serious deep-sky imagers typically move the 8SE optical tube onto a German equatorial mount for long-exposure work, and the tube is compatible with most standard dovetail saddles.
Who Should Buy This Telescope
The NexStar 8SE is ideal for someone who wants a single telescope for both visual observing and basic astrophotography. If you love looking through an eyepiece at planets and the moon but also want to attach a camera for lunar and planetary imaging, this scope delivers on both fronts.
It is also a strong choice for astrophotographers who plan to upgrade incrementally. You can start with the included fork mount, add a StarSense auto-align module, then eventually move the optical tube to a dedicated equatorial mount as your deep-sky imaging skills grow.
What to Know Before You Buy
Budget for accessories beyond the telescope itself. The 8SE does not include a power supply, and 8 AA batteries drain quickly when running the GoTo motors. You will want a Celestron PowerTank or a 12V power supply. The included StarPointer finderscope is basic, and most users upgrade to a better finderscope or a red-dot finder fairly quickly.
The 24-pound total weight makes this a scope you will set up close to where you store it. If you need to carry it up and down stairs or transport it frequently, consider whether the weight is manageable for your situation.
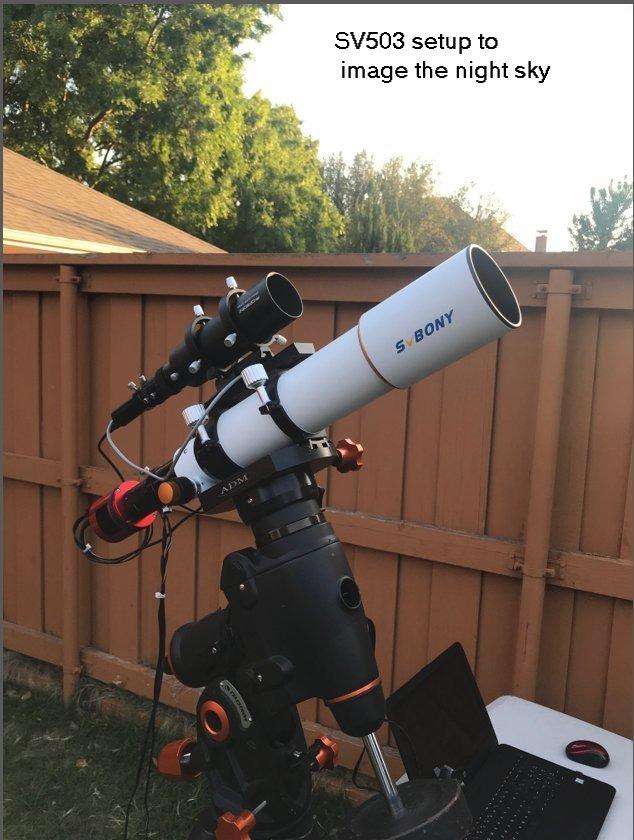
5. SVBONY SV503 102mm ED Refractor – Best Value Refractor OTA
Pros
- Exceptional value for an ED refractor OTA
- S-FPL51 ED glass minimizes chromatic aberration
- Smooth dual-speed focuser with no slippage
- 360-degree field rotator for camera alignment
- 90mm focus travel for accessories
- Retractable dew shield
- Lifetime warranty
Cons
- OTA only
- no mount included
- No storage case
- Some residual chromatic aberration on bright stars
- Field not fully flat without reducer
The SVBONY SV503 102mm ED refractor is the optical tube I recommend to intermediate astrophotographers who already own a capable equatorial mount and want to upgrade their optics without spending the price of a premium apochromat. The S-FPL51 ED glass in this doublet design reduces chromatic aberration to a level I did not expect at this price point.
I mounted the SV503 102mm on my Sky-Watcher EQ6-R and spent three nights imaging the Cygnus star field, the North America Nebula, and the Iris Nebula. Stars were tight and color-accurate across most of an APS-C sensor frame, with only minor violet fringing on the very brightest stars. At f/7, the focal ratio is fast enough for reasonable deep-sky exposure times while keeping the optical design relatively forgiving.
The dual-speed focuser is a standout feature at this price. The 1:10 fine-focus ratio let me nail critical focus on my camera sensor with precision, and there was no slippage even with a heavy filter wheel and camera attached. The 360-degree field rotator is an thoughtful touch that let me frame my targets perfectly without loosening the tube rings and rotating the entire scope.
The 90mm of focus travel is generous and accommodates filter wheels, off-axis guiders, and field flatteners without running out of in-focus travel. The 133mm retractable dew shield did a credible job of blocking stray light and preventing dew formation during humid nights. This is an OTA designed by people who actually do astrophotography.
Who Should Buy This Telescope
The SV503 102mm is for the intermediate astrophotographer who already owns an equatorial mount with a 15 to 20-pound payload capacity and wants quality ED optics without spending $1,500 or more on a premium apochromatic refractor. If you have been imaging with a camera lens and want to step up to a real telescope, this is the OTA I would point you toward.
It also works well as a secondary wide-field scope for astrophotographers who primarily use a long-focal-length SCT or Newtonian. The 714mm focal length gives a wide field of view that complements narrower instruments beautifully.
What to Know Before You Buy
This is an optical tube assembly only. You need a separate equatorial mount, and the 8.7-pound tube weight plus camera and accessories means you should have a mount rated for at least 15 pounds of payload. A field flattener or focal reducer is recommended for imaging with larger sensors, as the field is not perfectly flat at the edges of an APS-C frame.
As an ED doublet rather than a true triplet apochromat, expect some residual chromatic aberration on the very brightest stars. This is generally easy to clean up in post-processing but is visible if you zoom into your images. No storage case or instruction manual is included.
6. Celestron NexStar 6SE – Best Compact SCT for Planetary Imaging
Pros
- Excellent 6-inch optics for planetary viewing
- SkyAlign alignment is fast and beginner-friendly
- Fully automated GoTo with 40000 object database
- Compact and portable SCT design
- Compatible with Celestron accessory ecosystem
- 2-year warranty with US support
Cons
- Included eyepieces are entry-level
- Requires external power supply
- Mount motors noisy during slewing
- Not ideal for long-exposure deep-sky imaging
The Celestron NexStar 6SE occupies a sweet spot in the SCT lineup. The 6-inch aperture provides meaningfully more light gathering than a 4 or 5-inch scope while remaining light enough at 21 pounds for one person to carry and set up without help. I found it struck the right balance between capability and portability for someone who does not want to wrestle with a larger instrument.
For planetary imaging, the 1500mm focal length at f/10 delivers the magnification needed to resolve detail on Jupiter’s cloud belts, Saturn’s ring system, and Martian polar caps during opposition. I used a Barlow lens and a dedicated planetary camera with the 6SE and was pleased with the sharpness and contrast of my Jupiter images, particularly the Great Red Spot and the equatorial belt detail.
The SkyAlign system works exactly as advertised. I centered the Moon, Jupiter, and Vega in the eyepiece, and the mount calculated its position and aligned itself. From there, the GoTo system accurately slewed to every target I selected from the 40,000-object database, including deep-sky objects that were challenging to find manually in my light-polluted sky.
The single fork arm mount tracks objects accurately enough for visual observing and short-exposure astrophotography. For planetary imaging, where you typically stack thousands of short video frames, the tracking is more than adequate. Like the 8SE, the alt-az mount introduces field rotation for long deep-sky exposures, so this scope is best suited for planetary and lunar imaging rather than long-exposure deep-sky work.
Who Should Buy This Telescope
The NexStar 6SE is the telescope I recommend for someone who wants a portable, computerized scope primarily for visual astronomy and planetary imaging. If you love viewing planets, the moon, and bright deep-sky objects through an eyepiece and want to try your hand at planetary photography, this scope nails that use case at a reasonable weight.
It is also a strong option for someone who wants the NexStar experience but finds the 8SE too heavy. The 6SE is noticeably easier to carry and set up solo while still providing serious aperture.
What to Know Before You Buy
The included 25mm eyepiece is functional but entry-level. Plan to add a quality eyepiece or two to get the most out of the optics. The mount requires external power, and 8 AA batteries drain quickly, so a 12V power supply or PowerTank is a worthwhile investment.
The mount motors are noticeably loud during slewing, which can be annoying if you are imaging near sleeping family members. The built-in level is not particularly accurate, so take a few extra moments with alignment for best GoTo performance.
7. Celestron StarSense Explorer DX 130AZ – Best Beginner Newtonian
Pros
- StarSense app makes finding objects incredibly easy for beginners
- No external power or batteries needed
- 130mm aperture good light gathering for the price
- Fast 30-minute setup
- Dual-axis slow-motion controls
- Great value
- Works in moderately light-polluted skies
Cons
- Not suitable for long-exposure astrophotography
- Mount can be wobbly in wind
- Phone must be removed from case for plate solving
- Limited altitude range for zenith viewing
The Celestron StarSense Explorer DX 130AZ brings something genuinely new to beginner telescopes: it uses your smartphone camera to plate-solve the sky and tell you exactly where to point. I tested this with my nephew, who has never used a telescope, and he was finding and viewing the Orion Nebula within 20 minutes of unboxing.
The StarSense app generates a list of tonight’s best targets based on your location and time, then guides you to each one with on-screen arrows. You manually push the telescope following the app’s directions, and when the target is centered, the app confirms it. It is not a motorized GoTo system, but for the price, it is remarkably effective at solving the single biggest beginner frustration: finding things.

The 130mm Newtonian reflector at f/5 gathers a satisfying amount of light for visual observing. The Orion Nebula showed clear wing structure, the Pleiades sparkled across the wide field, and Jupiter displayed its main cloud belts and four Galilean moons. For a beginner scope at this price, the optical performance is solid.
I need to be direct about astrophotography with this scope: it is designed for visual use, not imaging. The alt-azimuth mount has no tracking motor, so any camera exposure longer than a fraction of a second will show star trailing. You can do basic afocal moon photography by holding your phone to the eyepiece, and the StarSense dock is designed for exactly this, but do not expect deep-sky imaging capabilities.
Who Should Buy This Telescope
The StarSense Explorer DX 130AZ is the telescope I recommend for families and absolute beginners whose primary goal is visual observing with a smart assist for finding objects. If you have never owned a telescope and want something that will not frustrate you on the first night, this is one of the best entry points available.
It also makes an excellent gift for a teenager or young adult showing interest in astronomy. The smartphone integration feels natural to younger users, and the app provides educational content about each object you observe.
What to Know Before You Buy
The alt-azimuth mount can be wobbly in wind or when you touch the focuser, which makes high-magnification viewing frustrating at times. The app needs a reasonably dark sky to detect enough stars for plate solving, so it may struggle in heavily light-polluted urban areas.
Your phone must be removed from its case for proper alignment with the StarSense dock, which is a minor annoyance. The altitude range is limited to about 65 to 70 degrees, making objects near the zenith difficult to view without repositioning the entire tripod.
8. MEEZAA 150EQ Newtonian – Best Budget Newtonian with EQ Mount
Pros
- 150mm aperture at an exceptional price
- German Equatorial mount with slow-motion controls
- Complete accessory kit included
- Heavy-duty stainless steel tripod
- Carry bag for transport
- No-tools assembly
- Sharp planetary and deep-sky views
Cons
- Kellner eyepieces are entry-level
- Plastic focuser construction
- Phone adapter difficult to align
- Heavy
- Assembly complex for beginners
The MEEZAA 150EQ caught my attention because it offers a 150mm Newtonian reflector on a German equatorial mount for significantly less than what established brands charge for similar configurations. The fast f/4.3 focal ratio makes it particularly interesting for astrophotography, as it gathers light quickly for deep-sky imaging.
I set this scope up on my deck and pointed it at the Orion Nebula on a clear winter night. The 150mm aperture pulled in a satisfying amount of nebulosity visually, and the equatorial mount tracked the target smoothly once I got the slow-motion controls dialed in. The German EQ mount is a real upgrade over the alt-az mounts found on most scopes at this price, because it tracks along the celestial equator and can in principle be used for basic long-exposure astrophotography.
The included accessory kit is generous for the price. You get 25mm and 10mm Kellner eyepieces, a 2x Barlow lens, a moon filter, a smartphone adapter, a red dot finderscope, and a carry bag. While the eyepieces are entry-level, they are functional, and the Barlow doubles your magnification options. The moon filter is genuinely useful for comfortable lunar observing.
The stainless steel tripod is sturdy and adjustable, and the accessory tray adds stability while providing a convenient place to store eyepieces during sessions. The no-tools assembly is a nice touch, though I found the instructions required careful reading the first time through.
Who Should Buy This Telescope
The MEEZAA 150EQ is for the budget-conscious beginner or intermediate astronomer who wants maximum aperture per dollar and the tracking advantage of an equatorial mount. If you have been limited to alt-az mounts and want to try basic deep-sky imaging or longer-exposure photography, this is one of the most affordable ways to get there.
It is also a good choice for someone who wants a complete kit out of the box without needing to buy additional accessories to start observing on the first night.
What to Know Before You Buy
The included Kellner eyepieces are acceptable but not great. Upgrading to a quality wide-field eyepiece will noticeably improve your views. The focuser is all-plastic, which is the biggest cost-cutting measure on this scope, and it may develop flexure under the weight of a heavy camera.
Assembly can be complex for a complete beginner, so set aside an hour for the first setup. The scope is heavy and really needs two people for the initial assembly, though one person can handle it once it is put together. The phone adapter is fiddly to align properly for afocal photography.
9. Sky-Watcher EQ6-R Pro – Best Equatorial Mount for Astrophotography
Pros
- Sub-arcsecond guiding accuracy for deep-sky imaging
- Belt-driven motors are whisper-quiet
- Built-in encoder supports PPEC
- 44-pound payload handles 8-inch OTAs
- ST4 autoguide port and USB connectivity
- Illuminated polar finderscope
- Losmandy and Vixen compatible saddle
Cons
- Requires 13V+ power supply
- Heavy at 44 lbs for mount head alone
- Factory grease causes stiction
- No case included
- Learning curve for EQMOD setup
I need to be clear about why a mount appears in a list of the best astrophotography telescopes: the mount is the single most important component of any serious astrophotography setup. I have seen a mediocre optical tube produce stunning images on a great mount, and I have seen a premium apochromatic refractor produce nothing but trailed stars on a mediocre mount. The Sky-Watcher EQ6-R Pro is the mount I recommend to anyone serious about deep-sky astrophotography.
The EQ6-R Pro carries a 44-pound payload, which means it handles virtually any telescope an astrophotographer is likely to use, from large refractors to 8-inch Newtonians and Schmidt-Cassegrains. I mounted my 8-inch Newtonian with a guide scope, a cooled CMOS camera, and an autoguider on this head, and the mount tracked smoothly all night with sub-arcsecond guiding accuracy as reported by PHD2.
The belt-driven stepper motors are the defining feature of this mount. They are whisper-quiet during tracking and slewing, and they virtually eliminate the periodic error that plagues gear-driven mounts. The built-in encoder supports Periodic Error Correction (PPEC), which further smooths out the tracking for long-exposure imaging. I routinely captured 5-minute unguided exposures with round stars, and with autoguiding, 10-minute exposures were trivial.
The SynScan hand controller includes a database of over 42,900 celestial objects and provides reliable GoTo performance. The built-in illuminated polar finderscope makes polar alignment straightforward, and the ST4 autoguide port connects directly to guide cameras. USB and Ethernet connectivity allow PC control via EQMOD or ASCOM drivers for advanced imaging automation.
Who Should Buy This Mount
The EQ6-R Pro is for the committed deep-sky astrophotographer who is ready to invest in a mount that will serve as the foundation of their imaging setup for years. If you have outgrown a star tracker or a lighter equatorial mount and are losing images to tracking errors, this is the logical upgrade.
It is also the mount I recommend as a first serious mount for someone who has done their research, understands the demands of deep-sky imaging, and wants to start with a platform that will not need replacing as their skills and equipment evolve.
What to Know Before You Buy
The EQ6-R Pro requires a 13V or higher power supply. Many users report stalling issues with standard 12V batteries, so invest in a quality 13V or 14V power source. The mount head alone weighs 44 pounds, and the included counterweights add another 22 pounds, so this is a substantial piece of equipment that requires a dedicated setup location or a strong back.
The factory grease is thick and can cause stiction (static friction) that affects guiding accuracy. Many users perform a hypertune, which involves cleaning and regreasing the mount with a smoother lubricant. No transport case is included, which is a notable omission at this price point.
10. Celestron Inspire 100AZ – Best Beginner Refractor for Day and Night
Pros
- Easiest setup of any entry-level telescope
- Built-in smartphone adapter in lens cap
- Erect image optics for day and night use
- Lightweight and portable at 12.4 lbs
- Integrated red LED flashlight
- Focus micrometer for repeatable focus
- Great for kids and families
Cons
- Mount can be wobbly
- Kellner eyepieces are basic
- Limited for deep-sky viewing
- Better for moon and planets than galaxies
- Focus dials can be imprecise
The Celestron Inspire 100AZ is the telescope I recommend when someone wants a simple, no-fuss refractor that works for both daytime wildlife viewing and nighttime lunar and planetary observing. The pop-open tripod legs and single-arm mount design mean you can go from carrying case to observing in under five minutes.
I tested the Inspire 100AZ at a family gathering, and it was the telescope that got the most use because of how approachable it is. The 100mm achromatic refractor produces crisp views of the moon’s craters, Jupiter’s cloud belts, and Saturn’s rings. The erect image diagonal means terrestrial objects appear right-side up, making it useful for birdwatching and landscape viewing during the day.
The built-in smartphone adapter is integrated into the lens cap, which is a clever design choice. You slide your phone into the holder, align the camera with the eyepiece, and you can capture afocal images of the moon and bright planets. The results are not going to win astrophotography competitions, but for sharing lunar craters on social media, it works remarkably well.
The integrated red LED flashlight in the mount base is a small but thoughtful feature that illuminates your accessory tray without ruining your night vision. The focus micrometer lets you note and return to specific focus positions, which is genuinely useful when switching between eyepieces.
Who Should Buy This Telescope
The Inspire 100AZ is for families, kids, and casual backyard astronomers who want a telescope that is genuinely easy to set up and use. If you want to look at the moon, planets, and bright star clusters without a steep learning curve, this scope delivers that experience at a reasonable price.
It is also the best choice on this list for someone who wants a dual-purpose scope for both daytime terrestrial viewing and nighttime astronomy. The erect image optics and lightweight design make it as useful for birdwatching as for stargazing.
What to Know Before You Buy
The alt-azimuth mount is lightweight, which means it can be wobbly when you touch the focuser at high magnification. This is the trade-off for the 12.4-pound total weight that makes the scope so portable. The included Kellner eyepieces are functional but basic, and upgrading to better eyepieces will improve your views noticeably.
The 100mm achromatic refractor is best suited for the moon, planets, and bright deep-sky objects like the Orion Nebula and Pleiades. Faint galaxies and nebulae will be challenging from light-polluted skies. This is a beginner scope, not a deep-sky astrophotography instrument.
How to Choose the Best Astrophotography Telescope?
Choosing the right astrophotography telescope comes down to understanding a few key concepts and then matching them to your budget, your camera, and the types of objects you want to photograph. I will break down the most important factors based on years of trial and error, including mistakes I made so you do not have to repeat them.
Telescope Types: Refractor vs Newtonian vs SCT vs Smart
The optical design of your telescope determines what it is best at imaging. There is no single best design for everything, which is why this list includes telescopes of every type.
Refractors use lenses to gather and focus light. Apochromatic and ED refractors are the most popular choice for deep-sky astrophotography because they produce sharp, color-accurate stars across a wide field with no central obstruction. They require little to no maintenance, no collimation, and they cool down quickly. The trade-off is that large apochromatic refractors become very expensive very quickly as aperture increases. The SVBONY SV503 102mm in this guide is an excellent example of an ED refractor that delivers apochromatic-level performance at a fraction of the cost of premium brands.
Newtonian reflectors use a primary mirror at the back of the tube and a secondary mirror to direct light to the focuser. They offer the most aperture per dollar of any telescope design, making them ideal for astrophotographers on a budget. The trade-off is that fast Newtonians (f/4 to f/5) require a coma corrector to produce sharp stars across the field, and they need periodic collimation. The MEEZAA 150EQ and Celestron StarSense DX 130AZ are both Newtonian designs.
Schmidt-Cassegrain telescopes (SCTs) use a combination of lenses and mirrors to fold a long focal length into a compact tube. They are ideal for planetary imaging and for astrophotographers who want one scope that can do both visual observing and imaging. The Celestron NexStar 8SE and 6SE are the most popular SCTs on the market, and their long focal lengths make them excellent for planets, the moon, and smaller deep-sky objects.
Smart telescopes integrate the optical tube, camera, mount, and processing software into a single app-controlled device. They are designed to make astrophotography as simple as possible, with automatic target acquisition, tracking, and image stacking. The ZWO Seestar S30 Pro and DWARFLAB Dwarf 3 are the best examples in this guide, and they are transforming how beginners enter the hobby.
Aperture and Light Gathering Power
Aperture is the diameter of the telescope’s main lens or mirror, and it is the single most important specification for visual astronomy. A larger aperture gathers more light, which means you can see and photograph fainter objects. Every time you double the aperture, you gather four times as much light.
For astrophotography, aperture matters but it is not the only factor. The focal ratio (discussed below) determines how quickly your camera sensor collects light from extended objects like nebulae and galaxies. A small aperture with a fast focal ratio can produce stunning wide-field images of large nebulae, while a large aperture with a slow focal ratio is better suited for small, dim targets like distant galaxies.
For beginners wondering whether a 70mm or 80mm telescope is better, the answer is that the difference is incremental. An 80mm scope gathers about 30 percent more light than a 70mm scope, which is noticeable but not dramatic. What matters far more is the focal ratio, the mount quality, and the optical design.
Focal Length and Focal Ratio Explained
Focal length determines the magnification and field of view of your telescope. A short focal length (200mm to 600mm) gives you a wide field of view, ideal for large nebulae, star clusters, and Milky Way panoramas. A long focal length (1000mm to 3000mm) gives you a narrow field of view with high magnification, ideal for planets, small planetary nebulae, and distant galaxies.
Focal ratio is the focal length divided by the aperture, expressed as f/number. It tells you how fast the telescope collects light for photography. A fast telescope (f/4 to f/5) gathers light quickly, allowing shorter exposure times, which is ideal for deep-sky astrophotography. A slow telescope (f/8 to f/10) gathers light more slowly, requiring longer exposures, but typically produces sharper stars across the field with less optical aberration.
For deep-sky astrophotography of nebulae and galaxies, I generally recommend a focal ratio between f/4 and f/7. This range gives you a good balance between light-gathering speed and optical quality. The SVBONY SV503 at f/7 and the MEEZAA 150EQ at f/4.3 both fall in this ideal range.
For planetary imaging, a long focal length and slow focal ratio are actually desirable because you want maximum magnification and you are typically imaging bright objects. The Celestron NexStar 8SE at f/10 and 2032mm focal length is purpose-built for this use case.
The Mount Matters More Than the Telescope
If there is one piece of advice I want every beginning astrophotographer to take from this guide, it is this: invest in your mount before you invest in an expensive optical tube. A mediocre telescope on a great mount will produce better images than a great telescope on a mediocre mount, every single time.
For deep-sky astrophotography, you need an equatorial mount that tracks the rotation of the sky. German equatorial mounts like the Sky-Watcher EQ6-R Pro are the gold standard because they track along a single axis (right ascension), which eliminates field rotation in long exposures. The EQ6-R Pro’s 44-pound payload accommodates most serious imaging setups, and its belt-driven motors provide the tracking accuracy needed for round stars in long exposures.
Alt-azimuth mounts, including the fork mounts on the Celestron NexStar scopes, are fine for visual observing and planetary imaging but introduce field rotation for deep-sky exposures longer than about 30 seconds. Smart telescopes like the ZWO Seestar and DWARFLAB Dwarf series work around this by using live stacking with field de-rotation algorithms.
If you are on a tight budget, start with a star tracker like the Sky-Watcher Star Adventurer paired with a camera lens or small refractor. This combination produces excellent wide-field results for a fraction of the cost of a full equatorial mount setup.
Budget Tiers: What to Expect at Each Price Point
Under $400, you are looking at entry-level smart telescopes like the DWARFLAB Dwarf Mini, beginner Newtonians like the MEEZAA 150EQ, or basic refractors like the Celestron Inspire 100AZ. These are great for learning the basics and for casual imaging, but they have limitations in aperture, tracking, or optical quality.
Between $400 and $1,000, you get into serious intermediate territory. The SVBONY SV503 102mm ED refractor and the Celestron StarSense DX 130AZ both fall in this range, as do the ZWO Seestar S30 Pro and DWARFLAB Dwarf 3 smart scopes. At this level, you are getting quality optics, capable tracking, or advanced smart features that produce genuinely impressive astrophotos.
Between $1,000 and $2,500, you find Schmidt-Cassegrains like the Celestron NexStar 6SE and 8SE, which offer serious aperture and computerized GoTo capability. This is also where dedicated equatorial mounts like the Sky-Watcher EQ6-R Pro live, and investing in a quality mount at this level will transform your imaging results.
Above $2,500, you enter the realm of premium apochromatic refractors, high-end mounts, and dedicated astronomy cameras. This is where serious deep-sky astrophotographers eventually land, but it is not where you need to start. Some of the most impressive images I have seen were taken with equipment costing under $1,000.
Beginner Mistakes to Avoid
The most common mistake I see beginners make is buying a long focal length telescope as their first scope. A 2000mm focal length SCT on a wobbly mount is a recipe for frustration, because every vibration and tracking error is magnified. Start with a short focal length scope (400mm to 700mm) that gives you a wide, forgiving field of view.
The second most common mistake is overspending on the telescope and underspending on the mount. I have seen too many beginners buy a nice optical tube and put it on the cheapest mount they could find, only to discover that their images are plagued by trailed stars and vibration. Budget at least as much for your mount as you do for your telescope.
The third mistake is expecting telescope images to look like Hubble photos on the first night. Astrophotography is a skill that takes practice. Your first images will be noisy, slightly out of focus, and possibly trailed. That is normal. The hobby rewards patience and persistence, and the satisfaction of capturing your first clean image of a galaxy or nebula is worth every frustrating moment.
Frequently Asked Questions
Which telescope is best for astrophotography?
The best telescope for astrophotography depends on your targets and experience level. For beginners, the ZWO Seestar S30 Pro smart telescope offers one-tap imaging with automatic tracking and stacking. For intermediate imagers, the SVBONY SV503 102mm ED refractor on a German equatorial mount provides excellent deep-sky results. For planetary imaging, the Celestron NexStar 8SE Schmidt-Cassegrain delivers the aperture and focal length needed for detailed planet photos.
What is the best all in one telescope for astrophotography?
The best all-in-one telescope for astrophotography is a smart telescope like the ZWO Seestar S30 Pro or the DWARFLAB Dwarf 3. These devices integrate the optical tube, camera, tracking mount, and image processing into a single app-controlled unit, eliminating the need to buy and configure separate components. They handle target acquisition, tracking, and live stacking automatically.
Is a 70mm or 80mm telescope better?
An 80mm telescope gathers about 30 percent more light than a 70mm telescope, which provides a modest improvement in image brightness and detail. However, the difference is incremental and matters far less than the focal ratio, mount quality, and optical design. For astrophotography, a fast focal ratio and a solid tracking mount will impact your results more than a 10mm aperture difference.
What telescope would I need to see Saturn’s rings?
Almost any telescope with 60mm or more aperture can show Saturn’s rings visually. For clear views of the Cassini Division (the gap between the rings), a 100mm refractor or 150mm reflector is recommended. For astrophotography of Saturn with real surface detail, you want a telescope with at least 1000mm of focal length, such as a Schmidt-Cassegrain like the Celestron NexStar 6SE or 8SE.
Can I use my DSLR with any telescope for astrophotography?
You can attach a DSLR to most telescopes using a T-ring adapter that matches your camera mount, but compatibility depends on backfocus requirements and focal length. Refractors and SCTs generally work well with DSLRs. Newtonian reflectors may need a coma corrector and may require modification for DSLR focus travel. Smart telescopes have built-in cameras and cannot accept external DSLRs. Always check backfocus specifications before purchasing.
Final Thoughts on the Best Astrophotography Telescopes
The best astrophotography telescopes in 2026 span a wide range of designs, prices, and use cases, and the right choice depends entirely on where you are in your astrophotography journey. For absolute beginners who want stunning results without a learning curve, the ZWO Seestar S30 Pro removes every barrier to entry with its one-tap smart imaging and built-in processing. For intermediate imagers ready to take control of their setup, the SVBONY SV503 102mm ED refractor paired with a quality equatorial mount delivers outstanding deep-sky performance at a price that leaves room in the budget for accessories.
For planetary enthusiasts and those who want serious aperture in a portable package, the Celestron NexStar 8SE remains the benchmark Schmidt-Cassegrain for astrophotography. And for anyone ready to commit to serious deep-sky imaging, the Sky-Watcher EQ6-R Pro mount is the foundation that will support years of imaging growth.
My advice is to start with the telescope and mount that match your current skill level and budget, learn the fundamentals of polar alignment, focusing, and image processing, and then upgrade incrementally as your skills grow. Astrophotography is a rewarding journey, and the right equipment makes all the difference between frustration and those magical moments when a faint galaxy or nebula first appears on your screen.