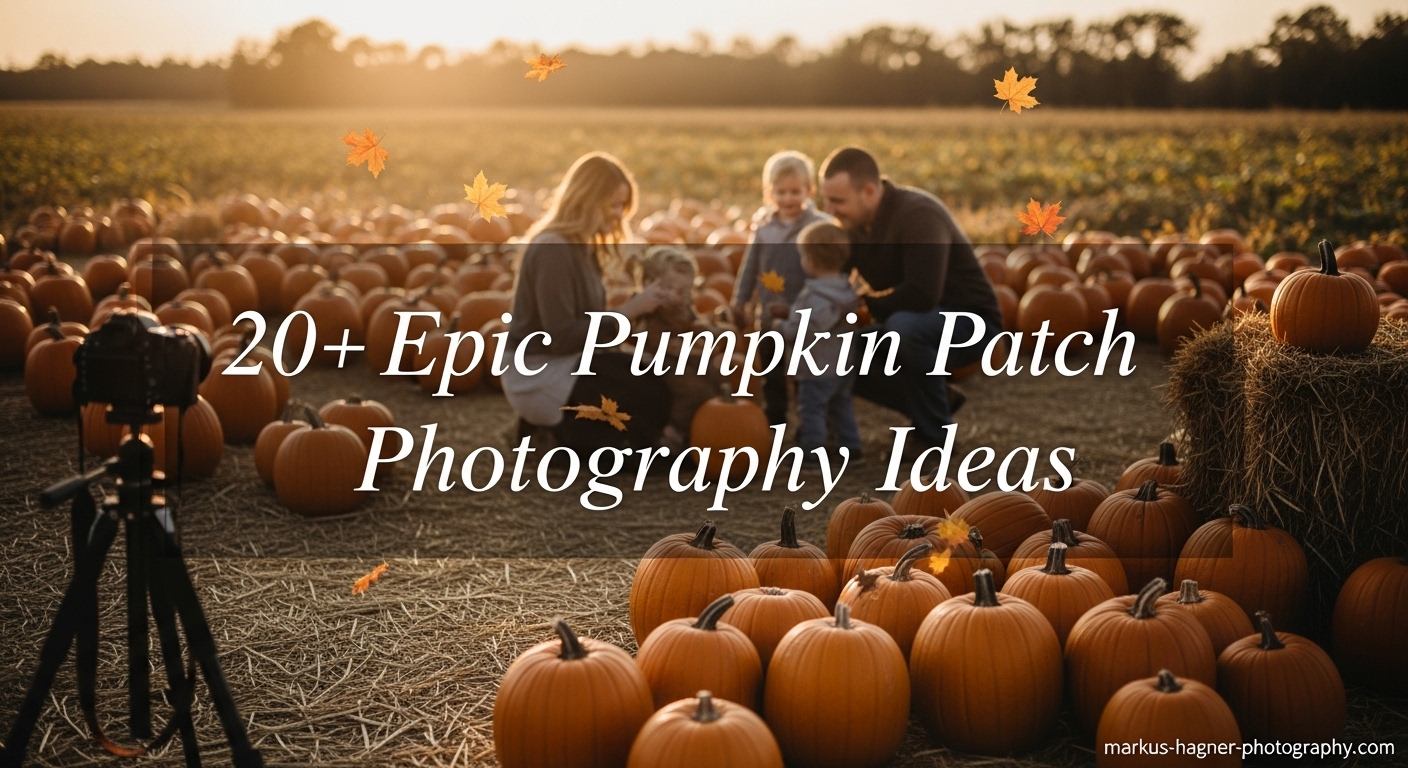
There’s something magical about pumpkin patch photography that just screams fall perfection, isn’t there? I’ve spent countless autumn afternoons wandering through pumpkin fields, camera in hand, capturing those precious moments that families will treasure for years to come. As a professional photographer who’s shot at dozens of pumpkin patches across the country, I’ve discovered that the difference between good and great pumpkin patch photos often comes down to having the right ideas and techniques in your back pocket.
When I first started shooting pumpkin patch sessions, I’ll admit I was overwhelmed. Between the harsh midday sun, the chaos of excited kids, and the pressure to get that “perfect” shot, I nearly gave up. But over the years, I’ve developed a foolproof system that consistently delivers stunning results, and today I’m sharing all my secrets with you.
Whether you’re a parent wanting to capture your family’s fall memories, a couple looking for romantic autumn photos, or even a budding photographer wanting to level up your skills, this guide has everything you need. I’ve compiled over 20 creative pumpkin patch photography ideas that I’ve personally tested and perfected, along with pro tips that will make your photos stand out from the sea of basic pumpkin patch shots flooding social media each fall.
Trust me, by the time you finish reading this, you’ll have more ideas than you know what to do with, and your pumpkin patch photos will be the envy of everyone in your feed. Let’s dive in!
Why Pumpkin Patch Photography is Special?
Before we jump into the specific ideas, let me share why I believe pumpkin patch photography holds such a special place in our hearts (and why it’s worth getting right). I discovered early in my career that pumpkin patches offer this unique combination of vibrant colors, natural textures, and authentic emotions that you just can’t replicate anywhere else.
Think about it – where else can you find that perfect orange glow of pumpkins against a crisp blue autumn sky? Or the way the late afternoon sun filters through corn stalks, creating those dreamy golden hour shots that make everyone look like they’re walking through a painting? I’ve shot in studios, in urban settings, and in other outdoor locations, but nothing quite compares to the organic magic of a pumpkin patch.
What I love most is how pumpkin patch photography captures genuine joy. Unlike posed studio sessions, pumpkin patch photos show families and couples in their element – laughing, exploring, and creating real memories together. I’ve found that my favorite shots are never the perfectly posed ones, but rather those candid moments when a child discovers the “perfect” pumpkin or when a couple shares an unexpected laugh while trying to lift a giant gourd together.
Plus, let’s be honest – pumpkin patch photos have incredible staying power. I’ve had clients come back to me years later, still cherishing those pumpkin patch photos and asking me to recreate the magic with their growing families. There’s something timeless about autumn imagery that never goes out of style, making these photos some of the most valuable you’ll ever take.
Essential Gear for Pumpkin Patch Photography
Now, I’m not going to lie – having the right gear can make a huge difference in your pumpkin patch photography results. But before you think you need to run out and buy thousands of dollars worth of equipment, let me share what I actually use on my shoots (and what you absolutely need versus what’s nice to have).
Camera Body
I’ve shot pumpkin patches with everything from my smartphone to professional DSLRs, and honestly, you can get great results with any modern camera. That said, I typically bring my Canon 5D Mark IV because it handles the dynamic range of bright skies and dark pumpkins exceptionally well. If you’re using a smartphone, don’t worry – the iPhone 13 Pro and newer models, plus most Android flagships, can produce stunning results if you know what you’re doing.
Lenses
This is where I see most people make mistakes. You don’t need a telephoto lens for pumpkin patch photography – in fact, I find they make the shots feel too detached. My go-to lens is a 50mm f/1.8 (often called the “nifty fifty”) because it’s versatile, lightweight, and creates beautiful background blur. For wider shots showing the entire pumpkin patch scene, I’ll sometimes switch to a 35mm lens.
If you’re shooting with a smartphone, use the portrait mode for those creamy backgrounds, but don’t be afraid to switch to the regular camera for wider environmental shots.
Must-Have Accessories
These are the items I never leave home without when heading to a pumpkin patch shoot:
- Reflector: A small 5-in-1 reflector is my secret weapon for bouncing light into shadows, especially during harsh midday sun
- Portable stool: Getting low angles is crucial (more on this later), and having a small stool saves your back
- Extra batteries: Cold weather drains batteries faster than you’d expect
- Lens cleaning cloth: Pumpkin patches are dusty, and you’ll be cleaning your lens constantly
- Small blanket or backdrop: Perfect for those sitting shots and helps contain little ones
- Props basket: I’ll fill this with mini pumpkins, fall leaves, and other seasonal items for variety
Optional But Helpful Gear
If you really want to elevate your pumpkin patch photography game, consider adding:
- External flash: Not for direct lighting, but for bouncing off reflectors or ceilings to fill in shadows
- Tripod: Essential for golden hour shots when light gets low, and for group photos where you want to be in the picture too
- Remote shutter: Makes self-timer shots much easier and more natural
- Lens hood: Helps with lens flare from those bright autumn skies
Remember, the best camera is the one you have with you. I’ve taken some of my favorite pumpkin patch photos with just my iPhone, so don’t let gear hold you back from getting started!
Timing is Everything: Best Times for Pumpkin Patch Photography
I can’t stress this enough – timing will make or break your pumpkin patch photography session. I’ve learned this lesson the hard way, showing up at noon only to fight harsh shadows and squinting subjects. Let me share what I’ve discovered about the best times to shoot.
The Golden Hour Magic
Without a doubt, my favorite time for pumpkin patch photography is during the golden hour – that magical period shortly after sunrise or before sunset when the light is soft, warm, and incredibly flattering. I’ve found that the hour before sunset (approximately 4:30-5:30 PM in most areas during fall) is absolutely perfect for pumpkin patch photography.
During golden hour, the low-angle sunlight creates this beautiful rim light around your subjects, making them practically glow against the pumpkin-filled background. The shadows are long and soft, adding depth to your images without the harsh contrast you get midday. I’ve captured some of my most stunning pumpkin patch photos during this time, and clients are always amazed at how the light seems to make everything look more magical.
Early Morning Advantages
While sunset gets all the glory, don’t overlook the early morning hours for pumpkin patch photography. I’ve discovered that showing up right when the pumpkin patch opens (usually around 9-10 AM) has some distinct advantages:
- Fewer crowds: You’ll often have the place to yourself, meaning no random people in your backgrounds
- Fresh pumpkins: The pumpkins haven’t been handled by hundreds of visitors yet
- Crisp air: Morning light has a different quality – it’s cooler and cleaner, which can create a completely different mood than sunset shots
- Energetic kids: If you’re photographing children, they’re usually at their best in the morning before fatigue sets in
Midday Challenges and Solutions
Sometimes, you just can’t avoid shooting during midday. I’ve had plenty of sessions where schedules only allowed for noon or early afternoon shoots. While this isn’t ideal, I’ve developed some workarounds:
- Find shade: Look for areas with trees or structures that create natural shade
- Use your reflector: Bounce light into the shadows to reduce contrast
- Embrace the harsh light: Sometimes, the high-contrast look can work if you’re going for a more dramatic, editorial feel
- Shoot with the sun behind your subjects: This creates backlighting that can be beautiful, though you’ll need to expose for the faces and let the background blow out a bit
Weather Considerations
I’ve shot pumpkin patches in every weather condition imaginable, and each brings its own opportunities:
- Overcast days: These are actually my secret weapon! The clouds act as a natural diffuser, creating soft, even light that’s incredibly flattering
- Light rain: Don’t cancel! Rain can make pumpkins look vibrant and fresh, and the wet ground can create beautiful reflections
- Windy days: Great for capturing movement in hair and clothing, though you’ll need faster shutter speeds
- Cold days: The cold can actually help – people tend to snuggle closer, creating more intimate shots
My advice? Check the weather forecast, but don’t let less-than-perfect conditions stop you. Some of my most unique pumpkin patch photos came from “imperfect” weather days!
20+ Creative Pumpkin Patch Photography Ideas
Now for the main event – the creative ideas that will make your pumpkin patch photography stand out. I’ve tested and perfected each of these concepts over years of shooting, and I guarantee you’ll find something here that works for your situation.
1. The Classic Pumpkin Patch Family Portrait
Let’s start with the foundation of pumpkin patch photography – the classic family portrait. But I’m not talking about the stiff, everyone-look-at-the-camera-and-smile shot. I’ve discovered that the best family portraits happen when you give your subjects something to do together.
How I do it: I’ll have families walk through the pumpkin patch holding hands, or I’ll ask them to find their favorite pumpkin together. The natural interaction that follows is pure gold for photography. I’ve found that giving specific prompts like “Tell each other why you love fall” or “Show me your best pumpkin patch dance move” results in genuine laughter and connection that posed shots just can’t capture.
Pro tip: Get low! I’ll often lie on the ground to shoot up at my subjects, which makes the pumpkins in the foreground look larger than life and creates a more dramatic perspective.
2. Pumpkin Head Portraits
This is one of my all-time favorite creative ideas, and it never fails to get laughs. I discovered this technique when I was looking for ways to incorporate the pumpkins themselves into the portraits in a fun, unexpected way.
How I do it: Have each person pick a pumpkin that’s roughly the size of their head, then hold it up in front of their face. The result is this quirky, mysterious portrait where the pumpkin becomes the face. I’ve done this with families, couples, and even pets, and it always creates memorable, share-worthy images.
Pro tip: For an extra creative twist, have people draw faces on their pumpkins first, or use different sized pumpkins to create visual interest and humor.
3. The Corn Maze Adventure
If your pumpkin patch has a corn maze (and most good ones do), you’ve got a goldmine of photographic opportunities. I’ve spent entire sessions just working within corn mazes, and the variety of shots you can get is incredible.
How I do it: I’ll have my subjects enter the maze and then photograph them from different angles – peeking around corners, walking down the paths, or even getting lost (pretend or real!). One of my favorite techniques is to shoot from above, looking down on the maze with my subjects small in the frame, which really shows the scale and adventure of the experience.
Pro tip: Corn mazes are perfect for capturing candid moments of decision-making and discovery. I’ll often give my subjects a challenge like “Find your way to the center without using the map” and document the process.
4. Wheelbarrow Wonders
I can’t tell you how many times I’ve seen wheelbarrows at pumpkin patches and thought they were just for transporting pumpkins. Then I discovered they’re actually incredible photography props!
How I do it: Fill a wheelbarrow with pumpkins and have your subjects interact with it in different ways. Kids love sitting in them, couples can push each other around, and families can gather around it as if it’s a centerpiece. I’ve even had couples stand in wheelbarrows together for a fun, playful shot.
Pro tip: The wheelbarrow creates natural leading lines in your composition. Use it to draw the viewer’s eye to your subjects, and don’t be afraid to get creative with angles – shoot from above looking down into the wheelbarrow, or from below looking up at your subjects in it.
5. Golden Hour Silhouettes
This is one of those techniques that looks incredibly professional but is actually quite simple to execute. I discovered the power of silhouettes during a particularly stunning sunset at a pumpkin patch, and now I include them in almost every session.
How I do it: Position your subjects between you and the setting sun, then expose for the sky rather than your subjects. This will create beautiful silhouettes against the colorful sunset sky. I love having families hold hands, couples kiss, or kids jump for these shots – the shapes tell the story without needing facial details.
Pro tip: Look for interesting shapes and poses. Simple silhouettes work best, so avoid complex poses that might become unrecognizable when reduced to outline form.
6. The Pumpkin Patch Process Series
One thing I’ve learned from years of pumpkin patch photography is that the journey is often more beautiful than the destination. That’s why I started creating “process series” that tell the complete story of the pumpkin patch experience.
How I do it: Instead of just focusing on the final “perfect pumpkin” shot, I document the entire process – arriving at the patch, exploring the fields, selecting pumpkins, trying to lift them, and finally loading them into the car. When presented together, these images create a narrative that’s much more meaningful than single standalone shots.
Pro tip: Use different focal lengths throughout the series – wide shots to show the environment, medium shots for the action, and close-ups for the emotional moments and details.
7. Hay Bale Heights
Hay bales are the unsung heroes of pumpkin patch photography. I’ve used them as props, backgrounds, and even as natural risers to create different levels in group shots.
How I do it: Have your subjects sit on, stand next to, or even jump off hay bales. I love the contrast between the rough texture of the hay and the softness of people’s clothing. For families, I’ll arrange them at different heights on and around hay bales to create visual interest and better composition.
Pro tip: Hay bales are perfect for creating that “fall feeling” in your photos. The golden color complements pumpkins beautifully, and the texture adds depth to your images.
8. The Tiny Pumpkin Detail Shot
While grand, wide shots are important, I’ve discovered that sometimes the most powerful images are the small, intimate details. That’s why I always make time for tiny pumpkin detail shots in every pumpkin patch session.
How I do it: Look for the smallest, most perfect mini pumpkins and photograph them up close. I love capturing the texture of the stem, the variations in color, and the unique shapes. These shots work great as detail images in albums or as standalone artistic pieces.
Pro tip: Use a wide aperture (low f-stop number) to create that beautiful background blur that makes your tiny pumpkin stand out. If you’re shooting with a smartphone, use portrait mode and get as close as the camera will allow.
9. Action Shots in the Patch
Static portraits are nice, but I’ve found that action shots really bring pumpkin patch photography to life. There’s something about capturing movement that makes images feel more dynamic and authentic.
How I do it: I’ll have kids run through the pumpkin rows, couples spin around holding hands, or families toss leaves in the air. The key is to use a fast shutter speed to freeze the motion (or a slow one to create motion blur if that’s the effect you’re going for).
Pro tip: For the best action shots, use burst mode on your camera or smartphone. This increases your chances of capturing that perfect moment mid-action. I’ve saved many a shot by having multiple frames to choose from!
10. The Overhead Pumpkin Patch View
This technique completely changed my pumpkin patch photography game. I discovered it when I climbed onto a hay bale to get a better view, and I was amazed at how different everything looked from above.
How I do it: Get above your subjects and shoot straight down. This creates a unique perspective that shows off the patterns of the pumpkin patch and the arrangement of your subjects within it. I love using this for families lying on the ground in a circle around a central pumpkin, or for couples holding hands in a sea of orange.
Pro tip: If you can’t find a natural high point, bring a small step stool or ladder. Just be sure it’s stable and safe – safety always comes before the shot!
11. Pumpkin Carving Preparation
Most people think of pumpkin carving as a separate activity from pumpkin patch photography, but I’ve found that combining them creates incredible storytelling opportunities.
How I do it: Document the selection process specifically for carving pumpkins. I’ll have my subjects look for pumpkins with good carving potential – flat bottoms, interesting shapes, smooth surfaces. Then I’ll capture them examining their chosen pumpkins, imagining what they’ll become.
Pro tip: These shots work great as a “before” series that you can later pair with photos of the actual carving process and the final illuminated jack-o’-lanterns.
12. The Corn Box Experience
Many pumpkin patches now have corn boxes (like sand boxes but filled with corn kernels), and they are absolute gold for photography, especially with children.
How I do it: Let kids play naturally in the corn while you capture their reactions and interactions. I love shooting from above looking down into the corn box, as it creates this contained, intimate scene that’s full of joy and discovery.
Pro tip: Corn boxes are perfect for capturing authentic childhood joy. Kids lose themselves in the sensory experience, which means you get genuine, unposed expressions that are impossible to replicate in traditional portraits.
13. Seasonal Fashion Statements
I’ve discovered that what people wear to the pumpkin patch can make or break the photos. That’s why I always advise my clients on their wardrobe choices and incorporate fashion elements into the shoot.
How I do it: I’ll have my subjects bring outfits in autumnal colors that complement the pumpkin patch environment – think rich oranges, deep reds, warm browns, and forest greens. Then I’ll capture detail shots of scarves, boots, and other seasonal accessories before moving on to full portraits.
Pro tip: Avoid busy patterns and logos, which can be distracting in photos. Solid colors and subtle textures work best, and layers add visual interest while keeping people comfortable in the changing fall weather.
14. The Giant Pumpkin Challenge
Every good pumpkin patch has at least one enormous pumpkin that seems impossible to lift. I’ve made it a point to incorporate these giant pumpkins into my sessions because they create such fun, interactive moments.
How I do it: I’ll have my subjects attempt to lift or move the giant pumpkin, capturing their struggles, teamwork, and eventual triumph (or hilarious failure!). These shots are always full of genuine emotion and make for great storytelling images.
Pro tip: The giant pumpkin challenge is perfect for showing relationships and dynamics. Watch how couples work together, how siblings compete, and how parents encourage their children – these interactions are pure photographic gold.
15. Pumpkin Patch Pathways
The pathways between pumpkin rows create natural leading lines that I love to use in my compositions. I discovered this technique when I was looking for ways to add depth and dimension to my pumpkin patch photos.
How I do it: Position your subjects at the end of a pumpkin row and shoot down the pathway toward them. The lines created by the pumpkin rows naturally draw the viewer’s eye to your subjects, creating a sense of depth and journey in the image.
Pro tip: This technique works especially well during golden hour when the low sun creates long shadows that emphasize the pathways and add even more depth to your images.
16. The Cozy Blanket Session
I started bringing blankets to pumpkin patch shoots as a practical measure – to keep kids clean and comfortable. But I quickly discovered they make incredible photography props.
How I do it: Spread a cozy, textured blanket in an area with good pumpkins and have your subjects sit or lie on it. I love using plaid or knitted blankets in autumnal colors, as they add warmth and texture to the images while keeping everyone comfortable.
Pro tip: Blankets are perfect for creating intimate, close-knit family shots. They naturally bring people together and create a sense of coziness that’s perfect for fall photography.
17. Fall Foliage Framing
Many pumpkin patches are surrounded by beautiful fall foliage, and I’ve learned to use these natural frames to enhance my compositions.
How I do it: Position your subjects so that they’re framed by colorful autumn leaves, tree branches, or other natural elements. This technique adds depth to your images and creates a sense of place that really emphasizes the fall season.
Pro tip: Look for natural frames at different heights and angles. Sometimes the best frames are low to the ground, created by fallen leaves or low-hanging branches.
18. The Pumpkin Stack
This is a simple but effective idea I developed when I wanted to create visual interest in otherwise flat pumpkin patch scenes.
How I do it: Have your subjects create a tower or stack of pumpkins, then photograph them interacting with their creation. Kids love stacking pumpkins, and couples can create heart-shaped arrangements or other meaningful designs.
Pro tip: Vary the sizes and colors of the pumpkins in the stack for maximum visual interest. The contrast between different pumpkin shapes and colors can create really striking compositions.
19. Sunset Reflections
If there’s any water near your pumpkin patch (even just puddles from recent rain), you have an incredible opportunity for reflection shots that I’ve found to be absolutely stunning.
How I do it: Look for surfaces that can create reflections – puddles, ponds, or even the shiny surfaces of the pumpkins themselves. Position your subjects so that their reflection is visible, then shoot from a low angle to capture both the subject and their reflection.
Pro tip: Reflection shots work best during golden hour when the warm, directional light creates beautiful, clear reflections. The combination of golden light and reflections can create almost magical images.
20. The Final Harvest Shot
I always end my pumpkin patch sessions with what I call the “final harvest shot” – a photo that captures the essence of the day and the bounty of the experience.
How I do it: Have your subjects gather all their chosen pumpkins together and pose with their harvest. This could be a family holding their pumpkins, a couple sitting among their selection, or kids proudly displaying their finds. This shot serves as a beautiful conclusion to the pumpkin patch story.
Pro tip: For extra impact, shoot this final harvest shot during the last moments of golden hour, when the light is most beautiful and the day is winding down. The combination of warm light and the satisfaction of a successful pumpkin hunt creates pure magic.
Advanced Photography Techniques for Pumpkin Patches
Now that we’ve covered the creative ideas, let me share some advanced techniques I’ve developed that will take your pumpkin patch photography to the next level. These are the pro secrets that separate good pumpkin patch photos from great ones.
Mastering Depth of Field
One of the most powerful tools in photography is controlling depth of field – how much of your image is in sharp focus versus blurred. I’ve found that mastering this technique is crucial for creating professional-looking pumpkin patch photos.
How I do it: I typically shoot with a wide aperture (f/1.8 to f/2.8) to create that beautiful background blur that makes my subjects pop against the pumpkin patch background. However, I’ll stop down to f/5.6 or f/8 when I want both the subject and the pumpkins around them to be sharp.
Pro tip: Don’t just rely on your camera’s automatic modes. Learn to shoot in aperture priority or manual mode so you can control depth of field intentionally. This single skill will dramatically improve your pumpkin patch photography.
Using Natural Light Modifiers
I rarely bring artificial lighting to pumpkin patch shoots because I’ve learned to use the natural environment to modify light. This approach creates more organic, natural-looking images.
How I do it: I’ll position my subjects under trees or near structures to create natural shade, or I’ll use the sides of buildings or corn stalks as natural reflectors to bounce light into shadows. Even something as simple as having a subject hold a white pumpkin can act as a natural reflector!
Pro tip: Pay attention to how light falls in different areas of the pumpkin patch. Some spots will have beautiful, soft light while others might be harsh and contrasty. Scout the location first and plan your shots around the best natural light conditions.
Creating Movement and Flow
Static images are fine, but I’ve found that incorporating movement and flow into pumpkin patch photography creates much more dynamic and engaging images.
How I do it: I’ll use slower shutter speeds (1/30s or slower) to intentionally create motion blur in moving elements like falling leaves, spinning subjects, or walking figures. The key is to keep some elements sharp while allowing others to blur, creating a sense of motion.
Pro tip: For the best motion shots, use a tripod to keep your camera steady. This allows you to use slower shutter speeds without camera shake, ensuring that the parts of the image you want sharp remain crystal clear.
The Art of Candid Photography
While posed shots have their place, I’ve discovered that candid photography often captures the true magic of the pumpkin patch experience. These are the images that people treasure most because they show genuine emotion and authentic moments.
How I do it: I’ll often give my subjects an activity or task and then step back to observe and capture natural interactions. I might say “Go find the most unusual pumpkin” or “Show each other your favorite part of the pumpkin patch” and then document what happens naturally.
Pro tip: Use a longer lens if you have one – it allows you to capture candid moments from a distance without being intrusive. Even with a smartphone, you can use the zoom function (though be aware of quality loss) to maintain some distance while shooting candidly.
Post-Processing Magic
What many people don’t realize is that great pumpkin patch photos are often made in post-processing. I’ve developed a specific editing style that enhances the natural beauty of pumpkin patch images without making them look over-processed.
How I do it: I typically increase the warmth and saturation slightly to bring out the rich autumn colors, adjust the shadows to reveal detail in darker areas, and add a subtle vignette to draw attention to my subjects. I’m careful not to overdo it – the goal is to enhance, not transform.
Pro tip: Develop a consistent editing style for your pumpkin patch photos. This creates a cohesive look when images are viewed together, whether in an album, on social media, or in a portfolio.
Common Pumpkin Patch Photography Mistakes to Avoid
In my years of shooting pumpkin patches, I’ve made just about every mistake in the book. Let me share some common pitfalls so you can avoid them and get better results faster.
Shooting at the Wrong Time
I can’t tell you how many times I’ve arrived at a pumpkin patch at noon, only to fight harsh shadows and squinting subjects. The middle of the day is generally the worst time for pumpkin patch photography.
How to fix it: Plan your shoots for early morning or late afternoon when the light is softer and more flattering. If you must shoot midday, find shade or use a reflector to fill in shadows.
Ignoring the Background
I’ve ruined many great shots by not paying attention to what’s happening in the background. Nothing kills a beautiful pumpkin patch portrait faster than a random person walking through or a trash can in the corner of the frame.
How to fix it: Always scan the entire frame before pressing the shutter. Move your subjects or change your angle to eliminate distracting background elements. Sometimes just taking a step to the left or right can make all the difference.
Forgetting to Get Low
When I first started shooting pumpkin patches, I did everything from standing height. The results were okay, but they lacked the impact and drama that comes from different perspectives.
How to fix it: Get down low! I mean really low – sometimes I’m lying on the ground to get the perfect angle. Shooting from low to the ground makes pumpkins look more impressive and creates a more immersive, engaging perspective.
Over-Posing Subjects
Early in my career, I thought I needed to pose every shot perfectly. The result was stiff, unnatural images that lacked the authentic emotion that makes pumpkin patch photography special.
How to fix it: Give your subjects activities and prompts rather than specific poses. Let natural interactions happen, and be ready to capture those genuine moments of connection and joy.
Not Bringing the Right Gear
I’ve shown up to pumpkin patch shoots without essential gear more times than I’d like to admit. There’s nothing worse than realizing you forgot extra batteries when the cold weather drains them in an hour.
How to fix it: Make a checklist of essential gear and go through it before every shoot. At minimum, bring extra batteries, memory cards, a lens cleaning cloth, and a reflector. Better to have it and not need it than need it and not have it.
Pumpkin Patch Photography for Specific Groups
Different groups have different needs when it comes to pumpkin patch photography. Let me share my specialized approaches for various types of sessions.
Family Photography
Families are my most common pumpkin patch clients, and I’ve developed a specific approach that works wonders for getting authentic family interactions.
My approach: I start with wider environmental shots to show the family in the pumpkin patch setting, then move closer for more intimate portraits. I’ll often give the family a task like “Find a pumpkin that represents each family member” to encourage natural interaction.
Key tip: Focus on the connections between family members rather than just individual portraits. The relationships and interactions are what make family photography meaningful.
Couples Photography
Couples sessions at pumpkin patches are incredibly romantic and fun. I love the challenge of capturing both the playful and intimate sides of a relationship in this setting.
My approach: I balance posed romantic shots with playful, interactive images. I’ll have couples do things like carry pumpkins together, navigate the corn maze hand-in-hand, or even have a mini pumpkin carving contest.
Key tip: Encourage physical touch and connection between couples. Holding hands, embracing, and even playful interactions like pumpkin fights create images that show the couple’s unique dynamic.
Children’s Photography
Kids and pumpkin patches are a match made in heaven, but photographing children in this environment comes with its own set of challenges and opportunities.
My approach: I let children lead the way. I’ll follow them as they explore the pumpkin patch, capturing their genuine curiosity and excitement. I rarely ask children to pose – instead, I create situations where natural expressions and actions occur.
Key tip: Get down to the child’s level, both physically and emotionally. Understand what excites them about the pumpkin patch and capture that authentic joy rather than forcing them to perform for the camera.
Pet Photography
More and more clients want to include their pets in pumpkin patch sessions, and I’ve discovered that pets can add an incredible element of fun and unpredictability to the photos.
My approach: I treat pets as equal members of the family session. I’ll capture them interacting with the pumpkins, exploring the patch, and connecting with their human family members.
Key tip: Bring treats and toys to keep pets engaged and looking at the camera. Be patient and flexible – pets operate on their own schedule, and sometimes the best shots come when you least expect them.
Seasonal Considerations for Pumpkin Patch Photography
Pumpkin patch photography changes throughout the fall season, and I’ve learned to adapt my approach based on when in the season I’m shooting.
Early Season (September-Early October)
Early season pumpkin patches have their own unique charm that I’ve grown to love.
What to expect: Fewer crowds, fresher pumpkins, and often more greenery in the backgrounds. The light is still warm but not as golden as later in the season.
My approach: I focus on the freshness and newness of the season. I’ll capture the excitement of the first pumpkin patch visit and the beauty of early fall colors.
Peak Season (Mid-October)
This is when pumpkin patches are in full swing, and while it’s the busiest time, it’s also when I get some of my best shots.
What to expect: Maximum fall colors, peak pumpkin selection, and the most activities and attractions available at the patch.
My approach: I embrace the energy and activity of peak season. I’ll incorporate more of the patch’s attractions into my shots and work with the crowds rather than against them.
Late Season (Late October-Early November)
Late season pumpkin patch photography has a different, more rustic feel that I find incredibly appealing.
What to expect: Fewer perfect pumpkins but more character-filled ones, potentially weathered conditions, and often more dramatic lighting as the season changes.
My approach: I focus on the character and imperfections of late season pumpkins. I’ll look for pumpkins with interesting shapes, textures, and even some decay that adds to the autumnal atmosphere.
Equipment Recommendations by Budget
I know that not everyone has the same budget for photography equipment, so let me share my recommendations at different price points.
Budget-Friendly Options (Under $200)
You don’t need expensive gear to get great pumpkin patch photos. Here’s what I recommend for those on a tight budget:
- Smartphone: Modern smartphones have excellent cameras. Use portrait mode for background blur and edit with free apps like Snapseed or VSCO.
- Entry-level DSLR: Cameras like the Canon Rebel series or Nikon D3000 series can be found used for under $200 and offer more control than smartphones.
- 50mm f/1.8 lens: This is the best bang-for-your-buck lens you can buy. It’s typically under $150 new and creates beautiful background blur.
Mid-Range Options ($200-$1000)
If you have a bit more to invest, here’s what I recommend for significantly better results:
- Mid-range mirrorless camera: Cameras like the Sony a6000 series or Canon M50 offer excellent image quality and more advanced features.
- Additional lenses: Consider adding a wide-angle lens (24mm or 35mm) for environmental shots and a portrait lens (85mm) for beautiful compression.
- Accessories: Invest in a good reflector, a sturdy tripod, and extra batteries. These will significantly improve your results.
Professional Options ($1000+)
For those serious about pumpkin patch photography, here’s the professional gear I use:
- Full-frame camera: Bodies like the Canon 5D Mark IV or Sony a7 III offer exceptional image quality and low-light performance.
- Professional lenses: A set of prime lenses (24mm, 50mm, 85mm) gives you maximum versatility and image quality.
- Lighting equipment: While I rarely use artificial light at pumpkin patches, having a good speedlight and portable modifiers can be useful in certain situations.
Post-Processing Workflow for Pumpkin Patch Photos
Great pumpkin patch photos often come to life in post-processing. Let me share my complete workflow for editing these images.
Initial Culling and Selection
The first step in my workflow is selecting the best images from the shoot.
My process: I’ll import all images into Lightroom and use the flag system to mark picks. I’m ruthless in my selection – I’d rather have 20 incredible images than 100 mediocre ones. I look for sharp focus, good expression, and strong composition.
Basic Adjustments
Once I’ve selected my keepers, I’ll make basic adjustments to enhance the images.
My process: I start with exposure, making sure the image is properly lit. Then I adjust contrast to add depth, followed by highlights and shadows to recover detail. I’ll boost the vibrance slightly to bring out the autumn colors without making them look unnatural.
Color Grading
Color grading is where I really make pumpkin patch photos pop.
My process: I’ll warm up the temperature slightly to enhance that autumn feeling, then adjust individual colors using the HSL panel. I typically boost oranges and reds while slightly desaturating greens to make the pumpkins stand out.
Advanced Techniques
For my favorite images, I’ll apply more advanced techniques.
My process: I might add a subtle vignette to draw attention to the subject, use radial filters to brighten faces, or apply graduated filters to balance sky and foreground exposure. I’m careful to keep these adjustments subtle – the goal is enhancement, not transformation.
Export and Delivery
The final step is preparing the images for delivery.
My process: I export high-resolution versions for printing and web-optimized versions for online sharing. I typically sharpen images slightly for web display and add a subtle watermark for online use.
Frequently Asked Questions About Pumpkin Patch Photography
What’s the best time of day for pumpkin patch photography?
The absolute best time is during golden hour – the hour after sunrise or before sunset. The light is soft, warm, and incredibly flattering. If that’s not possible, overcast days provide beautiful, even light that’s perfect for pumpkin patch photography.
What should we wear to a pumpkin patch photoshoot?
I recommend wearing autumnal colors that complement the pumpkin patch environment – think rich oranges, deep reds, warm browns, and forest greens. Avoid busy patterns and logos, and consider layers for both style and comfort in changing fall weather.
How long does a typical pumpkin patch photography session last?
Most of my sessions last 1-2 hours. This gives us enough time to explore different areas of the patch, try various poses and ideas, and work with changing light conditions without anyone getting tired or overwhelmed.
Do you recommend props for pumpkin patch photography?
Absolutely! Props like blankets, baskets, and seasonal items can add visual interest and create interactive moments. Just don’t overdo it – props should enhance the scene, not distract from it.
What’s the best camera setting for pumpkin patch photography?
I typically shoot in aperture priority mode with a wide aperture (f/1.8-f/2.8) to create beautiful background blur. I’ll adjust my ISO based on the lighting conditions, keeping it as low as possible for the best image quality.
How do you deal with crowds at popular pumpkin patches?
I recommend arriving early in the morning or later in the afternoon to avoid crowds. If that’s not possible, I’ll use angles and compositions that minimize distracting background elements, or I’ll embrace the crowds and incorporate them into the storytelling aspect of the images.
What’s your favorite pumpkin patch photography tip?
My favorite tip is to get low – really low. Shooting from ground level creates a much more dramatic and engaging perspective, making the pumpkins look larger than life and creating a sense of immersion in the pumpkin patch environment.
How do you make pumpkin patch photos look professional?
The key is attention to detail – good lighting, thoughtful composition, and careful post-processing. But more than that, it’s about capturing genuine emotion and authentic moments rather than just technically perfect but soulless images.
Can you get good pumpkin patch photos with a smartphone?
Absolutely! Modern smartphones have excellent cameras. Use portrait mode for background blur, shoot during good lighting conditions, and edit with apps like Snapseed or VSCO to enhance your images. The most important thing is the moment you’re capturing, not the equipment you’re using.
What’s the biggest mistake people make in pumpkin patch photography?
The biggest mistake I see is shooting at the wrong time of day. Harsh midday sun creates unflattering shadows and makes people squint. Planning your shoot for good lighting conditions will dramatically improve your results more than any other single factor.
Conclusion: Creating Timeless Pumpkin Patch Memories
As we wrap up this comprehensive guide to pumpkin patch photography, I want to leave you with one final thought: the most important thing isn’t technical perfection or having the latest equipment – it’s capturing the genuine joy and connection that happens when people experience the magic of a pumpkin patch together.
I’ve been shooting pumpkin patches for over a decade now, and the images that clients treasure most are never the technically perfect ones. They’re the photos that capture a child’s wonder at discovering the perfect pumpkin, a couple’s laughter as they try to lift a giant gourd together, or a family’s quiet moment of connection surrounded by autumn’s beauty.
These are the images that become family heirlooms, that get pulled out year after year as fall approaches, that tell the story of who we are and what we love about this season. That’s the real magic of pumpkin patch photography – it’s not just about creating beautiful images, but about preserving moments of genuine human connection and joy.
So take these ideas, adapt them to your own style, and most importantly, have fun with them. Experiment, try new things, and don’t be afraid to make mistakes. Some of my best shots have come from happy accidents and unexpected moments.
Remember, every pumpkin patch is different, every family is unique, and every session offers new opportunities for creativity and connection. That’s what keeps me coming back year after year, and I hope it’s what will inspire you to pick up your camera and capture some pumpkin patch magic of your own.
Happy shooting, and may your autumn be filled with beautiful light, perfect pumpkins, and memories that last a lifetime