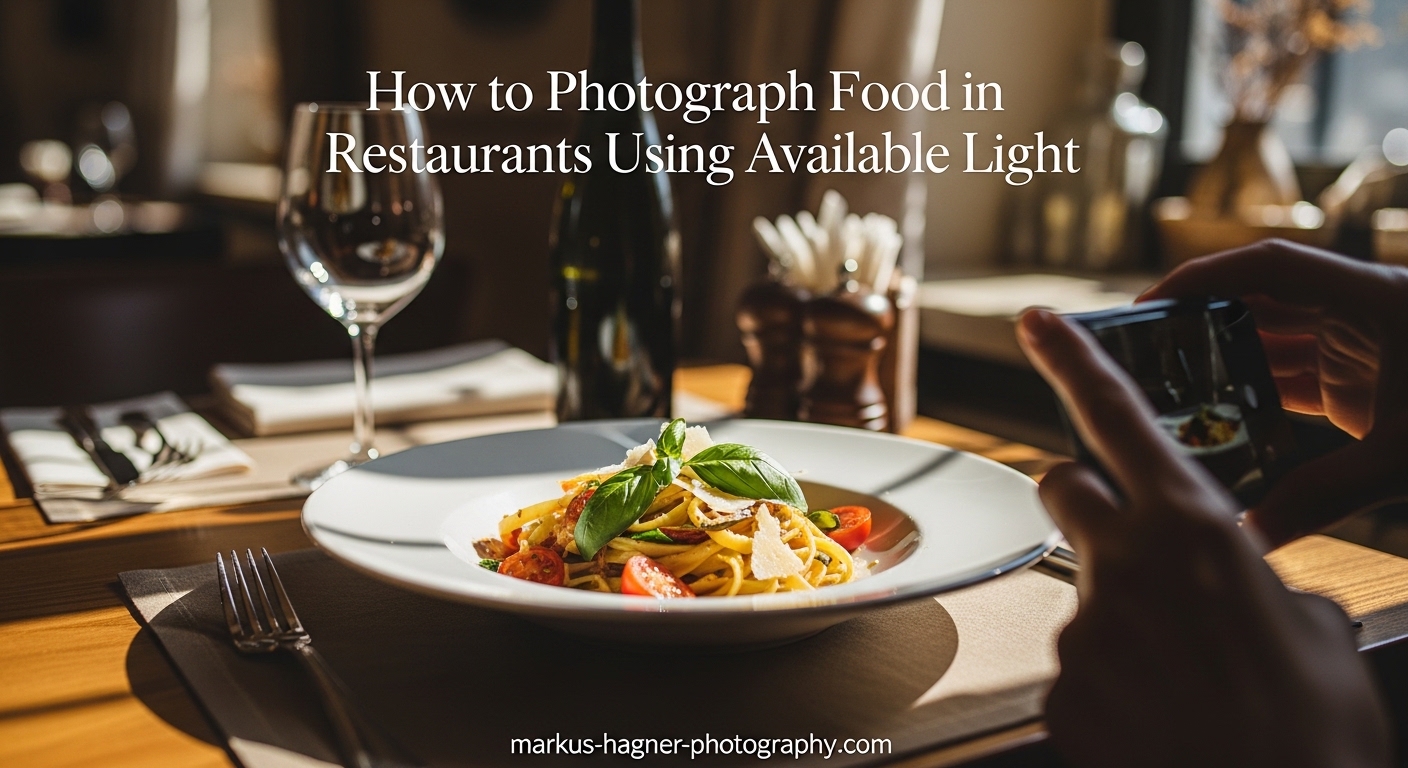
You just ordered a beautiful dish at a restaurant, and you want to capture it. But the lighting is dim, there is no flash allowed, and your photos keep coming out blurry or yellow. Learning how to photograph food in a restaurant using only available light transforms these frustrating moments into opportunities for stunning images.
Restaurant food photography challenges even experienced shooters. You work with whatever light exists—no softboxes, no reflectors, no control over the environment. Yet some of the most appetizing food photos happen exactly this way, using natural window light or ambient restaurant fixtures to create authentic, moody shots that look nothing like studio work.
In this guide, I will share techniques I have used shooting restaurant food for blogs and social media over the past several years. You will learn to read any restaurant’s lighting, position your food for maximum impact, choose camera settings that handle low light gracefully, and edit quickly for shareable results. Whether you shoot with a DSLR, mirrorless camera, or smartphone, these strategies work.
Why Available Light Matters for Restaurant Food Photography
Available light photography in restaurants produces images that feel genuine and atmospheric. When you work with existing light sources rather than adding flash or continuous lights, you preserve the mood the restaurant created intentionally. That warm candlelit bistro or sun-drenched brunch spot designed its lighting to make diners feel a certain way—your photos should capture that feeling.
Flash photography in restaurants also disturbs other guests. A bright burst of light interrupts conversations and draws attention. Most restaurants discourage or prohibit flash for this reason. Available light keeps you invisible to everyone except your dining companions.
Natural light also renders food more appetizing than artificial lighting in most cases. Window light, especially on cloudy days, creates soft shadows that reveal texture without harsh contrast. The colors stay true rather than shifting under weird restaurant bulbs. When natural light is not available, learning to work with ambient fixtures still produces better results than fighting them with flash.
Understanding Light Sources in Restaurants
Every restaurant presents a unique lighting situation. Some have large windows flooding tables with daylight. Others rely entirely on dim overhead fixtures, candles, or wall sconces. Reading the light quickly determines whether you get usable shots or struggle through the meal.
Window Light: Your Best Friend
Window light provides the most flattering illumination for food photography. It is soft, directional, and usually neutral in color. When you arrive at a restaurant, scan for window tables. Even if you are seated elsewhere, you can sometimes ask to move before ordering.
The quality of window light changes throughout the day. Morning light tends to be cooler and softer. Midday sun can create harsh shadows unless diffused by sheer curtains or clouds. Late afternoon brings warm, golden tones that look beautiful on food. Overcast days actually provide ideal light—clouds act as a giant softbox, diffusing sunlight evenly.
Position yourself so the window is to your side, not behind you or directly in front. Side lighting creates shadows that reveal texture and depth in food. If the window is behind your dish, you get backlighting which can work for certain shots but is trickier to expose correctly.
Dealing with Overhead Lighting
Many restaurants use overhead spotlights or pendant lights directly above tables. These create unflattering top-down shadows, especially under plates, bowls, and glasses. The light often has a warm orange or yellow cast from tungsten bulbs.
You cannot move these lights, but you can work around them. If there is any window light at all, position your food to maximize that side light and minimize the overhead contribution. Move your dish to the edge of the table where overhead lights have less reach. Sometimes simply shifting the plate six inches improves the lighting dramatically.
When overhead lighting cannot be avoided, embrace it as part of the restaurant’s atmosphere. These shots often benefit from darker, moodier editing that leans into the warm color temperature rather than fighting it.
Mixed Lighting: When Sources Collide
Mixed lighting occurs when daylight from windows combines with artificial overhead lights. This creates a color temperature nightmare—daylight is cool blue while tungsten is warm orange. Your camera struggles to balance these competing sources, often resulting in strange color casts.
The solution starts with white balance. If you shoot RAW, set your white balance manually using a gray card or white napkin as reference. This gives you flexibility to fine-tune color later. If you shoot JPG, choose the white balance preset that matches your dominant light source and accept some color compromise.
Position your food to minimize mixed lighting when possible. If window light hits one side of your plate and overhead light hits the other, move the dish entirely into one light source or the other. Cleaner lighting produces cleaner colors.
Essential Gear for Low-Light Food Photography
Restaurant food photography demands different equipment than studio work. You need gear that handles low light gracefully, fits at a dining table, and does not draw attention. The good news is that excellent results are possible with minimal equipment.
Camera and Lens Recommendations
A fast prime lens is the single most valuable piece of equipment for restaurant food photography. Look for a 50mm f/1.8 or f/1.4 lens. The wide aperture lets in two to four times more light than typical zoom lenses, allowing lower ISO and faster shutter speeds in dim conditions.
Any modern mirrorless or DSLR camera with decent high-ISO performance works well. Full-frame sensors handle noise better than crop sensors at high ISO values, but crop-sensor cameras still produce excellent results. The key is understanding your camera’s limits—test different ISO settings before your restaurant shoot to see where noise becomes unacceptable.
A small tabletop tripod helps in very dark situations, but many restaurants frown on tripods. I prefer learning to handhold steadily at slower shutter speeds. If you do use a tripod, choose a compact model that sets up quickly and does not obstruct servers or diners.
Using Restaurant Items as Light Modifiers
You cannot bring softboxes and reflectors into a restaurant, but you can improvise with items already on the table. White napkins make excellent reflectors. Hold one opposite your light source to bounce light into shadows. A menu held vertically works as a flag to block unwanted light.
White plates reflect light onto food from below. If your dish comes on a dark plate, ask your server if a white plate is available—the light bounce makes a noticeable difference. Paper menus can be folded into simple diffusers held between a harsh light source and your food.
Even your body serves as a light modifier. Position yourself to block harsh overhead spotlights from hitting your food directly. Your shadow becomes a natural flag.
Smartphone Food Photography Tips
Most restaurant food photos today are shot on smartphones. Modern phones handle low light surprisingly well and offer computational photography features that rival dedicated cameras. A few techniques maximize smartphone performance.
First, clean your lens before shooting. Phone lenses collect fingerprints and oils that create haze and flares. A quick wipe with a soft cloth or napkin sharpens every image.
Second, tap to focus and lock exposure on the brightest part of your food. This prevents the phone from overexposing highlights. Most phones let you drag the exposure slider down slightly after locking focus.
Third, avoid digital zoom. Crop later in editing instead. Digital zoom degrades image quality significantly in low light.
Fourth, hold your phone steady against a glass, menu, or your elbows planted on the table. The slight stabilization helps the phone’s night mode algorithms work better.
Camera Settings for Restaurant Food Photography
Getting your camera settings right makes the difference between blurry, noisy photos and sharp, appetizing images. Restaurant lighting forces compromises—you push ISO higher than you would outdoors, open apertures wider than normal, and accept slower shutter speeds. Understanding how these settings interact helps you make smart tradeoffs.
The Exposure Triangle for Low Light
The exposure triangle—aperture, shutter speed, and ISO—determines how bright your image appears and what tradeoffs you accept. In restaurants, you typically want the widest aperture your lens allows, the slowest shutter speed you can handhold, and the lowest ISO that produces correct exposure.
Aperture: Set your lens to its widest opening (lowest f-number). An f/1.8 lens wide open lets in four times more light than f/3.5. This shallow depth of field also creates attractive background blur that focuses attention on your food.
Shutter speed: The minimum shutter speed for sharp handheld shots depends on your focal length and stability. With a 50mm lens, try to stay above 1/50 second. With image stabilization, you might manage 1/25 second. Bracing your elbows on the table helps significantly.
ISO: This is your adjustment variable. Increase ISO until your exposure looks correct at your chosen aperture and shutter speed. Modern cameras produce clean images at ISO 800-1600. Many handle ISO 3200 acceptably. Test your camera to learn its limits.
A typical starting point for restaurant food photography: f/1.8, 1/60 second, ISO 800. Adjust ISO up or down based on brightness.
White Balance in Mixed Lighting
White balance controls how your camera interprets colors. Restaurant lighting often confuses auto white balance, resulting in yellow, orange, or greenish color casts that make food look unappetizing.
If your restaurant has mixed lighting, custom white balance produces the most accurate colors. Point your camera at a white napkin or menu under your shooting light and set custom white balance according to your camera’s instructions. This gives the camera a neutral reference point.
When custom white balance is not practical, try the tungsten or incandescent preset for warm overhead lighting, or the daylight preset for window-lit situations. Shoot RAW whenever possible so you can fine-tune white balance in editing without quality loss.
RAW vs JPG: Why RAW Wins in Restaurants
Shooting RAW rather than JPG gives you tremendous flexibility for restaurant food photography. RAW files capture all the data your sensor records, while JPGs process and compress that data in-camera, discarding information you cannot recover later.
In restaurants, RAW’s advantages are substantial. You can correct white balance errors without degrading image quality. You can recover details in shadows and highlights that would be lost in JPG. You can reduce noise more effectively during editing.
The downside is larger file sizes and the need to process every image. But for food photography, where every shot matters and conditions are challenging, RAW is worth the extra effort. Set your camera to shoot RAW, or RAW+JPG if you want ready-to-share files alongside editable masters.
Light Positioning Techniques
How light strikes your food determines its appearance more than almost any other factor. The direction, quality, and intensity of light shape shadows, reveal texture, and create mood. Learning to position yourself and your food relative to available light transforms ordinary snapshots into compelling food photographs.
Side Lighting: The Most Foolproof Approach
Side lighting creates shadows that fall across your food horizontally, revealing texture and creating dimension. This is the most reliable lighting direction for food photography because it works with almost any dish and creates natural-looking results.
To achieve side lighting, position yourself perpendicular to your light source. If light comes from a window on your left, shoot from the front or right side of your food. The light sweeps across the plate, creating shadows that define edges and surfaces.
The angle of side lighting matters too. Light from directly to the side (90 degrees) creates strong shadows. Light from slightly in front (45 degrees) provides more even illumination while still showing texture. Experiment by moving your camera position slightly while watching how shadows change.
Backlighting for Drama
Backlighting places your light source behind your food, shooting toward the light. This creates dramatic silhouettes and works especially well for translucent foods, steam, and drinks with ice. The rim lighting separates your subject from the background.
Backlighting is trickier to expose correctly because your camera wants to underexpose the backlit subject. Increase exposure compensation by one to two stops, or meter specifically on your food rather than the bright background.
This technique works beautifully for steam rising from hot dishes. The backlight illuminates the steam from behind, making it visible against the darker plate. Beverages with ice cubes also photograph well backlit, with light glowing through the glass.
Finding the Best Spot in Any Restaurant
When you enter a restaurant, quickly scan for the best light before being seated. Window tables are obvious choices, but not all windows are equal. North-facing windows provide consistent soft light throughout the day. South-facing windows get direct sun that may be too harsh unless diffused.
Patios and outdoor seating offer excellent natural light but present their own challenges—direct sun creates harsh shadows, and wind moves napkins and garnishes. Look for shaded patio areas or wait for cloud cover.
If you cannot choose your table, work with what you have. Move your food to the brightest spot within reach. Ask if you can photograph your dish near a window before bringing it back to your table. Most servers accommodate polite requests from enthusiastic diners.
Composition Strategies for Restaurant Settings
Composition guides how viewers experience your food photograph. The arrangement of elements within the frame, the angle you shoot from, and what you include or exclude all affect the final image. Restaurant settings present unique composition challenges and opportunities.
Overhead shots (flat lays) work well for plates with multiple components or tables with several dishes. This angle shows the arrangement of food clearly and minimizes distracting backgrounds. Stand up or hold your camera high above the table for this perspective.
45-degree angles approximate how we actually view food when seated. This angle shows some plate depth and works well for taller items like burgers, stacked foods, or drinks. It is the most versatile single angle for restaurant food photography.
Eye-level shots emphasize height and work beautifully for tall desserts, drinks, or stacked foods. This angle creates intimacy, placing the viewer at the table.
Backgrounds in restaurants often distract. Other tables, servers, and restaurant decor can clutter your frame. Use your wide aperture to blur the background. Reposition your camera to exclude distractions. Sometimes moving three inches in any direction cleans up your background entirely.
Dealing with Challenging Lighting Situations
Not every restaurant offers good light. Some are deliberately dark for atmosphere. Others have no windows at all. When conditions are challenging, you adapt your technique and expectations rather than giving up entirely.
Embrace high ISO. Modern cameras produce usable images at ISO 3200 and beyond. Some noise is preferable to a blurry photo from too-slow shutter speed. Viewers forgive grain more readily than lack of sharpness.
Convert to black and white. When color balance is impossible—strong mixed lighting, weird LED colors, or severely warm tungsten—black and white conversion eliminates the color problem entirely. High-contrast black and white food photography can be striking and artistic.
Consider the kitchen. Restaurant kitchens often have bright, consistent lighting for food preparation. If you are photographing for the restaurant rather than casually dining, ask if you can shoot a dish in the kitchen or just outside it where light may be better.
Know when to skip it. Some situations simply do not work. If the light is too dim for any technique, enjoy your meal without photographing it. Not every dish needs documentation. Sometimes the memory is enough.
Restaurant Photography Etiquette
Photographing food in restaurants exists in a social context. Other diners want to enjoy their meals without distraction. Staff have jobs to do. The restaurant created its atmosphere intentionally. Respecting these realities keeps you welcome and makes the experience better for everyone.
Never use flash. This is the most important rule. Flash disturbs every other person in the restaurant and destroys the ambient atmosphere you are trying to capture.
Be quick. Take your photos efficiently and return to dining. Extended photo sessions with multiple angles, rearranging food, and repeated shots draw attention and slow service. I aim to capture what I need within two minutes of food arriving.
Ask before rearranging. If you want to move your dish to better light, ask your server first. Most are happy to accommodate, but some restaurants have specific policies about moving food between tables.
Keep equipment minimal. Large cameras, tripods, and multiple lenses attract attention and take up space. Travel light and work discreetly.
Respect other diners. Avoid photographing when people at adjacent tables are eating. Position yourself so your camera does not point at other guests. Lower your voice when discussing shots with dining companions.
Post-Processing Tips for Restaurant Food Photos
Post-processing rescues restaurant food photos from challenging lighting and polishes good shots into great ones. A quick editing workflow addresses white balance, exposure, and noise while enhancing colors to make food look appetizing.
White balance correction is usually your first step. Even carefully set white balance often needs adjustment. Warm up images that feel too cool, cool down images that feel too orange. Food generally looks most appetizing slightly warmer than neutral, but avoid going too far.
Exposure adjustments brighten underexposed images and recover highlights. Most food photos benefit from slightly brighter exposure than your camera meter suggests. Increase exposure until whites just start to clip, then back off slightly.
Noise reduction cleans up high-ISO images. Modern editing software handles noise well, but over-processing creates plastic-looking images. Apply noise reduction gently, preserving some texture.
Mobile editing apps like Lightroom Mobile, Snapseed, or VSCO handle restaurant food photos well. These apps offer the same fundamental adjustments as desktop software: exposure, white balance, contrast, and selective edits. Edit on your phone for immediate social sharing.
Quick Reference Checklist
Before your next restaurant food photography session, review this checklist:
- Identify the best light source when you arrive (windows first, then brightest overhead)
- Position yourself for side lighting when possible
- Set aperture to widest opening (lowest f-number)
- Set shutter speed to 1/focal length minimum for handholding
- Adjust ISO until exposure is correct
- Set custom white balance or choose appropriate preset
- Shoot RAW for maximum editing flexibility
- Use white napkins or plates as reflectors
- Compose with clean backgrounds and appropriate angle
- Take photos quickly and return to enjoying your meal
- Edit for white balance, exposure, and subtle noise reduction
Frequently Asked Questions
How to use lighting in food photography?
How to take food pics at a restaurant?
What ISO should I use for restaurant food photos?
How do I photograph food in a dark restaurant?
Can I use my smartphone for restaurant food photography?
Final Thoughts
Learning how to photograph food in a restaurant using only available light takes practice, but the fundamentals are straightforward. Find the best light in your environment—usually window light—position your food for side lighting, use camera settings that handle low light gracefully, and edit thoughtfully. The more you practice these techniques, the more instinctive they become.
Remember that restaurant food photography should enhance your dining experience, not dominate it. Capture your shots efficiently, then put the camera away and enjoy the meal. The best food photograph is one that reminds you of a wonderful dining experience, not one that prevented you from having one.
Start with the basics from this guide, experiment with different restaurants and lighting situations, and develop your own style over time. Every restaurant presents a new lighting challenge and a new opportunity to create something beautiful.