Creating stunning panoramic images used to require specialized software and hours of manual work. Today, you can stitch panoramas in Lightroom and correct distortion automatically in just a few clicks. Whether you photograph sweeping landscapes, architectural interiors, or cityscapes, Lightroom’s built-in panorama tools give you everything needed to create seamless wide-angle images without leaving the application.
In this guide, I’ll walk you through the complete process from shooting tips to final output. You’ll learn how to use Photo Merge Panorama, understand projection types, apply Boundary Warp and Fill Edges, and automatically correct perspective distortion using Upright modes. By the end, you’ll have a reliable workflow that produces professional-quality panoramas every time.
Preparing Your Photos for Panorama Stitching
Before you jump into Lightroom, the quality of your panorama depends heavily on how you capture the source images. A little preparation goes a long way toward seamless results.
Shooting Tips for Better Panorama Results
The most important rule when shooting for panoramas is maintaining consistent exposure and focus across all frames. Lock your exposure settings manually before shooting the sequence. If your camera adjusts exposure between shots, you’ll see visible bands in the final stitched image.
Overlap each frame by at least one-third of the image. This gives Lightroom enough information to align and blend the photos accurately. Many photographers I’ve worked with prefer 30-40% overlap for challenging scenes with close foreground objects.
Use manual focus rather than autofocus. Focus shifts between frames create alignment problems that no amount of software can fix. Set your focus once, then shoot the entire sequence without touching the focus ring.
Keep your camera level throughout the sequence. A tripod with a leveling base helps, but even handheld shooting works if you pay attention to the horizon line. Lightroom can correct minor leveling issues, but extreme tilts cause distortion that’s difficult to fix.
Importing and Organizing Panorama Source Images
When you import your panorama sequences into Lightroom, organization becomes critical. I recommend creating a collection for each panorama project. Select all the source images, right-click, and choose Add to Collection. This keeps related photos together and makes them easy to find during the merge process.
Stack your panorama sequences to reduce clutter. Select all images in a sequence, right-click, and choose Stacking > Group into Stack. You can expand the stack when you’re ready to work on that specific panorama.
Enabling Lens Corrections Before Stitching
Lightroom’s panorama merge works best when lens corrections are applied first. Open the Develop module and navigate to the Lens Corrections panel. Click the Profile tab and check Enable Profile Corrections. Lightroom automatically detects your lens from the metadata and applies the appropriate correction profile.
This step removes barrel distortion, vignetting, and chromatic aberration from each source image. When Lightroom stitches corrected photos, the alignment algorithms work more accurately because the geometric distortions have already been removed.
Also check Remove Chromatic Aberration in the same panel. Color fringing at high-contrast edges becomes more visible in stitched panoramas, so eliminating it beforehand saves correction work later.
How to Stitch Panoramas in Lightroom: Step-by-Step
Now comes the main event. Lightroom’s Photo Merge Panorama tool handles the complex math of aligning and blending multiple images into a single seamless DNG file. Here’s the complete process.
Step 1: Select Your Source Images
In the Library module or Develop module, select all the photos you want to include in your panorama. Click the first image, then Shift-click the last image to select a range. For non-contiguous images, Ctrl-click (Windows) or Command-click (Mac) each photo.
Make sure you’re only selecting images that belong to the same panorama sequence. Accidentally including unrelated photos will cause the merge to fail.
Step 2: Open the Panorama Merge Dialog
With your images selected, go to Photo > Photo Merge > Panorama. The faster method is the keyboard shortcut: Ctrl+M on Windows or Command+M on Mac. This opens the Panorama Merge Preview window where you’ll see a preview of the stitched result.
The preview generation takes a few seconds depending on your computer speed and the number of source images. Lightroom analyzes the overlap areas and calculates the optimal alignment.
Step 3: Choose Your Projection Type
The projection type determines how Lightroom maps your 2D images onto the curved panorama surface. You have three options, and choosing the right one significantly affects the final result.
Spherical Projection works best for wide panoramas covering more than 120 degrees. It preserves the natural curvature of horizons and handles 360-degree panoramas perfectly. Use this for landscape panoramas with sweeping views.
Cylindrical Projection is ideal for panoramas with vertical lines that should remain straight, like architectural subjects. It maps images onto a cylinder, keeping verticals straight while allowing horizontal curvature. This projection often produces the most natural-looking results for general use.
Perspective Projection keeps all straight lines straight in both directions. It works best for relatively narrow panoramas (under 120 degrees) and architectural subjects. However, it can produce extreme stretching at the edges of wide panoramas.
Lightroom auto-selects a projection based on your images, but I recommend trying all three to see which looks best for your specific panorama.
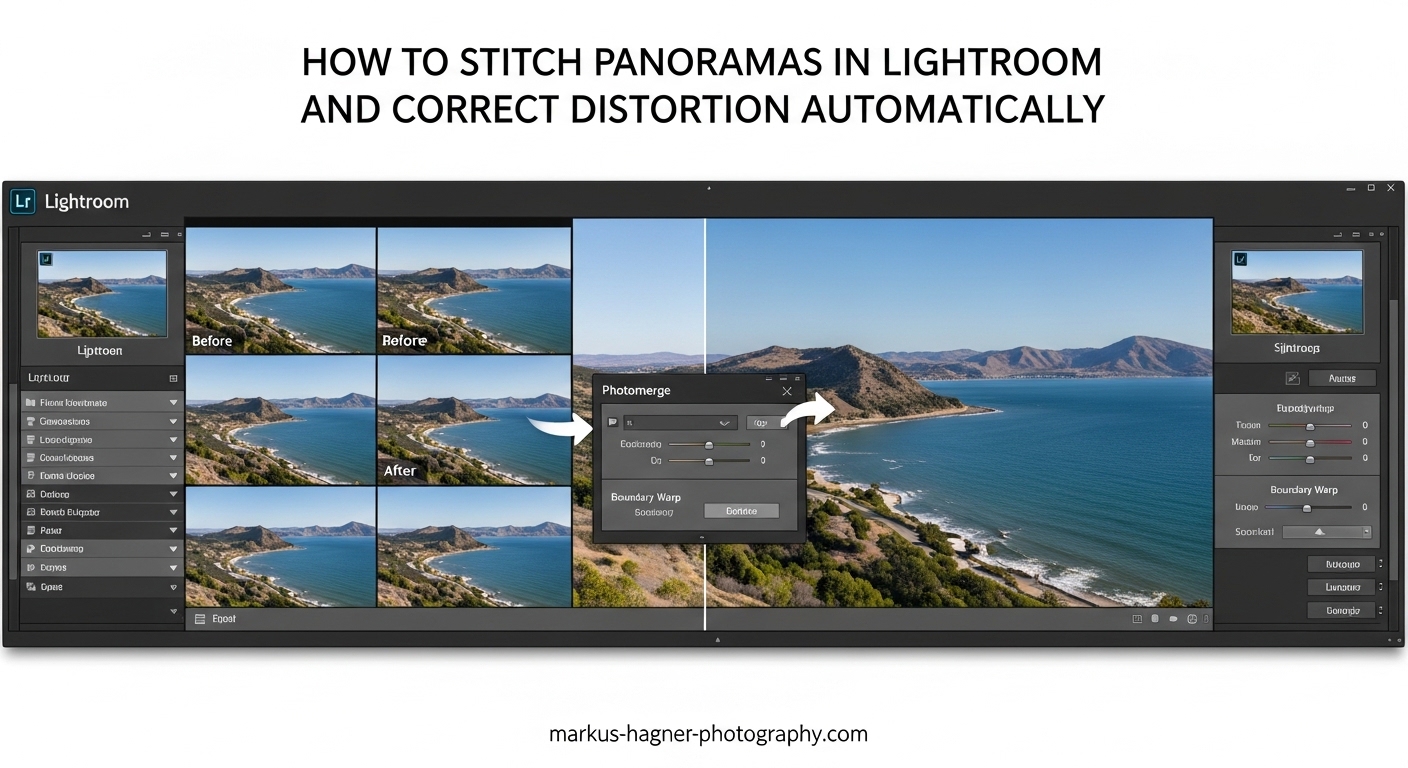
Step 4: Apply Boundary Warp
After stitching, your panorama will have irregular edges where the source images don’t perfectly cover the rectangular frame. Boundary Warp solves this by stretching the image content to fill those gaps while preserving straight lines.
The Boundary Warp slider ranges from 0 to 100. At 0, no warping occurs and you see the raw irregular edges. As you increase the value, Lightroom progressively stretches the image to fill the frame. I typically use values between 50-75 for most panoramas.
The advantage of Boundary Warp over simple cropping is that you retain the full field of view. No pixels are discarded, and no content-aware fill is needed. The stretching is usually imperceptible when applied moderately.
Step 5: Use Fill Edges When Needed
For panoramas where Boundary Warp can’t completely fill the edges, turn on the Fill Edges option. This uses content-aware technology to generate new pixels that match the surrounding areas.
Fill Edges works best when the missing areas are sky, grass, or other uniform textures. It struggles with complex details like people or architecture at the edges. Always check the filled areas carefully for artifacts.
When both Boundary Warp and Fill Edges are enabled, Lightroom applies Boundary Warp first, then uses Fill Edges for any remaining gaps.
Step 6: Decide on Auto Crop
The Auto Crop checkbox automatically crops the panorama to a clean rectangle, removing all irregular edges. It’s the fastest option but discards pixels at the edges.
I prefer to leave Auto Crop unchecked initially. This lets me see exactly what Boundary Warp and Fill Edges are doing. After reviewing the result, I can crop manually if needed, or accept the filled edges if they look natural.
Step 7: Configure Additional Options
The Auto Settings checkbox applies Lightroom’s automatic tone adjustments to the merged panorama. This can be a good starting point, but I usually leave it unchecked and develop the panorama manually afterward.
Create Stack groups the source images into a stack with the merged panorama on top. This keeps your library organized and makes it easy to find the original files if needed.
Step 8: Merge and Create the DNG
Once you’re satisfied with the preview settings, click Merge. Lightroom creates a new DNG file containing your stitched panorama. This isn’t a flattened JPEG or TIFF. It’s a full RAW file with all the editing flexibility that implies.
The merge process can take anywhere from a few seconds to several minutes depending on the number of source images, their resolution, and your computer’s processing power. Lightroom displays a progress bar in the upper-left corner.
When complete, the merged panorama appears alongside your source images in the library. It has a panorama icon overlay to distinguish it from regular photos.
Multi-Row Panorama Stitching
Lightroom handles multi-row panoramas just as easily as single-row sequences. Select all the images from your grid of shots, then use the same Photo Merge > Panorama command. Lightroom automatically detects the grid layout and stitches accordingly.
Multi-row panoramas produce significantly larger files and require more processing power. For a 3×3 grid of 24-megapixel images, expect a merged panorama exceeding 100 megapixels. Make sure your system has adequate RAM for smooth editing.
Creating HDR Panoramas
For high-contrast scenes, HDR panoramas combine the dynamic range benefits of HDR with the wide field of view of panoramas. Lightroom offers two approaches.
The simpler method uses Photo Merge > HDR Panorama. Select all your bracketed exposures from all panorama positions, then choose this option. Lightroom merges the brackets and stitches the panorama in one operation.
The alternative workflow gives more control. First, merge each bracketed set into individual HDR images using Photo Merge > HDR. Then select all the HDR results and merge those into a panorama. This approach lets you fine-tune each HDR before stitching, which helps with challenging scenes.
How to Correct Distortion Automatically in Lightroom?
Even with perfect shooting technique, stitched panoramas often exhibit distortion. Horizontal lines may curve, vertical lines may converge, and the overall perspective may feel unnatural. Lightroom’s distortion correction tools handle these issues automatically.
Why Panoramas Need Distortion Correction
When you rotate your camera to capture a panorama sequence, the sensor plane changes orientation relative to your subjects. Straight lines in the real world become curved in the stitched result. Wide-angle lenses introduce additional barrel distortion that compounds the problem.
Architecture photographers face this challenge constantly. A building’s vertical lines should appear parallel, but they often converge toward the top or bottom of the frame. Lightroom’s automatic correction tools fix these issues without manual intervention.
The Lens Corrections Panel
Open your merged panorama in the Develop module and navigate to the Lens Corrections panel. This is where automatic distortion correction begins.
In the Profile tab, ensure Enable Profile Corrections is checked. Lightroom applies the lens profile correction to the entire panorama. If your panorama was created from RAW files, the lens metadata carries through to the merged DNG, allowing automatic profile detection.
The Basics tab offers Remove Chromatic Aberration, which eliminates color fringing at high-contrast edges. This becomes more important in panoramas because the stitching process can amplify chromatic aberration at the seam areas.
Upright Modes for Automatic Perspective Correction
The real power for panorama correction lies in the Upright modes within the Lens Corrections panel. These four modes analyze your image and automatically correct perspective distortion.
Auto Mode lets Lightroom decide which corrections to apply. It analyzes horizontal and vertical lines in the image and corrects the most obvious distortions. This works well for most panoramas and is a good starting point.
Vertical Mode focuses exclusively on vertical lines. It corrects converging verticals (keystoning) while leaving horizontal lines unchanged. Use this when architectural verticals need straightening but the horizon should remain as captured.
Horizontal Mode corrects horizontal line distortion while preserving verticals. This helps when the horizon appears curved but vertical lines are already straight.
Full Mode applies both horizontal and vertical corrections simultaneously. It produces the most geometrically accurate result but may crop the image more aggressively. For architectural panoramas where accuracy matters most, Full mode delivers the best results.
Click each mode to preview its effect on your panorama. The correction happens instantly, so you can quickly compare options. I typically try Auto first, then Full, and choose whichever looks more natural.
Guided Upright for Manual Control
When automatic modes don’t produce the desired result, the Guided Upright tool gives you precise manual control. Click the Guided Upright icon (the ruler and triangle) at the top of the Transform panel.
Draw two or more guide lines on your image along features that should be straight. For architectural panoramas, draw guides along building edges or other vertical elements. Lightroom uses your guides to calculate the exact correction needed.
You can draw up to four guides: two horizontal and two vertical. More guides provide more data for accurate correction. Press Enter when finished to apply the transformation.
Guided Upright excels when automatic modes over-correct or under-correct. It’s particularly useful for panoramas with complex architectural subjects where you need specific lines to be perfectly straight.
The Transform Panel for Fine-Tuning
Below the Upright buttons, the Transform panel offers manual sliders for additional adjustment. After applying an Upright mode, use these sliders to fine-tune the result.
The Vertical slider adjusts the vertical perspective independently. Positive values increase the correction, while negative values reduce it. Use this when an Upright mode overcorrects slightly.
The Horizontal slider works similarly for horizontal perspective. The Rotate slider corrects any remaining rotation errors. Aspect controls whether the image stretches horizontally or vertically during correction.
The Scale slider zooms into the image to hide empty areas created by perspective correction. The X Offset and Y Offset sliders reposition the image within the frame after transformation.
The Complete Workflow: Stitch First, Then Correct
The recommended workflow applies distortion correction after stitching, not before. Here’s why this order works best.
When you stitch the panorama first, Lightroom has access to the complete merged image. The Upright algorithms can analyze the full field of view and make more accurate decisions about perspective correction. Stitching also applies its own geometric transformations, which should happen before any manual perspective work.
After stitching, open the merged panorama in Develop. Apply lens profile corrections if not already enabled. Then click through the Upright modes to find the best automatic correction. If needed, use Guided Upright for manual control. Finally, use the Transform sliders for fine-tuning.
This workflow produces the most accurate results with the least effort. The automatic tools handle 90% of the work, and you only need manual intervention for challenging cases.
Troubleshooting Common Panorama Issues
Even with careful preparation, panorama stitching doesn’t always go smoothly. Here are the most common problems and their solutions.
When Lightroom Panorama Merge Fails
Sometimes the merge process fails completely, displaying an error message or producing a garbled result. The most common cause is insufficient overlap between frames. If Lightroom can’t find matching features between adjacent images, alignment fails.
Solution: Reshoot the panorama with more overlap. Aim for at least 30% overlap between frames. For scenes with water, moving clouds, or other dynamic elements, increase overlap to 50%.
Another cause is dramatic exposure differences between frames. If your camera’s auto-exposure adjusted between shots, the tonal differences can prevent alignment. Use manual exposure mode when shooting panoramas.
Fixing Warped Panoramas with Close Foreground Objects
Panoramas that include objects within 10 feet of the camera often exhibit warping and distortion. This happens because of parallax error: the camera’s optical center shifts position between frames, causing foreground objects to appear in different relative positions.
The solution requires proper shooting technique. Use a panorama head that positions the camera’s nodal point over the rotation axis. This eliminates parallax and produces clean stitches even with close foreground elements.
If you’re working with an already-captured panorama that has warping issues, try the Guided Upright tool with multiple guides. This can reduce but not eliminate the distortion. For severe cases, you may need to use Photoshop’s Adaptive Wide Angle filter or dedicated software like PTGui.
Managing Large File Sizes and Memory Issues
Multi-row panoramas and HDR panoramas can produce massive files. A 3×3 grid of 24-megapixel images might create a 150+ megapixel panorama. These files consume significant disk space and require substantial RAM to edit smoothly.
Lightroom has technical limits: panoramas cannot exceed 65,000 pixels on the long edge or 512 megapixels total. Most panoramas stay well under these limits, but be aware they exist.
To manage file sizes, consider your output needs. If you’re printing at 300 DPI, you need fewer megapixels than you might think. A 20×60-inch print requires only about 108 megapixels. For web use, even smaller files suffice.
For memory issues during editing, close other applications to free RAM. Lightroom’s performance improves significantly when it has access to more system memory.
When to Use Third-Party Software
Lightroom handles most panorama stitching tasks admirably, but dedicated software like PTGui offers more control for challenging situations. Consider third-party tools when:
Your panorama includes moving subjects like waves or people. PTGui’s masking tools let you control which parts of each image appear in the final stitch. Lightroom has no equivalent feature.
You need manual control over control points. PTGui lets you place and adjust alignment points manually, which helps when Lightroom’s automatic alignment fails.
You’re stitching extremely wide or multi-row panoramas with complex geometry. PTGui offers more projection options and better handling of edge cases.
For most photographers, Lightroom’s built-in tools are sufficient. Reserve third-party software for the 5-10% of panoramas that Lightroom struggles with.
Recovering from Failed Stitches
When a merge produces visible seams or alignment errors, you don’t necessarily need to start over. Export the problem panorama as a layered file and open it in Photoshop. Manual blending with layer masks can fix many seam issues that Lightroom couldn’t handle automatically.
For gaps at the edges, Photoshop’s Content-Aware Fill often produces better results than Lightroom’s Fill Edges. Select the empty areas and apply Content-Aware Fill to generate matching pixels.
Pro Tips for Better Panoramas
After stitching hundreds of panoramas, I’ve learned several techniques that consistently improve results.
Optimal Overlap Percentage
One-third overlap works well for most situations. This gives Lightroom enough data for accurate alignment without requiring excessive shots. Increase to 40-50% for scenes with moving elements or close foreground objects.
Manual Focus vs Autofocus
Always use manual focus for panorama sequences. Even small focus shifts between frames create alignment problems that are impossible to fix in post. Set your focus once and don’t touch it until the sequence is complete.
Edit Before or After Merge
Apply basic corrections like lens profile and chromatic aberration removal before stitching. Save creative edits like exposure, contrast, and color adjustments for after the merge. This approach gives you maximum flexibility with the final DNG file.
The exception is when your source images have dramatically different exposures. In that case, apply exposure corrections before merging so Lightroom has consistent tones to work with.
Keyboard Shortcuts Reference
Speed up your workflow with these essential shortcuts:
Photo Merge Panorama: Ctrl+M (Windows) / Command+M (Mac)
Photo Merge HDR: Ctrl+H (Windows) / Command+H (Mac)
Photo Merge HDR Panorama: Ctrl+Shift+H (Windows) / Command+Shift+H (Mac)
Enable Profile Corrections: Check the box in Lens Corrections panel
Toggle Upright modes: Click the mode buttons in Lens Corrections panel
Batch Processing Multiple Panoramas
For projects with multiple panorama sequences, process them efficiently. Create a collection containing all your panorama source images. Stack each sequence separately. Work through each stack, merge to panorama, then move to the next.
Apply lens corrections to all source images at once using sync settings. Select all images, enable profile corrections in one, then click Sync to apply the same settings to all selected photos.
Frequently Asked Questions
Can you stitch a panorama in Lightroom?
How do you correct distortion in Lightroom?
How to automatically apply lens correction in Lightroom?
How to batch auto correct in Lightroom?
Conclusion
Learning how to stitch panoramas in Lightroom and correct distortion automatically transforms your photography workflow. The process combines Photo Merge Panorama for seamless stitching with Upright modes and Guided Upright for automatic perspective correction. Start with proper shooting technique: manual exposure, consistent focus, and adequate overlap. Then let Lightroom handle the heavy lifting while you focus on creative decisions. With practice, you’ll create stunning panoramic images that capture the full grandeur of any scene.