If you’ve been shooting with your Canon EOS R for a while, you might have noticed other photographers pressing a button on the back of their camera with their thumb before taking a shot. That’s back button focus, and it’s one of the most useful techniques you can learn for improving your autofocus control.
In this guide, I’ll walk you through exactly how to use back button focus on Canon EOS R cameras. You’ll learn what it is, why professional photographers swear by it, and the step-by-step process to set it up on your camera. I’ll also cover some advanced techniques that most guides miss, including dual back button focus setups and troubleshooting common issues.
How to Use Back Button Focus on Canon EOS R Cameras?
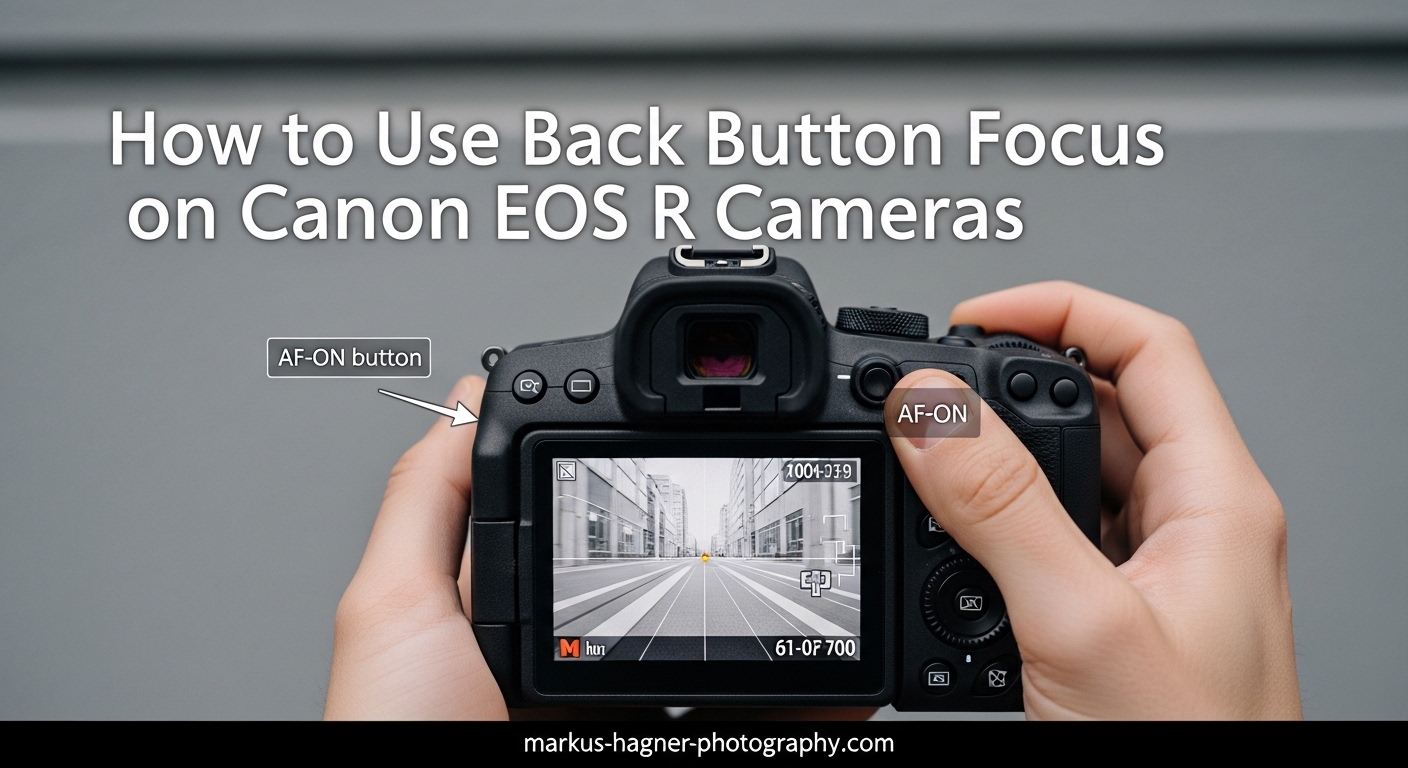
Back button focus is a camera technique that separates autofocus activation from the shutter button. Instead of pressing the shutter button halfway to focus and fully to take a photo, you use a button on the back of your camera (typically the AF-ON button) to control focusing independently.
On Canon EOS R cameras, this means your thumb controls when the camera focuses, while your index finger is dedicated solely to releasing the shutter. This separation gives you far more control over when and how your camera acquires focus.
The concept might sound simple, but this small change in how you operate your camera opens up creative possibilities that are difficult or impossible with traditional shutter-button focusing. Think of it as having manual control over an automatic process.
How Back Button Focus Works
When you use back button focus, the AF-ON button (or another button you assign) activates the autofocus system. Press it once to focus and release to lock focus in One Shot mode, or hold it for continuous tracking in AI Servo mode. The shutter button becomes purely a shutter release, with no effect on focusing.
This decoupling means you can focus on your subject, take your thumb off the back button to lock focus, recompose your shot, and fire off multiple frames without the camera trying to refocus each time. For portrait photographers who constantly recompose, this alone is worth the learning curve.
AF-ON Button vs AE Lock Button
Canon EOS R cameras offer two primary buttons for back button focus: the AF-ON button and the AE Lock (asterisk) button. The AF-ON button is positioned perfectly for your thumb and is set up by default to activate autofocus. Many photographers prefer it because it feels natural and requires no initial configuration.
The AE Lock button sits just below the AF-ON button and can be customized to perform the same function. Some photographers actually prefer this button because it leaves the AF-ON button free for other functions, or they find the lower position more comfortable for their hand size.
Why Use Back Button Focus? Key Benefits
After using back button focus on my Canon EOS R for several years, I can tell you the benefits are substantial. Here’s why so many photographers make the switch and never look back.
Lock Focus and Recompose Easily
The focus and recompose technique becomes effortless with back button focus. You focus on your subject’s eye, release the back button to lock focus, then move the camera to create your desired composition. Every shot you take maintains that locked focus distance, even as you reframe.
With traditional shutter-button focus, each half-press would refocus, often on the wrong thing after you’ve recomposed. Back button focus eliminates this frustration entirely.
Better Timing for Decisive Moments
Wedding and event photographers particularly appreciate the timing control back button focus provides. When you’re waiting for the perfect expression or moment, you don’t want the camera’s autofocus system activating and potentially causing a delay or focus shift right when you need to fire.
With focus already locked, you can capture moments instantly with full shutter presses. No more missed shots because the camera decided to hunt for focus at the wrong moment.
Avoid Focus Hunting with Distractions
When photographing sports or wildlife, objects often pass between you and your subject. With traditional focusing, the camera might lock onto that distraction and lose track of your actual subject. With back button focus, you simply release the button when something crosses your frame, keeping your original focus locked.
This benefit alone has saved countless shots during my wildlife photography sessions. Birds flying through branches, players running across fields, or children moving through cluttered rooms all become easier to track.
Manual Focus Override Without Mode Switching
Canon EOS R cameras allow full-time manual focus override even when autofocus is engaged. With back button focus, you can let the camera acquire initial focus with the AF-ON button, then fine-tune manually with the lens focus ring without ever switching to manual focus mode.
This is especially valuable for macro photography, where precise focus is critical and autofocus sometimes misses by a fraction. You get the speed of AF with the precision of manual control.
When Back Button Focus Excels
Different photography genres benefit from back button focus in specific ways. Portrait photographers love it for focus-and-recompose workflows. Sports and wildlife photographers appreciate the ability to pause tracking when distractions enter the frame. Macro photographers value the seamless manual focus override. Street photographers find it helps them react faster to fleeting moments.
How to Set Up Back Button Focus on Canon EOS R
Setting up back button focus on your Canon EOS R requires a few menu adjustments. The process takes about two minutes once you know where to look. Let me walk you through each step.
Prerequisite: Use Creative Zone Modes
Before configuring back button focus, make sure your camera is set to one of the Creative Zone modes: P, Tv, Av, M, Fv, or Bulb. The full Auto mode and scene modes don’t allow button customization, so back button focus setup won’t work in those modes.
I recommend starting in Program mode if you’re new to this, as it gives you full customization access while still handling most exposure decisions automatically.
Step 1: Access the Customize Buttons Menu
Press the Menu button on your Canon EOS R and navigate to the orange wrench tab (Setup). Scroll down to find “Customize Buttons” and press Set. This menu lets you reassign what each button does, including the shutter button and AF-ON button.
The menu might look intimidating at first, but you’ll only need to change two settings to enable back button focus.
Step 2: Verify AF-ON Button Configuration
In the Customize Buttons menu, navigate to the AF-ON button setting. By default, Canon EOS R cameras already have this button set to “Metering + AF Start,” which is exactly what you want for back button focus. If yours shows something different, change it to this setting.
This means pressing AF-ON will start both metering and autofocus, giving you the same focusing behavior you’re used to from the shutter button half-press, but now controlled by your thumb.
Step 3: Remove AF from the Shutter Button
Here’s the crucial step many guides gloss over. In the same Customize Buttons menu, find the setting for the shutter button. By default, it’s set to “Metering + AF Start.” Change this to “Metering Start.”
This change removes autofocus activation from the shutter button while keeping metering active. Now your shutter button will only start metering and release the shutter, with no effect on focus.
After making this change, press Set to confirm, then exit the menu. Your back button focus is now active.
Alternative: Using AE Lock for Back Button Focus
If you prefer using the AE Lock button (the asterisk button below AF-ON), the process is similar. In the Customize Buttons menu, find the AE Lock button and set it to “Metering + AF Start.” Then follow Step 3 above to remove AF from the shutter button.
Some photographers prefer this setup because the AE Lock button sits in a slightly different position that might feel more natural for their grip. Try both and see which works better for your hands.
Testing Your Setup
Before heading out for a shoot, test your back button focus configuration. Point your camera at something nearby and press the shutter button without touching AF-ON. The camera should not attempt to focus. Now press AF-ON, and the camera should autofocus as normal. Release AF-ON, and focus should lock.
If focus still activates when you press the shutter, double-check Step 3. The shutter button must be set to “Metering Start” only.
Advanced Back Button Focus Techniques
Once you’re comfortable with basic back button focus, you can explore some advanced techniques that really showcase the power of this approach.
Dual Back Button Focus Setup
Here’s a technique almost no other guides cover: setting up two different back buttons for different autofocus modes. You can configure AF-ON for Eye AF with subject detection, and AE Lock for a single-point spot AF. This gives you instant switching between tracking eyes for portraits and precise spot focus for detailed work.
To set this up, go to Customize Buttons and set AF-ON to your preferred tracking AF mode. Then set AE Lock to activate a different AF mode you’ve configured. You’ll need to save these as separate AF configurations using the camera’s AF method switching.
This dual setup is incredibly powerful for wedding and event photography, where you might switch between capturing candid moments with Eye AF and detail shots with precise spot focus.
Using BBF with AI Servo vs One Shot
Back button focus changes how AI Servo and One Shot modes behave, and understanding this difference is key to getting the most from the technique.
In One Shot mode, press and release AF-ON to focus on your subject, then release the button. Focus locks at that distance. You can now recompose and shoot freely without the camera refocusing.
In AI Servo mode, hold AF-ON continuously to track a moving subject. The camera will keep focusing as long as you hold the button. Release the button to stop tracking and lock focus at that moment. This lets you pause tracking when something crosses between you and your subject.
Focus and Recompose Technique
The focus and recompose technique is where back button focus really shines. Here’s how to use it effectively. First, position your active AF point over your subject’s key area, typically the nearest eye for portraits. Press AF-ON to focus. Release the button to lock focus. Now reposition your camera to create the composition you want. Take the shot.
Because focus is locked and the shutter button doesn’t activate AF, you can fire multiple frames at different compositions without ever losing your focus lock.
Subject Detection and Eye AF Integration
Canon EOS R cameras feature sophisticated subject detection and Eye AF systems that work beautifully with back button focus. When subject detection is enabled, pressing AF-ON will automatically find and track eyes, faces, or animals depending on your settings.
The beauty of back button focus here is control. You can let the camera track eyes while you hold AF-ON, then release to lock focus at the perfect moment. This is particularly useful for portraits where you want Eye AF to acquire initial focus but then lock it while you compose and direct your subject.
Troubleshooting Common Back Button Focus Issues
Even with proper setup, you might encounter some issues. Here are the most common problems and how to solve them.
Back Button Focus Not Working
If pressing AF-ON doesn’t activate autofocus, first check that you’re in a Creative Zone mode. Back button focus settings only apply in P, Tv, Av, M, Fv, or Bulb modes. If you’re in full Auto or a scene mode, the camera ignores your custom button settings.
Also verify that you successfully saved the menu changes. Sometimes exiting the menu without confirming leaves settings unchanged.
Shutter Button Still Activates Focus
If the shutter button still triggers autofocus, return to Customize Buttons and verify the shutter button is set to “Metering Start” only. Any other setting will include AF activation. This is the most common setup mistake.
Focus Behavior Feels Wrong
If focus seems to lock when you don’t expect or track when you want it locked, check your AF operation mode. One Shot locks focus when you release AF-ON, while AI Servo only locks when you release. Make sure you understand which mode you’re in and how it interacts with back button focus.
When Back Button Focus Might Not Be Right
Back button focus isn’t always the best choice. If you primarily hand your camera to others who don’t know the technique, they’ll struggle to focus. For casual family snapshots where you want the camera to behave like a smartphone, traditional focusing might be more convenient. Some video shooters also prefer different setups for recording.
Consider using Custom shooting modes (C1, C2, C3) to store your back button focus settings. This lets you switch between traditional and back button focus configurations quickly, giving you the best of both worlds.
Tips for Transitioning to Back Button Focus
Switching to back button focus takes some muscle memory adjustment. Give yourself a week or two of consistent shooting before deciding if it’s right for you. At first, you’ll probably press the shutter button halfway expecting focus, then remember nothing happens. This passes quickly with practice.
Start with static subjects like landscapes or still life before attempting fast action. Once the technique becomes second nature, you can apply it to more challenging situations.
Frequently Asked Questions
How do I set back button focus on Canon EOS R?
To set back button focus on Canon EOS R, go to Menu, select Customize Buttons under the Setup tab, set AF-ON to Metering + AF Start, and change the shutter button to Metering Start only. This removes autofocus from the shutter button while keeping it on the AF-ON button.
Why should I use back button focus?
Back button focus gives you greater control over autofocus by separating focus activation from the shutter button. Benefits include easier focus-and-recompose technique, better timing for decisive moments, the ability to pause tracking when distractions enter the frame, and seamless manual focus override without switching modes.
Which button should I use for back button focus?
Most photographers use the AF-ON button for back button focus because it’s positioned naturally for your thumb and works by default on Canon EOS R cameras. Alternatively, the AE Lock button (asterisk) can be customized for the same function if you prefer its lower position.
Does back button focus work with AI Servo?
Yes, back button focus works excellently with AI Servo mode. Hold the AF-ON button continuously to track moving subjects, and release the button to stop tracking and lock focus at that moment. This gives you precise control over when tracking pauses, which is useful when objects pass between you and your subject.
Can I use back button focus for video on Canon EOS R?
Yes, back button focus works for video recording on Canon EOS R cameras. The same setup applies, allowing you to pull focus with the AF-ON button while recording without the camera refocusing unexpectedly. This is particularly useful for controlled video shoots where you want to dictate exactly when focus changes.
Final Thoughts
Learning how to use back button focus on Canon EOS R cameras is one of those small changes that makes a big difference in your photography. The technique gives you precise control over when your camera focuses, eliminates accidental refocusing, and opens up creative possibilities that are difficult with traditional shutter-button focusing.
Mastering how to use back button focus on Canon EOS R cameras takes practice, but the results are worth the effort. The technique becomes second nature after a week or two of consistent shooting, and you’ll wonder how you ever worked without it.
I encourage you to save your back button focus settings to a Custom mode so you can experiment without losing your standard configuration. Give yourself a week or two of regular shooting to build the muscle memory. Most photographers who make the switch wonder how they ever worked without it.