Photographing small rooms presents a unique challenge that many real estate photographers, interior designers, and Airbnb hosts face regularly. When space is limited, capturing the full potential of a room without making it feel cramped requires specific techniques and the right approach. Learning how to photograph small rooms and make them look larger can transform your interior photography and help properties shine in listings and marketing materials.
In this guide, I will share proven techniques I have used when photographing compact spaces ranging from tiny 4×4 foot powder rooms to cozy bedrooms. These methods work whether you are using professional camera gear or a smartphone, and they will help you create images that showcase small spaces at their absolute best.
Essential Equipment for Small Room Photography
Before diving into techniques, let’s cover the gear that makes small room photography easier. The right equipment gives you more flexibility when working in tight spaces.
Wide-Angle Lens Selection
A wide-angle lens is your most important tool for small room photography. Lenses in the 16-24mm focal length range work best for most interior situations. A 16-35mm zoom lens gives you flexibility to adjust based on room size. I recommend avoiding ultra-wide lenses below 14mm because they create excessive distortion that makes furniture and fixtures look unnatural and stretched.
For crop sensor cameras, a 10-18mm lens provides similar coverage to 16-28mm on full frame. If you are just starting out, many kit lenses starting at 18mm (APS-C) or 24mm (full frame) can work, though you may struggle in the tightest spaces.
Tripod Options for Tight Spaces
A sturdy tripod keeps your camera steady for sharp images at slower shutter speeds. However, standard tripods can be cumbersome in small rooms. Consider these alternatives:
A compact travel tripod with legs that fold back on themselves takes up less space. Mini tripods or tabletop tripods can be placed on counters, beds, or other surfaces when floor space is limited. Some photographers even lean their tripod into corners to gain extra inches of shooting distance.
Additional Helpful Gear
A camera with a flip-out screen or articulating display helps when your camera ends up in awkward positions. Wireless remote shutter releases or tethering to a tablet let you trigger shots without being behind the camera. For lighting, a simple speedlight or LED panel can supplement window light when needed.
If you are shooting with a smartphone, you already have capable equipment. Modern phones have excellent wide-angle modes and computational photography features that work well for interiors.
How to Photograph Small Rooms and Make Them Look Larger: Core Camera Techniques
Now we get to the heart of how to photograph small rooms and make them look larger. These camera techniques form the foundation of successful small space photography.
Shoot from Corners to Maximize Distance
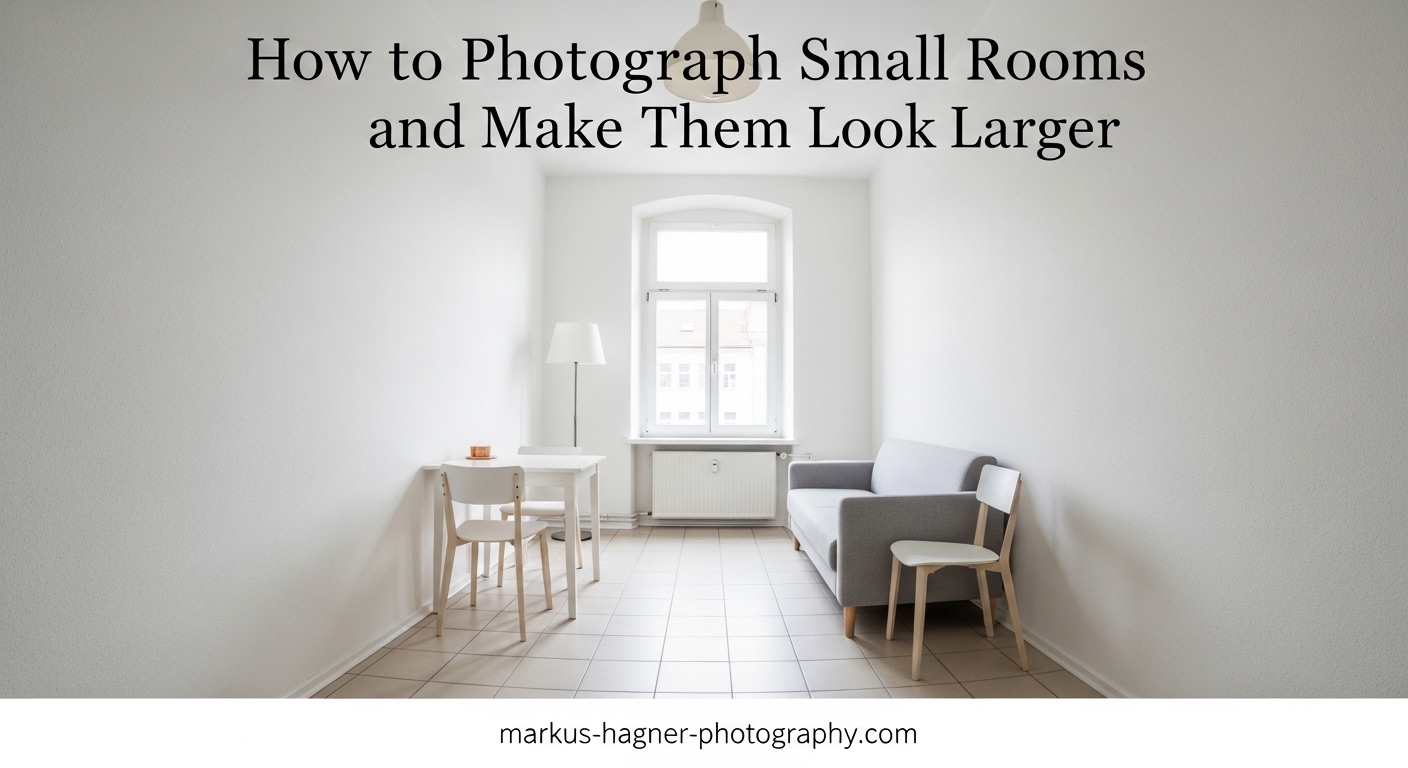
The single most effective technique is positioning your camera in a corner of the room. Corners give you the maximum possible distance from your subject, allowing you to capture more of the space in a single frame. This technique works because the diagonal distance across a rectangular room is always longer than shooting straight on from a wall.
When I photograph a small bedroom, I almost always start from the corner opposite the bed. This position lets me include the bed, nightstands, and window in one shot while maintaining a natural perspective.
Camera Height Matters More Than You Think
Camera height dramatically affects how spacious a room appears in photos. I recommend shooting from waist height, typically around 3-4 feet from the floor. This height creates a natural perspective that feels comfortable to viewers.
Shooting from too high (standing eye level) can make ceilings look lower and rooms feel smaller. Shooting from too low (floor level) exaggerates ceiling height but can make furniture look imposing and unnatural.
For rooms with interesting ceilings or when you want to emphasize height, try dropping your camera slightly below waist level. For rooms where you want to minimize low ceilings, raise the camera to chest height.
Optimal Camera Settings for Interior Photography
Getting your camera settings right ensures sharp, well-exposed images with maximum depth of field. Here are my recommended starting points:
Aperture: Use f/8 to f/11 for maximum depth of field. This keeps everything from foreground furniture to background walls in focus. Avoid wider apertures like f/2.8 or f/4 which can blur important details.
ISO: Keep ISO between 100 and 400 to minimize noise. Since you are using a tripod, slower shutter speeds are not a problem.
Shutter Speed: Let your camera determine this based on aperture and ISO. With a tripod, speeds of 1/15 second or slower are perfectly fine.
Focus: Use single-point autofocus and focus about one-third into the scene. Manual focus works well too, especially in low light.
File Format: Always shoot in RAW for maximum post-processing flexibility. Interior shots often need exposure and white balance adjustments.
Using Doorframes and Doorways
When a room is extremely tight, doorframes become useful positioning guides. Place your camera just inside the doorframe to maximize distance. For powder rooms and small bathrooms, shooting from the doorway might be your only option.
I have photographed 4×4 foot bathrooms where I literally could not fit inside with my camera. In these cases, I position the camera in the doorway, use my flip-out screen to compose, and trigger the shot remotely.
Mini Tripod Techniques for Extreme Small Spaces
For spaces where even the doorway is too close, try placing a mini tripod or tabletop tripod on a surface. Countertops, vanities, toilets (with the lid down), and even shelves can serve as camera platforms.
This technique works especially well for bathroom photography. Place a mini tripod on the counter, angle it toward the vanity and mirror, and capture the room from a unique elevated perspective that shows the space effectively.
Lighting Strategies for Small Spaces
Lighting can make or break small room photography. The right lighting approach creates depth and dimension while making spaces feel open and inviting.
Natural Light Optimization
Natural light from windows is usually your best light source for interior photography. It creates a soft, natural look that buyers and viewers prefer. Schedule your shoots during the day when windows provide good illumination.
When possible, photograph rooms when windows are not in direct sunlight. Overcast days or times when the sun is not streaming directly through windows produce more even, flattering light. Direct sun creates harsh shadows and bright hotspots that are difficult to balance.
Window Light Techniques
Position yourself so window light falls across the room rather than directly into your lens. This creates natural depth and dimension. If windows face your camera, the bright light can fool your meter and leave the rest of the room dark.
For rooms with multiple windows, take advantage of cross-lighting. Light coming from different directions fills shadows and creates even illumination throughout the space.
When window light is insufficient, do not be afraid to turn on room lights. The mix of warm artificial light and cool window light can add atmosphere. Just watch your white balance settings.
Artificial Lighting Considerations
For rooms without good window light, or for evening shots, you may need supplemental lighting. A single speedlight bounced off a white ceiling or wall provides soft fill light. Avoid pointing flash directly at the room as this creates harsh shadows.
Small LED panels work well for continuous lighting. Position them to fill shadows without creating new ones. In very small rooms, even a small light can illuminate the entire space effectively.
HDR and Bracketing for Challenging Light
When windows are much brighter than interior walls, HDR bracketing helps capture the full dynamic range. Take 3-5 exposures at different brightness levels and merge them in post-processing. This technique preserves detail in bright windows while maintaining shadow detail in darker corners.
Most cameras have built-in HDR modes or auto-bracketing features. I typically shoot 3 exposures: one at the metered setting, one 2 stops darker, and one 2 stops brighter.
Composition and Preparation Tips
How you compose your shot and prepare the room significantly impacts how spacious it appears in the final image.
Decluttering and Staging Basics
A cluttered room always looks smaller. Before photographing, remove unnecessary items from surfaces, floors, and visible storage. Clear nightstands except for one or two accessories. Remove toiletries from bathroom counters. Hide trash cans, laundry baskets, and cleaning supplies.
However, do not make rooms look sterile. A few well-placed items add scale and help viewers understand room size. A bed with nice linens, a small plant on a nightstand, or a soap dispenser on a vanity provides context without clutter.
Open Doors for Flow and Continuity
One of the simplest ways to make a space appear larger is opening all doors. Open closet doors, bathroom doors, and connecting room doors. This technique extends the visual space and creates a sense of flow between areas.
When viewers can see into adjacent spaces, they perceive more overall room. An open door to a hallway or another room suggests spaciousness beyond the immediate frame.
Mirror Placement for Visual Expansion
Mirrors are powerful tools for making rooms look bigger. They reflect light and create the illusion of additional space. When composing your shot, include mirrors in the frame when possible.
Position your camera so mirrors reflect interesting parts of the room rather than blank walls. A mirror reflecting a window doubles the natural light effect. Be careful not to capture yourself or your camera in the reflection.
Vertical Lines and Perspective Control
Keep vertical lines vertical. When walls, door frames, and cabinets lean inward or outward, the distortion looks unnatural and can make rooms feel smaller or oddly shaped.
Two techniques help maintain vertical lines. First, keep your camera level front-to-back. Tilting the camera up or down causes vertical convergence. Second, correct any remaining distortion in post-processing using lens correction tools.
Symmetry and Balance
Composing with symmetry creates a sense of order and spaciousness. Center your composition on a key element like a bed, window, or vanity. This balanced approach feels natural and shows off the room’s proportions accurately.
Not every shot needs perfect symmetry, but balanced compositions generally look more spacious than chaotic ones. Give important elements room to breathe within the frame.
Common Mistakes to Avoid
Even experienced photographers make these errors when shooting small rooms. Avoiding them will immediately improve your results.
Excessive wide-angle distortion: Using an ultra-wide lens or getting too close with any wide lens stretches edges unnaturally. Furniture looks warped, and rooms feel distorted rather than spacious. Stay back and use moderate wide angles.
Wrong camera height: Shooting from standing eye level is too high for most interiors. It emphasizes the floor and makes ceilings look lower. Drop to waist level for a more natural perspective.
Ignoring vertical lines: Letting walls lean inward looks amateurish and reduces perceived spaciousness. Keep your camera level and correct distortion in post.
Over-cluttering: Including too many elements fills the frame and makes rooms feel cramped. Less is more when photographing small spaces.
Post-Processing Tips
Post-processing fine-tunes your images and corrects issues you could not fix in camera. Focus on these key adjustments.
Vertical correction: Use lens correction tools to straighten vertical lines. Most editing software has automatic vertical correction that analyzes your image and fixes converging lines.
Lens distortion removal: Apply lens profile corrections to remove barrel distortion common in wide-angle lenses. This makes straight lines actually straight.
Exposure adjustments: Balance exposure between bright windows and darker interiors. Use graduated filters or adjustment brushes for targeted corrections.
HDR merging: If you shot bracketed exposures, merge them to capture the full dynamic range. Most editing programs handle HDR merging automatically.
Frequently Asked Questions
How to make rooms look bigger in photos?
Use a wide-angle lens (16-24mm), shoot from corners to maximize distance, position your camera at waist height, open all doors, declutter the space, and use natural light from windows. These techniques combined create visual depth and make small rooms appear more spacious.
What lens should I use for photographing small rooms?
For small rooms, use a wide-angle lens between 16-24mm focal length. A 16-35mm zoom lens offers flexibility for different room sizes. Avoid ultra-wide lenses below 14mm as they create excessive distortion that makes furniture and fixtures look unnatural.
How do I photograph very small bathrooms?
For tiny bathrooms like 4×4 ft powder rooms, try shooting from the doorway with your camera at head height or slightly higher. Use a mini tripod placed on surfaces when you cannot fit inside. A flip-out screen helps you compose shots without being behind the camera.
What camera settings work best for interior photography?
Set your aperture between f/8 and f/11 for maximum depth of field. Keep ISO low (100-400) to minimize noise. Use a tripod so you can shoot with slower shutter speeds. Always shoot in RAW for better post-processing flexibility.
Final Thoughts
Mastering how to photograph small rooms and make them look larger takes practice, but the core principles are straightforward. Use a wide-angle lens from corners, shoot at waist height, optimize natural light, declutter your scenes, and correct vertical lines in post-processing. With these techniques, you can make even the smallest powder room or cozy bedroom look spacious and inviting.
The key is experimenting with different positions and angles in each space. Every room presents unique challenges, and the best photographers develop an eye for finding the optimal shot. Start with these fundamentals, practice regularly, and you will see your interior photography improve dramatically.