Learning mirrorless camera video setup from scratch can feel overwhelming when you’re staring at dozens of menu options and wondering where to start. I remember unboxing my first mirrorless camera three years ago and spending weeks figuring out why my footage looked nothing like the cinematic videos I admired online.
This comprehensive guide walks you through every step I wish someone had shown me back then. You’ll learn exactly how to configure your mirrorless camera for professional-looking video, from basic settings to advanced techniques that separate amateur footage from polished content.
By the end of this guide, you’ll have a fully configured camera ready to shoot high-quality video, complete with the knowledge to avoid common beginner mistakes that plague many newcomers to video production.
What Makes Mirrorless Cameras Ideal for Video?
Mirrorless cameras have revolutionized video production for content creators, YouTubers, and aspiring filmmakers. Unlike traditional DSLRs, mirrorless cameras use an electronic viewfinder that shows you exactly what your footage will look like before you press record.
Real-time exposure preview means you see brightness changes instantly as you adjust settings. This immediate feedback helps beginners understand how aperture, shutter speed, and ISO work together in a way that optical viewfinders simply can’t provide.
Autofocus performance on modern mirrorless cameras often surpasses what DSLRs can achieve, with face and eye detection that keeps subjects sharp even when they move. This makes solo content creation much easier when you can’t monitor focus while performing in front of the camera.
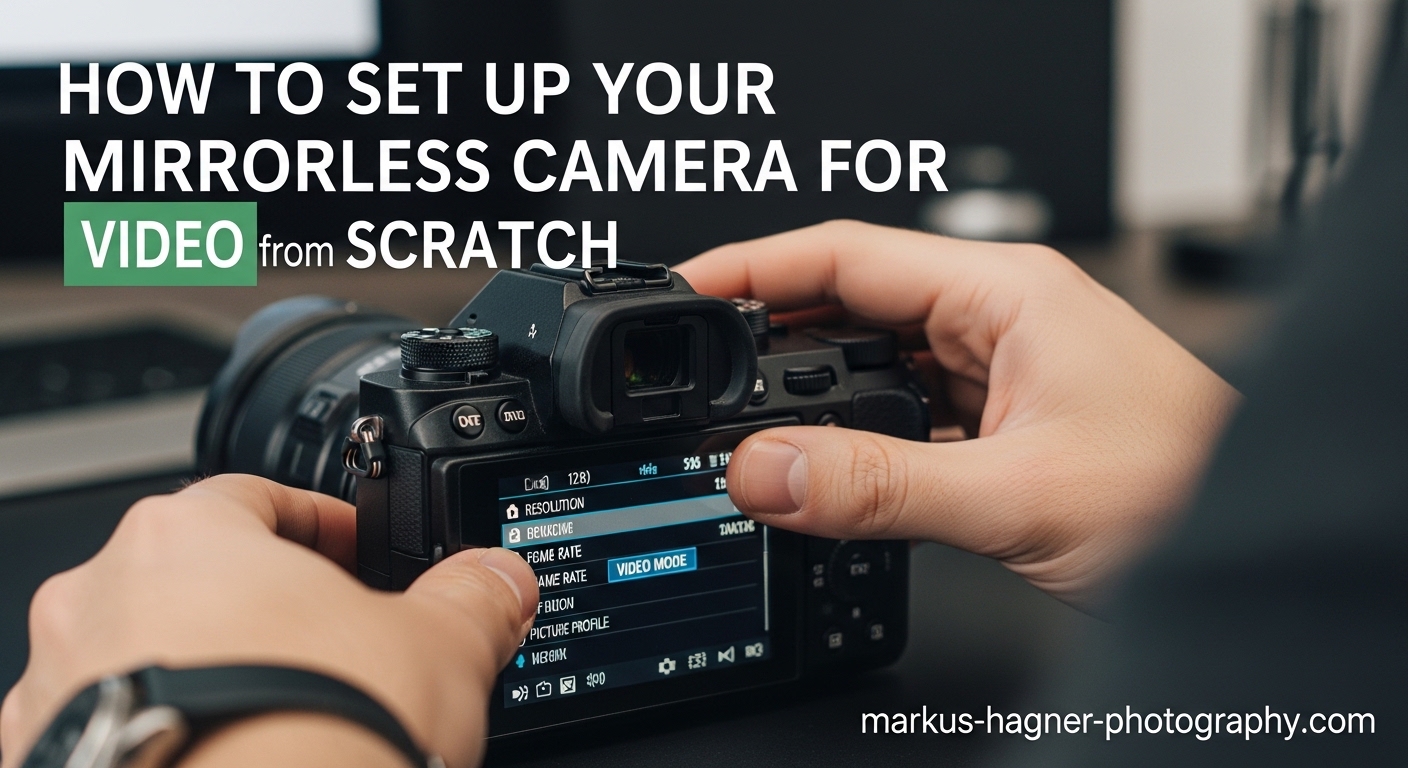
How to Set Up Your Mirrorless Camera for Video: The Complete Process
Now that you understand why mirrorless cameras excel for video, let’s dive into the complete setup process. This section covers everything you need to configure your camera properly from scratch.
Quick Start Checklist: Your First 10 Setup Steps
Before diving into the technical explanations, here’s the exact setup sequence I use every time I configure a new mirrorless camera for video work. Follow these steps in order for the fastest path to shooting quality footage.
Step 1: Set your camera to video mode (usually a red movie camera icon on the mode dial)
Step 2: Select manual exposure mode (M on the mode dial) to maintain consistent exposure during recording
Step 3: Choose your frame rate in the video settings menu (start with 24 or 30 fps for most projects)
Step 4: Set shutter speed using the 180-degree rule (1/50 for 24fps, 1/60 for 30fps, 1/125 for 60fps)
Step 5: Select your aperture based on desired depth of field (f/2.8-f/5.6 for shallow depth, f/8-f/11 for everything in focus)
Step 6: Adjust ISO to achieve proper exposure (keep under ISO 3200 for clean footage)
Step 7: Set white balance manually using a white card or Kelvin temperature (match your light source: 3200K for tungsten, 5600K for daylight)
Step 8: Configure audio input settings (external mic level to 10-15dB headroom for clean audio)
Step 9: Enable stabilization appropriate for your shooting style (IBIS for handheld, turn off for tripod work)
Step 10: Test record a 30-second clip and review for exposure, focus, audio levels, and stability
This checklist gets you shooting immediately. I’ll explain the technical reasoning behind each setting in the following sections so you understand not just what to set, but why it matters for your footage quality.
Frame Rate Selection Guide
Frame rate determines how smooth motion appears in your video and affects the overall aesthetic. Choosing the right frame rate starts with understanding your final delivery platform and the type of content you’re creating.
24 frames per second (fps) creates the cinematic look we’re accustomed to seeing in movies. This frame rate provides slight motion blur that feels natural and professional. I use 24fps for interviews, narrative work, and any content where I want that film-like quality.
30 fps delivers slightly smoother motion that’s common for television and online video content. YouTube, social media platforms, and most web video defaults to 30fps. This rate works well for talking-head videos, tutorials, and vlogs where clarity matters more than cinematic aesthetic.
60 fps captures smoother motion that’s ideal for action, sports, or any fast-moving subjects. Many creators shoot at 60fps even for regular content because it gives flexibility to slow down footage to 30fps in post-production for smooth slow-motion effects.
120 fps and higher is specifically for slow-motion footage. When you record at 120fps and play it back at 24fps or 30fps, you get beautiful 4x or 5x slow motion that’s perfect for emphasizing action, creating dramatic moments, or adding production value to B-roll.
Most mirrorless cameras let you set frame rate in the video recording menu. Sony cameras typically place this under Menu > Camera Settings > Record Settings. Canon users find it under Menu > Shooting Settings > Video Recording Quality. Nikon users look for it under Menu > Video Settings > Frame Size/Frame Rate.
Shutter Speed and the 180-Degree Rule
The 180-degree shutter rule is the most misunderstood concept in video production, yet following it makes the difference between amateur-looking footage and professional results. This rule establishes the relationship between frame rate and shutter speed for natural-looking motion blur.
The 180-degree rule states that your shutter speed should be approximately double your frame rate. This creates motion blur that mimics how our eyes perceive movement, resulting in footage that feels natural rather than choppy or artificially sharp.
For 24fps video: Set shutter speed to 1/50 second
For 30fps video: Set shutter speed to 1/60 second
For 60fps video: Set shutter speed to 1/125 second
For 120fps video: Set shutter speed to 1/250 second
Deviating from this rule creates distinctly different looks. Faster shutter speeds (like 1/500 at 24fps) produce sharp, stuttering motion that’s sometimes used intentionally for action scenes or to create tension. Slower shutter speeds (like 1/25 at 24fps) create excessive motion blur that feels dreamy or can cause motion sickness.
I learned this lesson the hard way when my first video project looked jerky and unnatural. I had shot everything at 1/1000 second because I was worried about motion blur making things look “unsharp.” The result was footage that looked more like a series of still photos than smooth video.
Your camera’s shutter speed dial or control wheel adjusts this setting. Look for “S” or a fraction display in your viewfinder. Some cameras require you to enable manual movie settings in the menu before letting you change shutter speed in video mode.
Manual Exposure Control for Video
Unlike photography where you can adjust exposure for each shot, video requires consistent exposure throughout your recording. Once you press record, you cannot change aperture, ISO, or shutter speed without creating obvious exposure jumps in your footage.
This limitation makes manual exposure mode essential for video work. Auto exposure might adjust mid-shot when lighting changes slightly, creating distracting brightening or darkening that screams amateur production.
Aperture Settings for Video
Aperture controls depth of field and exposure. For video, you’ll typically want one of these approaches:
Wide open (f/1.4-f/2.8): Creates shallow depth of field with creamy background blur. This isolates subjects beautifully but requires precise focus and often necessitates ND filters in bright light.
Mid-range (f/4-f/5.6): Balances subject separation with enough depth of field to keep moving subjects in focus. This is my go-to range for interviews and general-purpose shooting.
Stopped down (f/8-f/11): Keeps everything in sharp focus, ideal for landscapes, group shots, or scenes where you want to see all details clearly.
Video benefits from slightly smaller apertures than photography because moving subjects can easily drift out of focus with razor-thin depth of field.
ISO Settings for Clean Video
ISO affects your camera’s sensitivity to light. For video, you want the lowest ISO that gives proper exposure while avoiding noise that degrades image quality.
Most modern mirrorless cameras produce clean footage up to ISO 1600. Some full-frame models handle ISO 3200-6400 well. APS-C and Micro Four Thirds cameras typically show noticeable noise above ISO 1600.
Your camera’s native ISO (usually ISO 100 or 200) provides the cleanest image with maximum dynamic range. When light levels drop, increase ISO gradually while monitoring for noise in shadow areas.
A common beginner mistake I see in forums is cranking ISO to 6400 or higher in dim conditions, resulting in grainy footage that looks unprofessional. Better to add light or use a faster lens than rely on extreme ISO values.
White Balance Setup for Consistent Color
Auto white balance is one of the biggest culprits of amateur-looking video. When white balance shifts mid-recording, your footage changes color temperature, creating an editing nightmare and unprofessional results.
Manual white balance locks in a consistent color temperature that matches your lighting conditions. Set it once at the start of your shoot and forget it.
Tungsten/indoor lighting: 3200K-3400K
Daylight/outdoor sunny: 5600K-5800K
Overcast/cloudy: 6000K-6500K
Shade: 7000K-7500K
The most accurate method uses a white balance card. Frame the card filling your viewfinder, set exposure so it’s not blown out, then activate your camera’s custom white balance function. The camera measures the neutral white and calculates perfect color balance.
On Sony cameras, go to Menu > Camera Settings > White Balance > Custom Set. Canon users find it under Menu > Shooting Settings > White Balance > Custom WB. Nikon users look for it under Menu > Shooting Menu > White Balance > Preset Manual.
Forum discussions repeatedly show beginners struggling with footage that looks fine on camera but turns too orange or blue when viewed on different screens. Proper white balance eliminates this problem entirely.
Picture Profiles and LOG Recording
Picture profiles determine how your camera processes color and contrast in-camera. Standard profiles apply contrast and saturation that look good straight out of camera but limit flexibility in post-production.
Standard/Neutral profiles: Apply processing for immediate use with minimal editing. These work well for quick turnaround projects, social media content, or when you don’t plan extensive color grading.
LOG profiles (S-Log, N-Log, V-Log): Record flat, low-contrast footage that preserves maximum dynamic range and color information. LOG requires color grading in post-production but provides professional-level control over final look.
Beginners should start with Standard or Neutral profiles while learning exposure and composition fundamentals. LOG footage looks flat and lifeless without grading, which can be discouraging when you’re still mastering basics.
Once comfortable with manual exposure and you have grading software (DaVinci Resolve is free and excellent), experiment with LOG to unlock your camera’s full dynamic range potential. LOG captures 2-3 stops more highlight detail, which proves invaluable for high-contrast scenes.
Audio Configuration for Clean Sound
Audio quality can make or break your video. Viewers tolerate slightly imperfect visuals far more than bad audio. Built-in camera microphones pick up handling noise, wind, and sound distant and hollow.
External microphones dramatically improve audio quality. Here’s how to configure them properly:
Lavalier microphones: Clip to your subject’s clothing 6-8 inches below their mouth. Connect to your camera’s mic input or use a wireless system like the Rode Wireless GO. Set input levels to peak around -12dB to -6dB, leaving headroom for loud moments.
Shotgun microphones: Mount on your camera or boom pole, pointing at your sound source. These reject off-axis sound, focusing on what they’re pointed at. Position them as close as possible to your subject while staying out of frame.
Your camera’s audio input menu lets you adjust recording levels manually. Always use manual audio levels rather than auto, which creates unwanted volume changes during recording. Monitor with headphones to hear exactly what your camera records.
On Sony cameras, find audio settings under Menu > Setup > Audio Recording. Canon users look under Menu > Shooting Settings > Sound Recording. Nikon users find it under Menu > Setup > Microphone.
Stabilization Settings: IBIS, OIS, and Gimbals
Camera shake instantly signals amateur video. Modern mirrorless cameras offer multiple stabilization options, each suited for different shooting situations.
In-Body Image Stabilization (IBIS): Physical sensor movement compensates for camera shake. IBIS works with any lens, providing 3-8 stops of stabilization depending on your camera model. Enable IBIS for handheld shooting.
Optical Image Stabilization (OIS): Lens-based stabilization built into many zoom and telephoto lenses. OIS and IBIS often work together for even better stabilization. Check your lens switch to ensure OIS is turned on.
Electronic stabilization: Software-based stabilization that crops your image slightly and uses pixel data to reduce shake. Electronic stabilization works well but can create a “warping” effect in some situations. Many experienced videographers prefer to disable electronic stabilization in favor of IBIS or gimbal stabilization.
Gimbal stabilization: Motorized 3-axis stabilizers like the DJI RS 3 Mini provide the smoothest handheld footage possible. Gimbals require practice to operate smoothly but produce Hollywood-level camera movement.
Turn off all stabilization when using a tripod. Stabilization systems can actually introduce movement when the camera is perfectly still, creating mysterious micro-jitters in your footage.
ND Filters: Essential for Video Control
Neutral Density (ND) filters are arguably the most important video accessory that photographers often overlook. These darkened glass filters reduce light entering your lens without affecting color or image quality.
Why does video need ND when photography doesn’t? The 180-degree shutter rule locks you into specific shutter speeds, and you cannot adjust aperture for exposure without changing your depth of field aesthetic. ND filters give you exposure control independent of aperture and shutter speed.
Example scenario: You want shallow depth of field (f/2.8) for a portrait in bright sunlight. Without ND, even ISO 100 gives overexposed footage at 1/50 shutter speed. A 3-stop ND filter reduces light by 8x, bringing exposure into proper range while maintaining your artistic f/2.8 aperture.
Variable ND filters are most practical for video work, letting you adjust density from 2-8 stops by rotating the filter. Fixed ND filters work too but require swapping filters as light conditions change.
Circular thread-in ND filters screw onto your lens front. Step-up rings let you use larger filters on smaller lens diameters, saving money by buying one filter set for multiple lenses.
Start with a 3-5 stop variable ND filter in 77mm or 82mm size, then use step-up rings to adapt to your lenses. This covers most shooting scenarios from moderately bright to full sun.
Essential Video Accessories Beyond the Camera
Mirrorless cameras need support gear to unlock their full video potential. Here’s what I consider essential for serious video work:
Lavalier microphone: Rode Wireless GO II or similar wireless system gives you freedom to move while capturing clean, consistent audio. These clip-on mics produce broadcast-quality sound for interviews, presentations, and talking-head content.
Shotgun microphone: Rode VideoMic NTG or Deity D3 Pro mount on your camera for event coverage, B-roll, and situations where you can’t mic your subject directly. These directional mics reject off-axis noise while capturing what’s in front of them.
Variable ND filter: As discussed above, this is non-negotiable for outdoor shooting with wide apertures. PolarPro, Tiffen, and B+W make excellent video ND filters in various price ranges.
Video tripod with fluid head: Photo tripods prioritize stability for long exposures; video tripods add smooth pan and tilt controls essential for camera movement. Manfrotto Befree Live and similar sub-$200 options provide excellent value.
Camera cage: SmallRig, Tilta, and other manufacturers make cages that add mounting points for handles, microphones, monitors, and accessories while protecting your camera. Start basic and add components as needed.
External monitor: Small 5-7 inch monitors like the Atomos Shinobi or FeelWorld options display larger, more accurate images than your camera’s rear screen. External monitors also show focus peaking, waveforms, and other tools that help you nail exposure and focus.
Don’t buy everything at once. Start with audio (lavalier or shotgun mic) and an ND filter. Add a tripod with fluid head next. Build your rig gradually as you identify specific needs for your shooting style.
Lens Selection for Video: What Matters Most
Lens characteristics affect video differently than still photography. While sharpness and optical quality matter, video introduces additional considerations.
Focus breathing: Lenses that change focal length slightly as you adjust focus create visible framing shifts during focus pulls. High-end cinema lenses minimize breathing, but many photo lenses exhibit noticeable breathing that can look unprofessional in video.
Premium video lenses from manufacturers like Tamron specifically address breathing in their video-oriented designs. The Tamron 35-150mm F/2-2.8 and 28-75mm F/2.8 series demonstrate excellent focus breathing control.
Focus shift during zoom: Some zoom lenses change focus position as you zoom, requiring you to refocus after changing focal length. Parfocal zooms maintain focus throughout the zoom range but cost significantly more.
Zoom ring throw: Video benefits from smooth, controlled zoom action. Some photo lenses have short, stiff zoom throws that make smooth zooms difficult. Cine-style zooms offer longer throws with smooth operation.
Aperture control: Lenses with de-clicked aperture rings allow smooth exposure adjustments during recording. Photographers value clicked aperture for precise f-stop settings, but videographers prefer smooth, silent adjustment.
For starting out, choose a versatile zoom like a 24-70mm or 24-105mm equivalent. These cover wide to telephoto ranges for most shooting scenarios. Add primes (fixed focal length lenses) like a 35mm, 50mm, or 85mm as you develop specific style preferences.
Wide-angle lenses (16-35mm equivalent) excel for establishing shots, landscapes, and tight interior spaces. Telephoto lenses (70-200mm equivalent) compress distance and excel for interviews, sports, and isolating subjects.
Camera Brand Menu Navigation
Understanding where to find settings in your specific camera menu saves frustration. Here are common menu locations for major brands:
Sony Mirrorless (A7S III, A7IV, FX3):
Video settings: Menu > Camera Settings > Record Settings
Frame rate: Shutter Speed dial (movie mode) or Menu > Camera Settings > Record Settings > Frame Rate
Audio levels: Menu > Setup > Audio Recording > Audio Rec Level
White balance: Menu > Camera Settings > White Balance
Picture Profile: Menu > Camera Settings > Color/WB/Img.Processing > Picture Profile
Canon Mirrorless (R5, R6, R7):
Video settings: Menu > Shooting Settings > Video Recording Quality
Frame rate: Movie recording size options within video quality menu
Audio levels: Menu > Shooting Settings > Sound Recording > Recording Level
White balance: Menu > Camera Settings > White Balance
Picture Style: Menu > Camera Settings > Picture Style
Nikon Mirrorless (Z6, Z7, Z9):
Video settings: Menu > Video Settings > Frame Size/Frame Rate
Frame rate: Within Frame Size/Frame Rate options
Audio levels: Menu > Setup > Microphone > Microphone Sensitivity
White balance: Menu > Shooting Menu > White Balance > Choose Color Temperature
Picture Control: Menu > Shooting Menu > Set Picture Control
Fujifilm Mirrorless (X-T4, X-T5, X-H2S):
Video settings: Menu > Movie Settings
Frame rate: Movie Settings > Movie Mode (select resolution/fps combination)
Audio levels: Menu > Setup > Sound Settings > Audio Level Setting
White balance: Menu > IQ > White Balance
Film Simulation: Menu > IQ > Film Simulation (Fujifilm’s version of picture profiles)
Shooting Scenarios: Settings for Different Situations
Different shooting situations require different approaches. Here are starting points for common scenarios:
Portrait and Vlog Setup
For talking-head videos and portraits, prioritize shallow depth of field and clean audio.
Frame rate: 24fps for cinematic look, 30fps for standard video
Shutter speed: 1/50 (24fps) or 1/60 (30fps)
Aperture: f/2.8-f/4 for pleasing background blur
ISO: As low as possible for clean image
White balance: Match your lighting (3200K tungsten, 5600K daylight)
Audio: Lavalier microphone clipped 6-8 inches below mouth
Lens: 50mm-85mm equivalent for flattering perspective
Position yourself 3-6 feet from camera for proper framing. Use eye-level or slightly above camera position for most flattering angle.
Landscape and Nature Video
Landscape video prioritizes sharpness throughout the scene and smooth motion.
Frame rate: 24fps for cinematic, 60fps if you might want slow-motion options
Shutter speed: Follow 180-degree rule based on frame rate
Aperture: f/8-f/11 for maximum sharpness front to back
ISO: 100-400 for cleanest possible image
White balance: Daylight (5600K) or match golden hour warmth
Stabilization: Tripod essential, turn off IBIS when locked down
ND filter: Almost always necessary for wide apertures in bright light
Use slow, deliberate camera movements. Even small pans or tilts reveal the landscape beautifully. Consider slider or gimbal for subtle motion.
Action and Sports Video
Fast-moving subjects demand higher frame rates and quick autofocus performance.
Frame rate: 60fps minimum, 120fps for slow-motion options
Shutter speed: 1/125 (60fps) or 1/250 (120fps)
Aperture: f/5.6-f/8 for enough depth of field to keep moving subjects in focus
ISO: 400-1600 depending on lighting, prioritize faster shutter over low ISO
Autofocus: Continuous AF with subject tracking enabled
Stabilization: IBIS + gimbal for smoothest results
Anticipate action and position yourself for best viewing angle. Keep subjects moving across the frame rather than directly toward or away from camera when possible.
10 Common Beginner Mistakes to Avoid
Forums are filled with beginners asking why their footage doesn’t look professional. Here are the mistakes I see most often, and how to avoid them:
1. Wrong shutter speed: Using shutter speeds that don’t follow the 180-degree rule creates choppy or unnaturally sharp motion. Always set shutter speed to double your frame rate.
2. Auto white balance: Auto WB shifts color during recording, creating inconsistent footage that’s difficult to color correct. Set white balance manually and leave it.
3. Using built-in microphone: Camera mics pick up handling noise and sound distant. Even a $50 external microphone dramatically improves audio quality.
4. No ND filter: Shooting outdoors without ND forces you to stop down aperture, losing shallow depth of field aesthetic. Variable ND gives you creative control in any lighting.
5. Overexposed highlights: Video has less highlight recovery than raw photos. Expose to protect highlights, let shadows fall where they may unless they contain important detail.
6. Inconsistent settings: Changing frame rates, picture profiles, or color settings between shots makes editing difficult. Establish your settings at the start of each project.
7. No stabilization: Handheld footage without IBIS or gimbal looks shaky and unprofessional. Use appropriate stabilization for your shooting style.
8. Wrong picture profile: Shooting LOG without knowing how to grade it yields flat, lifeless footage. Master standard profiles before advancing to LOG recording.
9. Poor focus: Shallow depth of field with missed focus looks worse than deeper depth of field with everything sharp. Use focus peaking and practice manual focus.
10. Ignoring audio levels: Distorted audio ruins otherwise good footage. Monitor levels with headphones and leave 12-15dB headroom.
These mistakes show up repeatedly in forum posts from frustrated beginners. Master these fundamentals before worrying about advanced techniques or expensive gear upgrades.
Troubleshooting Common Issues
Even with proper setup, you’ll encounter issues. Here are solutions to common problems:
Choppy or stuttering footage: Check shutter speed – it’s likely too fast. Follow the 180-degree rule. Also verify your frame rate matches your timeline settings in editing.
Footage too bright/overexposed: Add ND filter strength, stop down aperture, or lower ISO. Check exposure using zebras or histogram before recording.
Footage too dark/underexposed: Open aperture, raise ISO (within acceptable noise limits), or add lighting. Video noise is preferable to unusable darkness.
Flickering under artificial lights: Adjust shutter speed to match electrical frequency – 1/60 for 60Hz regions, 1/50 for 50Hz regions. Some lights require specific shutter speeds to avoid flicker.
Audio clipping/distorted sound: Lower input levels in camera menu. Aim for peaks around -12dB. Use external recorder if camera preamps are noisy.
Camera overheating: Disable any features you don’t need (WiFi, stabilization if on tripod). Shoot shorter clips with cool-down periods. Use external recorder to reduce internal processing.
Focus hunting/pumping: Switch to manual focus or adjust AF sensitivity. Reduce focus area size so camera isn’t hunting across entire frame. Use focus limiter if available.
Strange colors or tint: Reset white balance and set manually. Verify picture profile settings haven’t changed. Check for mixed lighting sources with different color temperatures.
Micro-jitters in tripod footage: Turn off all stabilization (IBIS, OIS, electronic). Stabilization can create movement when camera is perfectly still.
Recording stops unexpectedly: Check SD card speed – video requires fast write speeds. Use V30, V60, or V90 rated cards. Also check file size limits and camera temperature.
SD card errors: Format card in-camera before important shoots. Use cards rated for your video codec and resolution. Have backup cards available.
Practice Exercises to Build Your Skills
Theory only gets you so far. These practical exercises build muscle memory and help settings become second nature:
Exercise 1: Exposure Triangle Mastery
Set up three scenes with different lighting conditions (bright outdoor, indoor window light, dim room). Practice achieving proper exposure using only aperture and ISO while maintaining proper shutter speed for 24fps. Note how settings change between scenes while shutter speed stays constant.
Exercise 2: Depth of Field Control
Film the same subject at f/2.8, f/5.6, and f/11. Notice how background blur changes while subject stays sharp. Practice pulling focus between foreground and background subjects at each aperture.
Exercise 3: White Balance Accuracy
Set up under mixed lighting (window daylight + indoor tungsten). Shoot using auto WB, tungsten preset, daylight preset, and custom WB. Compare results and note how each setting handles mixed lighting differently.
Exercise 4: Frame Rate Comparison
Shoot the same action (someone walking, pouring water, or similar motion) at 24fps, 60fps, and 120fps. Edit all clips to 24fps timeline and observe how slow-motion changes the feel and emphasizes different moments.
Exercise 5: Audio Level Management
Record yourself talking at different volumes (whisper, normal conversation, loud talking) while monitoring audio levels. Aim for consistent -12dB peaks across all volumes. Learn to adjust input gain without touching camera during recording.
Practice each exercise multiple times until you can execute settings changes quickly without referencing this guide. Speed and confidence come from repetition.
What to Learn After Mastering Basic Setup
Once comfortable with fundamental settings, these topics advance your video production skills:
Color grading workflow: Learn DaVinci Resolve (free) or Adobe Premiere Pro Lumetri color tools. Master primary color correction before creative grading.
Advanced audio: Dual-system recording with external audio recorders like Zoom H5 or Tascam DR-60D. Sync audio in post-production for maximum quality.
Cinematic camera movement: Slider techniques, jib operation, advanced gimbal moves, and understanding when to use each type of movement.
Lighting fundamentals: Three-point lighting, natural light shaping, LED panel usage, and creating mood with light quality and direction.
Storytelling and editing: Shot sequencing, pacing, music selection, and editing techniques that serve your story rather than just showing off technical skills.
Rig building: Understanding when cages, V-mount batteries, external monitors, wireless video, and follow focus systems actually improve your workflow versus adding unnecessary complexity.
Build gradually. Master one concept at a time rather than trying to learn everything simultaneously. Video production has many interconnected skills, and rushing creates frustration.
Frequently Asked Questions
Final Recommendations for Getting Started
Starting your mirrorless camera video setup journey doesn’t require mastering everything at once. Begin with the fundamentals outlined in this guide and build your skills progressively.
Focus on the exposure triangle for video first: frame rate, shutter speed, and aperture locked together with ISO determining brightness. Master manual white balance before attempting advanced color grading. Invest in external audio before buying more camera bodies or lenses.
The mirrorless camera video setup process becomes intuitive with practice. Spend time with your camera daily, even if just testing settings in your living room. Muscle memory develops through repetition, not just reading.
Remember that perfect settings mean nothing without interesting content to capture. The best camera setup serves your creative vision rather than becoming the focus itself. Start shooting, make mistakes, learn from them, and keep creating.
Your mirrorless camera is capable of producing stunning video content. Now you have the knowledge to unlock that potential and create footage you’re proud to share.